
Cucumber Growing Mistakes: We’ve all been there, haven’t we? You envision a summer filled with crisp, refreshing cucumbers straight from your garden, perfect for salads, pickles, and everything in between. But then reality hits, and your cucumber plants are struggling, producing misshapen fruit, or worse, nothing at all! Don’t despair, fellow gardeners, because I’m here to help you navigate the tricky world of cucumber cultivation and avoid those common pitfalls.
Cucumbers have a rich history, dating back thousands of years to their origins in India. They’ve been enjoyed by cultures around the globe, from ancient Egyptians to Roman emperors, and have become a staple in cuisines worldwide. But even with centuries of cultivation under our belts, growing cucumbers successfully can still be a challenge.
Why is it so important to get it right? Well, beyond the sheer joy of harvesting your own food, homegrown cucumbers simply taste better! They’re fresher, more flavorful, and you know exactly what went into growing them. Plus, avoiding cucumber growing mistakes means a more bountiful harvest, saving you money and reducing food waste. In this article, I’ll share my top DIY tricks and hacks to help you troubleshoot common cucumber problems and ensure a thriving, productive garden. Let’s get growing!
Gurken-Anbau-Fehler vermeiden: Dein ultimativer DIY-Guide für eine reiche Ernte
Hallo liebe Gartenfreunde! Ich bin so aufgeregt, euch heute durch die häufigsten Fehler beim Gurkenanbau zu führen und euch zu zeigen, wie ihr sie vermeiden könnt. Gurken sind fantastisch – frisch, knackig und vielseitig. Aber sie können auch ein bisschen zickig sein. Keine Sorge, mit diesem Guide werdet ihr bald Gurken in Hülle und Fülle ernten!
Die häufigsten Fehler beim Gurkenanbau (und wie du sie vermeidest!)
Hier ist eine Liste der häufigsten Fehler, die ich und viele andere Gärtner gemacht haben, und wie ihr sie umgehen könnt:
* Falsche Sortenwahl: Nicht jede Gurkensorte ist für jeden Garten geeignet. Informiert euch, welche Sorten in eurer Region gut wachsen und welche euren Bedürfnissen entsprechen (z.B. Einlegegurken, Salatgurken, Freilandgurken, Gewächshausgurken).
* Falscher Standort: Gurken lieben die Sonne! Ein schattiger Standort führt zu kümmerlichem Wachstum und wenig Ertrag.
* Schlechter Boden: Gurken sind Starkzehrer und brauchen einen nährstoffreichen, gut drainierten Boden.
* Falsche Bewässerung: Zu viel oder zu wenig Wasser kann zu Problemen führen. Gurken brauchen regelmäßige, gleichmäßige Bewässerung.
* Falsche Düngung: Zu wenig oder zu viel Dünger kann das Wachstum beeinträchtigen.
* Fehlende Rankhilfe: Gurken sind Kletterpflanzen und brauchen eine Rankhilfe, um optimal zu wachsen und Krankheiten vorzubeugen.
* Vernachlässigung der Bestäubung: Einige Gurkensorten brauchen Bestäubung, um Früchte zu bilden.
* Zu späte Ernte: Wenn Gurken zu lange an der Pflanze bleiben, werden sie bitter und die Pflanze stellt die Produktion neuer Früchte ein.
* Krankheiten und Schädlinge: Gurken sind anfällig für verschiedene Krankheiten und Schädlinge. Regelmäßige Kontrolle und rechtzeitige Maßnahmen sind wichtig.
* Falsche Lagerung: Gurken sind nicht lange haltbar und müssen richtig gelagert werden, um frisch zu bleiben.
Gurken richtig anbauen: Schritt-für-Schritt-Anleitung
Jetzt zeige ich euch, wie ihr Gurken richtig anbaut, um diese Fehler zu vermeiden.
1. Die richtige Sorte wählen
Bevor ihr überhaupt anfangt, müsst ihr euch für die richtige Gurkensorte entscheiden. Hier sind ein paar Tipps:
* Überlegt, wofür ihr die Gurken verwenden wollt: Möchtet ihr sie einlegen, als Salat essen oder einfach so knabbern?
* Berücksichtigt euer Klima: Einige Sorten sind besser für kältere Regionen geeignet, andere für wärmere.
* Achtet auf die Resistenzen: Wählt Sorten, die resistent gegen häufige Gurkenkrankheiten sind.
Ich persönlich liebe die Sorte “Marketmore 76” für Salatgurken und “Delikatess” für Einlegegurken.
2. Der perfekte Standort
Gurken lieben die Sonne! Sucht euch einen Standort, der mindestens 6-8 Stunden Sonne pro Tag bekommt. Außerdem sollte der Standort windgeschützt sein, da starker Wind die Pflanzen beschädigen kann.
3. Den Boden vorbereiten
Gurken brauchen einen nährstoffreichen, gut drainierten Boden. So bereitet ihr den Boden vor:
1. Lockert den Boden auf: Grabt den Boden um und entfernt Steine und Unkraut.
2. Verbessert die Bodenstruktur: Mischt Kompost oder gut verrotteten Mist unter den Boden. Das verbessert die Drainage und versorgt die Pflanzen mit Nährstoffen.
3. Testet den pH-Wert: Gurken bevorzugen einen pH-Wert zwischen 6,0 und 7,0. Wenn der pH-Wert zu niedrig ist, könnt ihr Kalk hinzufügen.
4. Aussaat oder Jungpflanzen?
Ihr habt zwei Möglichkeiten: Gurken selbst aussäen oder Jungpflanzen kaufen.
* Aussaat: Gurken sind frostempfindlich, daher solltet ihr sie erst nach den Eisheiligen (Mitte Mai) direkt ins Freiland säen. Ihr könnt sie aber auch ab April im Haus vorziehen.
1. Sät die Samen in Anzuchttöpfe mit Anzuchterde.
2. Haltet die Erde feucht und stellt die Töpfe an einen warmen, hellen Ort.
3. Nach ca. 2-3 Wochen könnt ihr die Jungpflanzen ins Freiland pflanzen.
* Jungpflanzen: Wenn ihr es eilig habt oder keine Zeit für die Anzucht habt, könnt ihr auch Jungpflanzen kaufen. Achtet darauf, dass die Pflanzen gesund und kräftig aussehen.
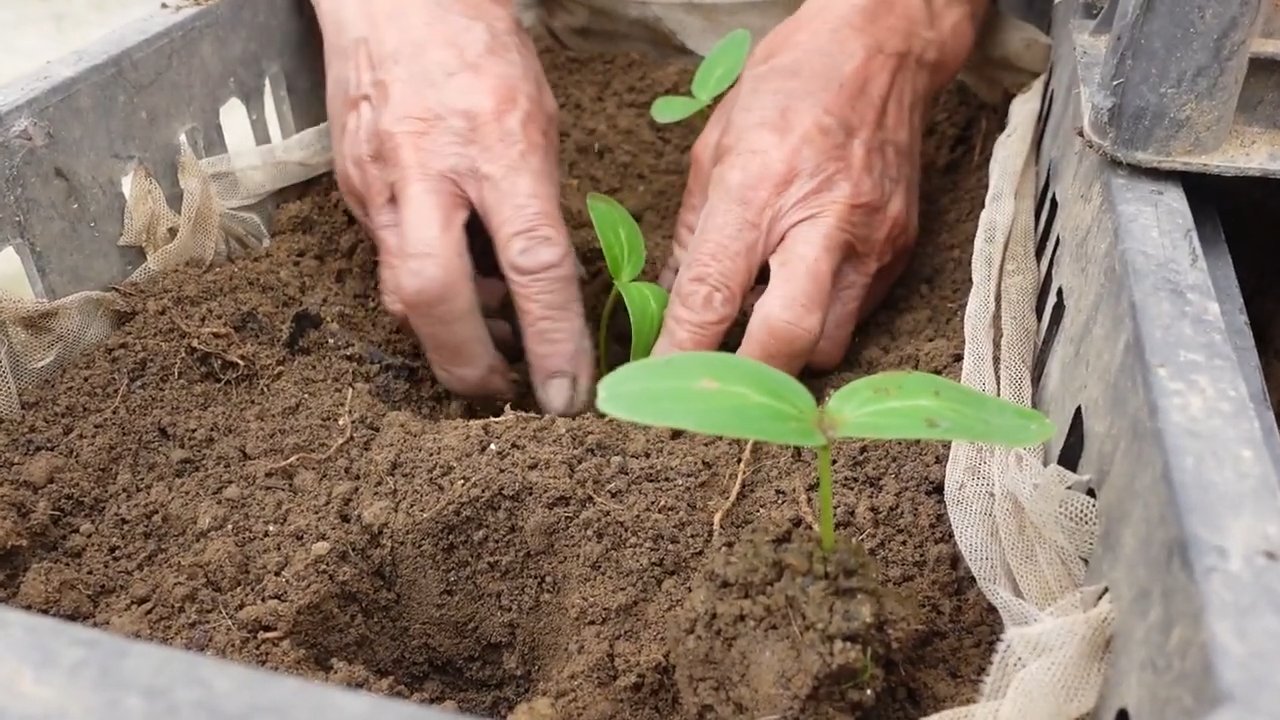
5. Pflanzen und Rankhilfe anbringen
1. Pflanzt die Gurkenpflanzen im Abstand von ca. 50 cm.
2. Setzt die Pflanzen nicht zu tief ein. Die Oberseite des Wurzelballens sollte mit der Erdoberfläche abschließen.
3. Gießt die Pflanzen gut an.
4. Bringt eine Rankhilfe an. Gurken sind Kletterpflanzen und brauchen eine Rankhilfe, um optimal zu wachsen. Ihr könnt ein Rankgitter, einen Zaun oder einfach nur Stäbe verwenden. Ich persönlich mag Rankgitter am liebsten, weil sie den Pflanzen viel Halt bieten.
6. Bewässerung
Gurken brauchen regelmäßige, gleichmäßige Bewässerung. Der Boden sollte immer leicht feucht sein, aber nicht nass. Gießt am besten morgens, damit die Blätter bis zum Abend abtrocknen können. Vermeidet es, die Blätter direkt zu gießen, da dies Krankheiten fördern kann.
7. Düngung
Gurken sind Starkzehrer und brauchen regelmäßige Düngung.
1. Grunddüngung: Bei der Pflanzung könnt ihr einen organischen Dünger wie Hornspäne oder Kompost in den Boden einarbeiten.
2. Nachdüngung: Während der Wachstumsperiode solltet ihr die Gurken alle 2-3 Wochen mit einem Flüssigdünger für Gemüse düngen. Achtet darauf, dass der Dünger reich an Kalium ist, da Kalium für die Fruchtbildung wichtig ist.
8. Bestäubung
Einige Gurkensorten sind parthenokarp, das heißt, sie bilden Früchte ohne Bestäubung. Andere Sorten brauchen Bestäubung, um Früchte zu bilden. Wenn ihr eine Sorte habt, die Bestäubung braucht, könnt ihr die Blüten von Hand bestäuben. Nehmt dazu einen Pinsel und übertragt den Pollen von den männlichen auf die weiblichen Blüten. Die männlichen Blüten erkennt ihr daran, dass sie nur einen Stiel haben, während die weiblichen Blüten einen kleinen Fruchtansatz haben.
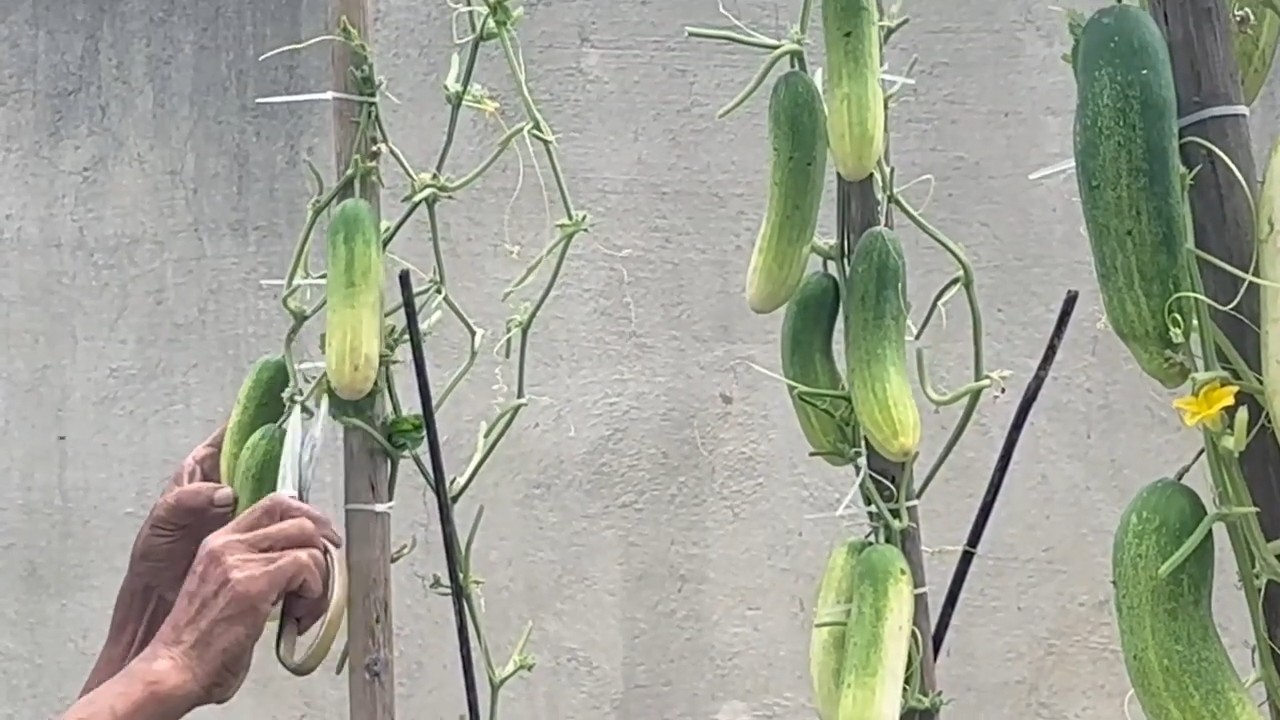
9. Ernte
Gurken sind erntereif, wenn sie die gewünschte Größe erreicht haben und sich leicht vom Stiel lösen lassen. Erntet die Gurken regelmäßig, da dies die Pflanze anregt, neue Früchte zu bilden. Lasst die Gurken nicht zu lange an der Pflanze hängen, da sie sonst bitter werden können.
10. Krankheiten und Schädlinge
Gurken sind anfällig für verschiedene Krankheiten und Schädlinge. Hier sind ein paar häufige Probleme und wie ihr sie bekämpfen könnt:
* Echter Mehltau: Echter Mehltau ist eine Pilzkrankheit, die sich durch einen weißen, mehlartigen Belag auf den Blättern äußert. Bekämpft den Mehltau mit einem Fungizid oder mit Hausmitteln wie Milch oder Backpulver.
* Falscher Mehltau: Falscher Mehltau ist eine weitere Pilzkrankheit, die sich durch gelbliche Flecken auf den Blättern äußert. Bekämpft den falschen Mehltau mit einem Fungizid.
* Gurkenmosaikvirus: Das Gurkenmosaikvirus ist eine Viruserkrankung, die sich durch mosaikartige Muster auf den Blättern äußert. Es gibt keine Heilung für das Gurkenmosaikvirus. Entfernt befallene Pflanzen, um die Ausbreitung zu verhindern.
* Blattläuse: Blattläuse sind kleine, saugende Insekten, die sich an den Blättern und Stängeln der Gurkenpflanzen ansiedeln. Bekämpft Blattläuse mit einem Insektizid oder mit Hausmitteln wie Schmierseife oder Brennnesseljauche.
* Spinnmilben: Spinnmilben sind win
Conclusion
So, there you have it! Avoiding these common cucumber growing mistakes is the key to unlocking a bountiful harvest of crisp, refreshing cucumbers right from your own garden. We’ve covered everything from soil preparation and watering techniques to pest control and pollination strategies. By implementing these simple yet effective adjustments, you’ll be well on your way to enjoying a summer filled with delicious, homegrown cucumbers.
But why is mastering these techniques a must-try? Imagine biting into a cucumber bursting with flavor, knowing you nurtured it from seed to table. Think of the satisfaction of sharing your homegrown bounty with friends and family. And consider the cost savings compared to constantly buying cucumbers from the grocery store. Beyond the practical benefits, growing your own cucumbers connects you to nature, provides a rewarding hobby, and promotes a healthier lifestyle.
Don’t be afraid to experiment! Try different cucumber varieties to find your favorites. Consider companion planting with herbs like basil or dill to deter pests and enhance flavor. Explore vertical gardening techniques to maximize space in smaller gardens. You can even pickle your surplus cucumbers for a tangy treat to enjoy throughout the year. The possibilities are endless!
We encourage you to take the plunge and put these tips into practice. Start small, learn from your experiences, and don’t be discouraged by setbacks. Gardening is a journey, and every mistake is an opportunity to learn and grow.
Most importantly, we want to hear about your cucumber growing adventures! Share your successes, challenges, and variations in the comments below. What cucumber varieties did you try? What techniques worked best for you? What unexpected challenges did you encounter? Your experiences can help other gardeners learn and improve their own cucumber growing skills. Let’s create a community of thriving cucumber growers! Mastering these techniques to avoid common cucumber growing mistakes is not just about growing vegetables; it’s about cultivating a connection with nature, fostering a sense of accomplishment, and enjoying the fruits (or rather, vegetables) of your labor. So, get your hands dirty, embrace the challenge, and prepare to be amazed by the abundance of your own cucumber patch!
Frequently Asked Questions (FAQ)
Why is soil preparation so crucial for cucumber growth?
Proper soil preparation is absolutely fundamental for successful cucumber cultivation. Cucumbers are heavy feeders, meaning they require a significant amount of nutrients to thrive and produce a bountiful harvest. Well-prepared soil provides these essential nutrients, ensuring strong root development, vigorous growth, and abundant fruit production. Amending the soil with compost or well-rotted manure improves drainage, aeration, and water retention, all of which are vital for healthy cucumber plants. Poorly prepared soil can lead to stunted growth, nutrient deficiencies, and increased susceptibility to diseases and pests. Think of it as building a strong foundation for your cucumber plants – the better the foundation, the healthier and more productive they will be.
How often should I water my cucumber plants, and what’s the best watering method?
Cucumbers require consistent moisture, especially during hot weather and fruit development. Aim to water deeply and regularly, providing approximately 1-2 inches of water per week. The best watering method is to water at the base of the plant, avoiding wetting the foliage. This helps prevent fungal diseases like powdery mildew. Soaker hoses or drip irrigation systems are excellent choices for delivering water directly to the roots. Check the soil moisture regularly by sticking your finger about an inch into the soil. If it feels dry, it’s time to water. Avoid overwatering, as this can lead to root rot. Morning watering is generally preferred, as it allows the foliage to dry before nightfall, reducing the risk of fungal diseases.
What are some common cucumber pests and diseases, and how can I prevent them?
Cucumbers are susceptible to several pests and diseases, including aphids, cucumber beetles, squash bugs, powdery mildew, and downy mildew. Prevention is key to managing these problems. Start by selecting disease-resistant cucumber varieties. Practice crop rotation to prevent the buildup of soilborne pathogens. Keep your garden clean and free of weeds, which can harbor pests and diseases. Regularly inspect your plants for signs of infestation or disease. If you spot pests, try handpicking them off or using insecticidal soap. For fungal diseases, ensure good air circulation around your plants and avoid overhead watering. Copper fungicides can be used as a preventative measure. Companion planting with herbs like basil or dill can also help deter pests.
How do I ensure proper pollination for my cucumber plants?
Cucumbers are typically pollinated by bees and other insects. If you’re not seeing much bee activity in your garden, you may need to hand-pollinate your cucumber flowers. To do this, use a small paintbrush to transfer pollen from the male flowers (which have a long, thin stem) to the female flowers (which have a small cucumber-like structure behind the flower). Hand-pollination is best done in the morning, when the pollen is most viable. You can also attract more pollinators to your garden by planting flowers that are rich in nectar and pollen, such as sunflowers, zinnias, and lavender. Avoid using pesticides that can harm pollinators.
What are some signs that my cucumber plants are not getting enough nutrients?
Nutrient deficiencies can manifest in various ways, depending on the specific nutrient that is lacking. Yellowing leaves, stunted growth, and poor fruit development are all common signs of nutrient deficiencies. Nitrogen deficiency can cause yellowing of the lower leaves, while phosphorus deficiency can result in stunted growth and dark green leaves. Potassium deficiency can lead to yellowing or browning of the leaf edges. To address nutrient deficiencies, amend the soil with compost or well-rotted manure. You can also use a balanced fertilizer specifically formulated for vegetables. Follow the instructions on the fertilizer label carefully to avoid over-fertilizing. Soil testing can help you determine the specific nutrient deficiencies in your soil and guide your fertilization strategy.
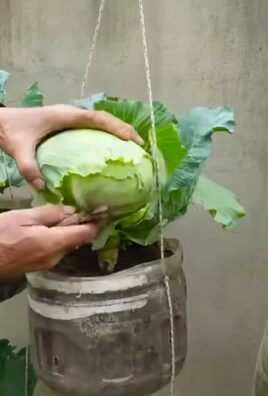
Can I grow cucumbers in containers?
Yes, you can absolutely grow cucumbers in containers! Choose a large container, at least 12 inches in diameter, with good drainage. Use a high-quality potting mix that is rich in organic matter. Select bush or compact cucumber varieties that are well-suited for container gardening. Provide a trellis or support structure for the vines to climb. Water regularly and fertilize every 2-3 weeks with a balanced fertilizer. Place the container in a sunny location that receives at least 6-8 hours of sunlight per day. Container-grown cucumbers may require more frequent watering and fertilization than those grown in the ground.
How do I know when my cucumbers are ready to harvest?
Cucumbers are typically ready to harvest when they are firm, green, and of the desired size for the variety you are growing. Check the seed packet or plant tag for specific size and color guidelines. Overripe cucumbers can become bitter and seedy. Harvest cucumbers by cutting them from the vine with a sharp knife or pruning shears. Handle them carefully to avoid bruising. Regular harvesting encourages continued fruit production.
What are some creative ways to use my homegrown cucumbers?
Beyond salads and pickles, there are countless ways to enjoy your homegrown cucumbers. Try adding them to smoothies for a refreshing and hydrating boost. Use them to make cucumber sandwiches with cream cheese and dill. Grill them for a smoky and flavorful side dish. Create a refreshing cucumber and mint infused water. Ferment them to make delicious and probiotic-rich pickles. Use them in skincare recipes for their soothing and hydrating properties. The possibilities are endless!


Leave a Comment