
Container Carrot Gardening: Imagine plucking vibrant, sweet carrots straight from your patio, balcony, or even your kitchen windowsill! Sounds like a dream, right? Well, it doesn’t have to be! For centuries, humans have cultivated carrots, tracing their roots back to ancient Persia and beyond. These root vegetables weren’t always the bright orange we know and love; they came in shades of purple, white, and yellow! But regardless of their color, carrots have always been a staple, packed with nutrients and flavor.
Now, you might be thinking, “Carrots? In containers? Isn’t that difficult?” Not at all! In fact, container carrot gardening is a fantastic way to enjoy fresh, homegrown carrots, even if you’re short on space or dealing with poor soil conditions. I’m here to share some simple, yet effective DIY tricks and hacks that will transform you into a container carrot-growing pro. Forget struggling with rocky garden beds or battling pesky pests. With a few clever techniques, you can create the perfect environment for your carrots to thrive, yielding a bountiful harvest of crunchy goodness. So, grab your gardening gloves, and let’s get started on this exciting journey to homegrown carrot bliss!
Container Carrot Gardening: A Bumper Crop on Your Balcony!
Hey there, fellow gardening enthusiasts! Ever dreamed of pulling fresh, vibrant carrots straight from your own backyard? Well, even if your “backyard” is a tiny balcony or a sunny patio, you can absolutely make that dream a reality! Container carrot gardening is surprisingly easy and incredibly rewarding. I’m going to walk you through everything you need to know to grow a thriving carrot crop in pots. Let’s get digging (metaphorically, for now!).
Choosing the Right Container and Carrot Variety
The key to successful container carrot gardening lies in selecting the right container and carrot variety. Carrots need space to grow downwards, so depth is crucial.
* Container Depth: Aim for a container that’s at least 12 inches deep, but 18-24 inches is even better. This will give your carrots plenty of room to develop long, healthy roots.
* Container Material: Plastic, terracotta, or even fabric grow bags work well. Just make sure your container has drainage holes to prevent waterlogging.
* Container Size: The width of your container depends on how many carrots you want to grow. A 12-inch diameter pot can comfortably accommodate 3-5 carrots.
* Carrot Variety: Not all carrots are created equal when it comes to container gardening. Shorter, rounder varieties are ideal. Here are a few of my favorites:
* ‘Thumbelina’: These are adorable, golf ball-sized carrots that are perfect for shallow containers.
* ‘Parisian’: Similar to ‘Thumbelina,’ these are round and sweet.
* ‘Short ‘n Sweet’: As the name suggests, these are shorter than typical carrots and very sweet.
* ‘Danvers Half Long’: A classic carrot flavor in a shorter size.
* ‘Nantes’: A cylindrical, almost coreless carrot with a sweet flavor.
Preparing Your Potting Mix
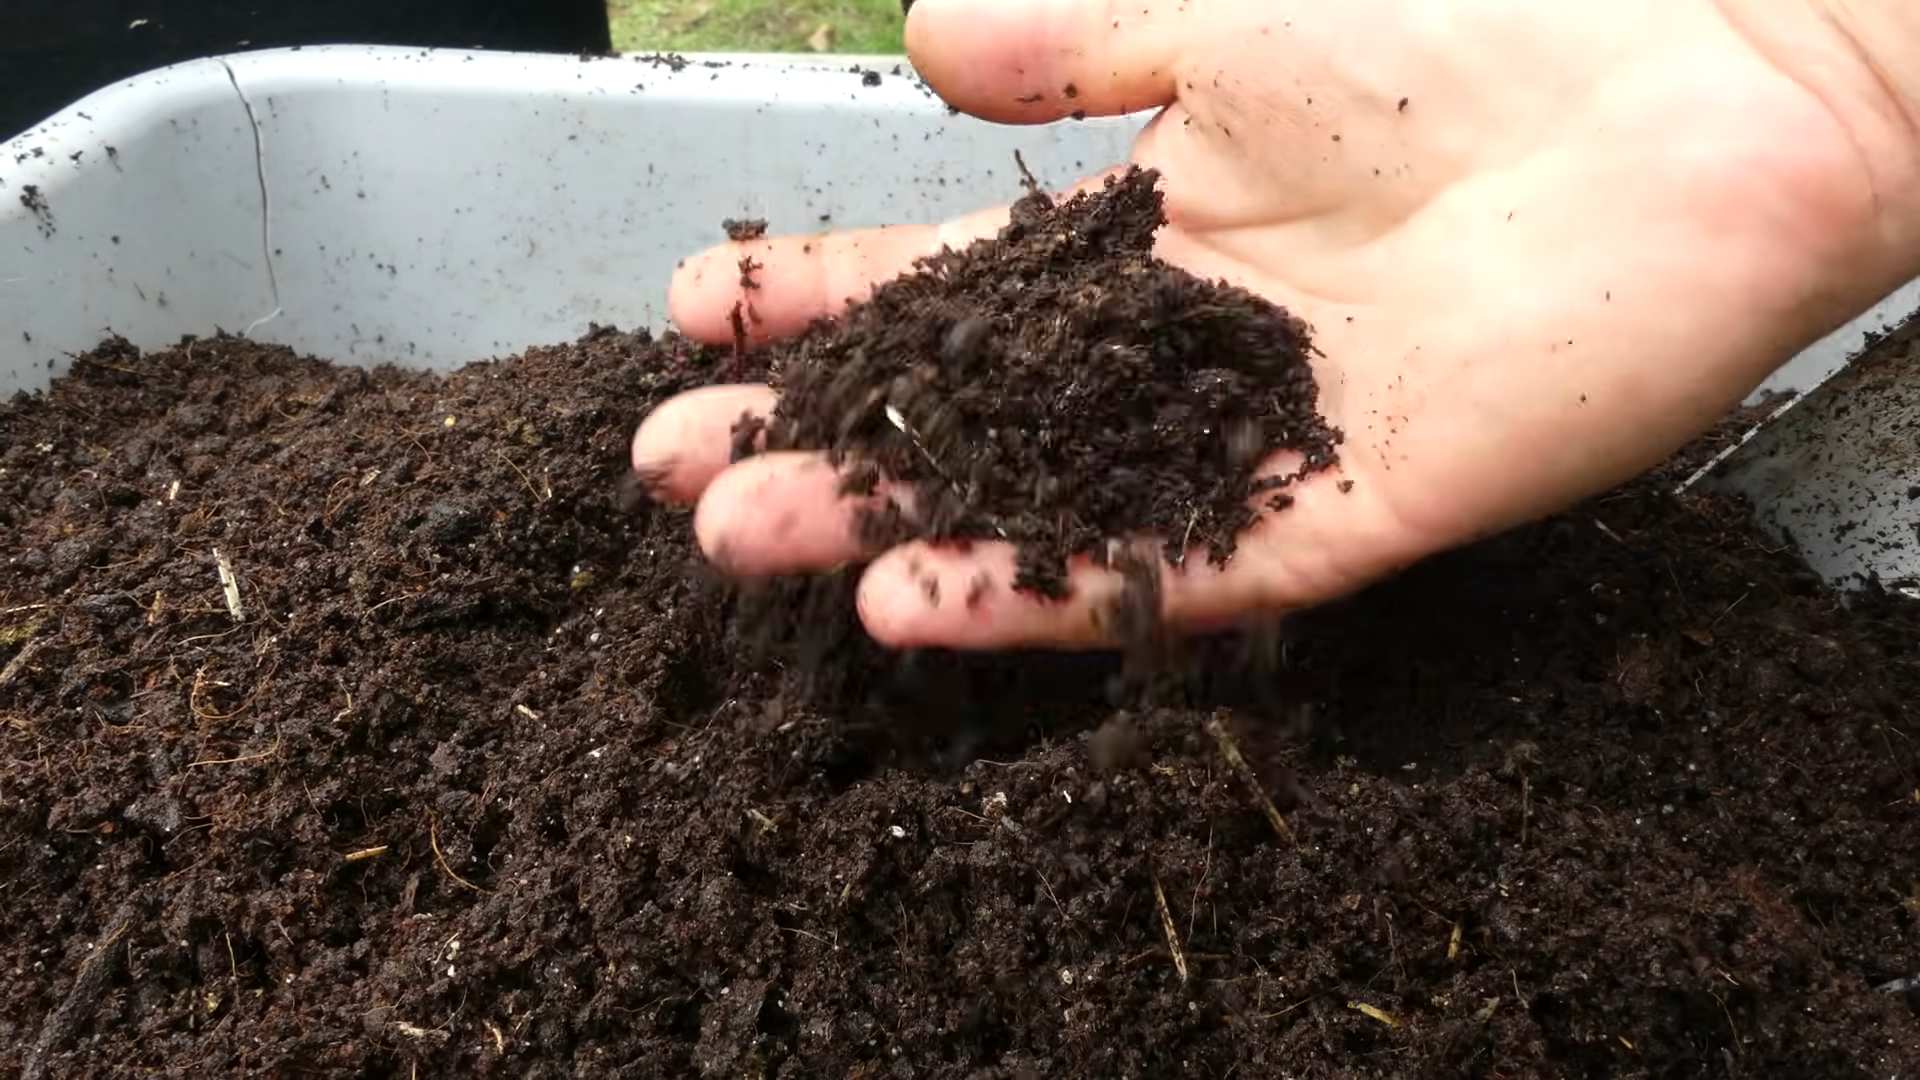
Carrots need loose, well-draining soil to thrive. Heavy, compacted soil will result in stunted or misshapen roots. I’ve found that a good potting mix is essential for success.
* Avoid Garden Soil: Garden soil is often too heavy and dense for container gardening. It can compact easily and hinder root growth.
* Use a High-Quality Potting Mix: Look for a potting mix that’s specifically formulated for containers. These mixes typically contain a blend of peat moss, perlite, and vermiculite, which provide good drainage and aeration.
* Amend with Compost: Adding compost to your potting mix will provide essential nutrients and improve drainage. I usually add about 25% compost to my potting mix.
* Consider Adding Sand: For extra drainage, you can add a small amount of horticultural sand to your potting mix.
Planting Your Carrot Seeds
Now for the fun part – planting! Carrot seeds are tiny, so it’s important to handle them carefully.
1. Moisten the Soil: Before planting, thoroughly moisten your potting mix. You want it to be damp but not soggy.
2. Sow the Seeds: Sprinkle the carrot seeds evenly over the surface of the soil. Don’t sow them too thickly, as this will result in overcrowding.
3. Cover Lightly: Cover the seeds with a very thin layer of potting mix (about 1/4 inch). Carrot seeds need light to germinate, so don’t bury them too deeply.
4. Water Gently: Water the soil gently with a watering can or spray bottle. Avoid using a strong stream of water, as this can dislodge the seeds.
5. Keep Moist: Keep the soil consistently moist until the seeds germinate. You can cover the container with plastic wrap to help retain moisture.
6. Germination Time: Carrot seeds can take anywhere from 7 to 21 days to germinate, depending on the temperature and moisture levels. Be patient!
Caring for Your Carrot Plants
Once your carrot seedlings emerge, it’s important to provide them with the right care to ensure a healthy and productive crop.
1. Thinning: This is crucial! Once the seedlings are about 1-2 inches tall, thin them out so that they are spaced about 1-2 inches apart. This will give the carrots enough room to develop properly. Use small scissors to snip the seedlings at soil level rather than pulling them out, which can disturb the roots of the remaining plants.
2. Watering: Carrots need consistent moisture to thrive. Water deeply whenever the top inch of soil feels dry to the touch. Avoid overwatering, as this can lead to root rot.
3. Fertilizing: Carrots are not heavy feeders, but they will benefit from occasional fertilization. Use a balanced liquid fertilizer diluted to half strength every 2-3 weeks. Avoid fertilizers that are high in nitrogen, as this can promote leafy growth at the expense of root development.
4. Sunlight: Carrots need at least 6 hours of sunlight per day. Place your container in a sunny location where it will receive plenty of direct sunlight.
5. Weed Control: Keep your container free of weeds, as they can compete with your carrots for nutrients and water. Hand-pull any weeds that emerge.
6. Pest Control: Carrots are generally pest-resistant, but they can occasionally be attacked by aphids or carrot rust flies. Inspect your plants regularly for signs of pests and take action if necessary. For aphids, you can spray the plants with a strong stream of water or use insecticidal soap. Carrot rust flies are more difficult to control, but you can try covering your plants with row covers to prevent them from laying their eggs.
Harvesting Your Carrots
The moment you’ve been waiting for! Harvesting your own homegrown carrots is incredibly satisfying.
1. Harvest Time: Carrots are typically ready to harvest 60-80 days after planting, depending on the variety.
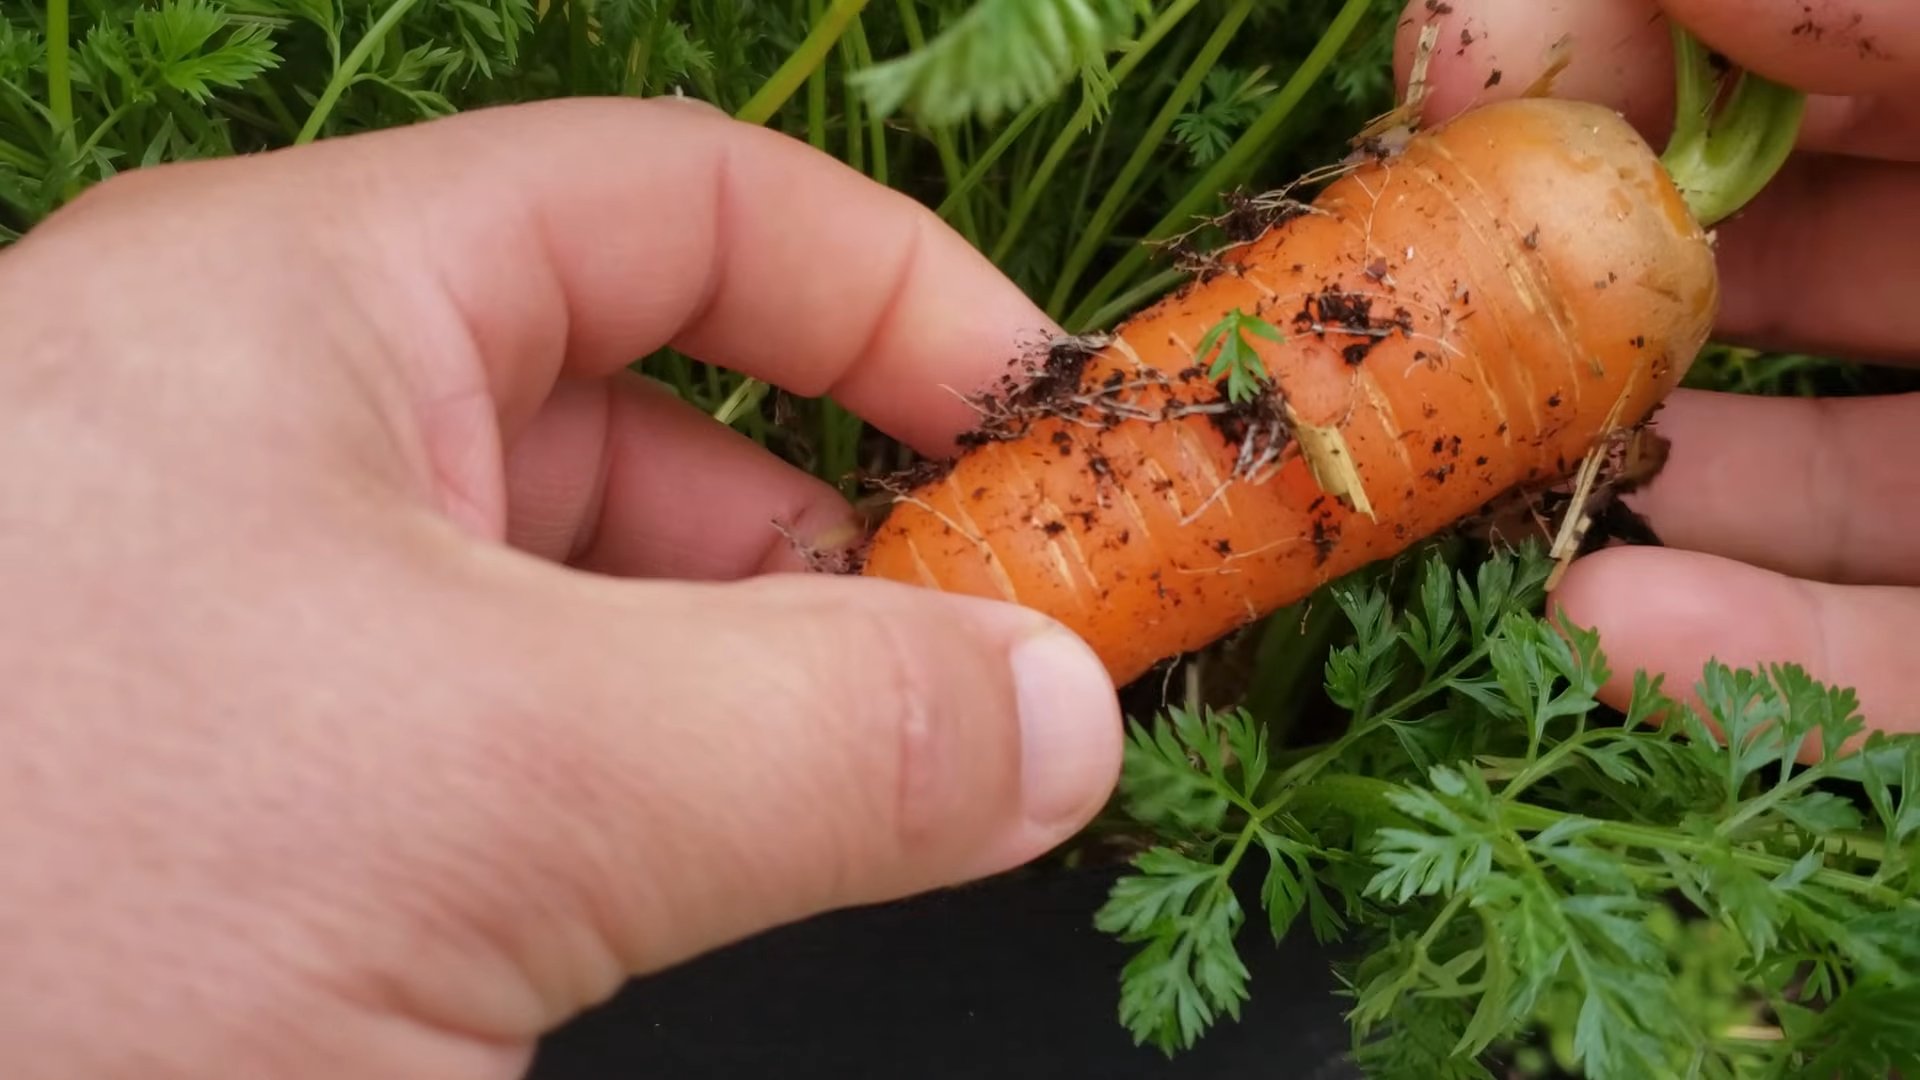
2. Check for Size: Gently brush away some of the soil around the base of the plant to check the size of the carrot. If it’s the size you want, it’s time to harvest.
3. Loosen the Soil: Before pulling the carrots, loosen the soil around them with a trowel or garden fork. This will make it easier to pull them out without breaking them.
4. Pull Gently: Grasp the carrot at the base of the leaves and gently pull upwards. If the carrot is difficult to pull, loosen the soil further.
5. Wash and Enjoy: Wash your freshly harvested carrots and enjoy them raw, cooked, or juiced!
Troubleshooting Common Problems
Even with the best care, you may encounter some problems while growing carrots in containers. Here are a few common issues and how to address them:
* Stunted Growth: This can be caused by a number of factors, including poor soil, lack of sunlight, or overcrowding. Make sure your carrots are planted in well-draining soil, receive plenty of sunlight, and are thinned properly.
* Forked Roots: Forked roots are often caused by rocks or other obstructions in the soil. Make sure your potting mix is free of debris.
* Bitter Taste: A bitter taste can be caused by inconsistent watering or high temperatures. Water your carrots regularly and provide shade during the hottest part of the day.
* Pests: As mentioned earlier, aphids and carrot rust flies can be a problem. Inspect your plants regularly and take action if necessary.
Extra Tips for Container Carrot Success
Here are a few extra tips that I’ve learned over the years that can help you grow even better carrots in containers:
* Succession Planting: Plant a new batch of carrot seeds every few weeks to ensure a continuous harvest throughout the growing season.
* Companion Planting: Plant carrots alongside other vegetables and herbs that can benefit them. Good companion plants for carrots include onions, garlic, rosemary, and sage.
* Rotate Your Crops: Avoid planting carrots in the same container year after year. This can help prevent soilborne diseases and pests.
* Have Fun! Gardening should be enjoyable. Don’t be afraid to experiment and try new things.
I hope this guide has inspired you to try container carrot gardening. It’s a fun, rewarding, and delicious way to grow your own food, even in a small space. Happy gardening!
Conclusion
So, there you have it! Transforming your patio, balcony, or even a sunny windowsill into a thriving miniature carrot farm is not only achievable but surprisingly rewarding. This container carrot gardening method unlocks the joy of harvesting fresh, sweet carrots right at your fingertips, regardless of your garden size or experience level. Forget those bland, store-bought carrots – imagine the vibrant color and unparalleled flavor of homegrown goodness gracing your table.
This isn’t just about growing carrots; it’s about connecting with your food, embracing sustainability, and experiencing the satisfaction of nurturing something from seed to table. The beauty of container gardening lies in its adaptability. Feel free to experiment with different carrot varieties. Nantes are a classic choice for their cylindrical shape and sweet taste, while Chantenay carrots are shorter and sturdier, perfect for shallower containers. Rainbow carrots add a splash of color to your garden and your plate.
Don’t be afraid to get creative with your container choices too. While a standard pot works well, consider using repurposed items like old buckets, storage bins, or even grow bags. Just ensure they have adequate drainage to prevent waterlogging. You can also companion plant with herbs like rosemary or sage to deter pests and enhance the flavor of your carrots. Marigolds are another excellent companion plant, known for their pest-repelling properties.
This DIY container carrot gardening trick is a must-try for several reasons:
* Space-Saving: It’s perfect for urban dwellers or anyone with limited garden space.
* Control: You have complete control over the soil quality, watering, and pest management.
* Convenience: Fresh carrots are just steps away from your kitchen.
* Educational: It’s a fantastic learning experience for kids and adults alike.
* Delicious: Homegrown carrots simply taste better!
We’ve covered the essentials, from choosing the right container and soil to planting, watering, and harvesting. Remember to provide your carrots with plenty of sunlight, consistent moisture, and well-draining soil. Don’t overcrowd your seedlings, and be patient – the reward of pulling those vibrant carrots from the soil is well worth the wait.
Now, it’s your turn! Grab a container, some carrot seeds, and get your hands dirty. We’re confident that you’ll be amazed by the results. We encourage you to embark on this fulfilling gardening journey.
Once you’ve harvested your first batch of homegrown carrots, we’d love to hear about your experience. Share your photos, tips, and any variations you’ve tried in the comments below. Let’s build a community of container carrot gardening enthusiasts and inspire others to grow their own food. Happy gardening!
Frequently Asked Questions (FAQ)
What is the best size container for growing carrots?
The ideal container size depends on the carrot variety you choose. Generally, a container that is at least 12 inches deep and 8 inches wide is suitable for most standard carrot varieties like Nantes. Shorter varieties like Chantenay can thrive in containers that are 6-8 inches deep. The wider the container, the more carrots you can grow. Remember to consider drainage; the container must have drainage holes.
What type of soil is best for container carrot gardening?
Carrots need loose, well-draining soil to grow properly. Heavy clay soil can hinder their development and result in misshapen roots. A good potting mix specifically formulated for vegetables is ideal. You can also create your own mix by combining equal parts of compost, peat moss (or coconut coir), and perlite or vermiculite. Avoid using garden soil, as it can be too dense and may contain pests or diseases.
How often should I water my container carrots?
Carrots need consistent moisture to thrive, but avoid overwatering, which can lead to root rot. Water deeply when the top inch of soil feels dry to the touch. The frequency of watering will depend on the weather conditions and the type of container you’re using. During hot, dry periods, you may need to water daily. Ensure the container has good drainage to prevent water from pooling at the bottom.
How much sunlight do carrots need?
Carrots need at least 6 hours of direct sunlight per day to grow well. Choose a sunny location for your container garden. If you live in a particularly hot climate, providing some afternoon shade can help prevent the soil from drying out too quickly.
When should I thin my carrot seedlings?
Thinning is essential to give your carrots enough space to develop properly. Once your seedlings are a few inches tall, thin them to about 1-2 inches apart. Use small scissors to snip off the unwanted seedlings at the soil level, rather than pulling them out, which can disturb the roots of the remaining plants.
How do I prevent pests from attacking my container carrots?
Several pests can affect carrots, including carrot rust flies, aphids, and nematodes. Companion planting with herbs like rosemary, sage, or marigolds can help deter pests. You can also use row covers to protect your plants from flying insects. Regularly inspect your plants for signs of pests and take action promptly if you notice any problems. Organic pest control methods, such as insecticidal soap or neem oil, can be effective.
How long does it take for carrots to mature?
Carrots typically take 60-80 days to mature, depending on the variety. Check the seed packet for specific information on the maturity time for your chosen variety. You can start harvesting carrots when they reach the desired size, even if they haven’t fully matured.
How do I know when my carrots are ready to harvest?
You can usually tell when carrots are ready to harvest by checking the size of the root at the soil surface. Gently brush away some soil to get a better look. The top of the carrot should be the diameter specified on the seed packet. You can also gently pull up a test carrot to check its size and maturity.
Can I grow carrots in containers indoors?
Yes, you can grow carrots in containers indoors, but you’ll need to provide them with adequate light. A sunny windowsill that receives at least 6 hours of direct sunlight per day is ideal. You may also need to supplement with grow lights, especially during the winter months.
Can I grow carrots in the same container as other vegetables?
Yes, you can companion plant carrots with other vegetables in the same container. Good companions for carrots include radishes, lettuce, onions, and garlic. These plants can help deter pests and improve the overall health of your carrot plants. Avoid planting carrots near fennel, as it can inhibit their growth.
What are some common problems when growing carrots in containers and how can I fix them?
Some common problems include:
* Forked or misshapen roots: This is often caused by rocky or compacted soil. Ensure your soil is loose and well-draining.
* Slow growth: This can be due to insufficient sunlight, poor soil quality, or lack of nutrients. Provide adequate sunlight, use a good quality potting mix, and fertilize regularly.
* Pest infestations: Regularly inspect your plants for pests and take action promptly.
* Root rot: This is caused by overwatering. Ensure your container has good drainage and avoid overwatering.
Can I reuse the soil from my container carrot garden?
It’s generally not recommended to reuse soil from a container carrot garden without amending it first. Carrots can deplete the soil of nutrients. Before reusing the soil, remove any plant debris and add fresh compost and fertilizer to replenish the nutrients. You may also want to sterilize the soil to kill any potential pests or diseases.

Leave a Comment