
Clever cleaning tips and tricks – who doesn’t crave them? Let’s be honest, cleaning isn’t usually anyone’s favorite pastime. But what if I told you that tackling those household chores could be quicker, easier, and even… dare I say… a little bit fun?
For centuries, people have been devising ingenious ways to keep their homes sparkling. From ancient Roman bathhouses meticulously maintained by slaves to Victorian-era housewives armed with elbow grease and homemade concoctions, the pursuit of cleanliness has always been a part of human civilization. These days, we’re all about working smarter, not harder!
That’s where these clever cleaning tips and tricks come in. In today’s fast-paced world, who has hours to spend scrubbing and scouring? We all want to reclaim our weekends and spend more time doing the things we love. Whether it’s removing stubborn stains, banishing unpleasant odors, or simply streamlining your cleaning routine, these DIY hacks will help you achieve a spotless home with minimal effort. I’m excited to share these secrets with you, so let’s dive in and transform your cleaning game!
DIY Cleaning Hacks That Will Save You Time and Money!
Hey everyone! I’m so excited to share some of my favorite DIY cleaning hacks with you. I’ve been experimenting with natural cleaning solutions for years, and I’ve found some real gems that are not only effective but also budget-friendly and better for the environment. Get ready to ditch those harsh chemicals and embrace a cleaner, greener home!
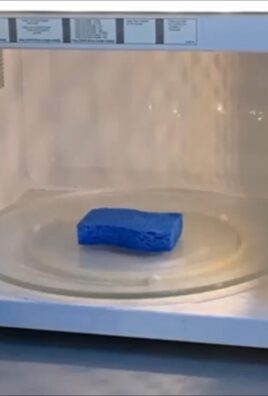
Cleaning Your Microwave Like a Pro
Microwaves can get incredibly gross, incredibly fast. Splattered food, lingering odors – it’s a cleaning nightmare! But don’t worry, I’ve got a super simple trick that will have your microwave sparkling in minutes.
What You’ll Need:
* 1 cup of water
* 1/4 cup of white vinegar
* Microwave-safe bowl
* Clean sponge or cloth
Step-by-Step Instructions:
1. Combine Water and Vinegar: In your microwave-safe bowl, mix together the water and white vinegar. The vinegar helps to loosen grime and deodorize the microwave.
2. Microwave the Mixture: Place the bowl in the microwave and heat it on high for 5-7 minutes. You want the mixture to boil and create steam inside the microwave. This steam is what will loosen all the stuck-on food particles.
3. Let it Sit: Once the timer goes off, don’t open the microwave immediately! Let the bowl sit inside for another 3-5 minutes. This allows the steam to continue working its magic.
4. Wipe it Clean: Carefully remove the bowl (it will be hot!). Use your clean sponge or cloth to wipe down the interior of the microwave. You’ll be amazed at how easily the grime comes off! For stubborn spots, you might need to scrub a little, but most of the mess should wipe away effortlessly.
5. Clean the Turntable: Don’t forget to remove the turntable and wash it separately with warm, soapy water. Rinse it well and dry it before placing it back in the microwave.
Deodorizing Your Garbage Disposal
A stinky garbage disposal can make your whole kitchen smell unpleasant. Here’s a quick and easy way to freshen it up using ingredients you probably already have.
What You’ll Need:
* 1 cup of ice cubes
* 1/2 cup of coarse salt (like rock salt or sea salt)
* Lemon or lime wedges
* Water
Step-by-Step Instructions:
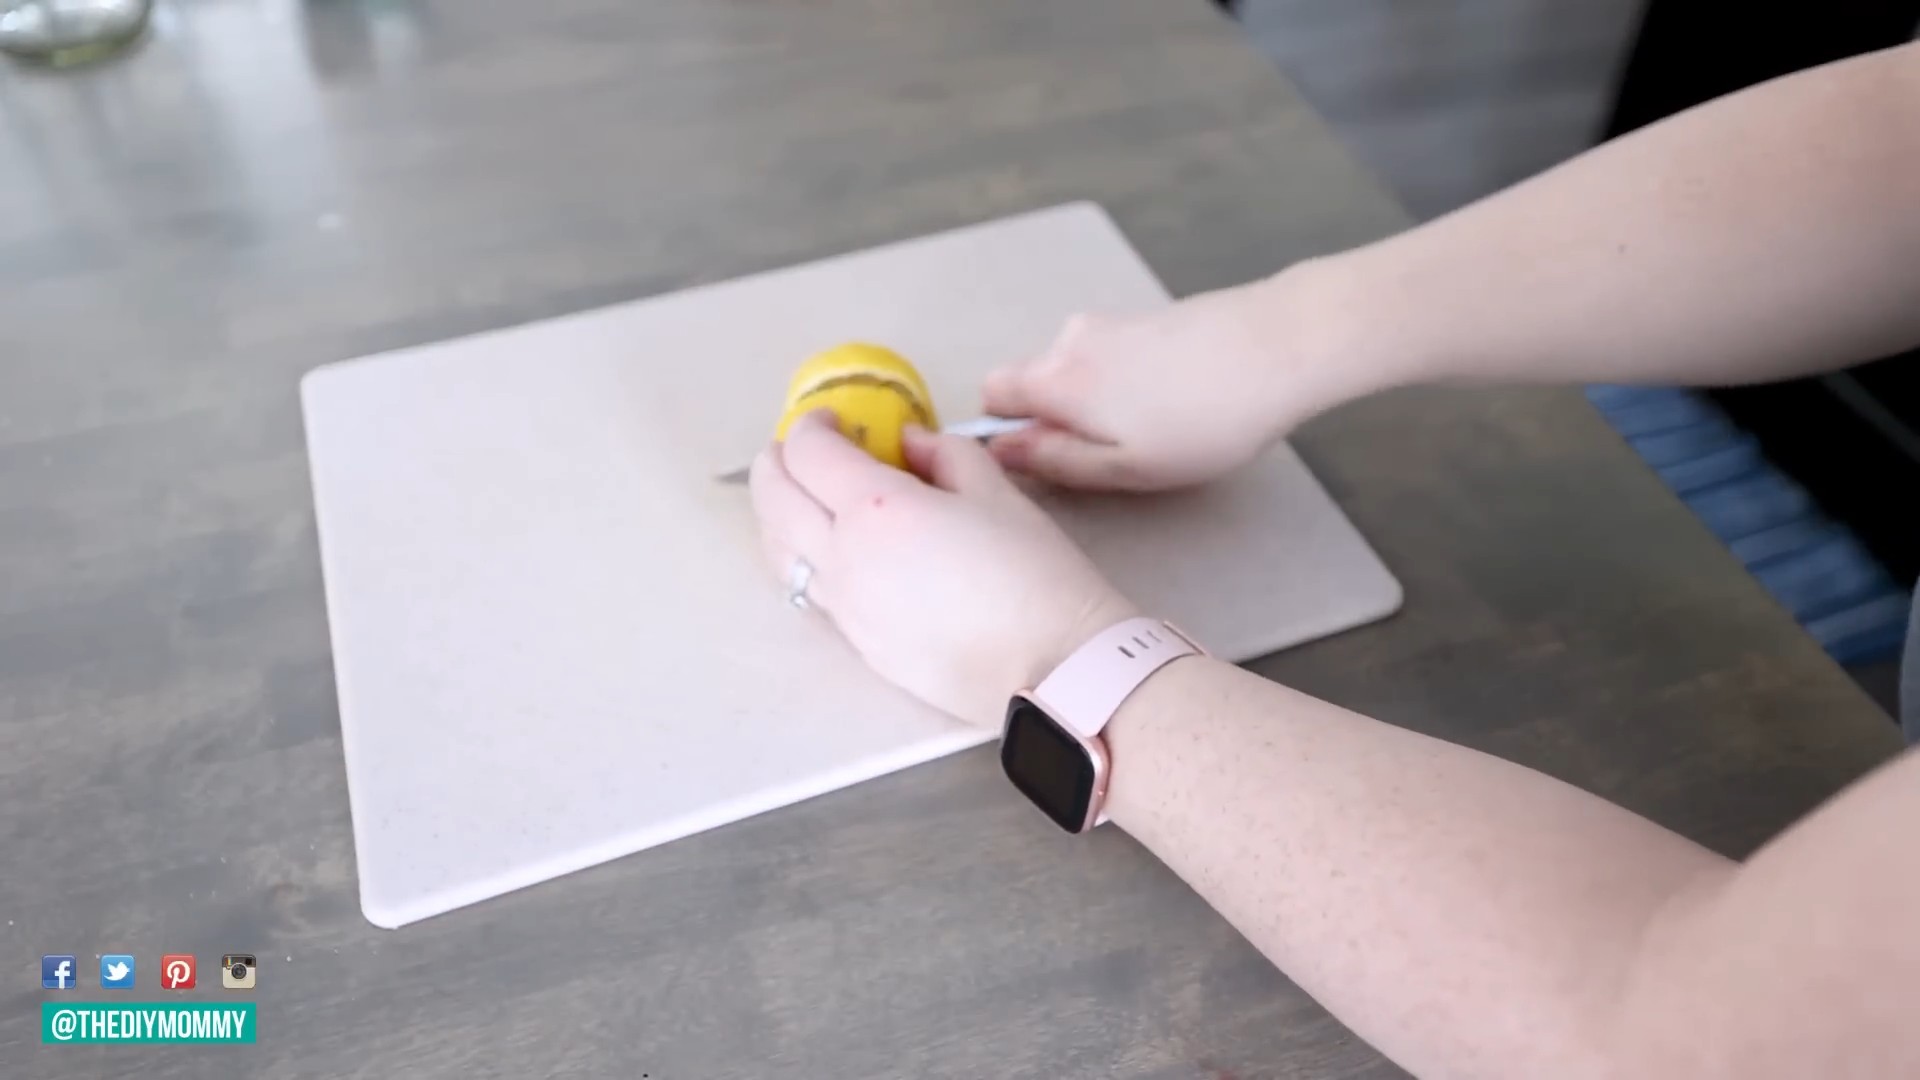
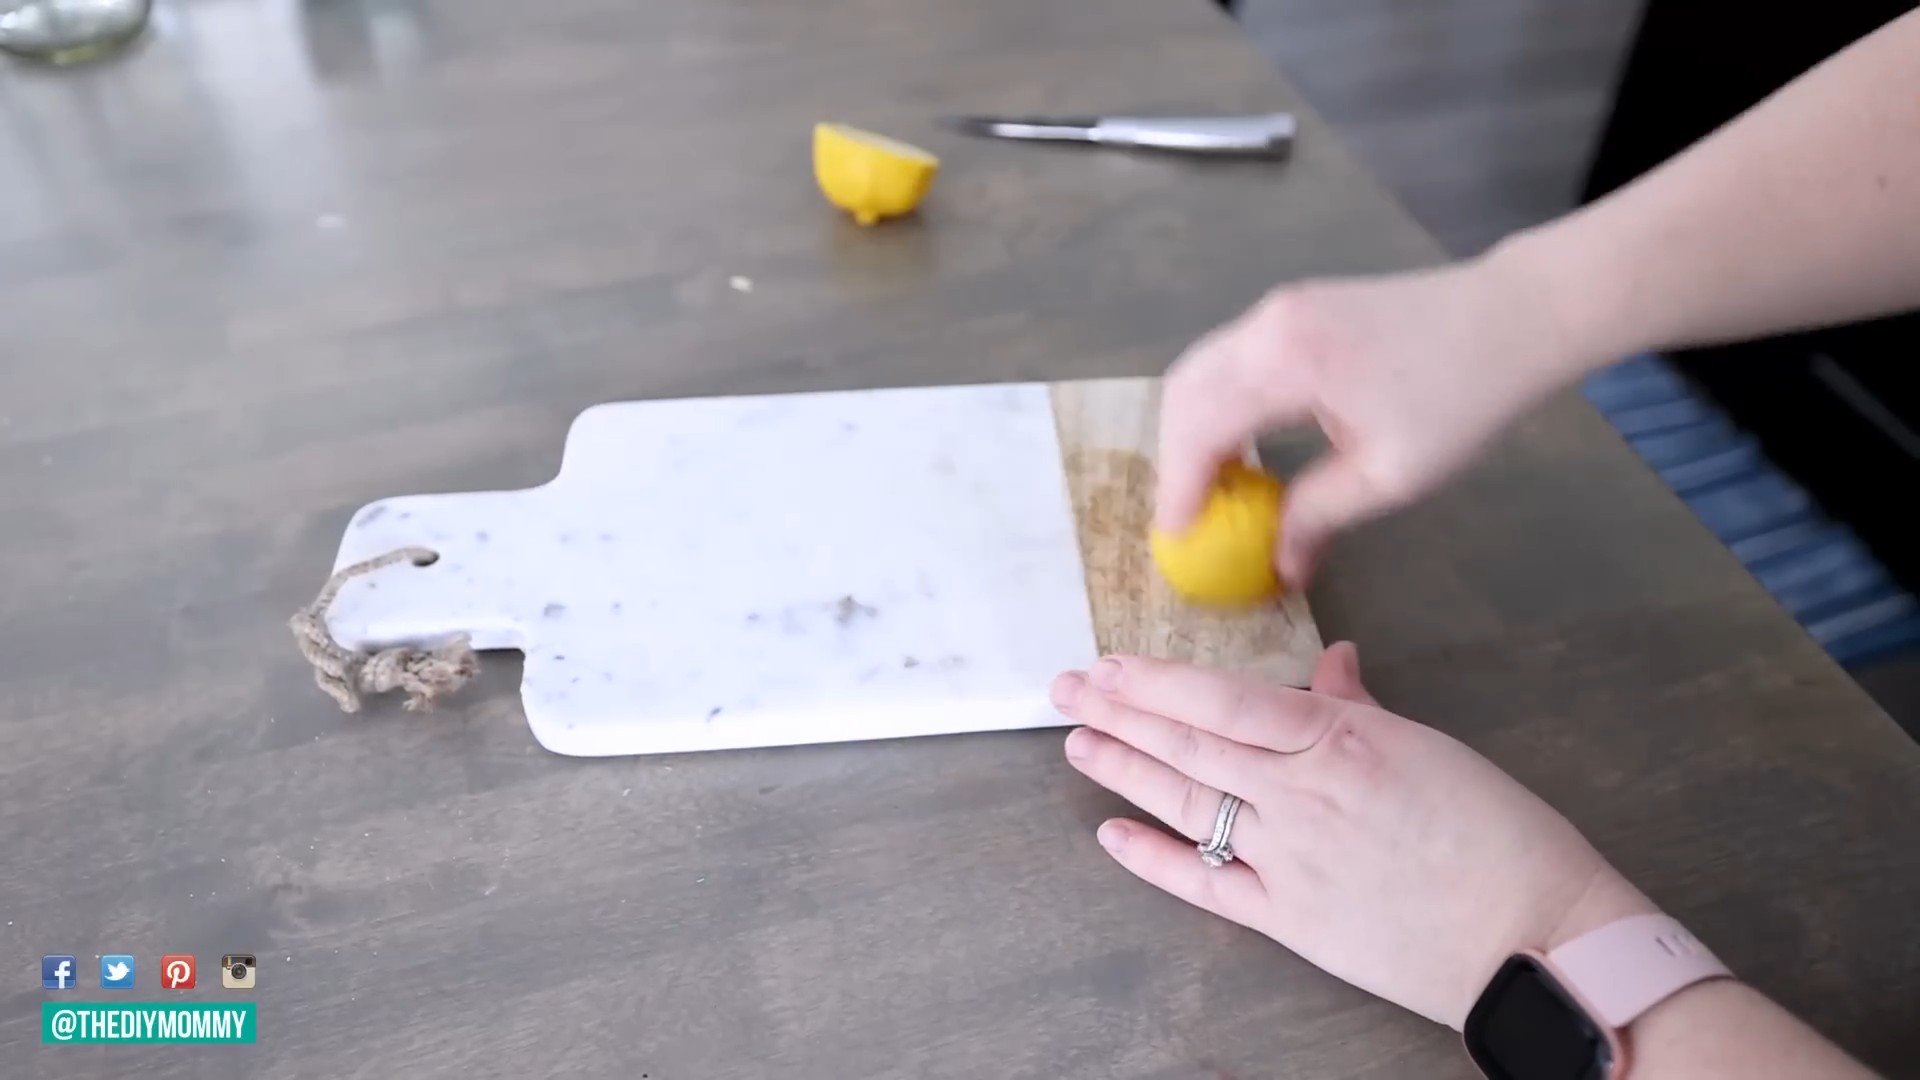
1. Prepare the Ice and Salt: Combine the ice cubes and coarse salt. The ice helps to dislodge debris, while the salt acts as an abrasive to scrub the disposal walls.
2. Add Citrus: Toss in a few lemon or lime wedges. The citrus will help to deodorize the disposal and leave a fresh scent.
3. Grind it Up: Turn on the cold water and run the garbage disposal. Slowly pour the ice, salt, and citrus mixture into the disposal. Let it run for about 30 seconds to a minute.
4. Flush with Water: After grinding the mixture, continue running cold water for another minute to flush out any remaining debris.
Cleaning Your Shower Head for Better Water Pressure
Over time, shower heads can become clogged with mineral deposits, leading to reduced water pressure and an uneven spray. Here’s how to clean your shower head without even removing it!
What You’ll Need:
* White vinegar
* Plastic bag (gallon-sized works well)
* Rubber band or twist tie
Step-by-Step Instructions:
1. Fill the Bag with Vinegar: Pour enough white vinegar into the plastic bag to completely submerge the shower head.
2. Secure the Bag: Carefully position the bag over the shower head, ensuring that the entire head is submerged in the vinegar. Use a rubber band or twist tie to secure the bag tightly around the shower arm.
3. Soak Overnight: Let the shower head soak in the vinegar overnight (or for at least a few hours). This allows the vinegar to dissolve the mineral deposits.
4. Remove and Rinse: Remove the bag and discard the vinegar. Turn on the shower and let the water run for a few minutes to flush out any remaining debris.
5. Wipe Clean: Use a clean cloth to wipe down the shower head. If you still see any stubborn deposits, you can use an old toothbrush to gently scrub them away.
Removing Hard Water Stains from Faucets and Shower Doors
Hard water stains can be a real eyesore, leaving a cloudy film on your faucets and shower doors. But don’t despair! Here’s a simple solution using vinegar and baking soda.
What You’ll Need:
* White vinegar
* Baking soda
* Spray bottle
* Clean cloth or sponge
* Old toothbrush (optional)
Step-by-Step Instructions:
1. Vinegar Spray: Fill a spray bottle with white vinegar. Spray the vinegar directly onto the hard water stains on your faucets and shower doors.
2. Let it Sit: Allow the vinegar to sit for 10-15 minutes. This gives the vinegar time to dissolve the mineral deposits.
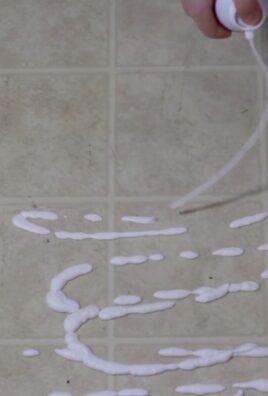
3. Baking Soda Paste: Make a paste by mixing baking soda with a little bit of water. The paste should be thick enough to stick to the surface.
4. Apply the Paste: Apply the baking soda paste to the vinegar-soaked areas. The baking soda will act as a gentle abrasive to help scrub away the stains.
5. Scrub Gently: Use a clean cloth or sponge to gently scrub the affected areas. For stubborn stains, you can use an old toothbrush to get into the crevices.
6. Rinse Thoroughly: Rinse the surfaces thoroughly with water to remove all traces of vinegar and baking soda.
7. Dry and Shine: Dry the surfaces with a clean, dry cloth to prevent water spots. Your faucets and shower doors should now be sparkling clean!
Cleaning Your Blender Like a Pro
Cleaning a blender can be tricky, especially after making smoothies or sauces. Here’s a super easy way to clean it without taking it apart.
What You’ll Need:
* Warm water
* Dish soap
Step-by-Step Instructions:
1. Rinse the Blender: After using your blender, rinse out any remaining food particles with warm water.
2. Fill with Water and Soap: Fill the blender halfway with warm water and add a squirt of dish soap.
3. Blend it Up: Secure the lid and blend the mixture on high speed for about 30 seconds.
4. Rinse Again: Pour out the soapy water and rinse the blender thoroughly with clean water.
5. Air Dry: Allow the blender to air dry completely before storing it.
Freshening Up Your Mattress
Mattresses can harbor dust mites, allergens, and odors. Here’s how to freshen up your mattress and create a cleaner sleeping environment.
What You’ll Need:
* Baking soda
* Essential oil (optional, like lavender or eucalyptus)
* Vacuum cleaner with upholstery attachment
* Sieve or strainer
Step-by-Step Instructions:
1. Strip the Bed: Remove all bedding, including sheets, blankets, and pillows. Wash the bedding in hot water to kill dust mites.
2. Sprinkle with Baking Soda: In a bowl, mix baking soda with a few drops of your favorite essential oil (if using). The essential oil will add a pleasant scent. Use a sieve or strainer to evenly sprinkle the baking soda mixture over the entire surface of the mattress.
3. Let it Sit: Allow the baking soda to sit on the mattress for at least 30 minutes, or even better, for a few hours. The baking soda will absorb odors and moisture.
4. Vacuum Thoroughly: Use the upholstery attachment of your vacuum cleaner to thoroughly vacuum the entire surface of the mattress. Make sure to get into all the crevices and seams.
5. Flip and Repeat: Flip the mattress over and repeat steps 2-4 on the other side.
6. Air Out: Allow the mattress to air out for a few hours before making the bed with fresh bedding.
Cleaning Burnt Food from Pots and Pans
Burnt food stuck to the bottom of pots and pans can be a nightmare to clean. But don’t worry, I’ve got a simple solution that will save you from hours of scrubbing.
What You’ll Need:
* Baking soda
* Water
* Dish soap
* Scrubbing sponge or pad
Step-by-Step Instructions:
1. Cover the Burnt Area: Cover the burnt food with a generous layer of baking soda.
2. Add Water: Add enough water to cover the baking soda and the burnt food.
3. Boil the Mixture:
Conclusion
So, there you have it! This simple yet incredibly effective DIY cleaning trick is more than just a way to save money; it’s a game-changer for maintaining a sparkling clean home. We’ve walked you through the steps, highlighting how easy it is to create your own powerful cleaning solution using ingredients you likely already have in your pantry. Forget those expensive, chemical-laden cleaners that promise the world but often fall short. This homemade alternative is not only budget-friendly but also environmentally conscious, reducing your reliance on harsh chemicals and single-use plastic bottles.
But why is this DIY cleaning trick a must-try? Because it works! It’s effective on a wide range of surfaces, from countertops and sinks to showers and floors. It cuts through grease, grime, and everyday messes with ease, leaving behind a fresh, clean scent without the overpowering chemical odor. Plus, the satisfaction of knowing you created something so effective yourself is an added bonus.
Don’t be afraid to experiment and personalize this cleaning solution to suit your specific needs and preferences. For a boost of disinfecting power, consider adding a few drops of tea tree oil or eucalyptus oil. If you prefer a citrusy scent, lemon or orange essential oils are excellent choices. For tackling stubborn stains, a paste made with baking soda and a little of your DIY cleaner can work wonders. Remember to always test any cleaning solution on an inconspicuous area first to ensure it doesn’t damage the surface.
We’re confident that once you try this DIY cleaning trick, you’ll be hooked. It’s a simple, affordable, and effective way to keep your home clean and healthy. So, ditch the store-bought cleaners and embrace the power of homemade!
We encourage you to give this **clever cleaning trick** a try and see the amazing results for yourself. Share your experiences with us in the comments below! Let us know what variations you tried, what surfaces you cleaned, and how this DIY solution worked for you. We’re eager to hear your success stories and learn from your experiences. Together, we can create a community of savvy cleaners who are saving money, reducing waste, and enjoying sparkling clean homes.
Now, let’s dive into some frequently asked questions to address any concerns or curiosities you might have.
Frequently Asked Questions
Is this DIY cleaning solution safe for all surfaces?
While this DIY cleaning solution is generally safe for most surfaces, it’s always best to test it on an inconspicuous area first, especially on delicate materials like wood, marble, or granite. The acidity of vinegar, while beneficial for cleaning, can potentially damage certain surfaces over time. For these surfaces, consider diluting the solution further or using a different cleaning agent altogether. For example, a solution of mild dish soap and water is often a safer option for delicate surfaces. Always read the manufacturer’s instructions for your specific surfaces before using any cleaning product, homemade or store-bought.
How long does this DIY cleaning solution last?
This DIY cleaning solution typically lasts for several weeks when stored properly in an airtight container. However, it’s best to use it within a month for optimal effectiveness. Over time, the essential oils may lose their potency, and the solution may become less effective at cleaning. To ensure the longevity of your cleaning solution, store it in a cool, dark place away from direct sunlight. This will help to preserve the integrity of the ingredients and prevent them from degrading.
Can I use different types of vinegar?
Yes, you can use different types of vinegar, such as white vinegar, apple cider vinegar, or cleaning vinegar. White vinegar is the most commonly used and readily available option, and it’s generally the most effective for cleaning due to its higher acidity. Apple cider vinegar has a milder scent and may be preferred by those who are sensitive to the strong odor of white vinegar. Cleaning vinegar is specifically formulated for cleaning purposes and has an even higher acidity than white vinegar, making it an excellent choice for tackling tough stains and grime. However, be sure to dilute cleaning vinegar appropriately, as its higher acidity can be more corrosive to certain surfaces.
What essential oils are best to use?
The best essential oils to use in your DIY cleaning solution depend on your personal preferences and the desired cleaning benefits. Tea tree oil and eucalyptus oil are known for their antibacterial and antifungal properties, making them excellent choices for disinfecting surfaces. Lemon and orange essential oils have a refreshing citrus scent and are effective at cutting through grease and grime. Lavender essential oil has a calming scent and can help to create a more relaxing cleaning experience. Experiment with different essential oils to find your favorite combinations and create a cleaning solution that smells great and effectively cleans your home. Remember to use pure, high-quality essential oils for the best results.
Can I use this cleaning solution on my windows and mirrors?
Yes, this cleaning solution can be used on windows and mirrors, but it’s important to dilute it properly to avoid streaks. A solution of equal parts vinegar and water is generally effective for cleaning glass surfaces. You can also add a few drops of dish soap to help cut through grime and leave a streak-free shine. Use a microfiber cloth to wipe down the windows and mirrors, and dry them immediately with a clean, dry cloth to prevent water spots. Avoid cleaning windows and mirrors in direct sunlight, as this can cause the cleaning solution to dry too quickly and leave streaks.
Is this cleaning solution safe for pets and children?
While this DIY cleaning solution is generally safer than many commercial cleaners, it’s still important to take precautions when using it around pets and children. Keep the cleaning solution out of reach of children and pets, and avoid spraying it directly on them. If your pet or child ingests the cleaning solution, contact your veterinarian or poison control center immediately. When cleaning surfaces that pets and children come into contact with, such as floors and countertops, be sure to rinse them thoroughly with water after cleaning to remove any residue. Consider using milder essential oils, such as lavender or chamomile, if you have pets or children with sensitivities.
How do I get rid of the vinegar smell?
The vinegar smell typically dissipates quickly after cleaning. However, if you find the odor unpleasant, there are several things you can do to minimize it. Add a few drops of your favorite essential oils to the cleaning solution to mask the vinegar smell. Open windows and doors to ventilate the area while cleaning. After cleaning, wipe down the surfaces with a damp cloth to remove any lingering vinegar residue. You can also place a bowl of baking soda in the room to absorb any remaining odors.
What if I don’t have vinegar? Can I substitute it with something else?
While vinegar is a key ingredient in this DIY cleaning solution due to its acidity and cleaning properties, you can try substituting it with lemon juice in a pinch. Lemon juice also has acidic properties and can help to cut through grease and grime. However, lemon juice is not as strong as vinegar, so you may need to use a higher concentration to achieve the same cleaning results. Be sure to strain the lemon juice to remove any pulp or seeds before adding it to the cleaning solution. Keep in mind that lemon juice may also have a slight bleaching effect, so test it on an inconspicuous area first before using it on delicate surfaces.
Can I use this to clean my toilet?
Yes, this DIY cleaning solution can be used to clean your toilet. Pour about a cup of the solution into the toilet bowl and let it sit for about 15-20 minutes. Then, scrub the bowl with a toilet brush and flush. The vinegar will help to remove stains and mineral deposits, leaving your toilet bowl clean and fresh. For stubborn stains, you can add a paste of baking soda and water to the affected areas and let it sit for a longer period before scrubbing.
What about mold and mildew? Will this help?
This DIY cleaning solution can help to remove mold and mildew, but it may not be as effective as specialized mold and mildew removers. Vinegar has antifungal properties and can help to kill mold and mildew spores. To treat mold and mildew, spray the affected area with the cleaning solution and let it sit for about 30 minutes. Then, scrub the area with a brush or sponge and rinse with water. For severe mold and mildew infestations, you may need to use a stronger cleaning agent, such as bleach or a commercial mold and mildew remover. Always wear gloves and a mask when cleaning mold and mildew, and ensure proper ventilation to avoid inhaling harmful spores.
Leave a Comment