
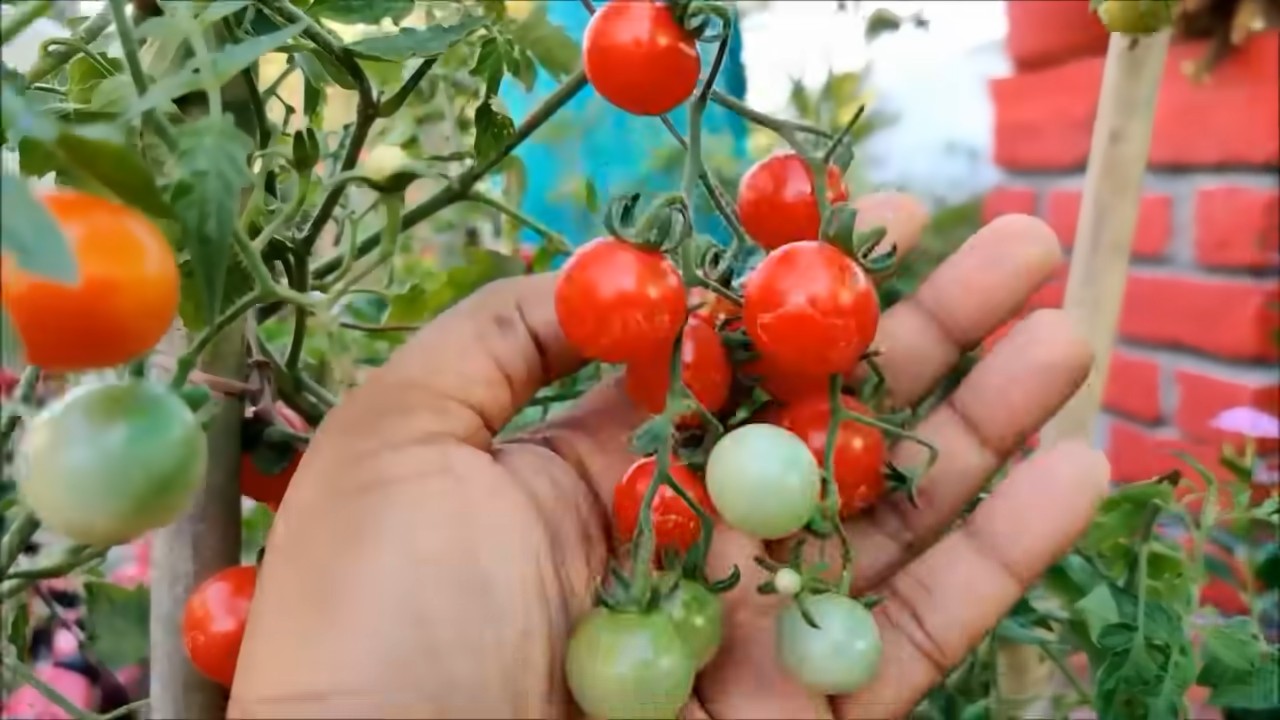
Cherry Tomato Home Gardening: Imagine plucking juicy, sun-ripened cherry tomatoes straight from your own backyard! There’s nothing quite like the burst of flavor from a homegrown tomato, especially when you’ve nurtured it from a tiny seedling. For centuries, cultivating tomatoes has been a cherished tradition, dating back to the Aztecs and Incas who first domesticated these vibrant fruits. Today, even if you don’t have acres of land, you can still enjoy the satisfaction of growing your own.
But let’s be honest, sometimes home gardening can feel a little daunting, right? That’s where these DIY tricks and hacks come in! I’m here to share some simple, yet effective, techniques that will help you maximize your cherry tomato yield, even in small spaces. Whether you’re a seasoned gardener or just starting out, these tips will empower you to create a thriving cherry tomato garden that will be the envy of your neighbors.
Why do you need these hacks? Because growing cherry tomatoes doesn’t have to be complicated or expensive! With a few clever strategies, you can overcome common challenges like pests, diseases, and limited sunlight. Plus, who wouldn’t want a constant supply of delicious, organic cherry tomatoes for salads, snacks, and sauces? So, get ready to roll up your sleeves and discover the secrets to successful cherry tomato home gardening!
Growing Cherry Tomatoes Indoors: A Beginner’s Guide
Hey there, fellow gardening enthusiasts! Ever dreamt of plucking fresh, juicy cherry tomatoes right from your kitchen windowsill, even when the weather outside is frightful? Well, dream no more! I’m going to walk you through a simple, step-by-step guide on how to grow cherry tomatoes indoors. It’s easier than you think, and the reward of homegrown goodness is totally worth it.
Choosing the Right Cherry Tomato Variety
Not all cherry tomato varieties are created equal, especially when it comes to indoor growing. You’ll want to pick a variety that’s compact, disease-resistant, and known for its good yields in smaller spaces. Here are a few of my personal favorites:
* Tiny Tim: This is a super compact variety, perfect for small pots. It produces adorable, bite-sized tomatoes.
* Tumbling Tom: As the name suggests, this variety is ideal for hanging baskets. The vines cascade beautifully, loaded with sweet tomatoes.
* Red Robin: Another dwarf variety that stays small and produces a good amount of fruit.
* Sweet Million: While not a dwarf variety, Sweet Million is known for its prolific yields and relatively compact growth habit compared to larger tomato types. You might need a slightly bigger pot for this one.
Gathering Your Supplies
Before we dive into the planting process, let’s make sure you have everything you need. Trust me, having all your supplies ready beforehand will make the whole experience much smoother.
* Cherry Tomato Seeds: Choose your preferred variety from the list above (or any other compact cherry tomato variety you like!).
* Seed Starting Tray or Small Pots: These will be used to germinate your seeds.
* Seed Starting Mix: This is a light, sterile soil mix specifically designed for starting seeds. Don’t use regular garden soil; it’s too heavy and can harbor diseases.
* Larger Pots (at least 5 gallons): Once your seedlings are big enough, they’ll need to be transplanted into larger pots. Make sure they have drainage holes!
* Potting Soil: Use a high-quality potting mix that’s well-draining and rich in nutrients.
* Grow Lights: This is crucial for indoor growing, especially if you don’t have a super sunny window.
* Watering Can or Spray Bottle: For gentle watering.
* Fertilizer: A balanced liquid fertilizer formulated for tomatoes.
* Small Stakes or Tomato Cages: To support the plants as they grow.
* Optional: Heat Mat: To speed up germination.
Starting Your Seeds
This is where the magic begins! We’re going to coax those tiny seeds into becoming thriving tomato plants.
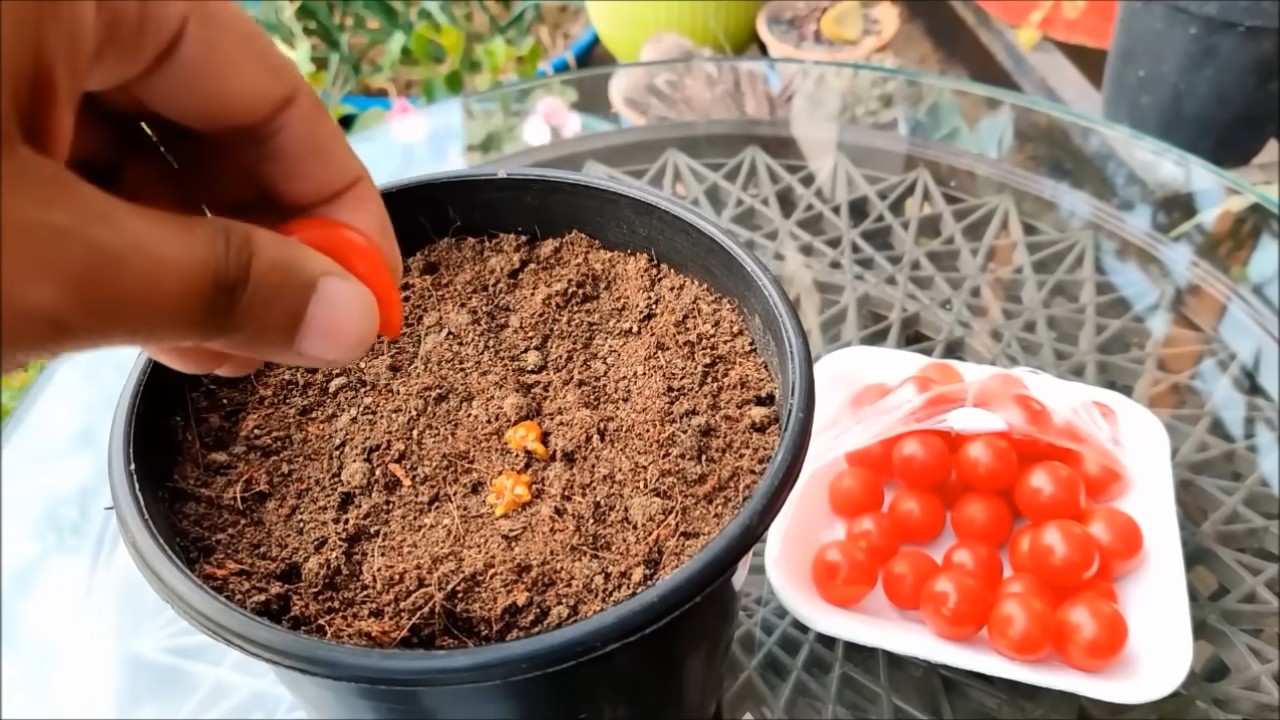
1. Prepare Your Seed Starting Tray: Fill your seed starting tray or small pots with seed starting mix. Gently pat it down to remove any air pockets.
2. Sow the Seeds: Make a small indentation (about 录 inch deep) in the soil. Place 2-3 seeds in each indentation. This increases your chances of at least one seed germinating.
3. Cover the Seeds: Gently cover the seeds with more seed starting mix.
4. Water Thoroughly: Use a spray bottle or watering can to gently moisten the soil. You want it to be damp, but not soggy.
5. Provide Warmth: Cherry tomato seeds germinate best in warm conditions (around 70-80掳F). If you have a heat mat, place the seed starting tray on top of it. Otherwise, find a warm spot in your house.
6. Maintain Moisture: Keep the soil consistently moist, but not waterlogged. You can cover the seed starting tray with a clear plastic lid or plastic wrap to help retain moisture. Just make sure to remove it once the seeds start to germinate.
7. Provide Light: Once the seedlings emerge (usually within 5-10 days), they’ll need plenty of light. Place them under grow lights or in a very sunny window. If using grow lights, keep them a few inches above the seedlings and adjust as they grow.
Transplanting Your Seedlings
Once your seedlings have developed their first set of true leaves (the leaves that look like miniature tomato leaves, not the initial seed leaves), it’s time to transplant them into larger pots.
1. Prepare Your Larger Pots: Fill your larger pots (at least 5 gallons) with potting soil.
2. Gently Remove the Seedlings: Carefully remove the seedlings from the seed starting tray or small pots. Be gentle to avoid damaging the roots. If the roots are tightly packed, you can gently tease them apart.
3. Plant the Seedlings: Make a hole in the potting soil large enough to accommodate the seedling’s root ball. Place the seedling in the hole and gently backfill with potting soil. You can bury the stem a little deeper than it was previously planted; this will encourage more root growth.
4. Water Thoroughly: Water the newly transplanted seedlings thoroughly.
5. Provide Support: Insert a small stake or tomato cage into the pot to provide support for the growing plant.
Caring for Your Cherry Tomato Plants
Now that your cherry tomato plants are happily settled in their new homes, it’s time to provide them with the care they need to thrive.
* Light: Cherry tomatoes need at least 6-8 hours of direct light per day. If you don’t have a sunny window, use grow lights. I usually keep my grow lights on for about 14-16 hours a day.
* Watering: Water your cherry tomato plants regularly, keeping the soil consistently moist but not waterlogged. Check the soil moisture by sticking your finger into the soil. If the top inch feels dry, it’s time to water. Avoid getting water on the leaves, as this can lead to fungal diseases.
* Fertilizing: Feed your cherry tomato plants with a balanced liquid fertilizer every 2-3 weeks. Follow the instructions on the fertilizer label. I like to use a fertilizer that’s specifically formulated for tomatoes.
* Pruning: Prune your cherry tomato plants regularly to encourage air circulation and prevent disease. Remove any suckers (the small shoots that grow between the main stem and the branches). You can also remove any yellowing or dead leaves.
* Pollination: Indoor cherry tomato plants may need a little help with pollination. You can gently shake the plants or use a small paintbrush to transfer pollen from one flower to another. A small fan can also help with pollination.
* Temperature: Cherry tomatoes thrive in temperatures between 65-85掳F. Avoid exposing them to extreme temperatures.
* Pest Control: Keep an eye out for pests like aphids, whiteflies, and spider mites. If you spot any pests, you can try spraying them with insecticidal soap or neem oil.
Harvesting Your Cherry Tomatoes
The moment you’ve been waiting for! Harvesting your own homegrown cherry tomatoes is incredibly satisfying.
1. Wait for Ripeness: Cherry tomatoes are ready to harvest when they’re fully colored (usually red, but it depends on the variety) and slightly soft to the touch.
2. Gently Pluck: Gently pluck the tomatoes from the vine.
3. Enjoy! Wash your cherry tomatoes and enjoy them fresh, in salads, or in your favorite recipes.
Troubleshooting
Even with the best care, you might encounter a few challenges along the way. Here are some common problems and how to address them:
* Yellowing Leaves: This could be a sign of overwatering, underwatering, nutrient deficiency, or disease. Check the soil moisture and adjust your watering accordingly. Fertilize your plants regularly. If you suspect disease, remove the affected leaves and treat the plant with a fungicide.
* Blossom End Rot: This is a condition where the bottom of the tomato turns black and leathery. It’s usually caused by a calcium deficiency. Make sure your potting soil is rich in calcium and water your plants consistently.
* Lack of Fruit: This could be due to insufficient light, poor pollination, or nutrient deficiency. Make sure your plants are getting enough light and help with pollination. Fertilize your plants regularly.
* Pests: As mentioned earlier, keep an eye out for pests and treat them promptly with insecticidal soap or neem oil.
Final Thoughts
Growing cherry tomatoes indoors is a rewarding experience that can bring a touch of summer to your home year-round. With a little patience and care, you’ll be enjoying delicious, homegrown cherry tomatoes in no time. Don’t be afraid to experiment and learn from your mistakes. Happy gardening!
Conclusion
So, there you have it! Cultivating your own cherry tomatoes at home is not only achievable but also incredibly rewarding. From the vibrant colors bursting forth to the sweet, tangy flavor that surpasses anything you can find in a grocery store, the experience of growing your own cherry tomatoes is truly special. This DIY approach to cherry tomato home gardening empowers you to take control of your food source, ensuring freshness, quality, and a connection to nature that’s often missing in our modern lives.
But why is this DIY trick a must-try? Beyond the obvious benefits of fresh, delicious tomatoes, it’s about the satisfaction of nurturing something from seed to harvest. It’s about reducing your carbon footprint by minimizing transportation and packaging. It’s about knowing exactly what goes into your food, free from harmful pesticides and chemicals. And, perhaps most importantly, it’s about the sheer joy of sharing your homegrown bounty with friends and family. Imagine the delight on their faces as they savor the taste of sun-ripened cherry tomatoes, knowing they came straight from your garden!
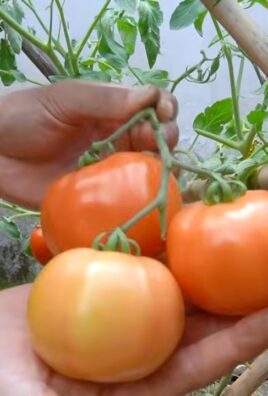
Don’t be afraid to experiment with different varieties of cherry tomatoes. From the classic red to the yellow, orange, and even black varieties, each offers a unique flavor profile and visual appeal. Consider growing them in hanging baskets for a cascading display of color, or train them up a trellis for a vertical garden that maximizes space. You can even try companion planting, pairing your cherry tomatoes with basil, marigolds, or other herbs and flowers that deter pests and enhance growth.
For those with limited space, container gardening is an excellent option. Choose a pot that’s at least 12 inches in diameter and ensure it has good drainage. Use a high-quality potting mix and provide regular watering and fertilization. Even a small balcony or patio can become a thriving cherry tomato garden with a little bit of planning and effort.
And if you’re feeling adventurous, why not try saving seeds from your best-performing plants to grow again next year? This is a great way to develop your own unique varieties that are perfectly adapted to your local climate.
We wholeheartedly encourage you to embark on this DIY cherry tomato home gardening journey. It’s an investment in your health, your well-being, and your connection to the natural world. The process is simple, the rewards are plentiful, and the satisfaction is immeasurable.
So, grab your seeds, prepare your soil, and get ready to experience the joy of growing your own delicious cherry tomatoes. And don’t forget to share your experiences with us! We’d love to hear about your successes, your challenges, and your favorite ways to enjoy your homegrown harvest. Share your photos, tips, and recipes in the comments below, and let’s create a community of passionate cherry tomato gardeners!
Frequently Asked Questions (FAQ)
What is the best time to plant cherry tomatoes?
The ideal time to plant cherry tomatoes depends on your local climate. Generally, you should plant them after the last frost when the soil has warmed up to at least 60掳F (15掳C). In most regions, this is typically in late spring or early summer. If you live in a warmer climate, you may be able to plant them earlier in the spring or even in the fall for a winter harvest. To be sure, check your local weather forecasts and consult with your local garden center for specific recommendations. Starting seeds indoors 6-8 weeks before the last expected frost can give you a head start.
How much sunlight do cherry tomatoes need?
Cherry tomatoes thrive in full sun, which means they need at least 6-8 hours of direct sunlight per day. Insufficient sunlight can lead to leggy growth, reduced fruit production, and a higher susceptibility to diseases. Choose a planting location that receives ample sunlight throughout the day. If you’re growing them in containers, you can move them around to ensure they get enough sun. If you live in a particularly hot climate, some afternoon shade may be beneficial to prevent the plants from overheating.
What kind of soil is best for cherry tomatoes?
Cherry tomatoes prefer well-draining soil that is rich in organic matter. A slightly acidic soil pH of 6.0 to 6.8 is ideal. Before planting, amend your soil with compost, aged manure, or other organic materials to improve its fertility and drainage. Avoid heavy clay soils, as they can become waterlogged and suffocate the roots. If you have clay soil, consider growing your cherry tomatoes in raised beds or containers with a well-draining potting mix.
How often should I water my cherry tomatoes?
Water your cherry tomatoes regularly, especially during hot, dry weather. Aim to keep the soil consistently moist but not waterlogged. Water deeply at the base of the plant, avoiding wetting the foliage, which can encourage fungal diseases. A good rule of thumb is to water when the top inch of soil feels dry to the touch. Mulching around the plants can help retain moisture and suppress weeds. During periods of heavy rain, you may need to reduce watering to prevent root rot.
Do cherry tomatoes need fertilizer?
Yes, cherry tomatoes benefit from regular fertilization. Use a balanced fertilizer with equal amounts of nitrogen, phosphorus, and potassium (e.g., 10-10-10) at planting time. Once the plants start to flower and produce fruit, switch to a fertilizer that is higher in phosphorus and potassium to promote fruit development. Follow the instructions on the fertilizer package carefully, and avoid over-fertilizing, which can lead to excessive foliage growth and reduced fruit production. Organic fertilizers, such as compost tea or fish emulsion, are also excellent options.
How do I prevent pests and diseases on my cherry tomatoes?
Prevention is key when it comes to pests and diseases. Choose disease-resistant varieties of cherry tomatoes, and practice good garden hygiene by removing any dead or diseased leaves and stems. Water at the base of the plant to avoid wetting the foliage, and provide good air circulation to prevent fungal diseases. Monitor your plants regularly for signs of pests, such as aphids, whiteflies, and tomato hornworms. If you find pests, treat them promptly with insecticidal soap, neem oil, or other appropriate organic controls. Crop rotation can also help prevent soilborne diseases.
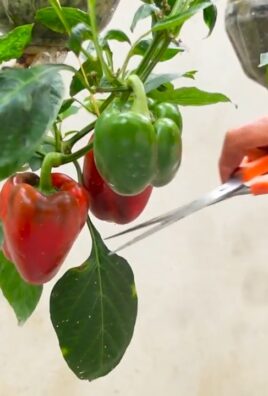
How do I prune cherry tomatoes?
Pruning cherry tomatoes can improve air circulation, promote fruit production, and prevent the plants from becoming too overgrown. Remove suckers, which are the small shoots that grow between the main stem and the branches. Prune off any yellowing or diseased leaves. You can also prune the lower leaves to improve air circulation and prevent soilborne diseases from splashing onto the foliage. Use clean, sharp pruning shears to avoid spreading diseases.
When are cherry tomatoes ripe?
Cherry tomatoes are typically ripe when they are fully colored and slightly soft to the touch. The color will depend on the variety you are growing. Gently twist the tomato from the vine; if it comes off easily, it’s ripe. Ripe cherry tomatoes should have a sweet, tangy flavor. Harvest them regularly to encourage continued fruit production.
Can I grow cherry tomatoes indoors?
Yes, you can grow cherry tomatoes indoors, but it requires some extra effort. You’ll need a sunny location, preferably a south-facing window, or you’ll need to provide supplemental lighting with grow lights. Choose a compact or dwarf variety of cherry tomato that is well-suited for container gardening. Use a large pot with good drainage and a high-quality potting mix. Water regularly and fertilize as needed. You may also need to hand-pollinate the flowers to ensure fruit production.
How do I store cherry tomatoes?
Store cherry tomatoes at room temperature for the best flavor. Avoid refrigerating them, as this can make them mealy and reduce their flavor. If you have a large harvest, you can preserve cherry tomatoes by canning, freezing, or drying them. You can also make cherry tomato sauce, salsa, or relish.

Leave a Comment