
Bottle gardening bell peppers: sounds a little crazy, right? But trust me, it’s a game-changer for anyone who dreams of fresh, vibrant bell peppers without a sprawling garden! I’m so excited to share this surprisingly simple and incredibly rewarding DIY trick with you.
For centuries, humans have sought innovative ways to cultivate food, even in limited spaces. From ancient rooftop gardens in Babylon to the modern-day urban farming movement, the desire to connect with nature and grow our own food is deeply ingrained. Bottle gardening, while a relatively recent adaptation, taps into this same primal urge, offering a sustainable and accessible solution for growing delicious produce.
Why do you need this DIY hack? Well, maybe you live in an apartment with a tiny balcony, or perhaps your backyard is more concrete jungle than lush oasis. Maybe you’re simply looking for a fun and eco-friendly project to try. Whatever your reason, bottle gardening bell peppers offers a fantastic way to overcome space constraints, recycle materials, and enjoy the satisfaction of harvesting your own colorful, crunchy peppers. Plus, it’s a fantastic conversation starter! Get ready to impress your friends and neighbors with your ingenuity and green thumb. Let’s dive in and discover how easy it is to transform ordinary plastic bottles into thriving mini-gardens!
DIY Bottle Gardening: Grow Bell Peppers in Recycled Plastic
Hey there, fellow gardening enthusiasts! I’m super excited to share one of my favorite DIY projects with you: growing bell peppers in recycled plastic bottles. It’s a fantastic way to reuse those bottles that would otherwise end up in the trash, and it’s surprisingly easy to get started. Plus, who doesn’t love fresh, homegrown bell peppers? Let’s dive in!
Why Bottle Gardening?
Before we get into the nitty-gritty, let’s talk about why bottle gardening is so awesome:
* Eco-Friendly: You’re giving plastic bottles a new life, reducing waste and helping the environment.
* Space-Saving: Perfect for small spaces like balconies, patios, or even windowsills.
* Cost-Effective: It’s a budget-friendly way to grow your own food.
* Portable: You can easily move your plants around to find the best sunlight.
* Fun and Educational: A great project for kids and adults alike!
Materials You’ll Need
Okay, let’s gather our supplies. Here’s what you’ll need to get started:
* Plastic Bottles: I recommend using 2-liter soda bottles or larger water bottles. The bigger, the better, as bell peppers need some room to grow. You’ll need at least one bottle per plant, but I usually prepare a few extras just in case.
* Bell Pepper Seeds or Seedlings: You can start from seeds or buy small seedlings from your local garden center. If you’re starting from seeds, you’ll need to start them indoors a few weeks before you plan to transplant them into the bottles.
* Potting Soil: Use a good quality potting mix that’s well-draining. This is crucial for healthy pepper plants.
* Scissors or a Utility Knife: For cutting the plastic bottles. Be careful!
* Drill or Nail: To create drainage holes in the bottom of the bottles.
* Watering Can or Spray Bottle: For watering your plants.
* Optional:
* Gravel or Small Stones: To improve drainage at the bottom of the bottles.
* Plant Markers: To label your pepper varieties.
* Gloves: To keep your hands clean.
* Fertilizer: A balanced liquid fertilizer to feed your plants.
Preparing the Bottles
This is where the recycling magic happens!
1. Clean the Bottles: Wash the plastic bottles thoroughly with soap and water to remove any residue. Rinse them well and let them dry completely.
2. Cut the Bottles: This is where you need to decide how you want to set up your bottle garden. There are a couple of options:
* Option 1: Single Bottle: Cut the bottle in half horizontally. You’ll use the bottom half as the planter and discard the top half (or save it for another project!).
* Option 2: Self-Watering Bottle: Cut the bottle about 2/3 of the way up. Invert the top portion and nestle it inside the bottom portion. This creates a self-watering system. You’ll need to drill a hole in the bottle cap to allow water to wick up to the soil.
I personally prefer the single bottle method for bell peppers, as it provides more room for the roots to grow.
3. Create Drainage Holes: Using a drill or nail, carefully create several drainage holes in the bottom of the bottle. This is essential to prevent waterlogging, which can lead to root rot. I usually make about 4-5 holes.
4. Optional: Add Gravel: If you want to improve drainage even further, add a layer of gravel or small stones to the bottom of the bottle before adding the soil. This helps to prevent the drainage holes from getting clogged.
Planting Your Bell Peppers
Now for the fun part – planting!
1. Fill the Bottle with Soil: Fill the prepared bottle with potting soil, leaving about an inch of space at the top.
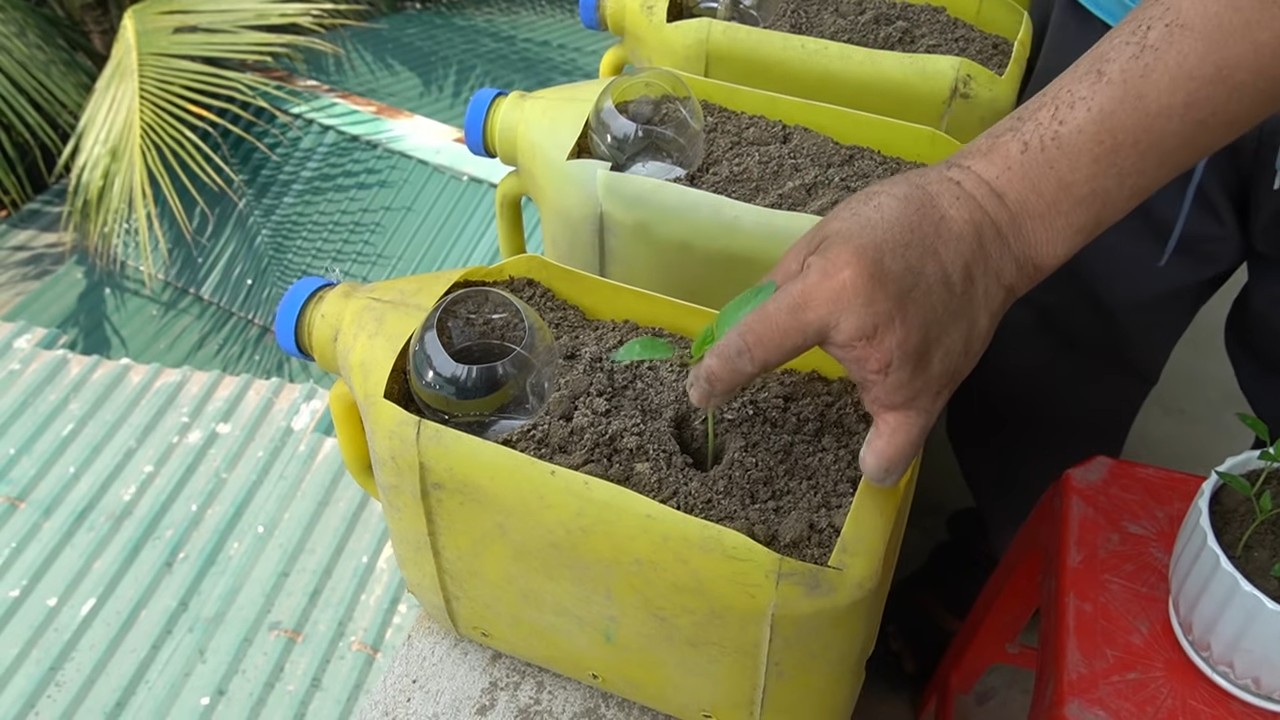
2. Plant the Seeds or Seedlings:
* From Seeds: Make a small indentation in the soil and plant 2-3 bell pepper seeds. Cover them lightly with soil and water gently. Keep the soil moist but not soggy. You’ll need to thin out the seedlings later, keeping the strongest one.
* From Seedlings: Gently remove the seedling from its container, being careful not to damage the roots. Create a hole in the soil large enough to accommodate the root ball. Place the seedling in the hole and fill in around it with soil. Water thoroughly.
3. Water Thoroughly: After planting, water the soil thoroughly until water drains out of the drainage holes. This helps to settle the soil and get the roots established.
4. Label Your Plants: If you’re growing multiple varieties of bell peppers, use plant markers to label each bottle. This will help you keep track of which plant is which.
Caring for Your Bell Pepper Plants
Now that your bell pepper plants are in their new homes, it’s time to provide them with the care they need to thrive.
1. Sunlight: Bell peppers need at least 6-8 hours of sunlight per day. Place your bottle garden in a sunny location, such as a south-facing balcony or patio. If you don’t have enough natural sunlight, you can supplement with grow lights.
2. Watering: Water your bell pepper plants regularly, especially during hot weather. Check the soil moisture by sticking your finger into the soil. If the top inch of soil feels dry, it’s time to water. Avoid overwatering, as this can lead to root rot.
3. Fertilizing: Bell peppers are heavy feeders, so they need regular fertilization. Use a balanced liquid fertilizer every 2-3 weeks, following the instructions on the label.
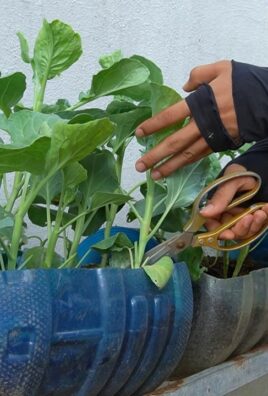
4. Pruning: Pruning can help to improve air circulation and encourage fruit production. Remove any yellowing or dead leaves. You can also pinch off the suckers that grow between the main stem and the branches.
5. Support: As your bell pepper plants grow, they may need some support to prevent them from falling over. You can use stakes or tomato cages to provide support.
6. Pest Control: Keep an eye out for pests such as aphids, whiteflies, and spider mites. If you notice any pests, you can treat them with insecticidal soap or neem oil.
7. Pollination: Bell peppers are self-pollinating, but they may need some help from you, especially if they’re grown indoors. You can gently shake the plants or use a small paintbrush to transfer pollen from one flower to another.
Harvesting Your Bell Peppers
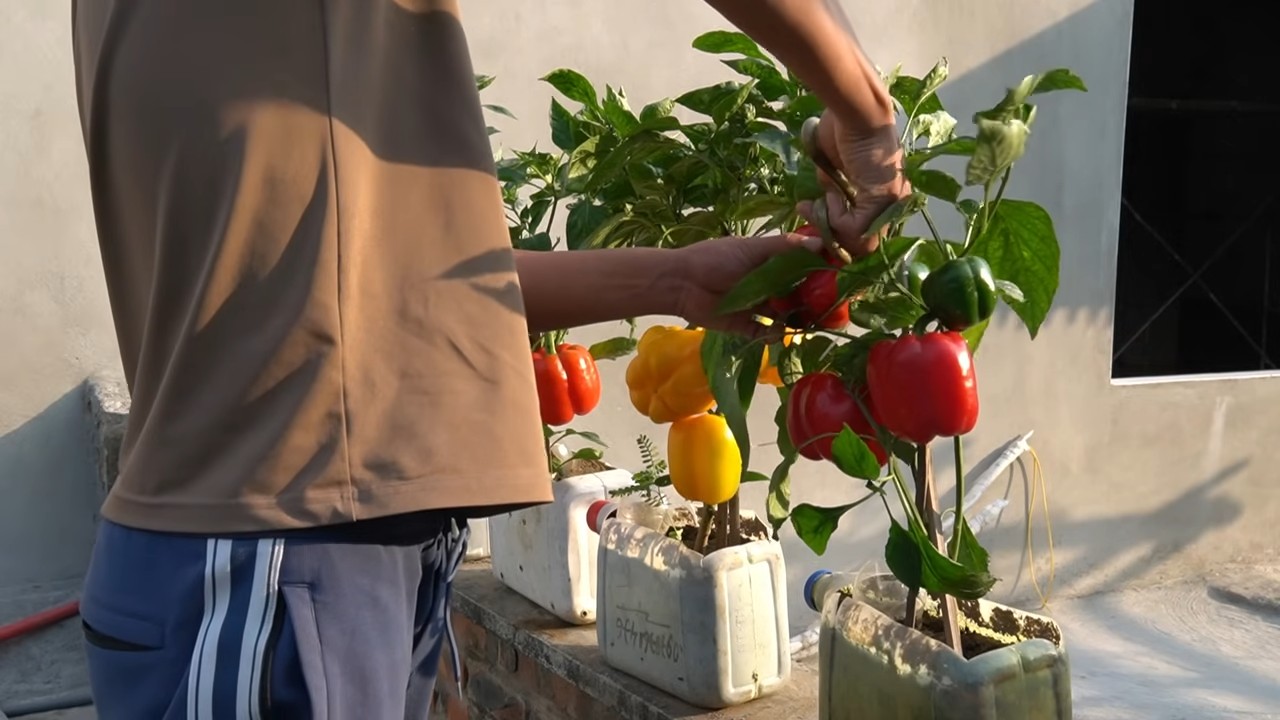
The moment you’ve been waiting for – harvesting your homegrown bell peppers!
1. When to Harvest: Bell peppers are typically ready to harvest about 60-90 days after transplanting, depending on the variety. They should be firm, glossy, and have reached their mature color (green, red, yellow, or orange).
2. How to Harvest: Use a sharp knife or scissors to cut the bell pepper from the plant, leaving about an inch of stem attached.
3. Enjoy Your Harvest: Now you can enjoy your delicious, homegrown bell peppers in salads, stir-fries, or any of your favorite recipes!
Troubleshooting
Even with the best care, you might encounter some challenges along the way. Here are a few common problems and how to fix them:
* Yellowing Leaves: This could be a sign of overwatering, underwatering, nutrient deficiency, or pest infestation. Check the soil moisture, fertilize your plants, and inspect them for pests.
* Blossom End Rot: This is a calcium deficiency that causes the bottom of the bell peppers to rot. You can prevent blossom end rot by adding calcium to the soil or using a calcium-rich fertilizer.
* Lack of Fruit: This could be due to insufficient sunlight, poor pollination, or nutrient deficiency. Make sure your plants are getting enough sunlight, hand-pollinate them if necessary, and fertilize them regularly.
* Pest Infestation: Treat pests with insecticidal soap or neem oil. You can also try attracting beneficial insects to your garden, such as ladybugs and lacewings.
Tips for Success
Here are a few extra tips to help you succeed with bottle gardening bell peppers:
* Choose the Right Variety: Some bell pepper varieties are better suited for container gardening than others. Look for compact or dwarf varieties.
* Use High-Quality Soil: Don’t skimp on the soil! Use a good quality potting mix that’s well-draining.
* Don’t Overcrowd: Give your bell pepper plants enough space to grow. Don’t plant too many plants in one bottle.
* Rotate Your Crops: If you’re growing bell peppers in the
Conclusion
So, there you have it! Transforming discarded bottles into thriving bell pepper havens is not just a fun project; it’s a sustainable, space-saving, and surprisingly effective way to cultivate your own fresh produce. We’ve walked you through the process, highlighting the simplicity and the potential rewards of this unique gardening method.
Why is this bottle gardening bell peppers trick a must-try? Because it democratizes gardening. You don’t need acres of land or expensive equipment. All you need are readily available resources – plastic bottles, soil, bell pepper seeds or seedlings, and a little bit of patience. It’s an excellent way to recycle, reduce your carbon footprint, and enjoy the satisfaction of growing your own food. Plus, the visual appeal of bell peppers flourishing in repurposed bottles adds a touch of quirky charm to any balcony, patio, or windowsill.
But the beauty of this method lies in its adaptability. Feel free to experiment with different types of bottles. Larger bottles can accommodate larger bell pepper varieties, while smaller bottles are perfect for compact spaces or smaller pepper types. You can also explore different soil mixes to find what works best for your local climate and the specific needs of your bell peppers. Consider adding organic fertilizers or compost tea to boost growth and yield.
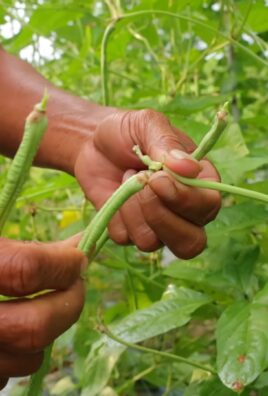
For a spicier twist, try growing chili peppers or jalapeños using the same bottle gardening technique. The principles remain the same, and you’ll have a constant supply of fresh peppers for your culinary creations. You can even create a vertical garden by hanging multiple bottle planters together, maximizing space and creating a stunning visual display.
Don’t be afraid to get creative with the aesthetics too. Paint the bottles with vibrant colors, add decorative labels, or even create intricate designs. This is your chance to personalize your garden and make it a true reflection of your style.
We understand that venturing into new gardening techniques can be daunting, but we assure you that this method is incredibly beginner-friendly. The key is to start small, observe your plants closely, and adjust your approach as needed. Remember to provide adequate sunlight, water regularly, and protect your plants from extreme weather conditions.
We are confident that you’ll be amazed by the results. Imagine the joy of harvesting your own juicy, flavorful bell peppers, knowing that you grew them yourself in repurposed bottles. It’s a truly rewarding experience that connects you to nature and empowers you to live more sustainably.
So, what are you waiting for? Gather your bottles, prepare your soil, and embark on this exciting gardening adventure. We encourage you to try this bottle gardening bell peppers method and share your experiences with us. Post photos of your bottle gardens on social media using #BottlePepperGarden and let us know what worked well for you, what challenges you faced, and any tips you have for fellow gardeners. Let’s create a community of bottle gardening enthusiasts and inspire others to embrace this sustainable and rewarding practice. Happy gardening!
Frequently Asked Questions (FAQ)
What type of bottles are best for bottle gardening bell peppers?
The best bottles for bottle gardening bell peppers are sturdy plastic bottles, such as those used for water, soda, or juice. Clear or translucent bottles are preferable as they allow you to monitor the soil moisture levels. Avoid using bottles that have contained harsh chemicals or pesticides, as these could contaminate the soil and harm your plants. The size of the bottle will depend on the variety of bell pepper you plan to grow. Larger varieties will require larger bottles to accommodate their root systems. Generally, bottles with a capacity of 2 liters or more are ideal. Make sure to thoroughly clean the bottles before using them to remove any residue or debris.
How often should I water my bell peppers grown in bottles?
Watering frequency depends on several factors, including the size of the bottle, the type of soil, the climate, and the stage of growth of your bell pepper plants. As a general rule, check the soil moisture level daily. If the top inch of soil feels dry to the touch, it’s time to water. Water thoroughly until excess water drains out of the drainage holes at the bottom of the bottle. Avoid overwatering, as this can lead to root rot. During hot and dry weather, you may need to water more frequently, possibly even twice a day. In cooler or more humid conditions, you can reduce the watering frequency. Observe your plants closely and adjust your watering schedule accordingly. Wilting leaves can indicate either underwatering or overwatering, so it’s important to check the soil moisture level before watering.
What kind of soil should I use for bottle gardening bell peppers?
The ideal soil for bottle gardening bell peppers is a well-draining, nutrient-rich potting mix. Avoid using garden soil, as it can be too heavy and compact, hindering drainage and root growth. A good potting mix should contain a blend of peat moss, perlite, and vermiculite. You can also add compost or other organic matter to improve the soil’s fertility and water retention. Ensure the soil is slightly acidic to neutral, with a pH between 6.0 and 7.0. You can test the soil pH using a soil testing kit. If the soil is too acidic, you can add lime to raise the pH. If it’s too alkaline, you can add sulfur to lower the pH. Consider adding slow-release fertilizer to the soil to provide your bell pepper plants with a steady supply of nutrients throughout the growing season.
How much sunlight do bell peppers need when grown in bottles?
Bell peppers require at least 6-8 hours of direct sunlight per day to thrive. When growing bell peppers in bottles, ensure they are placed in a location that receives ample sunlight. A south-facing window or balcony is often ideal. If you don’t have access to enough natural sunlight, you can supplement with artificial grow lights. Position the grow lights about 6-12 inches above the plants and keep them on for 14-16 hours per day. Rotate the bottles regularly to ensure that all sides of the plants receive equal exposure to sunlight. Insufficient sunlight can lead to stunted growth, pale leaves, and reduced fruit production.
How do I prevent pests and diseases in my bottle garden bell peppers?
Preventing pests and diseases is crucial for successful bottle gardening bell peppers. Start by using healthy, disease-free seeds or seedlings. Inspect your plants regularly for signs of pests or diseases, such as aphids, whiteflies, spider mites, or fungal infections. If you spot any pests, you can try removing them manually or using insecticidal soap or neem oil. For fungal diseases, ensure good air circulation around the plants and avoid overwatering. You can also use a fungicide if necessary. Consider companion planting with herbs like basil or marigolds, which can help repel pests. Regularly clean the bottles and surrounding area to prevent the buildup of bacteria or fungi. Proper watering and fertilization can also help strengthen your plants and make them more resistant to pests and diseases.
Can I grow different varieties of bell peppers in bottles?
Yes, you can absolutely grow different varieties of bell peppers in bottles. The key is to choose varieties that are well-suited to container gardening and to provide them with adequate space and nutrients. Smaller, more compact varieties, such as ‘Mini Bell’ or ‘Lunchbox’, are particularly well-suited to bottle gardening. However, you can also grow larger varieties, such as ‘California Wonder’ or ‘Jupiter’, as long as you use larger bottles and provide them with support as they grow. When growing multiple varieties, label each bottle clearly to avoid confusion. Be aware that some varieties may be more susceptible to certain pests or diseases than others, so it’s important to monitor your plants closely and take appropriate action if necessary.
How do I support my bell pepper plants as they grow in bottles?
As bell pepper plants grow taller and produce fruit, they may require support to prevent them from toppling over or breaking. You can use bamboo stakes, wooden dowels, or even repurposed chopsticks to provide support. Gently insert the stakes into the soil near the base of the plant and tie the stems to the stakes using soft twine or plant ties. Avoid tying the stems too tightly, as this can restrict growth. You can also use a tomato cage or a similar structure to provide more comprehensive support. As the plants grow, continue to adjust the supports as needed. Providing adequate support will help ensure that your bell pepper plants remain healthy and productive throughout the growing season.
Leave a Comment