
Bottle garden chili hack: Ever dreamt of harvesting fiery chilies right from your windowsill, even if you lack a sprawling garden? I know I have! There’s something incredibly satisfying about growing your own food, and chilies, with their vibrant colors and zesty flavors, are a fantastic place to start. But what if I told you that you could cultivate these little flavor bombs using nothing more than a recycled plastic bottle?
The concept of container gardening, a practice deeply rooted in human history, has allowed us to cultivate plants in limited spaces for centuries. From ancient Egyptians growing herbs in terracotta pots to modern urban dwellers transforming balconies into lush oases, the desire to connect with nature and grow our own food is timeless. This simple bottle garden chili hack takes that tradition and gives it a modern, eco-friendly twist.
In today’s fast-paced world, finding time and space for traditional gardening can be a challenge. That’s where this DIY trick comes in! It’s perfect for apartment dwellers, busy individuals, or anyone looking for a fun and sustainable way to add a touch of spice to their lives. Plus, knowing exactly where your food comes from and avoiding harmful pesticides is a huge win. So, let’s dive in and discover how to transform a humble plastic bottle into a thriving chili garden!
DIY Bottle Garden Chili: From Plastic Waste to Spicy Harvest!
Hey there, fellow gardening enthusiasts! I’m super excited to share one of my favorite DIY projects with you: turning old plastic bottles into a thriving chili garden. Not only is this a fantastic way to recycle and reduce waste, but it also allows you to grow your own fresh chilies, even if you have limited space. Get ready to spice up your life – literally!
What You’ll Need: The Chili Gardener’s Toolkit
Before we dive in, let’s gather all the necessary materials. Trust me, having everything organized beforehand will make the whole process much smoother and more enjoyable.
* Plastic Bottles: The stars of our show! I usually use 2-liter soda bottles, but any similar size will work. Make sure they’re clean and dry. You’ll need at least one bottle per chili plant you want to grow.
* Chili Seeds: Choose your favorite chili variety! From mild jalapenos to fiery habaneros, the choice is yours. You can buy seeds online, at your local garden center, or even harvest them from existing chilies.
* Potting Soil: Good quality potting soil is essential for healthy chili growth. Avoid using garden soil, as it can be too dense and may contain pests or diseases.
* Scissors or Utility Knife: For cutting the plastic bottles. Be careful!
* Drill or Nail and Hammer: To create drainage holes in the bottles.
* Watering Can or Spray Bottle: For watering your chili plants.
* Optional:
* Gloves: To protect your hands.
* Permanent Marker: For labeling your chili varieties.
* Small Pebbles or Gravel: To improve drainage.
* Twine or String: For hanging your bottle garden (if desired).
* Seed Starting Tray or Small Pots: If you’re starting your chilies from seed indoors.
Step-by-Step Guide: Creating Your Bottle Garden
Okay, let’s get our hands dirty! Follow these steps to transform those plastic bottles into mini chili paradises.
1. Preparing the Bottles: The Foundation of Your Garden
1. Clean the Bottles: Thoroughly wash the plastic bottles with soap and water to remove any residue. Rinse them well and let them dry completely. This is crucial to prevent any contamination that could harm your chili plants.
2. Cut the Bottles: This is where the scissors or utility knife comes in. You have a couple of options here, depending on how you want to set up your bottle garden.
* Option 1 (Hanging Garden): Cut the bottle in half horizontally. You’ll use the bottom half as the planting container and the top half as a sort of mini-greenhouse initially.
* Option 2 (Standing Garden): Cut a large rectangular opening in the side of the bottle, leaving the bottom intact. This will be the opening where you plant your chili.
3. Create Drainage Holes: Drainage is super important to prevent root rot. Use a drill or a nail and hammer to create several drainage holes in the bottom of each bottle. If you’re using the hanging garden method, make sure to create holes in the bottom half of the bottle. For the standing garden, create holes on the bottom of the bottle.
4. Optional: Add a Drainage Layer: To further improve drainage, you can add a layer of small pebbles or gravel to the bottom of each bottle before adding the potting soil. This will help prevent the soil from becoming waterlogged.
2. Planting Your Chili Seeds or Seedlings: Nurturing New Life
This section depends on whether you’re starting from seeds or using seedlings. I personally prefer starting from seeds, as it’s more rewarding to watch them sprout and grow.
Starting from Seeds: Patience is a Virtue
1. Seed Starting Tray (Optional): If you live in a colder climate or want to get a head start on the growing season, I recommend starting your chili seeds indoors in a seed starting tray or small pots.
2. Fill with Potting Soil: Fill the seed starting tray or small pots with good quality potting soil.
3. Sow the Seeds: Make a small indentation in the soil (about 1/4 inch deep) and place one or two chili seeds in each indentation. Cover the seeds with soil and gently water them.
4. Provide Warmth and Light: Chili seeds need warmth and light to germinate. Place the seed starting tray or small pots in a warm, sunny location or under a grow light.
5. Keep the Soil Moist: Keep the soil consistently moist, but not waterlogged. You can use a spray bottle to gently mist the soil.
6. Wait for Germination: Chili seeds typically germinate in 7-14 days. Be patient!
7. Transplant Seedlings: Once the seedlings have developed a few sets of true leaves (the leaves that look like miniature versions of the adult plant’s leaves), they’re ready to be transplanted into the prepared plastic bottles.
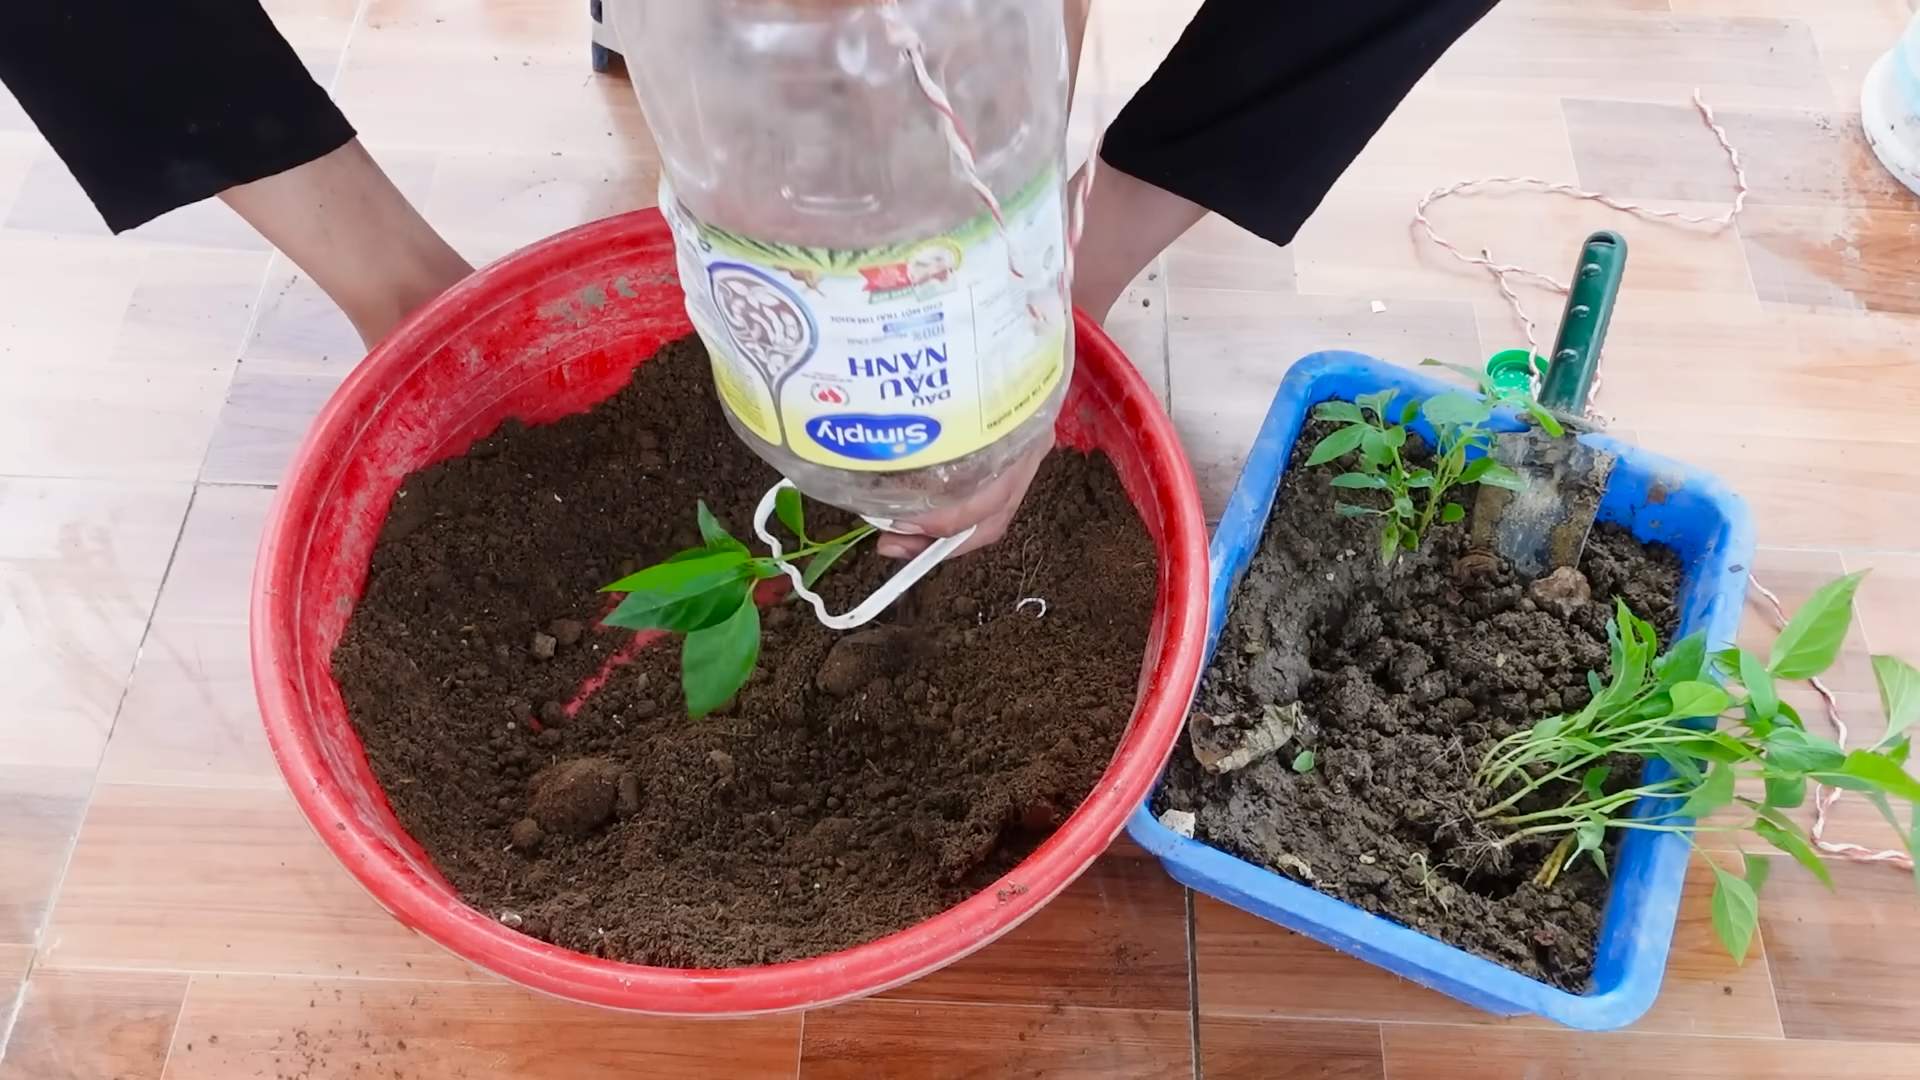
Using Seedlings: A Head Start
1. Fill the Bottles with Potting Soil: Fill the prepared plastic bottles with good quality potting soil, leaving about an inch of space at the top.
2. Create a Planting Hole: Make a small hole in the center of the soil, large enough to accommodate the root ball of the seedling.
3. Gently Remove the Seedling: Carefully remove the seedling from its container, being careful not to damage the roots.
4. Place the Seedling in the Hole: Place the seedling in the planting hole and gently backfill with soil.
5. Water Thoroughly: Water the seedling thoroughly after planting.
3. Caring for Your Chili Plants: The Key to a Bountiful Harvest
Now that your chili plants are in their new homes, it’s time to provide them with the care they need to thrive.
1. Sunlight: Chili plants need at least 6-8 hours of sunlight per day. Place your bottle garden in a sunny location, such as a windowsill, balcony, or patio.
2. Watering: Water your chili plants regularly, especially during hot weather. The soil should be kept consistently moist, but not waterlogged. Check the soil moisture by sticking your finger into the soil. If the top inch of soil feels dry, it’s time to water.
3. Fertilizing: Chili plants are heavy feeders and benefit from regular fertilization. Use a balanced liquid fertilizer every 2-3 weeks, following the instructions on the fertilizer label.
4. Pruning: Pruning can help encourage bushier growth and more fruit production. Pinch off the tips of the branches to encourage side shoots to develop.
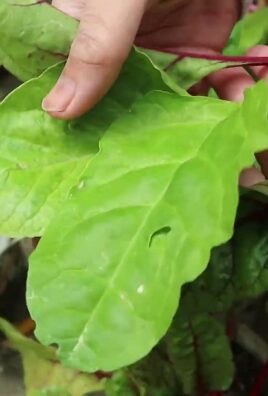
5. Pest Control: Keep an eye out for pests, such as aphids, spider mites, and whiteflies. If you notice any pests, treat them with an insecticidal soap or neem oil.
6. Support: As your chili plants grow, they may need support to prevent them from falling over. You can use stakes or twine to support the plants.
7. Pollination: Chili plants are self-pollinating, but you can help them along by gently shaking the plants or using a small paintbrush to transfer pollen from one flower to another. This is especially important if you’re growing your chili plants indoors.
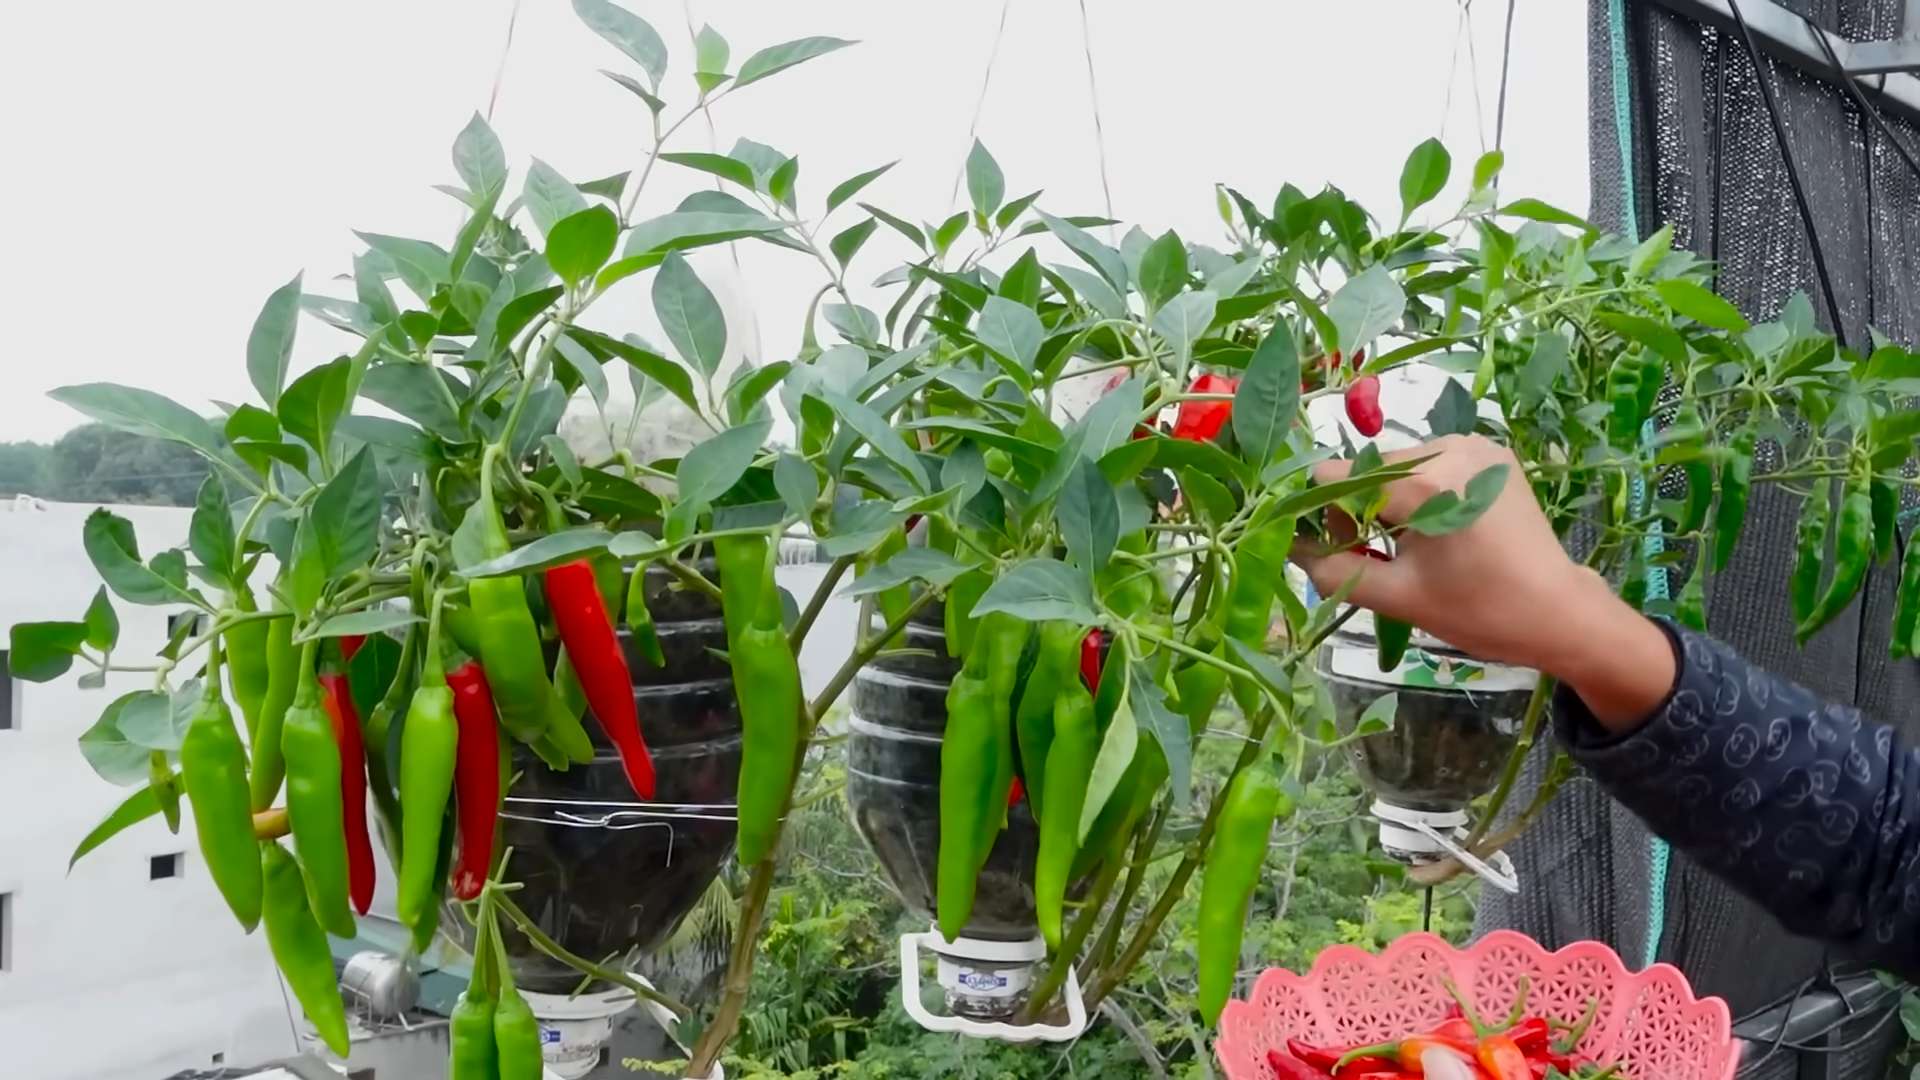
4. Harvesting Your Chilies: The Sweet Reward
The moment you’ve been waiting for! Harvesting your own homegrown chilies is incredibly satisfying.
1. Harvest When Ripe: Chilies are typically ready to harvest when they’ve reached their mature color and size. The color will depend on the variety of chili you’re growing.
2. Use Scissors or Pruning Shears: Use scissors or pruning shears to cut the chilies from the plant, leaving a small stem attached.
3. Enjoy Your Harvest: Use your fresh chilies in your favorite recipes, or dry them for later use.
Tips and Tricks for a Successful Bottle Garden
Here are a few extra tips and tricks that I’ve learned along the way:
* Label Your Bottles: Use a permanent marker to label each bottle with the variety of chili you’re growing. This will help you keep track of your plants and avoid any confusion.
* Rotate Your Bottles: If you’re growing your bottle garden indoors, rotate the bottles regularly to ensure that all sides of the plants receive equal sunlight.
* Monitor for Root Rot: Root rot is a common problem in container gardens. To prevent root rot, make sure your bottles have adequate drainage and avoid overwatering.
* Repotting: If your chili plants become root-bound (the roots are circling around the inside of the bottle), you may need to repot them into larger containers.
* Experiment with Different Varieties: Don’t be afraid to experiment with different varieties of chilies to find your favorites.
* Have Fun! Gardening should be enjoyable. Relax,
Conclusion
So, there you have it! This bottle garden chili hack is more than just a quirky gardening trick; it’s a game-changer for anyone looking to cultivate fresh, flavorful chilies, regardless of space constraints or gardening experience. We’ve walked you through the simple steps, highlighting how easy it is to transform ordinary plastic bottles into thriving mini-gardens. The benefits are undeniable: space-saving efficiency, reduced water waste, and a readily available supply of fiery chilies right at your fingertips.
But why is this DIY method a must-try? Beyond the sheer convenience, it’s about empowerment. It’s about taking control of your food source, even in a small way. It’s about connecting with nature and experiencing the satisfaction of nurturing something from seed to harvest. And let’s be honest, there’s a certain undeniable coolness factor to showing off your upcycled bottle garden to friends and family!
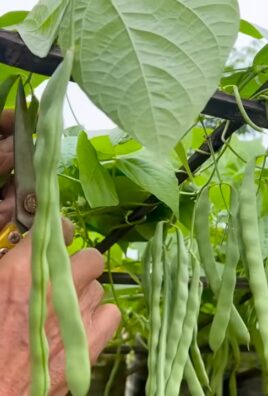
Don’t be afraid to experiment! While we’ve focused on chilies, this method can be adapted for other small vegetables and herbs. Imagine a bottle garden bursting with cherry tomatoes, basil, or even strawberries. The possibilities are endless. Consider using different types of bottles – larger bottles for bigger plants, or smaller bottles for herbs. You can also get creative with the design, painting the bottles or arranging them in unique patterns to add a touch of personality to your space.
For those living in colder climates, consider bringing your bottle gardens indoors during the winter months. A sunny windowsill or a grow light can provide the necessary warmth and light to keep your plants thriving year-round. You can also adjust the type of chili you grow based on your climate and preferences. From mild jalapeños to scorching habaneros, the choice is yours!
This bottle garden chili hack is truly a sustainable and rewarding way to grow your own food. It’s a project that’s both environmentally friendly and incredibly satisfying.
We wholeheartedly encourage you to give this DIY trick a try. It’s a simple, affordable, and effective way to enjoy fresh chilies, even if you don’t have a traditional garden. And most importantly, we want to hear about your experiences! Share your photos, tips, and variations with us in the comments below. Let’s create a community of bottle garden enthusiasts and inspire others to embrace this innovative and sustainable gardening method. What are you waiting for? Grab some bottles, some soil, and some chili seeds, and let’s get growing! We are confident that you will find this method to be a rewarding and productive way to grow your own chilies.
Frequently Asked Questions (FAQ)
What type of plastic bottles are best for this project?
Ideally, you should use PET (Polyethylene Terephthalate) plastic bottles, which are commonly used for water and soda. These are generally considered food-safe and durable enough to withstand the elements. Avoid using bottles that have contained harsh chemicals or cleaning products. Thoroughly wash and rinse the bottles before using them for planting. Make sure to remove any labels or adhesive residue that could attract pests or block sunlight.
How often should I water my bottle garden chilies?
The watering frequency will depend on several factors, including the climate, the type of soil you’re using, and the size of the bottle. As a general rule, check the soil moisture level daily. If the top inch of soil feels dry to the touch, it’s time to water. Water thoroughly until you see water draining from the drainage holes at the bottom of the bottle. Avoid overwatering, as this can lead to root rot. During hot weather, you may need to water more frequently.
What type of soil should I use for my bottle garden chilies?
A well-draining potting mix is essential for growing healthy chilies in bottle gardens. Avoid using garden soil, as it can be too heavy and compact, leading to poor drainage and root problems. A good potting mix will typically contain a blend of peat moss, perlite, and vermiculite. You can also add some compost to the mix to provide extra nutrients. Consider using a potting mix specifically formulated for vegetables or herbs for optimal results.
How much sunlight do my bottle garden chilies need?
Chilies thrive in full sun, which means they need at least 6-8 hours of direct sunlight per day. If you’re growing your bottle garden indoors, place it near a sunny window that receives plenty of natural light. If you don’t have access to enough natural light, you can supplement with a grow light. Position the grow light about 12-18 inches above the plants and keep it on for 14-16 hours per day.
How do I fertilize my bottle garden chilies?
Chilies are heavy feeders and require regular fertilization to produce a bountiful harvest. Start fertilizing your plants about 2-3 weeks after transplanting them into the bottle gardens. Use a balanced liquid fertilizer, such as a 10-10-10 or 20-20-20, diluted to half strength. Fertilize every 2-3 weeks during the growing season. You can also use organic fertilizers, such as compost tea or fish emulsion. Avoid over-fertilizing, as this can burn the roots and damage the plants.
How do I protect my bottle garden chilies from pests and diseases?
Regularly inspect your plants for signs of pests or diseases. Common pests that can affect chilies include aphids, spider mites, and whiteflies. You can control these pests by spraying the plants with insecticidal soap or neem oil. Diseases such as powdery mildew and fungal leaf spots can also affect chilies. To prevent these diseases, ensure good air circulation around the plants and avoid overwatering. If you notice any signs of disease, remove the affected leaves and spray the plants with a fungicide.
Can I grow different varieties of chilies in the same bottle garden?
While it’s possible to grow different varieties of chilies in the same bottle garden, it’s generally not recommended. Different varieties of chilies may have different growth habits and nutrient requirements, which can make it difficult to manage them effectively. Additionally, cross-pollination can occur between different varieties, resulting in unexpected and potentially undesirable traits in the fruits. It’s best to grow only one variety of chili per bottle garden to ensure optimal growth and consistent results.
How long does it take for chilies to mature in a bottle garden?
The time it takes for chilies to mature will depend on the variety of chili you’re growing and the growing conditions. Generally, it takes about 60-90 days from transplanting to harvest. Some varieties may mature faster, while others may take longer. You’ll know your chilies are ready to harvest when they have reached their mature size and color. The color will vary depending on the variety, but typically chilies will turn from green to red, yellow, or orange when they are ripe.
What do I do with my bottle garden chilies after harvesting?
Once you’ve harvested your chilies, you can use them fresh in your favorite recipes. You can also dry them, pickle them, or make chili powder. To dry chilies, simply string them together and hang them in a cool, dry place until they are completely dry. To pickle chilies, follow a standard pickling recipe. To make chili powder, dry the chilies and then grind them into a fine powder using a spice grinder or food processor. Store your dried or pickled chilies in airtight containers in a cool, dark place.
Can I reuse the plastic bottles for future plantings?
Yes, you can definitely reuse the plastic bottles for future plantings. Just make sure to thoroughly clean and disinfect them before using them again. Wash the bottles with soap and water, and then rinse them with a solution of 1 part bleach to 9 parts water. This will help to kill any bacteria or fungi that may be present. Allow the bottles to air dry completely before using them for planting. By reusing the bottles, you’re not only saving money but also reducing waste and contributing to a more sustainable lifestyle.
Leave a Comment