
Bitter Melon Tub Gardening: Unlock the secrets to growing this unique and nutritious vegetable right on your patio or balcony! Have you ever dreamed of harvesting your own fresh, slightly bitter, and incredibly healthy bitter melons, but thought you didn’t have the space? Well, dream no more! This DIY guide will walk you through the surprisingly simple process of cultivating bitter melon in tubs, even if you’re a complete beginner.
Bitter melon, also known as bitter gourd or karela, has a rich history, deeply rooted in Asian and African cultures. For centuries, it’s been prized not only for its distinctive flavor but also for its impressive medicinal properties. From traditional remedies to culinary delights, this vegetable has earned a respected place in many households. But let’s be honest, growing it can seem intimidating!
That’s where this DIY trick comes in. Many people struggle to grow bitter melon successfully in traditional gardens due to space constraints, soil conditions, or pest issues. Tub gardening offers a fantastic solution, providing a controlled environment where you can nurture your bitter melon plants to their full potential. I’m going to show you how to create the perfect setup, from choosing the right tub and soil to providing the necessary support for these climbing vines. Get ready to enjoy a bountiful harvest of homegrown bitter melons, right at your fingertips!
DIY Bitter Melon Tub Gardening: A Bountiful Harvest in Small Spaces
Hey there, fellow gardening enthusiasts! Ever dreamed of growing your own bitter melon but thought you didn’t have the space? Well, I’m here to tell you that you absolutely can! With this DIY tub gardening method, you can enjoy fresh, homegrown bitter melon even if you only have a balcony or small patio. I’ve been doing this for years, and trust me, the results are incredibly rewarding. Let’s get started!
What You’ll Need: The Essential Supplies
Before we dive into the nitty-gritty, let’s gather all the necessary materials. Having everything on hand will make the process smooth and enjoyable.
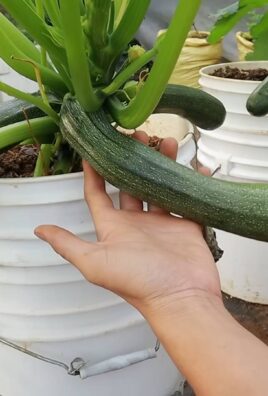
* Large Tub or Container: This is your garden bed! Choose a tub that’s at least 24 inches in diameter and 18 inches deep. The bigger, the better, as bitter melon vines can get quite extensive. Plastic, terracotta, or even a repurposed container will work. Just make sure it has drainage holes.
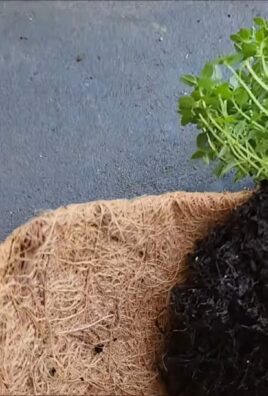
* High-Quality Potting Mix: Don’t skimp on this! Bitter melon needs well-draining, nutrient-rich soil. I recommend a mix specifically formulated for vegetables. Avoid using garden soil, as it can compact and hinder drainage.
* Bitter Melon Seeds: You can find these at most garden centers or online. Choose a variety that suits your climate and preferences. I personally love the ‘Taiwan Long’ variety for its impressive size and flavor.
* Trellis or Support Structure: Bitter melon is a vine, so it needs something to climb on. A sturdy trellis, bamboo stakes, or even a repurposed tomato cage will do the trick. Make sure it’s tall enough to accommodate the vine’s growth.
* Slow-Release Fertilizer: This will provide your bitter melon with a steady supply of nutrients throughout the growing season. Look for a fertilizer specifically formulated for vegetables.
* Watering Can or Hose: Essential for keeping your bitter melon plants hydrated.
* Gardening Gloves: Protect your hands from dirt and potential irritants.
* Hand Trowel or Shovel: For planting and transplanting.
* Optional:
* Compost: To enrich the soil and provide additional nutrients.
* Mulch: To help retain moisture and suppress weeds.
* Seed Starting Tray and Seed Starting Mix: If you prefer to start your seeds indoors.
Step-by-Step Guide: Planting Your Bitter Melon
Now that we have all our supplies, let’s get our hands dirty! This section will guide you through the planting process, from seed starting to transplanting.
1. Starting Seeds (Optional but Recommended)
Starting your bitter melon seeds indoors gives them a head start and increases your chances of a successful harvest.
1. Soak the Seeds: Before planting, soak the bitter melon seeds in warm water for 24 hours. This helps soften the seed coat and promotes germination.
2. Prepare the Seed Starting Tray: Fill the seed starting tray with seed starting mix. Moisten the mix thoroughly.
3. Plant the Seeds: Plant the seeds about 1/2 inch deep in the seed starting mix. Place one or two seeds per cell.
4. Provide Warmth and Light: Cover the seed starting tray with a clear plastic lid or plastic wrap to create a humid environment. Place the tray in a warm location, such as on top of a refrigerator or near a sunny window. Once the seeds germinate, remove the lid and provide them with plenty of light. A grow light is ideal, but a sunny windowsill will also work.
5. Keep the Soil Moist: Water the seedlings regularly, keeping the soil consistently moist but not waterlogged.
6. Harden Off the Seedlings: Before transplanting the seedlings outdoors, you need to harden them off. This process gradually acclimates them to the outdoor environment. Start by placing the seedlings outdoors in a sheltered location for a few hours each day, gradually increasing the amount of time they spend outdoors over the course of a week.
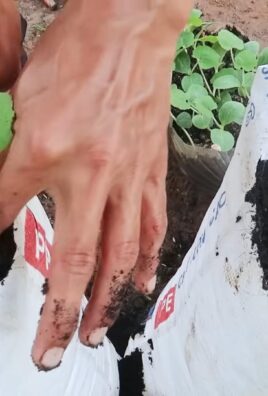
2. Preparing the Tub
A well-prepared tub is crucial for healthy bitter melon growth.
1. Ensure Drainage: Make sure your tub has adequate drainage holes. If not, drill a few holes in the bottom.
2. Add a Layer of Gravel (Optional): Adding a layer of gravel to the bottom of the tub can improve drainage.
3. Fill with Potting Mix: Fill the tub with high-quality potting mix, leaving a few inches of space at the top.
4. Incorporate Compost (Optional): Mix in some compost to enrich the soil and provide additional nutrients.
3. Transplanting or Direct Sowing
Now, it’s time to get those seeds or seedlings into their new home!
1. Transplanting Seedlings: If you started your seeds indoors, gently remove the seedlings from the seed starting tray. Dig a hole in the potting mix that’s large enough to accommodate the root ball. Place the seedling in the hole and gently backfill with potting mix. Water thoroughly.
2. Direct Sowing: If you’re direct sowing, plant the seeds about 1/2 inch deep in the potting mix. Space the seeds a few inches apart. Water thoroughly.
3. Install the Trellis: Install the trellis or support structure near the center of the tub. Make sure it’s sturdy and tall enough to support the vine’s growth.
Caring for Your Bitter Melon: Nurturing Your Plants
Once your bitter melon plants are established, it’s important to provide them with the care they need to thrive.
1. Watering
Bitter melon needs consistent moisture, especially during hot weather.
1. Water Regularly: Water your bitter melon plants regularly, keeping the soil consistently moist but not waterlogged.
2. Water Deeply: Water deeply, allowing the water to soak into the soil.
3. Avoid Overwatering: Overwatering can lead to root rot, so be careful not to overwater.
4. Water in the Morning: Water in the morning to allow the foliage to dry before nightfall, which can help prevent fungal diseases.
2. Fertilizing
Bitter melon is a heavy feeder, so it needs regular fertilization.
1. Apply Slow-Release Fertilizer: Apply a slow-release fertilizer according to the package directions.
2. Supplement with Liquid Fertilizer: Supplement with a liquid fertilizer every few weeks to provide additional nutrients.
3. Choose a Fertilizer for Vegetables: Use a fertilizer specifically formulated for vegetables.
3. Pruning and Training
Pruning and training your bitter melon vine will encourage healthy growth and fruit production.
1. Train the Vine: As the vine grows, train it to climb the trellis or support structure.
2. Prune Side Shoots: Prune side shoots to encourage the main vine to grow and produce fruit.
3. Remove Yellowing Leaves: Remove any yellowing or dead leaves to prevent the spread of disease.
4. Pest and Disease Control
Bitter melon can be susceptible to certain pests and diseases.
1. Monitor for Pests: Regularly monitor your plants for pests, such as aphids, spider mites, and squash bugs.
2. Use Organic Pest Control Methods: If you find pests, use organic pest control methods, such as insecticidal soap or neem oil.
3. Prevent Fungal Diseases: To prevent fungal diseases, provide good air circulation and avoid overwatering.
4. Remove Infected Leaves: If you see signs of fungal disease, remove the infected leaves immediately.
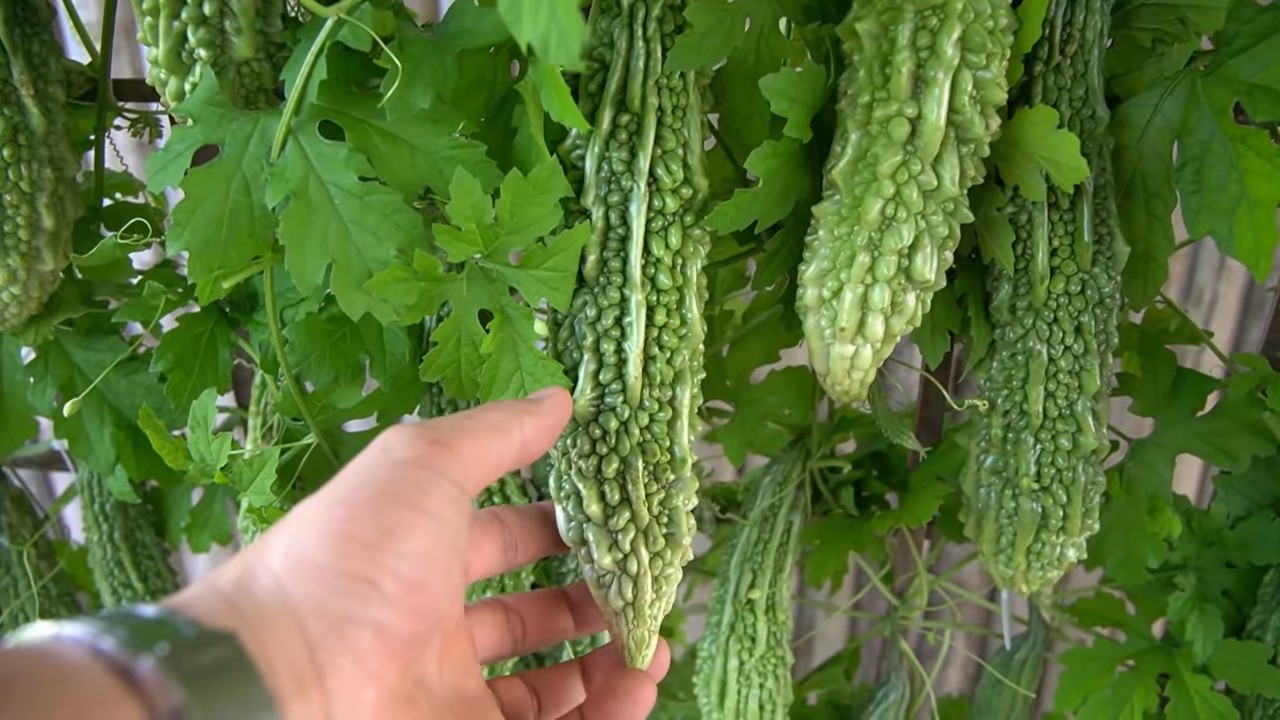
Harvesting Your Bitter Melon: Enjoying the Fruits of Your Labor
The moment you’ve been waiting for! Harvesting your own homegrown bitter melon is incredibly satisfying.
1. Harvest When Mature: Harvest your bitter melon when it’s mature but still green. The fruit should be firm and slightly tender.
2. Use a Sharp Knife: Use a sharp knife to cut the fruit from the vine.
3. Harvest Regularly: Harvest regularly to encourage the plant to produce more fruit.
4. Enjoy Your Harvest: Enjoy your fresh, homegrown bitter melon in your favorite recipes!
Troubleshooting: Addressing Common Issues
Even with the best care, you might encounter some challenges along the way. Here are some common issues and how to address them:
* Yellowing Leaves: This could be a sign of overwatering, underwatering, nutrient deficiency, or disease. Check the soil moisture, fertilize if necessary, and inspect the leaves for signs of disease.
* Lack of Fruit Production: This could be due to insufficient pollination, lack of nutrients, or stress. Hand-pollinate the flowers if necessary, fertilize regularly, and ensure the plant is getting enough sunlight and water.
* Pest Infestation: Treat pest infestations with organic pest control methods, such as insecticidal soap or neem oil.
* Fungal Diseases: Prevent fungal

Conclusion
So, there you have it! Transforming a humble bitter melon into a thriving tub garden is not just a fun project; it’s a rewarding experience that brings the vibrant flavors and textures of this unique vegetable right to your doorstep. We’ve explored the simple steps, from selecting the right tub and preparing the soil to nurturing your plant and harvesting its bounty. But why is this DIY trick a must-try?
Firstly, growing bitter melon in a tub offers unparalleled convenience, especially for those with limited garden space. Whether you have a small balcony, a sunny patio, or even just a well-lit corner indoors, you can cultivate your own supply of fresh, organic bitter melon. This is a game-changer for urban gardeners and anyone who appreciates the convenience of having fresh produce readily available.
Secondly, this method provides greater control over the growing environment. You can easily adjust the soil composition, watering schedule, and sun exposure to optimize the plant’s health and productivity. This is particularly beneficial for bitter melon, which can be sensitive to environmental fluctuations. By creating a controlled environment, you can minimize the risk of pests, diseases, and other common gardening challenges.
Thirdly, and perhaps most importantly, growing your own bitter melon allows you to enjoy the freshest, most flavorful produce possible. Store-bought bitter melon often lacks the vibrant taste and crisp texture of homegrown varieties. By harvesting your own bitter melon at its peak ripeness, you can savor its unique flavor and reap its numerous health benefits.
But the possibilities don’t end there! Feel free to experiment with different varieties of bitter melon, from the classic green types to the more exotic white or even red varieties. You can also try companion planting, adding herbs like basil or mint to your tub garden to deter pests and enhance the flavor of your bitter melon. Consider adding a small trellis or support structure to encourage vertical growth and maximize space utilization.
And if you’re feeling adventurous, why not try fermenting your homegrown bitter melon? Fermented bitter melon is a delicious and probiotic-rich treat that can be enjoyed on its own or added to salads and other dishes.
Ultimately, the key to success with this DIY bitter melon tub gardening project is to embrace experimentation and have fun. Don’t be afraid to try new things, learn from your mistakes, and adapt your approach as needed. The rewards of growing your own bitter melon are well worth the effort.
We wholeheartedly encourage you to give this DIY trick a try. It’s a simple, affordable, and incredibly rewarding way to enjoy the benefits of fresh, homegrown bitter melon. Once you’ve experienced the satisfaction of harvesting your own crop, we’re confident that you’ll be hooked!
So, grab a tub, some soil, and a bitter melon seedling, and get ready to embark on a gardening adventure. And don’t forget to share your experiences with us! We’d love to hear about your successes, challenges, and creative variations. Share your photos, tips, and recipes on social media using #BitterMelonTubGarden and let’s inspire others to join the fun. Happy gardening!
Frequently Asked Questions (FAQ)
1. What size tub is best for growing bitter melon?
A tub that is at least 18 inches in diameter and 12 inches deep is generally recommended. This provides ample space for the roots to develop and allows for sufficient drainage. Larger tubs are always preferable, as they provide more room for growth and reduce the need for frequent watering. Consider using a plastic, terracotta, or even a repurposed container, ensuring it has adequate drainage holes. The key is to provide enough space for the bitter melon’s extensive root system to thrive.
2. What type of soil should I use for my bitter melon tub garden?
A well-draining, nutrient-rich soil mix is essential for growing healthy bitter melon. A good option is to combine equal parts of potting soil, compost, and perlite or vermiculite. The potting soil provides a base for the mix, the compost adds essential nutrients, and the perlite or vermiculite improves drainage and aeration. Avoid using heavy clay soil, as it can become waterlogged and inhibit root growth. You can also amend the soil with slow-release fertilizer to provide a steady supply of nutrients throughout the growing season.
3. How much sunlight does bitter melon need?
Bitter melon thrives in full sun, requiring at least 6-8 hours of direct sunlight per day. Choose a location for your tub garden that receives ample sunlight throughout the day. If you live in a particularly hot climate, you may need to provide some afternoon shade to prevent the leaves from scorching. If you’re growing bitter melon indoors, supplement with grow lights to ensure adequate light exposure. Insufficient sunlight can lead to stunted growth and reduced fruit production.
4. How often should I water my bitter melon plant?
Water your bitter melon plant regularly, especially during hot and dry weather. The soil should be kept consistently moist but not waterlogged. Check the soil moisture level by sticking your finger into the soil; if the top inch feels dry, it’s time to water. Avoid overwatering, as this can lead to root rot. Water deeply and thoroughly, allowing the water to drain out of the drainage holes. Reduce watering frequency during cooler weather.
5. How do I fertilize my bitter melon plant?
Bitter melon is a heavy feeder and requires regular fertilization to produce abundant fruit. Use a balanced fertilizer (e.g., 10-10-10) every 2-3 weeks during the growing season. You can also supplement with organic fertilizers such as compost tea or fish emulsion. Avoid over-fertilizing, as this can burn the roots and damage the plant. Follow the instructions on the fertilizer package carefully.
6. How do I deal with pests and diseases?
Bitter melon can be susceptible to pests such as aphids, spider mites, and squash bugs. Regularly inspect your plants for signs of infestation and take action promptly. You can use insecticidal soap, neem oil, or other organic pest control methods to control pests. To prevent diseases, ensure good air circulation around the plants and avoid overwatering. Remove any diseased leaves or stems promptly to prevent the spread of infection.
7. When is the best time to harvest bitter melon?
Harvest bitter melon when the fruits are still young and green, before they turn yellow or orange. The ideal size for harvesting depends on the variety, but generally, fruits that are 6-8 inches long are ready to be harvested. Use a sharp knife or pruning shears to cut the fruit from the vine, leaving a short stem attached. Harvesting bitter melon regularly encourages the plant to produce more fruit.
8. Can I grow bitter melon from seed?
Yes, you can grow bitter melon from seed. Soak the seeds in water for 24 hours before planting to improve germination. Sow the seeds directly into the tub garden, about 1 inch deep and 2-3 inches apart. Keep the soil moist and warm until the seeds germinate, which usually takes about 1-2 weeks. Thin the seedlings to one plant per tub once they have developed a few true leaves.
9. What are some common problems when growing bitter melon in a tub?
Some common problems include stunted growth, yellowing leaves, lack of fruit production, and pest infestations. Stunted growth can be caused by insufficient sunlight, poor soil, or lack of nutrients. Yellowing leaves can be a sign of overwatering, underwatering, or nutrient deficiency. Lack of fruit production can be caused by insufficient pollination, poor weather conditions, or lack of fertilizer. Pest infestations can be controlled with appropriate pest control methods.
10. Can I grow bitter melon indoors?
Yes, you can grow bitter melon indoors, but it requires a sunny location and supplemental lighting. Place the tub garden near a south-facing window that receives at least 6-8 hours of direct sunlight per day. Supplement with grow lights if necessary. Ensure good air circulation around the plants and monitor for pests and diseases. Indoor-grown bitter melon may not produce as much fruit as outdoor-grown plants, but it can still be a rewarding experience.
Leave a Comment