
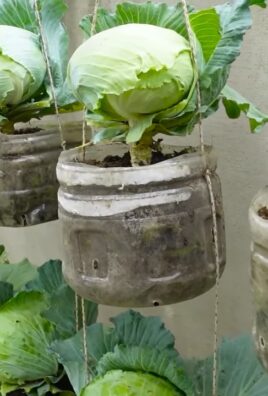
Best soil for carrots: Dreaming of pulling vibrant, sweet carrots straight from your own backyard? I know I am! There’s nothing quite like the taste of homegrown produce, and carrots are a fantastic place to start. But before you grab your seeds and get digging, let’s talk dirt – because the secret to carrot success lies beneath the surface.
For centuries, carrots have been cultivated around the world, evolving from their humble, often purple, wild ancestors. From ancient medicinal uses to becoming a staple in cuisines across the globe, these root vegetables have a rich history. But even with all that history, one thing remains constant: carrots are picky about their soil!
Let’s face it, nobody wants to harvest a bunch of stunted, forked, or bitter-tasting carrots. That’s where understanding the best soil for carrots comes in. This DIY guide will equip you with the knowledge to create the perfect growing environment, ensuring a bountiful harvest of delicious, healthy carrots. We’ll explore soil composition, amendments, and even some clever DIY hacks to improve drainage and nutrient availability. Get ready to roll up your sleeves and transform your garden into a carrot-growing paradise!
DIY: Crafting the Perfect Carrot-Growing Soil Mix
Okay, fellow gardening enthusiasts! Let’s talk carrots. These crunchy, sweet root vegetables are a garden staple, but getting them to thrive can be a bit of a challenge, especially when it comes to the soil. Carrots need loose, well-draining soil to develop properly. Compacted or rocky soil will result in stunted, misshapen carrots – and nobody wants that! So, I’m going to walk you through how to create the *perfect* soil mix for your carrot patch, ensuring you get long, straight, and delicious carrots every time.
Understanding Carrot Soil Needs
Before we dive into the recipe, let’s quickly cover what carrots need from their soil. This will help you understand *why* we’re using specific ingredients.
* Loose Texture: Carrots need to push through the soil easily. Heavy clay soil is a big no-no.
* Excellent Drainage: Soggy soil leads to rot and disease.
* Sufficient Nutrients: Carrots are moderate feeders, meaning they need a balanced supply of nutrients, but not overly rich soil. Too much nitrogen can lead to excessive leafy growth at the expense of root development.
* Slightly Acidic pH: A pH between 6.0 and 6.8 is ideal.
The Ultimate DIY Carrot Soil Mix Recipe
This recipe is my go-to for growing fantastic carrots. It’s a blend of ingredients that provides the perfect balance of drainage, nutrients, and texture.
Ingredients:
* Topsoil (1 part): This provides the base and some essential nutrients. Make sure it’s good quality topsoil, free from large rocks and debris.
* Compost (1 part): Compost adds organic matter, improves drainage, and provides a slow-release source of nutrients. Use well-rotted compost for best results.
* Sand (1 part): Horticultural sand (also called coarse sand or builder’s sand) is crucial for drainage. Avoid using play sand, as it’s too fine and can compact.
* Peat Moss or Coco Coir (1 part): These help retain moisture and improve soil structure. Coco coir is a more sustainable alternative to peat moss.
* Optional: Bone Meal (according to package instructions): Bone meal is a good source of phosphorus, which is essential for root development. I usually add a small amount to give my carrots a boost.
Tools:
* Wheelbarrow or large container for mixing
* Shovel or garden trowel
* Gardening gloves
* pH meter (optional, but recommended)
Step-by-Step Mixing Instructions
Now, let’s get our hands dirty! Follow these steps to create your perfect carrot-growing soil mix:
1. Gather Your Ingredients: Make sure you have all your ingredients on hand before you start. This will save you time and effort. I like to lay everything out so I can easily grab what I need.
2. Prepare Your Mixing Area: Choose a well-ventilated area to mix your soil. A wheelbarrow is ideal, but a large container or even a tarp on the ground will work.
3. Combine the Topsoil and Compost: Start by adding one part topsoil and one part compost to your mixing container. Use your shovel or trowel to thoroughly combine them. Break up any large clumps of compost to ensure a uniform mixture.
4. Incorporate the Sand: Next, add one part horticultural sand to the mixture. The sand is essential for improving drainage and preventing the soil from becoming compacted. Mix it in well, making sure it’s evenly distributed throughout the topsoil and compost.
5. Add the Peat Moss or Coco Coir: Now, add one part peat moss or coco coir. These materials help retain moisture and improve the overall structure of the soil. If using coco coir, you may need to pre-moisten it slightly, as it can be quite dry. Mix it in thoroughly.
6. Optional: Add Bone Meal: If you’re using bone meal, now is the time to add it. Follow the package instructions for the correct amount to use. Bone meal is a slow-release source of phosphorus, which is essential for root development. Mix it in well.
7. Test the pH (Optional): If you have a pH meter, you can test the pH of your soil mix. The ideal pH for carrots is between 6.0 and 6.8. If the pH is too high (alkaline), you can add a small amount of sulfur to lower it. If the pH is too low (acidic), you can add a small amount of lime to raise it. Always follow the instructions on the product label.
8. Moisten the Soil Mix: Once you’ve mixed all the ingredients together, lightly moisten the soil mix with water. You want it to be damp, but not soggy. This will help the ingredients bind together and make it easier to work with.
9. Let it Rest (Optional): Ideally, let the soil mix rest for a few days before planting. This will allow the ingredients to fully integrate and the nutrients to become more readily available to the plants.
Preparing Your Garden Bed
Now that you have your perfect carrot soil mix, it’s time to prepare your garden bed.
1. Choose a Sunny Location: Carrots need at least 6 hours of sunlight per day. Choose a location in your garden that receives plenty of sun.
2. Clear the Area: Remove any weeds, rocks, or debris from the area where you’ll be planting your carrots.
3. Loosen the Soil: Use a garden fork or tiller to loosen the soil to a depth of at least 12 inches. This will make it easier for the carrot roots to grow.
4. Amend the Soil (if necessary): If your existing garden soil is heavy clay or very sandy, you may need to amend it with compost or other organic matter to improve its texture and drainage.
5. Create Raised Beds (Optional): Raised beds are a great way to improve drainage and soil quality. If you’re growing carrots in an area with poor drainage, consider creating raised beds.
6. Fill with Your DIY Soil Mix: Fill your prepared garden bed or raised beds with your DIY carrot soil mix. Make sure the soil is evenly distributed and lightly compacted.
Planting Your Carrots
With your soil mix ready and your garden bed prepared, you’re ready to plant your carrots!
1. Choose Your Carrot Variety: There are many different varieties of carrots to choose from, each with its own unique characteristics. Consider factors such as size, shape, color, and maturity time when selecting your carrot variety.
2. Sow the Seeds: Sow the carrot seeds directly into the soil, about 1/4 inch deep and 1 inch apart. You can use a seed drill or simply sprinkle the seeds over the soil.
3. Cover the Seeds: Gently cover the seeds with a thin layer of soil.
4. Water Gently: Water the soil gently to avoid washing away the seeds.
5. Thin the Seedlings: Once the seedlings emerge, thin them to about 2-3 inches apart. This will give the carrots enough room to grow.
Caring for Your Carrots
Once your carrots are planted, it’s important to provide them with proper care to ensure a successful harvest.
1. Water Regularly: Carrots need consistent moisture to grow properly. Water them regularly, especially during dry periods. Avoid overwatering, as this can lead to rot.
2. Weed Regularly: Keep the area around your carrots free of weeds. Weeds compete with carrots for nutrients and water.
3. Fertilize (if necessary): If your carrots are not growing well, you may need to fertilize them. Use a balanced fertilizer or a fertilizer specifically formulated for root vegetables. Follow the instructions on the product label.
4. Protect from Pests: Carrots can be susceptible to pests such as carrot rust flies and nematodes. Use appropriate pest control measures to protect your carrots.
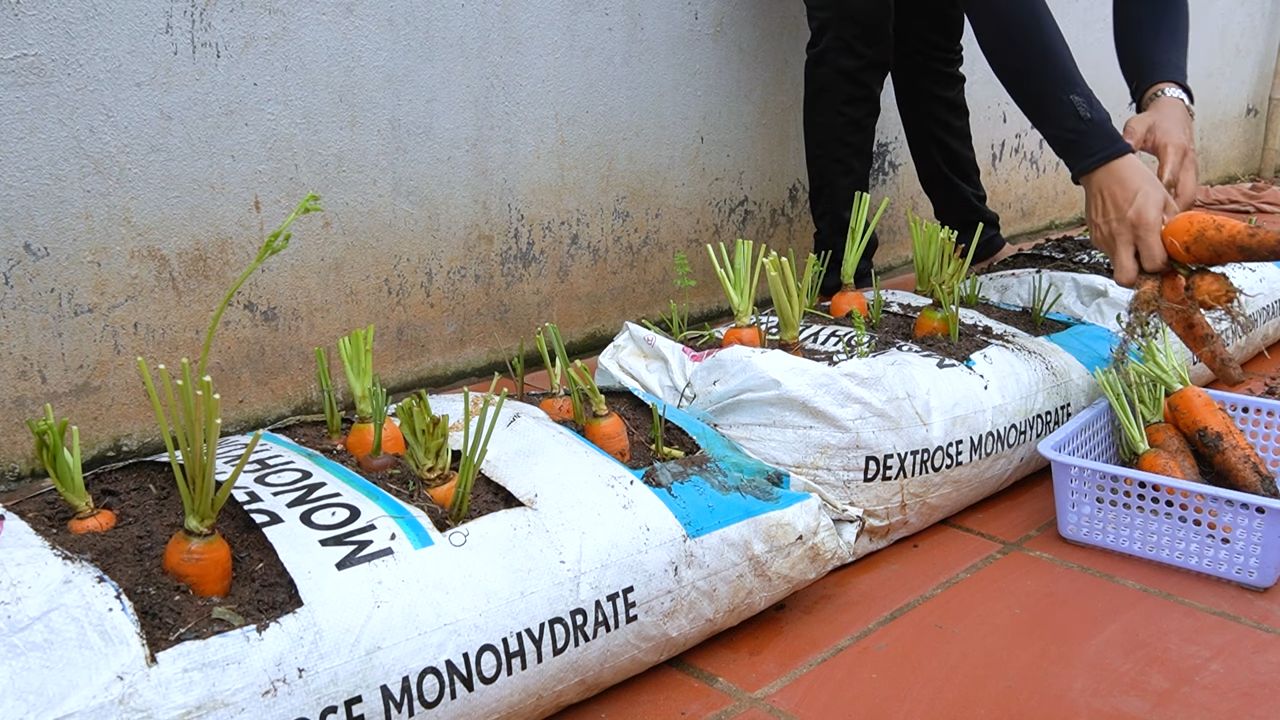
5. Harvest When Ready: Carrots are typically ready to harvest 60-80 days after planting. You can harvest them when they reach the desired size. Gently pull the carrots from the soil, or use a garden fork to loosen the soil around them.
Troubleshooting Common Carrot Problems
Even with the perfect soil mix, you might encounter some problems while growing carrots. Here are a few common issues and how to address them:
* Forked or Stunted Carrots: This is usually caused by compacted soil or rocks in the soil. Make sure your soil is loose and well-draining, and remove any rocks or debris.
* Bitter Carrots: This can be caused by inconsistent watering or exposure to high temperatures. Water your carrots regularly and provide shade during hot weather.
* Carrot Rust Flies: These pests lay their eggs near the base of the carrot plants, and the larvae tunnel into the
Conclusion
So, there you have it! Transforming your garden soil into the perfect haven for thriving carrots is not only achievable but also incredibly rewarding. We’ve explored the secrets to creating the best soil for carrots, focusing on drainage, texture, and nutrient balance. Remember, carrots are finicky about their growing conditions, and dense, rocky soil can lead to stunted, misshapen roots. By taking the time to amend your soil with organic matter like compost, well-rotted manure, or peat moss, you’re setting the stage for a bountiful harvest of sweet, crisp carrots.
This DIY soil improvement trick is a must-try for several reasons. First and foremost, it empowers you to take control of your garden’s health and productivity. You’re not relying on expensive store-bought mixes that may or may not be perfectly suited to your specific needs. Instead, you’re crafting a custom blend tailored to the unique requirements of carrots. Secondly, it’s a cost-effective solution. Utilizing readily available organic materials can significantly reduce your gardening expenses. Finally, it’s an environmentally friendly approach. By composting and using natural amendments, you’re minimizing your reliance on synthetic fertilizers and promoting a healthier ecosystem in your backyard.
But don’t stop there! Feel free to experiment with variations to further enhance your carrot-growing success. Consider adding a small amount of bone meal to provide a boost of phosphorus, which is essential for root development. If your soil is particularly heavy clay, incorporating some coarse sand or perlite can improve drainage even further. Another option is to try raised beds or containers filled with your custom soil mix. This is especially beneficial if your native soil is consistently problematic. You can also consider companion planting. Marigolds, for example, can help deter nematodes, which can damage carrot roots. Radishes, planted alongside carrots, can help break up the soil and mark the rows.
We’re confident that this DIY soil improvement trick will revolutionize your carrot-growing experience. Imagine pulling up vibrant, perfectly formed carrots from your own garden, knowing that you played a crucial role in their success. The taste of homegrown carrots is simply unmatched, and the satisfaction of nurturing them from seed to harvest is truly fulfilling.
Don’t hesitate to give this a try! We encourage you to experiment, adapt the techniques to your specific garden conditions, and most importantly, share your experiences with us. Let us know what works best for you, what challenges you encounter, and any creative solutions you discover. Your insights can help other gardeners achieve their carrot-growing dreams. Post your photos and stories in the comments section below – we can’t wait to see your amazing carrot harvests! Happy gardening!
Frequently Asked Questions (FAQ)
What exactly makes soil “good” for carrots?
Good soil for carrots is all about structure, drainage, and nutrient availability. Carrots need loose, well-drained soil to grow long and straight. Heavy, compacted soil restricts root growth, leading to short, stubby, or forked carrots. The ideal soil should be rich in organic matter, which improves drainage, aeration, and water retention. It should also have a slightly acidic to neutral pH (around 6.0 to 7.0) and contain essential nutrients like phosphorus and potassium, which are crucial for root development. Nitrogen is important, but too much can lead to excessive leafy growth at the expense of root size.
How do I know if my soil is suitable for carrots?
The best way to determine if your soil is suitable is to perform a simple drainage test. Dig a hole about 12 inches deep and wide, fill it with water, and let it drain completely. Then, fill it again and see how long it takes to drain. If the water drains in less than an hour, your soil drains well. If it takes several hours or even days, your soil likely has poor drainage and needs amendment. You can also visually inspect your soil. If it’s hard, compacted, and difficult to dig, it’s probably not ideal for carrots. A soil test kit can also provide valuable information about your soil’s pH and nutrient levels. These kits are readily available at garden centers and online retailers.
What kind of compost is best for amending soil for carrots?
Any well-rotted compost is beneficial, but some types are particularly well-suited for carrots. Leaf mold compost is excellent for improving soil structure and drainage. Vegetable compost, made from kitchen scraps and garden waste, is rich in nutrients. Worm castings are a fantastic soil amendment, providing a slow-release source of nutrients and beneficial microbes. Avoid using compost that contains large chunks of woody material, as this can interfere with root growth. The key is to ensure the compost is fully decomposed and has a crumbly texture.
How much compost should I add to my soil?
The amount of compost you need to add depends on the condition of your existing soil. For moderately poor soil, aim to incorporate about 2-3 inches of compost into the top 6-8 inches of soil. For very heavy clay or sandy soil, you may need to add even more, up to 4-6 inches. It’s always better to err on the side of caution and add too little rather than too much. You can always add more compost later if needed. Thoroughly mix the compost into the soil using a garden fork or tiller.
Can I use fertilizer instead of compost?
While fertilizer can provide essential nutrients, it’s not a substitute for compost. Compost improves soil structure, drainage, and water retention, while fertilizer primarily provides nutrients. Using fertilizer alone can lead to nutrient imbalances and soil degradation over time. It’s best to use a combination of compost and fertilizer. Incorporate compost into the soil to improve its overall health and then supplement with a balanced fertilizer specifically formulated for root vegetables. Follow the instructions on the fertilizer package carefully to avoid over-fertilizing.
When is the best time to amend my soil for carrots?
The best time to amend your soil is in the fall or early spring, before planting. This gives the compost time to decompose and integrate into the soil. If you’re amending your soil in the spring, do it at least a few weeks before planting to allow the soil to settle. Avoid amending your soil immediately before planting, as this can disturb the roots of young seedlings.
What if my carrots still don’t grow well after amending the soil?
If you’ve amended your soil and are still experiencing problems with carrot growth, there could be other factors at play. Make sure your carrots are getting enough sunlight (at least 6 hours per day). Water them regularly, especially during dry periods. Thin the seedlings to prevent overcrowding. Check for pests and diseases, such as carrot rust fly or nematodes. Consider rotating your crops to prevent soilborne diseases from building up. If you’ve tried all of these things and are still having trouble, it may be helpful to consult with a local gardening expert or extension agent.
Leave a Comment