
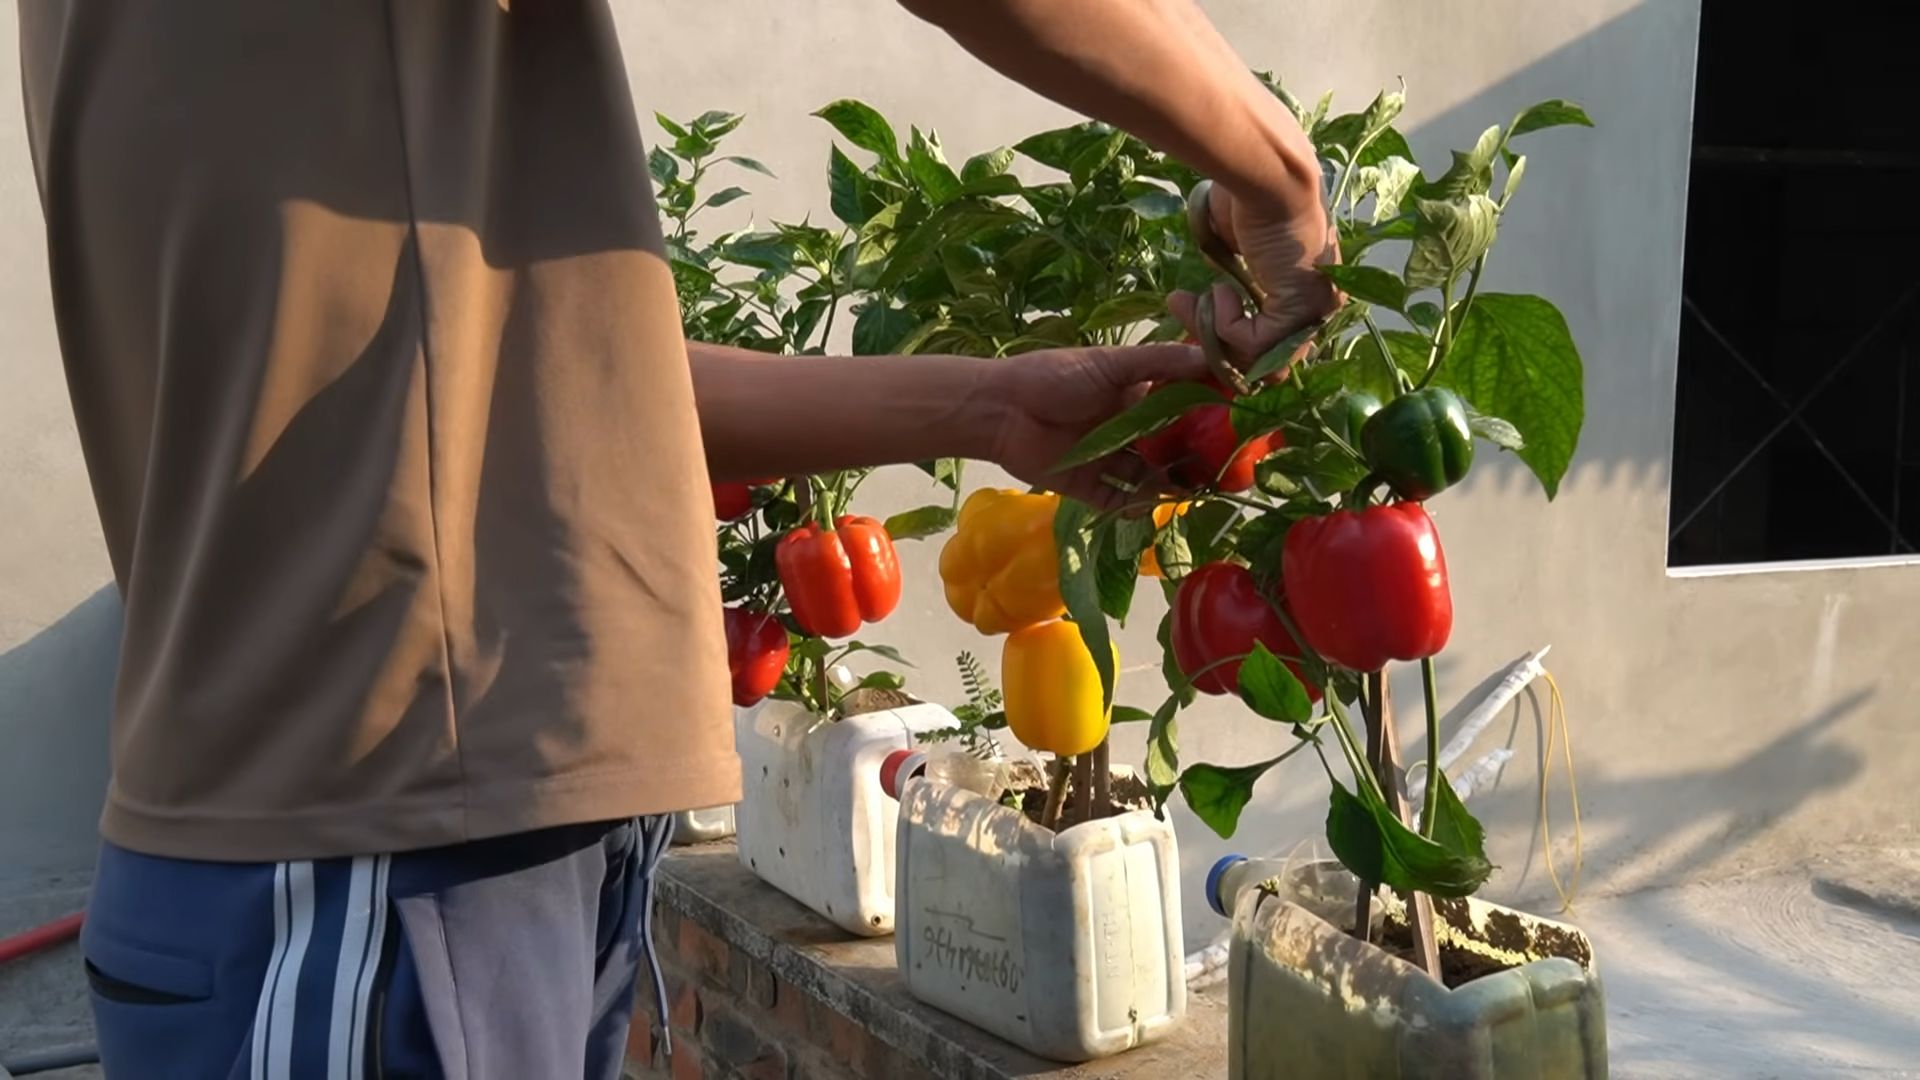
Bell Pepper Bottle Gardening: Ever dreamed of harvesting vibrant, juicy bell peppers right from your windowsill, even without a sprawling garden? I’m here to tell you, it’s absolutely possible, and surprisingly easy! For centuries, resourceful gardeners have sought innovative ways to cultivate their own food, adapting to limited spaces and resources. From ancient rooftop gardens to modern-day urban farms, the spirit of growing your own food has always thrived.
But let’s face it, not everyone has the luxury of a large backyard. That’s where this ingenious DIY trick comes in. Imagine transforming discarded plastic bottles into mini-greenhouses, nurturing bell pepper plants from seedling to harvest. This isn’t just about saving space; it’s about sustainability, reducing waste, and connecting with nature in a tangible way.
In this article, I’ll guide you through the simple steps of bell pepper bottle gardening, showing you how to create a thriving ecosystem in a bottle. You’ll learn everything from preparing the bottles and soil to nurturing your plants and harvesting your delicious, homegrown bell peppers. Get ready to unleash your inner gardener and enjoy the satisfaction of growing your own food, one bottle at a time!
Bell Pepper Bottle Gardening: A Fun and Eco-Friendly DIY Project
Hey there, fellow gardening enthusiasts! Are you looking for a fun, eco-friendly, and space-saving way to grow bell peppers? Well, look no further! I’m going to walk you through creating your very own bell pepper garden using recycled plastic bottles. It’s a fantastic project for beginners, kids, and anyone who wants to add a touch of green to their lives without breaking the bank. Plus, you’re helping the environment by repurposing those plastic bottles!
What You’ll Need
Before we dive in, let’s gather our supplies. This is a pretty low-cost project, so you probably have most of these items lying around already.
* Plastic Bottles: The star of the show! You’ll need at least two large plastic bottles (2-liter soda bottles or similar work great) per bell pepper plant. The more, the merrier if you want to create a whole bottle garden! Make sure they’re clean and dry.
* Bell Pepper Seeds or Seedlings: You can start from seeds or buy small seedlings from your local garden center. Seedlings will give you a head start, but starting from seeds is super rewarding!
* Potting Soil: Use a good quality potting mix that drains well. This is crucial for healthy bell pepper growth.
* Scissors or Utility Knife: For cutting the plastic bottles. Be careful!
* Drill or Nail and Hammer: To create drainage holes.
* Measuring Tape or Ruler: For accurate cutting.
* Permanent Marker: To mark cutting lines.
* Watering Can or Spray Bottle: For watering your plants.
* Optional: Twine or Wire: For hanging your bottle garden (if you choose to hang it).
* Optional: Gravel or Small Stones: To improve drainage at the bottom of the bottle.
Preparing the Bottles
This is where we transform those plastic bottles into mini-planters. Take your time and be careful with the cutting tools.
1. Cleaning the Bottles: First things first, make sure your bottles are squeaky clean. Rinse them thoroughly with soap and water to remove any residue. Let them dry completely before moving on.
2. Cutting the First Bottle (Top Section): This bottle will act as the main planter.
* Measure and mark a line around the bottle about 2/3 of the way up from the bottom. This will determine the height of your planter.
* Carefully cut along the marked line using your scissors or utility knife. You should now have two pieces: the bottom part (which we’ll use) and the top part (which we’ll discard or save for another project!).
3. Cutting the Second Bottle (Water Reservoir): This bottle will serve as a self-watering reservoir.
* Measure and mark a line around the bottle about 1/3 of the way up from the bottom.
* Cut along the marked line. You’ll have the bottom part (the reservoir) and the top part (which we’ll invert and use as a divider).
4. Creating Drainage Holes: Drainage is essential to prevent root rot.
* Take the bottom part of the *first* bottle (the main planter).
* Using your drill or nail and hammer, carefully create several drainage holes in the bottom. I usually aim for about 5-6 holes, evenly spaced.
5. Preparing the Water Reservoir Divider:
* Take the top part of the *second* bottle (the one we cut to create the reservoir).
* Invert it. This will sit inside the bottom part of the first bottle (the main planter) and separate the soil from the water reservoir.
* Drill or poke several small holes near the bottle cap area. These holes will allow water to wick up into the soil.
Assembling the Bottle Planter
Now comes the fun part – putting everything together!
1. Adding Drainage Material (Optional): If you have gravel or small stones, add a layer to the bottom of the main planter (the bottom part of the first bottle). This will further improve drainage.
2. Inserting the Water Reservoir Divider: Place the inverted top part of the second bottle (the one with the holes near the cap) inside the main planter. It should sit snugly inside. This creates a barrier between the soil and the water reservoir.
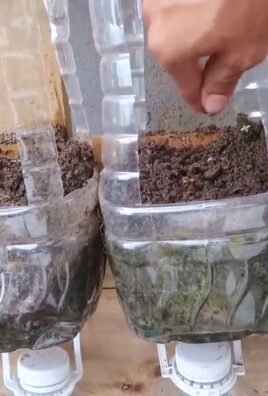
3. Adding the Potting Soil: Carefully fill the main planter with potting soil, leaving about an inch or two of space at the top. Gently pat down the soil to remove any air pockets.
Planting Your Bell Pepper
Time to get those bell peppers growing!
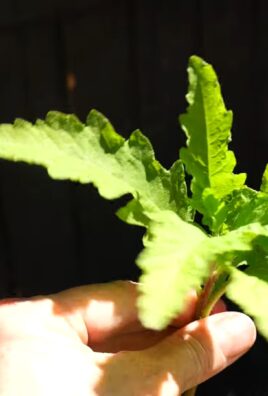
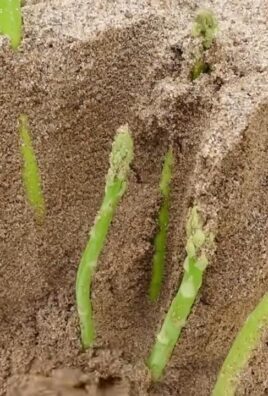
1. Planting Seeds: If you’re starting from seeds, follow the instructions on the seed packet. Generally, you’ll want to make a small hole in the soil, drop in a few seeds, and cover them lightly with soil. Water gently.
2. Planting Seedlings: If you’re using seedlings, gently remove the seedling from its container. Loosen the roots slightly. Make a hole in the soil large enough to accommodate the root ball. Place the seedling in the hole and cover the roots with soil. Gently pat down the soil.
3. Watering: Water your newly planted bell pepper thoroughly. Make sure the water drains out of the drainage holes.
Creating the Water Reservoir
This is what makes this project so convenient!
1. Adding Water to the Reservoir: Take the bottom part of the *second* bottle (the reservoir). Carefully place the main planter (with the soil and plant) on top of the reservoir. The bottom of the main planter should be submerged slightly in the reservoir.
2. Filling the Reservoir: Pour water into the reservoir, being careful not to overfill it. The water level should be just below the bottom of the main planter.
Caring for Your Bell Pepper Bottle Garden
Now that your bottle garden is assembled, it’s time to provide the right care to help your bell pepper thrive.
1. Sunlight: Bell peppers need plenty of sunlight – at least 6-8 hours per day. Place your bottle garden in a sunny location, such as a windowsill, balcony, or patio.
2. Watering: The beauty of this system is that it’s self-watering! The water in the reservoir will wick up into the soil as needed. Check the reservoir level regularly and refill it when it gets low. Avoid overwatering, as this can lead to root rot.
3. Fertilizing: Bell peppers are heavy feeders, so you’ll need to fertilize them regularly. Use a balanced liquid fertilizer diluted to half strength. Fertilize every 2-3 weeks during the growing season.
4. Support: As your bell pepper plant grows, it may need support. You can use a small stake or trellis to help support the stems and prevent them from breaking.
5. Pruning: Prune your bell pepper plant to encourage bushier growth and more fruit production. Remove any suckers (small shoots that grow from the base of the plant) and any yellowing or dead leaves.
6. Pest Control: Keep an eye out for pests, such as aphids, whiteflies, and spider mites. If you spot any pests, treat them with an insecticidal soap or neem oil.
Hanging Your Bottle Garden (Optional)
If you want to create a hanging bottle garden, here’s how:
1. Drilling Hanging Holes: Carefully drill two holes on opposite sides of the main planter, near the top.
2. Attaching Twine or Wire: Thread twine or wire through the holes and tie securely. Make sure the twine or wire is strong enough to support the weight of the planter.
3. Hanging: Hang your bottle garden in a sunny location. Make sure it’s in a spot where it won’t be blown around by the wind.
Troubleshooting
Even with the best care, you might encounter some challenges. Here are a few common issues and how to address them:
* Yellowing Leaves: This could be a sign of overwatering, underwatering, or nutrient deficiency. Check the soil moisture and adjust your watering accordingly. Fertilize if necessary.
* Lack of Fruit: This could be due to insufficient sunlight, poor pollination, or nutrient deficiency. Make sure your plant is getting enough sunlight. You can hand-pollinate the flowers by gently shaking the plant or using a small brush to transfer pollen from one flower to another. Fertilize with a fertilizer that’s high in phosphorus.
* Pests: As mentioned earlier, keep an eye out for pests and treat them promptly.
Enjoying Your Harvest
After a few months of care, your bell pepper plant should start producing delicious, colorful bell peppers! Harvest them when they’re fully ripe and enjoy them in salads, stir-fries, or any other dish you like.
I hope you found this guide helpful! Growing bell peppers in recycled plastic bottles is a rewarding and

Conclusion
So, there you have it! Transforming a simple bell pepper into a self-watering bottle garden is more than just a quirky DIY project; it’s a sustainable, space-saving, and surprisingly effective way to nurture your favorite herbs or small plants. We’ve walked you through the process, highlighting the ease and accessibility of this method. But why should you actually try it?
Firstly, the self-watering aspect is a game-changer. Forget daily watering routines! The bell pepper reservoir provides a consistent supply of moisture to the soil, preventing both overwatering and underwatering – common pitfalls for novice gardeners. This is especially beneficial if you’re prone to forgetting or if you travel frequently.
Secondly, it’s incredibly eco-friendly. You’re repurposing a food waste item (the bell pepper) and a plastic bottle, reducing your environmental footprint. In a world increasingly conscious of waste, this small act can make a significant difference.
Thirdly, it’s a fantastic way to introduce children to gardening. The visual appeal of the bell pepper and the simplicity of the setup make it an engaging and educational activity. They can learn about plant life cycles, the importance of water, and the satisfaction of growing their own food.
But the beauty of this DIY trick lies in its adaptability. While we’ve focused on herbs and small plants, you can experiment with other varieties. Consider using different types of peppers for a colorful display. You could also try using larger bottles for plants with more extensive root systems.
Here are a few variations to spark your creativity:
* Herb Garden Medley: Plant a mix of basil, mint, and thyme in the same bottle garden for a fragrant and flavorful addition to your kitchen.
* Succulent Sanctuary: Succulents thrive in well-draining soil and require minimal watering, making them ideal candidates for this self-watering system.
* Seed Starting Station: Use the bell pepper bottle garden to start seeds indoors before transplanting them to your garden. This gives your plants a head start and extends your growing season.
* Vertical Garden Wall: Create multiple bell pepper bottle gardens and hang them on a wall or fence for a unique and space-saving vertical garden.
We strongly encourage you to give this bell pepper bottle gardening method a try. It’s a fun, rewarding, and sustainable way to connect with nature and grow your own food. Don’t be afraid to experiment and personalize your bottle garden to suit your preferences and needs.
Once you’ve created your own bell pepper bottle garden, we’d love to hear about your experience! Share your photos, tips, and variations on social media using the hashtag #BellPepperBottleGarden. Let’s inspire others to embrace this simple yet effective gardening technique. Happy gardening!
Frequently Asked Questions
What kind of bell pepper should I use?
Any bell pepper will work, but larger, sturdier peppers are generally better. Red, yellow, or orange bell peppers tend to be thicker-walled than green ones, making them more durable for this project. Choose a pepper that is free from blemishes or soft spots. The size of the pepper will dictate how much soil you can use and therefore the size of the plant you can grow.
What kind of plastic bottle is best?
A clear plastic bottle, such as a water or soda bottle, is ideal. The size of the bottle will depend on the size of your bell pepper and the plant you intend to grow. A 16-20 ounce bottle is a good starting point for smaller herbs. Ensure the bottle is clean and free from any residue. Avoid using bottles that have contained harsh chemicals.
What kind of soil should I use?
A well-draining potting mix is essential for success. Avoid using garden soil, as it can become compacted and prevent proper drainage. A mix specifically formulated for container gardening is a good choice. You can also amend your potting mix with perlite or vermiculite to improve drainage. For succulents, use a cactus potting mix.
How often do I need to refill the water bottle?
The frequency of refilling depends on several factors, including the type of plant, the size of the bottle, and the ambient temperature. Check the water level in the bottle regularly. When the water level is low, refill it. In general, you may need to refill the bottle every few days to once a week.
What plants are best suited for a bell pepper bottle garden?
Herbs like basil, mint, thyme, oregano, and rosemary are excellent choices. Small succulents, such as echeverias and sedums, also thrive in this environment. You can also grow small flowering plants like pansies or violas. Avoid plants with extensive root systems, as they will quickly outgrow the container. Seedlings also do well in this environment.
How much sunlight does my bell pepper bottle garden need?
Most herbs and succulents require at least six hours of sunlight per day. Place your bottle garden in a sunny location, such as a windowsill or a patio. If you don’t have access to enough natural light, you can supplement with a grow light. Be mindful of intense direct sunlight, which can scorch the leaves of some plants.
How do I prevent mold or algae growth?
Mold or algae growth can occur in the bottle due to the moist environment. To prevent this, ensure the bottle is clean before use. You can also add a small amount of hydrogen peroxide to the water to inhibit growth. Avoid overwatering, as this can create a breeding ground for mold and algae. Regularly clean the outside of the bottle to remove any buildup.
Can I use fertilizer in my bell pepper bottle garden?
Yes, you can use a diluted liquid fertilizer to provide your plants with essential nutrients. Follow the instructions on the fertilizer package. Avoid over-fertilizing, as this can damage the plants. A balanced fertilizer with equal parts nitrogen, phosphorus, and potassium is a good choice for most plants.
What if my plant starts to outgrow the bell pepper bottle garden?
If your plant starts to outgrow the container, you will need to transplant it to a larger pot. Gently remove the plant from the bell pepper and bottle, being careful not to damage the roots. Choose a pot that is at least twice the size of the original container. Fill the pot with fresh potting mix and transplant the plant. Water thoroughly after transplanting.
Is this method suitable for all climates?
The bell pepper bottle garden is generally suitable for most climates, but you may need to adjust your watering schedule and plant selection based on your local conditions. In hot, dry climates, you may need to refill the water bottle more frequently. In cold climates, you may need to bring the bottle garden indoors during the winter months.
Can I reuse the bell pepper after the plant is finished?
Yes, you can compost the bell pepper after the plant is finished. The bell pepper will decompose and provide nutrients to your compost pile. Alternatively, you can bury the bell pepper in your garden to enrich the soil.
What if the bell pepper starts to decompose?
The bell pepper will eventually start to decompose. This is a natural process. If the pepper starts to become too soft or moldy, it’s time to replace it. Carefully remove the plant and soil from the pepper and transfer it to a new bell pepper or another container.
How do I clean the plastic bottle?
To clean the plastic bottle, use warm soapy water. Rinse thoroughly to remove any soap residue. You can also use a bottle brush to scrub the inside of the bottle. Avoid using harsh chemicals or abrasive cleaners, as these can damage the plastic.
Can I use this method for other vegetables besides bell peppers?
While bell peppers are ideal due to their shape and sturdiness, you could experiment with other vegetables with a similar structure. However, the bell pepper’s natural cavity and ability to hold its shape make it particularly well-suited for this DIY project.
Leave a Comment