
Balcony strawberry growing no soil – sounds like a gardening dream, right? Imagine plucking juicy, sun-ripened strawberries right from your balcony, without even getting your hands dirty in soil! For centuries, humans have cultivated strawberries, from their humble beginnings as wild berries to the plump, sweet delights we enjoy today. But who says you need a sprawling garden to partake in this delicious tradition?
In today’s urban landscape, space is a premium. Many of us crave the joy of gardening but lack the traditional backyard. That’s where innovative techniques like soil-less strawberry growing come in! This DIY guide will unlock the secrets to successfully growing strawberries on your balcony, even if you’ve never gardened before. We’ll explore simple, cost-effective methods that are perfect for beginners and seasoned gardeners alike.
Why is balcony strawberry growing no soil so appealing? Because it’s clean, efficient, and minimizes pests and diseases. Plus, it’s incredibly rewarding to nurture your own food source in a small space. Get ready to transform your balcony into a thriving strawberry patch and enjoy the sweet taste of success!
DIY Balcony Strawberry Garden: Soil-Free Success!
Hey there, fellow balcony gardeners! Are you dreaming of juicy, homegrown strawberries but lack the space (or desire!) for traditional soil gardening? Well, you’re in the right place! I’m going to walk you through creating a thriving strawberry garden on your balcony, completely soil-free. Get ready for a bountiful harvest with this fun and easy DIY project!
Why Soil-Free Strawberry Growing?
Before we dive in, let’s talk about why going soil-free is a fantastic option for balcony gardening:
* Less Mess: No more muddy messes to clean up! Hydroponics (growing without soil) is much cleaner.
* Space Saving: We can utilize vertical space more efficiently, perfect for small balconies.
* Reduced Pests and Diseases: Soil can harbor pests and diseases that can harm your plants. Soil-free systems minimize these risks.
* Water Conservation: Hydroponic systems are often more water-efficient than traditional gardening.
* Faster Growth: Plants can often grow faster in hydroponic systems because they have direct access to nutrients.
Choosing Your System: The Kratky Method
For this guide, we’ll be using the Kratky method, a passive hydroponic system that’s incredibly simple and beginner-friendly. It requires no pumps, electricity, or moving parts! Basically, you set it up, and the plants do their thing.
Materials You’ll Need
Here’s what you’ll need to gather before we get started:
* Opaque Containers: These are crucial! We need to prevent light from reaching the nutrient solution to avoid algae growth. Dark-colored plastic bins, buckets, or even repurposed containers (like large yogurt tubs) work great. The size depends on how many plants you want to grow. I recommend at least a 5-gallon container per 3-4 plants.
* Net Pots: These will hold your strawberry plants and allow their roots to access the nutrient solution. You can find these at most garden centers or online. 3-inch net pots are a good size.
* Growing Medium: This will support your strawberry plants in the net pots. Coco coir, perlite, or a mix of both are excellent choices. I personally prefer coco coir for its water retention and aeration.
* Strawberry Plants: You can start with bare-root strawberry plants or established plants from a nursery. Everbearing varieties are a good choice for continuous harvests.
* Hydroponic Nutrient Solution: This is essential for providing your plants with the nutrients they need to thrive. Look for a nutrient solution specifically formulated for strawberries or general hydroponic use.
* pH Testing Kit: Maintaining the correct pH level is crucial for nutrient absorption. A simple pH testing kit (either liquid or digital) will help you monitor and adjust the pH of your nutrient solution.
* pH Up and pH Down Solutions: These will allow you to adjust the pH of your nutrient solution as needed.
* Drill with Hole Saw Attachment: You’ll need this to create holes in the lid of your container for the net pots. The hole saw should be the same size as the diameter of your net pots.
* Measuring Cups and Spoons: For accurately measuring the nutrient solution.
* Water: Use clean, dechlorinated water. Tap water is usually fine if you let it sit out for 24 hours to allow the chlorine to evaporate.
* Optional: Rockwool cubes for starting bare-root plants.
* Optional: Black spray paint (if your container isn’t already opaque).
Step-by-Step Instructions: Building Your Soil-Free Strawberry Garden
Okay, let’s get our hands dirty (well, not really, since it’s soil-free!). Follow these steps to create your own balcony strawberry paradise:
1. Prepare Your Container
1. Clean the Container: Thoroughly wash your container with soap and water to remove any dirt or debris.
2. Make it Opaque: If your container isn’t already dark-colored, spray paint the outside with black paint to prevent light penetration. Let it dry completely.
3. Drill the Holes: Using your drill and hole saw attachment, create holes in the lid of your container. Space the holes evenly, allowing enough room for each plant to grow. Make sure the holes are snug enough to hold the net pots securely.
2. Prepare the Net Pots
1. Rinse the Growing Medium: If you’re using coco coir, rinse it thoroughly with water to remove any excess salts.
2. Fill the Net Pots: Fill each net pot with your chosen growing medium. Leave a little space at the top.
3. Plant Your Strawberries
This step depends on whether you’re starting with bare-root plants or established plants.
* Bare-Root Plants:
1. Soak the Roots: Soak the bare roots in water for about 30 minutes to rehydrate them.
2. Wrap in Rockwool (Optional): If you’re using rockwool cubes, moisten them and gently wrap them around the roots of the strawberry plants. This will help them establish in the net pots.
3. Plant in Net Pots: Carefully place the strawberry plants in the net pots, ensuring the crown (where the leaves emerge) is above the growing medium. Gently pack the growing medium around the roots to secure the plant.
* Established Plants:
1. Gently Remove from Pot: Carefully remove the strawberry plant from its original pot, being careful not to damage the roots.
2. Loosen the Roots: Gently loosen the roots to encourage them to grow into the net pot.
3. Plant in Net Pots: Place the strawberry plant in the net pot, filling the remaining space with your growing medium.
4. Prepare the Nutrient Solution
1. Read the Instructions: Carefully read the instructions on your hydroponic nutrient solution. Different brands have different concentrations, so it’s crucial to follow the directions precisely.
2. Mix the Solution: Mix the nutrient solution with water according to the instructions. Use a measuring cup and spoon to ensure accurate measurements.
3. Check the pH: Use your pH testing kit to check the pH of the nutrient solution. Strawberries prefer a pH between 5.5 and 6.5.
4. Adjust the pH: If the pH is too high, add a small amount of pH Down solution and retest. If the pH is too low, add a small amount of pH Up solution and retest. Repeat until the pH is within the desired range.
5. Assemble Your System
1. Fill the Container: Pour the nutrient solution into your container, leaving about an inch or two of space at the top. The bottom of the net pots should be submerged in the nutrient solution. This is key for the Kratky method!
2. Place the Net Pots: Carefully place the net pots with your strawberry plants into the holes in the lid.
3. Secure the Lid: Secure the lid onto the container.
6. Placement and Care
1. Sunlight: Place your strawberry garden in a location that receives at least 6-8 hours of direct sunlight per day. A south-facing balcony is ideal.
2. Watering (Initial Setup): For the first few days, you may want to gently water the growing medium from the top to help the plants establish. After that, the roots will reach the nutrient solution, and you won’t need to water from the top anymore.
3. Monitoring the Nutrient Solution: Check the nutrient solution level regularly. As the plants grow, they will absorb the water and nutrients. Replenish the solution as needed, maintaining the same concentration as the original mixture.
4. pH Monitoring: Check the pH of the nutrient solution every week or two and adjust as needed.
5. Pest Control: Keep an eye out for pests like aphids or spider mites. If you notice any, treat them with an organic insecticide.
6. Pollination: Strawberries are self-pollinating, but you can help them along by gently shaking the plants or using a small paintbrush to transfer pollen from one flower to another. This is especially important if you’re growing indoors or in a sheltered location with limited wind.
7. Pruning: Remove any dead or yellowing leaves to keep your plants healthy.
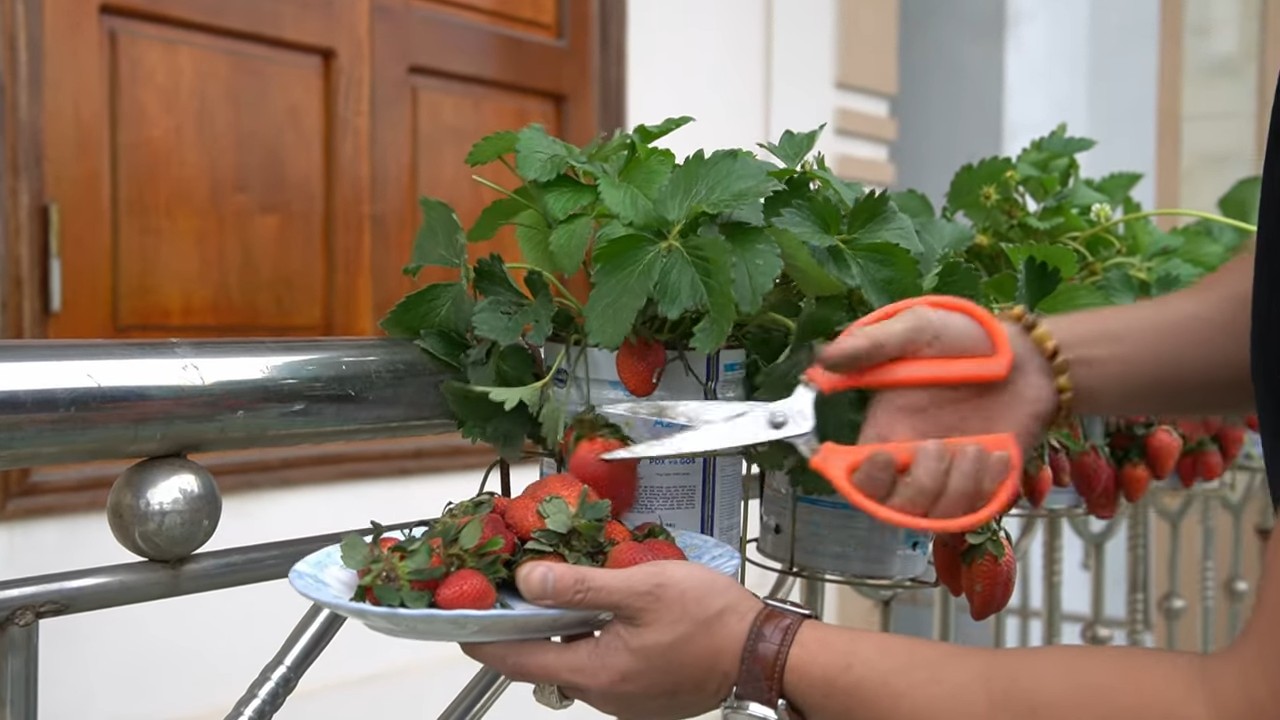
8. Harvesting: Once your strawberries are ripe (bright red and easily detached from the plant), harvest them! Enjoy the fruits of your labor!
Troubleshooting Tips
* Algae Growth: If you notice algae growing in your container, it means light is getting in. Make sure your container is completely opaque. You can also add a small amount of hydrogen peroxide to the nutrient solution to kill the algae.
* Yellowing Leaves: Yellowing leaves can indicate a nutrient deficiency. Check the
Conclusion
So, there you have it! Transforming your balcony into a thriving strawberry patch without the hassle of soil is not only possible, it’s incredibly rewarding. This no-soil method, focusing on hydroponics or other soilless mediums, offers a cleaner, more controlled environment for your strawberries to flourish, minimizing pests and diseases while maximizing yield.
Why is this DIY trick a must-try? Because it democratizes gardening! Even if you’re a complete beginner with limited space and zero gardening experience, you can enjoy the sweet taste of homegrown strawberries. It’s also a fantastic way to recycle materials, reduce your environmental footprint, and add a touch of green to your urban landscape. Imagine stepping onto your balcony and plucking ripe, juicy strawberries straight from the vine – a truly satisfying experience!
But the beauty of this method lies in its adaptability. Feel free to experiment with different soilless mediums. Coco coir, perlite, and vermiculite are all excellent choices, each offering unique benefits in terms of water retention and aeration. You can also explore different container options. While we’ve focused on hanging baskets and vertical planters, repurposed plastic bottles, old buckets, or even DIY pallet planters can work wonders. Just ensure adequate drainage and sunlight exposure.
Consider adding companion plants like basil or marigolds to your strawberry containers. These not only enhance the aesthetic appeal but also help deter pests naturally. For a sweeter harvest, ensure your strawberries receive at least six hours of direct sunlight daily. And don’t forget to fertilize regularly with a balanced nutrient solution specifically formulated for strawberries.
Ready to embark on your soil-free strawberry adventure? We wholeheartedly encourage you to give this DIY trick a try. It’s a fun, engaging, and ultimately delicious project that will transform your balcony into a miniature strawberry farm.
Don’t be afraid to get creative and personalize your setup. The possibilities are endless! And most importantly, don’t forget to share your experiences with us. We’d love to see your balcony strawberry gardens in action. Share your photos, tips, and challenges in the comments below. Let’s build a community of soil-free strawberry growers and inspire others to embrace the joy of urban gardening. This method of **balcony strawberry growing no soil** is a game changer.
Frequently Asked Questions (FAQ)
What exactly is a “no-soil” method for growing strawberries?
The term “no-soil” refers to growing plants without traditional garden soil. Instead, we use alternative mediums like coco coir, perlite, vermiculite, or even a hydroponic system where the roots are suspended in nutrient-rich water. These methods provide the necessary support and nutrients for the plants to thrive, without the weight, mess, and potential for soilborne diseases associated with traditional soil gardening.
What are the benefits of growing strawberries without soil on a balcony?
There are several advantages:
* **Reduced Weight:** Soilless mediums are significantly lighter than soil, making them ideal for balconies where weight restrictions may be a concern.
* **Improved Drainage:** Soilless mixes typically offer better drainage than soil, preventing waterlogging and root rot.
* **Fewer Pests and Diseases:** Soil can harbor pests and diseases that can harm your strawberry plants. Soilless mediums are generally sterile, reducing the risk of these problems.
* **Better Nutrient Control:** You have precise control over the nutrients your plants receive, leading to healthier growth and higher yields.
* **Cleaner Gardening:** No more muddy hands or messy soil spills! Soilless gardening is a much cleaner and tidier option.
* **Space Saving:** Vertical planters and hanging baskets, often used in soilless methods, maximize space on small balconies.
What kind of soilless medium should I use for my balcony strawberries?
Several options work well:
* **Coco Coir:** Made from coconut husks, coco coir is a sustainable and absorbent medium that provides excellent aeration.
* **Perlite:** A lightweight volcanic glass that improves drainage and aeration.
* **Vermiculite:** A mineral that retains moisture and nutrients, releasing them slowly to the plants.
* **Peat Moss:** While effective, peat moss is not a sustainable option, so consider alternatives.
* **Hydroponics:** A system where the roots are suspended in nutrient-rich water. This requires a bit more setup but can yield impressive results.
A mix of coco coir and perlite is a popular and effective choice for balcony strawberry growing no soil.
How often should I water my soil-free strawberry plants?
Watering frequency depends on the medium, the weather, and the size of your containers. Generally, you should water when the top inch of the medium feels dry to the touch. Avoid overwatering, as this can lead to root rot. In hot weather, you may need to water daily.
What kind of fertilizer should I use for my balcony strawberries?
Use a balanced, water-soluble fertilizer specifically formulated for strawberries. Look for a fertilizer with an NPK ratio (nitrogen, phosphorus, potassium) that is appropriate for fruiting plants. Follow the instructions on the fertilizer package carefully. Fertilize regularly, especially during the flowering and fruiting stages.
How much sunlight do my balcony strawberries need?
Strawberries need at least six hours of direct sunlight per day to produce a good crop. Choose a sunny spot on your balcony for your strawberry plants. If your balcony doesn’t get enough sunlight, you may need to supplement with grow lights.
How do I protect my balcony strawberries from pests and diseases?
Regularly inspect your plants for signs of pests or diseases. Remove any affected leaves or plants immediately. You can use organic pest control methods, such as insecticidal soap or neem oil, to control pests. Ensure good air circulation around your plants to prevent fungal diseases. Companion planting with basil or marigolds can also help deter pests.
Can I grow strawberries on a balcony year-round?
In warmer climates, you may be able to grow strawberries year-round. In colder climates, you will need to protect your plants from frost and freezing temperatures. You can bring your containers indoors during the winter or cover them with frost blankets. Some strawberry varieties are more cold-hardy than others.
How long does it take for strawberries to grow and produce fruit?
It typically takes a few months for strawberry plants to mature and start producing fruit. The exact time will depend on the variety of strawberry, the growing conditions, and the time of year. You can expect to harvest your first strawberries within a few months of planting.
What are some good strawberry varieties for balcony growing?
Some popular strawberry varieties for balcony growing include:
* **Everbearing varieties:** These produce fruit throughout the growing season. Examples include Albion, Seascape, and Ozark Beauty.
* **Day-neutral varieties:** These are less sensitive to day length and produce fruit continuously. Examples include Tristar and Tribute.
* **Alpine strawberries:** These are small, flavorful strawberries that are well-suited for containers.
Choose a variety that is well-suited to your climate and growing conditions.
How do I encourage more fruit production on my balcony strawberry plants?
* Ensure adequate sunlight (at least 6 hours per day).
* Fertilize regularly with a balanced fertilizer.
* Water consistently, but avoid overwatering.
* Remove any dead or yellowing leaves.
* Pinch off runners (the long stems that grow out from the plant) to encourage the plant to focus its energy on fruit production.
* Protect your plants from pests and diseases.
* Hand-pollinate the flowers if necessary, especially if you don’t have many bees or other pollinators visiting your balcony.
Where can I find the materials needed for this DIY project?
Most of the materials, such as coco coir, perlite, vermiculite, containers, and fertilizer, can be found at your local garden center or online retailers. You may also be able to repurpose materials you already have at home, such as plastic bottles or old buckets.


Leave a Comment