
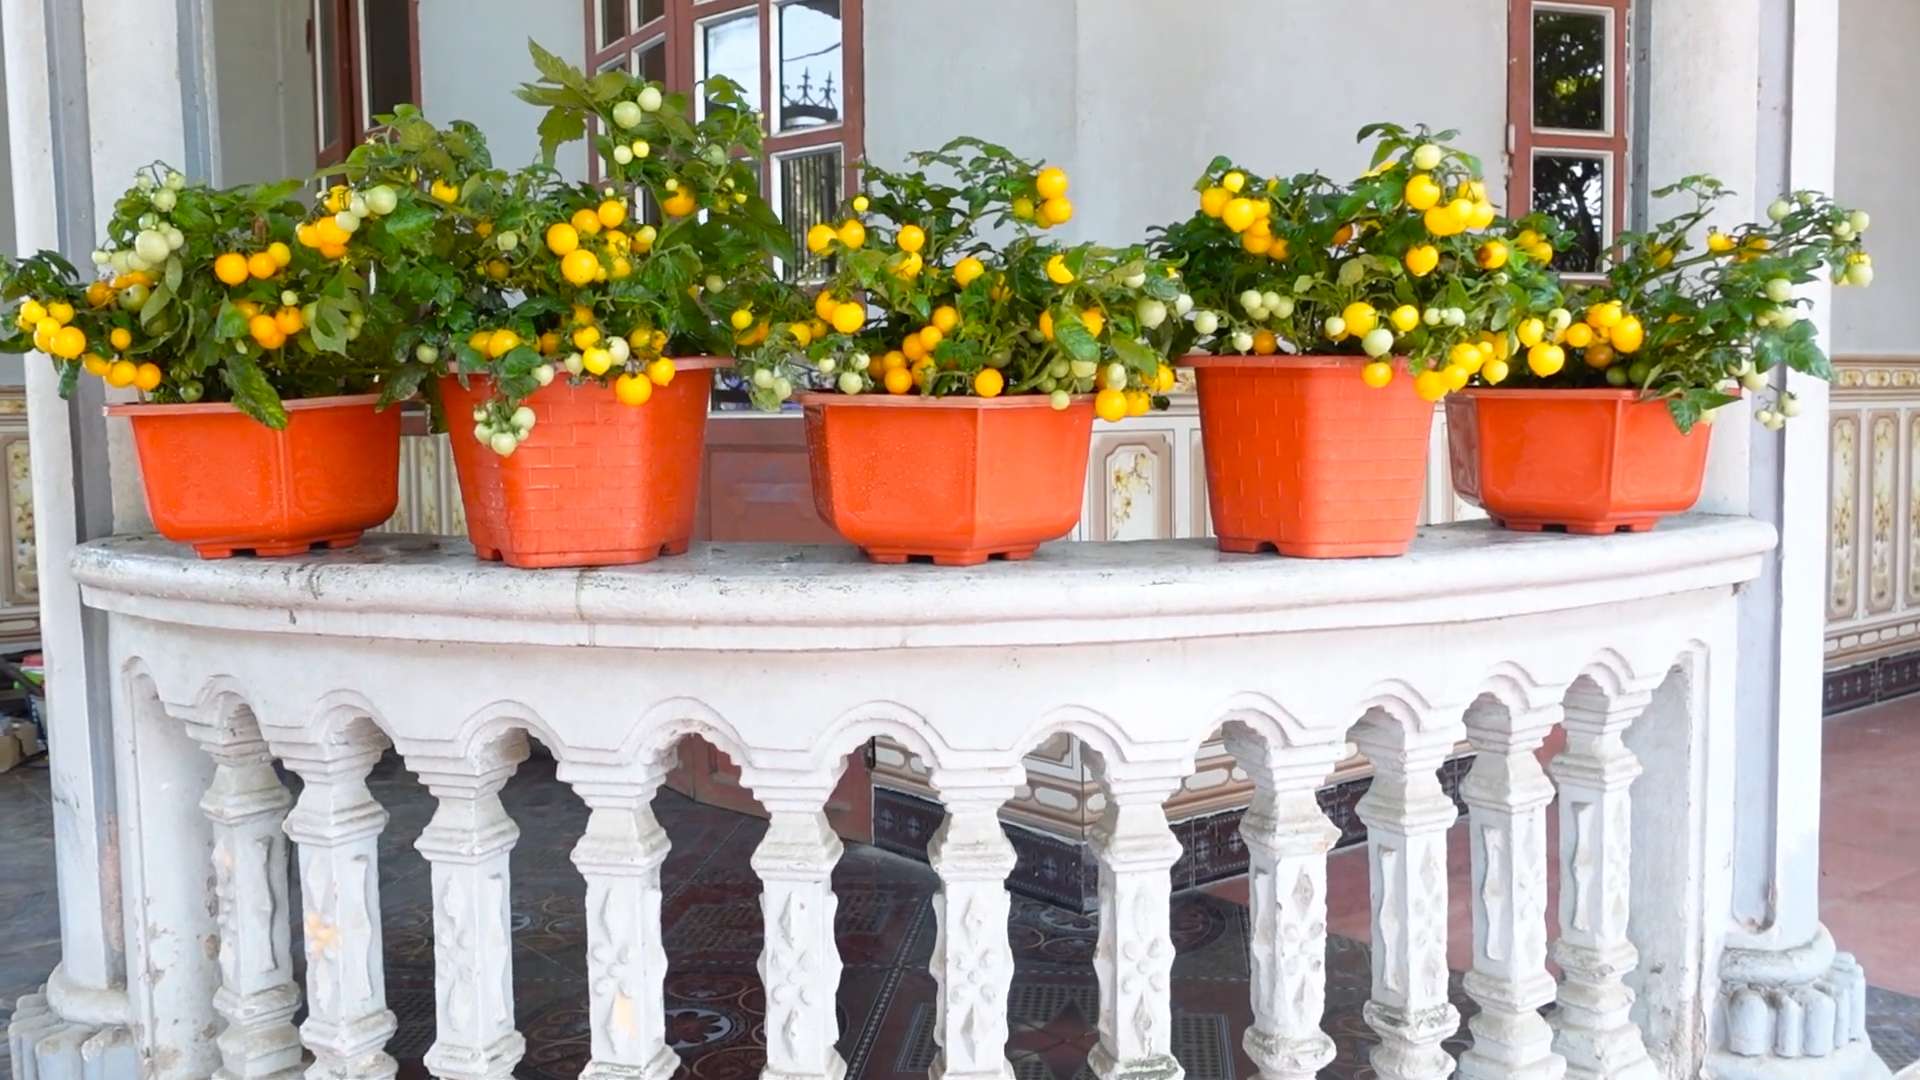
Balcony Cherry Tomatoes: Imagine stepping onto your balcony and plucking a handful of sweet, juicy cherry tomatoes, bursting with flavor, straight from the vine. Sounds idyllic, right? Well, it doesn’t have to be just a dream! For centuries, people have cultivated small gardens in urban spaces, from the hanging gardens of Babylon to the window boxes of Victorian London. This connection to nature, even in the heart of the city, is deeply ingrained in our human spirit.
But let’s be honest, sometimes growing your own food feels intimidating. Where do you even start? That’s where these DIY tricks and hacks come in! I’m here to show you that growing delicious balcony cherry tomatoes is easier than you think, even if you’re a complete beginner. We’ll cover everything from choosing the right container and soil to providing the perfect amount of sunlight and water.
In today’s fast-paced world, knowing where your food comes from is more important than ever. Growing your own cherry tomatoes on your balcony not only provides you with fresh, healthy produce, but it also connects you to the natural world and offers a rewarding sense of accomplishment. Plus, imagine the bragging rights when you serve your friends a salad made with tomatoes you grew yourself! So, let’s get started and transform your balcony into a thriving mini-farm!
Growing Delicious Cherry Tomatoes on Your Balcony: A DIY Guide
Hey there, fellow balcony gardeners! I’m so excited to share my tried-and-true method for growing a bounty of sweet, juicy cherry tomatoes right on your balcony. Forget those bland supermarket tomatoes – with a little effort, you can enjoy homegrown goodness all summer long. This guide will walk you through every step, from choosing the right variety to troubleshooting common problems. Let’s get started!
Choosing the Right Cherry Tomato Variety
Before you even think about soil, you need to pick the perfect cherry tomato variety for your balcony. Not all tomatoes are created equal, especially when it comes to container gardening. Here’s what I look for:
* Determinate vs. Indeterminate: This is crucial! Determinate varieties are bush-like and grow to a certain size, making them ideal for containers. Indeterminate varieties, on the other hand, are vining and keep growing throughout the season, requiring significant staking and space. For balconies, I highly recommend determinate or compact indeterminate varieties.
* Size and Shape: Cherry tomatoes come in all shapes and sizes, from tiny currant tomatoes to larger grape tomatoes. Consider how you plan to use them. If you want them for snacking, smaller varieties are great. If you want to use them in salads, larger grape or cherry tomatoes might be better.
* Disease Resistance: Look for varieties that are resistant to common tomato diseases like Fusarium wilt (F), Verticillium wilt (V), and Tomato Mosaic Virus (ToMV). This will save you a lot of headaches later on.
* Days to Maturity: This tells you how long it will take for the tomatoes to ripen after transplanting. Choose varieties with shorter days to maturity if you live in a cooler climate with a shorter growing season.
Some of my favorite balcony-friendly cherry tomato varieties include:
* ‘Tiny Tim’: A super compact determinate variety that’s perfect for small balconies.
* ‘Patio’: Another great determinate variety that produces lots of medium-sized cherry tomatoes.
* ‘Tumbling Tom Red’: A trailing variety that’s ideal for hanging baskets.
* ‘Sungold’: An indeterminate variety known for its incredibly sweet, golden-orange tomatoes. (Requires staking!)
* ‘Black Cherry’: An indeterminate variety with a unique smoky flavor. (Requires staking!)
Gathering Your Supplies
Now that you’ve chosen your variety, it’s time to gather your supplies. Here’s what you’ll need:
* Tomato Seeds or Seedlings: You can start your own seeds indoors or buy seedlings from a local nursery. I usually buy seedlings to save time.
* Large Containers: Choose containers that are at least 12 inches in diameter and 12 inches deep. Bigger is better, as it will give the roots more room to grow. Make sure the containers have drainage holes.
* High-Quality Potting Mix: Don’t use garden soil! It’s too heavy and doesn’t drain well. Use a lightweight potting mix specifically formulated for containers.
* Tomato Cage or Stakes: If you’re growing an indeterminate variety, you’ll need a tomato cage or stakes to support the plant. Even some determinate varieties benefit from support.
* Fertilizer: Use a balanced fertilizer specifically formulated for tomatoes. I prefer organic fertilizers.
* Watering Can or Hose: You’ll need a way to water your plants regularly.
* Hand Trowel: For planting and transplanting.
* Gardening Gloves: To protect your hands.
* Optional: Mulch (straw, wood chips, or shredded leaves) to help retain moisture and suppress weeds.
Planting Your Cherry Tomatoes
Okay, let’s get our hands dirty! Here’s how to plant your cherry tomatoes:
1. Prepare Your Containers: Fill your containers with potting mix, leaving about an inch of space at the top.
2. Planting Seeds (if starting from seed): Sow seeds about ¼ inch deep and water gently. Keep the soil moist but not soggy. Place the containers in a warm, sunny location.
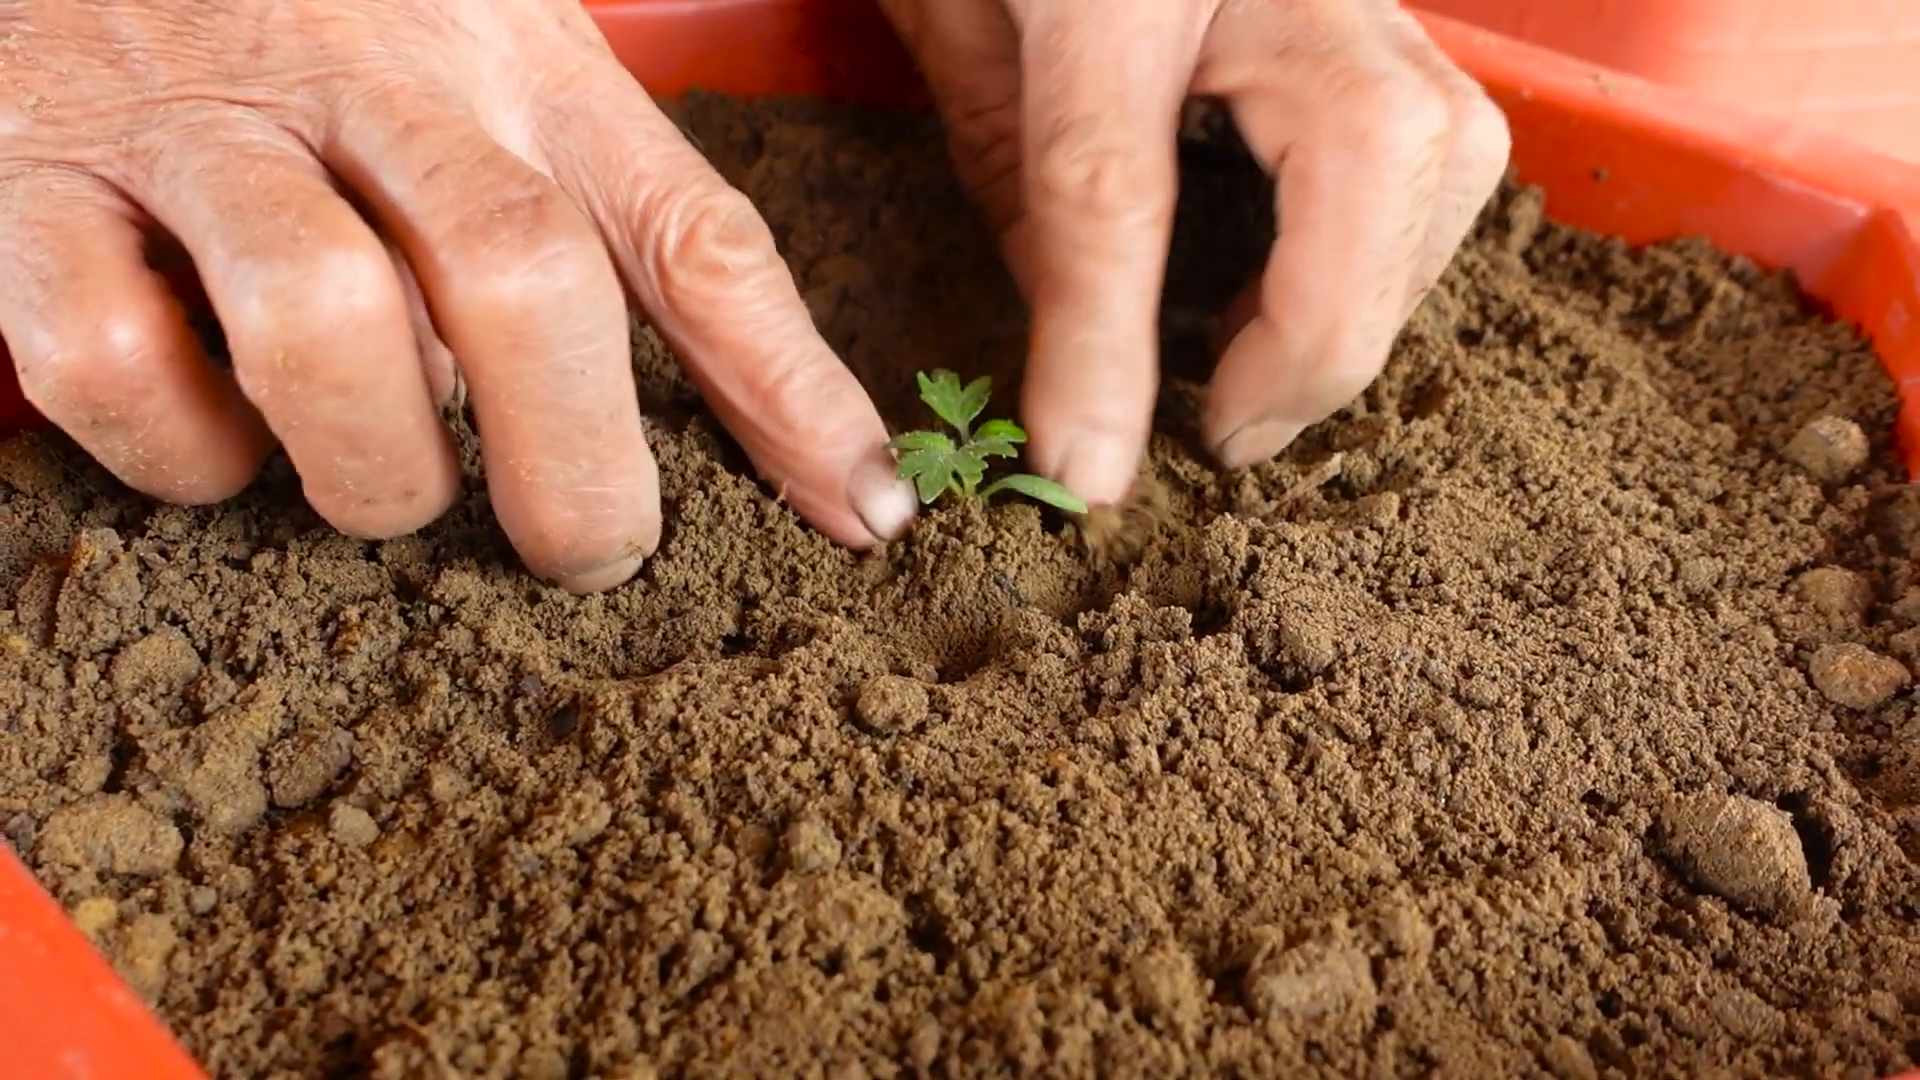
3. Transplanting Seedlings (if using seedlings): Gently remove the seedlings from their pots. If the roots are tightly bound, gently loosen them with your fingers.
4. Dig a Hole: Dig a hole in the potting mix that’s large enough to accommodate the root ball.
5. Plant the Seedling: Place the seedling in the hole and gently backfill with potting mix. Make sure the top of the root ball is level with the soil surface.
6. Water Thoroughly: Water the plant thoroughly after planting.
7. Add Support: If you’re growing an indeterminate variety, install a tomato cage or stakes now. This will help support the plant as it grows.
8. Mulch (Optional): Add a layer of mulch around the base of the plant to help retain moisture and suppress weeds.
Caring for Your Cherry Tomatoes
Now that your cherry tomatoes are planted, it’s time to give them the care they need to thrive.
1. Watering: Water your plants regularly, especially during hot, dry weather. Check the soil moisture by sticking your finger into the soil. If the top inch of soil is dry, it’s time to water. Water deeply, until the water drains out of the drainage holes. Avoid watering the foliage, as this can lead to disease.
2. Fertilizing: Fertilize your plants every 2-3 weeks with a balanced tomato fertilizer. Follow the instructions on the fertilizer package.
3. Sunlight: Cherry tomatoes need at least 6-8 hours of sunlight per day. Place your containers in a sunny location on your balcony. If your balcony doesn’t get enough sunlight, you may need to supplement with grow lights.
4. Pruning: Pruning is important for indeterminate varieties. Remove suckers (the small shoots that grow between the main stem and the branches) to encourage the plant to focus its energy on producing fruit. Determinate varieties generally don’t need much pruning.
5. Pest and Disease Control: Keep an eye out for pests and diseases. Common tomato pests include aphids, whiteflies, and tomato hornworms. Common tomato diseases include early blight, late blight, and blossom end rot. If you see any signs of pests or diseases, take action immediately. You can use organic pesticides and fungicides to control these problems.
6. Pollination: Tomatoes are self-pollinating, but sometimes they need a little help, especially if you live in an area with low bee activity. You can hand-pollinate your tomatoes by gently shaking the plant or using a small paintbrush to transfer pollen from one flower to another.
Troubleshooting Common Problems
Even with the best care, you may encounter some problems while growing cherry tomatoes. Here are some common issues and how to fix them:
* Blossom End Rot: This is a condition where the bottom of the tomato turns black and leathery. It’s caused by a calcium deficiency. To prevent blossom end rot, make sure your soil is rich in calcium and water your plants regularly. You can also add calcium to the soil by adding crushed eggshells or bone meal.
* Yellowing Leaves: Yellowing leaves can be caused by a variety of factors, including nutrient deficiencies, overwatering, and underwatering. Check the soil moisture and fertilize your plants if necessary.
* Cracked Tomatoes: Cracked tomatoes are caused by inconsistent watering. Water your plants regularly and avoid letting the soil dry out completely.
* Pests: As mentioned earlier, keep an eye out for pests and take action immediately if you see any signs of infestation.
Harvesting Your Cherry Tomatoes
The best part of growing cherry tomatoes is, of course, harvesting them! Cherry tomatoes are usually ready to harvest about 60-80 days after transplanting. They should be fully colored and slightly soft to the touch. Gently twist the tomato off the vine.
Tips for Harvesting:
* Harvest your tomatoes in the morning, when they’re at their peak flavor.
* Don’t wait too long to harvest your tomatoes, as they can become overripe and mushy.
* Store your harvested tomatoes at room temperature. Don’t refrigerate them, as this can affect their flavor and texture.
Enjoying Your Homegrown Cherry Tomatoes
Now that you’ve harvested your cherry tomatoes, it’s time to enjoy them! Here are some ideas:
* Eat them fresh off the vine.
* Add them to salads.
* Use them in pasta sauces.
* Make cherry tomato salsa.
* Roast them with herbs and garlic.
* Make sun-dried tomatoes.
Growing cherry tomatoes on your balcony is a rewarding experience. With a little effort, you can enjoy a bounty of fresh, delicious tomatoes all summer long. Happy gardening!
Conclusion
So, there you have it! Growing your own balcony cherry tomatoes is not only achievable, even in the smallest of spaces, but it’s also incredibly rewarding. Forget those bland, store-bought tomatoes that lack that sun-ripened sweetness. With a little effort and this simple DIY trick, you can have a constant supply of juicy, flavorful cherry tomatoes right outside your door.
This isn’t just about saving money (although that’s a definite perk!). It’s about connecting with your food, understanding where it comes from, and experiencing the pure joy of nurturing something from seed to table. Imagine plucking a handful of warm, bursting-with-flavor cherry tomatoes straight from the vine and adding them to your salad, pasta, or simply popping them in your mouth as a healthy snack. The taste difference is truly remarkable.
But the best part? This DIY method for growing balcony cherry tomatoes is incredibly adaptable. Feel free to experiment with different varieties of cherry tomatoes. Yellow pear tomatoes, grape tomatoes, or even black cherry tomatoes can all thrive using this technique. You can also play around with different container sizes and materials. While we’ve focused on using readily available materials, you could certainly invest in more decorative pots or even try vertical gardening systems to maximize your space.
Consider adding companion plants to your tomato containers. Basil, marigolds, and even certain herbs can help deter pests and improve the overall health of your tomato plants. Plus, they add a beautiful touch of color and fragrance to your balcony garden.
Don’t be afraid to get creative with your supports. While bamboo stakes work perfectly well, you could also use tomato cages, trellises, or even repurpose old ladders to create a unique and eye-catching display. The possibilities are endless!
We truly believe that anyone can successfully grow balcony cherry tomatoes with this DIY trick. It’s a fun, engaging, and ultimately delicious project that will bring a touch of nature to your urban oasis. So, gather your supplies, follow our simple steps, and get ready to enjoy the fruits (or rather, vegetables!) of your labor.
We’re confident that you’ll be amazed by the results. But don’t just take our word for it. Give it a try and see for yourself! And most importantly, we want to hear about your experience. Share your photos, tips, and stories with us in the comments below. Let’s create a community of balcony tomato growers and inspire others to embrace the joy of homegrown goodness. Happy gardening!
Frequently Asked Questions (FAQs)
What kind of soil should I use for my balcony cherry tomatoes?
The best soil for balcony cherry tomatoes is a well-draining potting mix specifically formulated for containers. Avoid using garden soil, as it tends to compact in pots and doesn’t provide adequate drainage. Look for a potting mix that contains ingredients like peat moss, perlite, and vermiculite. These ingredients help to retain moisture while also ensuring good drainage, which is crucial for healthy tomato growth. You can also amend your potting mix with compost to provide additional nutrients.
How often should I water my balcony cherry tomatoes?
Watering frequency depends on several factors, including the weather, the size of your container, and the type of potting mix you’re using. As a general rule, water your tomato plants deeply whenever the top inch of soil feels dry to the touch. During hot, sunny weather, you may need to water them daily, or even twice a day. Avoid overwatering, as this can lead to root rot. A good way to check if your plants need water is to stick your finger into the soil. If it feels dry, it’s time to water. Also, pay attention to the leaves of your tomato plants. If they start to wilt, it’s a sign that they need water.
How much sunlight do balcony cherry tomatoes need?
Cherry tomatoes need at least 6-8 hours of direct sunlight per day to thrive. Choose a location on your balcony that receives plenty of sunlight throughout the day. If your balcony doesn’t get enough direct sunlight, you may need to supplement with grow lights.
Do I need to fertilize my balcony cherry tomatoes?
Yes, fertilizing is essential for healthy tomato growth and abundant fruit production. Use a balanced fertilizer specifically formulated for tomatoes. Follow the instructions on the fertilizer package for application rates and frequency. You can also use organic fertilizers, such as compost tea or fish emulsion. Start fertilizing your tomato plants a few weeks after transplanting them into their containers, and continue fertilizing them throughout the growing season.
How do I prevent pests and diseases on my balcony cherry tomatoes?
Prevention is key when it comes to pests and diseases. Start by choosing disease-resistant tomato varieties. Inspect your plants regularly for signs of pests or diseases. If you spot any problems, address them promptly. You can use organic pest control methods, such as insecticidal soap or neem oil, to control pests. To prevent diseases, ensure good air circulation around your plants and avoid overwatering. You can also use a copper fungicide to protect your plants from fungal diseases.
How do I support my balcony cherry tomato plants?
Cherry tomato plants can get quite tall and heavy, so it’s important to provide them with adequate support. You can use tomato cages, stakes, or trellises to support your plants. Insert the support structure into the container when you transplant your tomato plants, and tie the stems to the support as they grow.
When should I harvest my balcony cherry tomatoes?
Cherry tomatoes are typically ready to harvest about 60-80 days after transplanting. The tomatoes should be fully colored and slightly soft to the touch. Gently twist the tomatoes off the vine when they are ripe.
Can I grow balcony cherry tomatoes in hanging baskets?
Yes, you can grow balcony cherry tomatoes in hanging baskets, especially smaller, bushier varieties. Make sure the hanging basket is large enough to accommodate the mature size of the plant, and use a well-draining potting mix. Water and fertilize regularly, and provide adequate support for the stems.
What are some good companion plants for balcony cherry tomatoes?
Good companion plants for balcony cherry tomatoes include basil, marigolds, nasturtiums, and onions. Basil helps to repel pests and improve the flavor of tomatoes. Marigolds also repel pests and attract beneficial insects. Nasturtiums attract aphids away from tomato plants. Onions help to deter pests and improve the overall health of tomato plants.
My balcony cherry tomatoes are not producing fruit. What could be the problem?
There are several reasons why your balcony cherry tomatoes may not be producing fruit. Some common causes include lack of sunlight, insufficient watering, lack of pollination, and nutrient deficiencies. Make sure your plants are getting at least 6-8 hours of direct sunlight per day, water them regularly, and fertilize them with a balanced tomato fertilizer. You can also try hand-pollinating your tomato flowers by gently shaking the plants or using a small brush to transfer pollen from one flower to another. If you suspect a nutrient deficiency, have your soil tested and amend it accordingly.

Leave a Comment