
Backyard Watermelon Growing: Your Guide to Juicy Success
Backyard watermelon growing might seem daunting, conjuring images of sprawling vines and elusive, perfectly ripe fruit. But I’m here to tell you it’s far more achievable than you think! This article is your passport to a summer bursting with the sweet, refreshing taste of homegrown watermelons, all from the comfort of your own backyard. I’ll share my tried-and-true Backyard Watermelon Growing techniques, simple DIY tricks, and insider tips to help you cultivate a bountiful harvest.
The history of watermelon cultivation is fascinating, stretching back thousands of years to ancient Egypt. These juicy delights weren’t just a tasty treat; they held cultural significance, appearing in artwork and even being included in tombs as offerings. Today, the joy of growing your own watermelons remains, offering a connection to this rich history while providing a delicious, healthy reward.
Why Grow Your Own Watermelons?
Let’s be honest, store-bought watermelons can be disappointing. Often picked before they’re fully ripe to withstand transport, they lack the intense sweetness and juicy texture of a perfectly ripened melon. With Backyard Watermelon Growing, you’ll experience the unparalleled satisfaction of biting into a watermelon bursting with flavor, knowing you nurtured it from seed to succulent slice. Plus, you’ll save money and avoid potentially harmful pesticides.
This article is packed with practical advice, from selecting the right seeds and preparing the ideal soil to dealing with common pests and harvesting your prize-winning melons. Get ready to transform your backyard into a watermelon paradise! Let’s dive into the juicy details of Backyard Watermelon Growing and unlock the secrets to a successful harvest.
Growing Your Own Backyard Watermelons: A Complete Guide
I love the juicy sweetness of a perfectly ripe watermelon, and nothing beats the satisfaction of growing your own. This guide will walk you through the entire process, from seed to succulent slice!
Phase 1: Planning and Preparation
- Choose your watermelon variety: Research different varieties to find one that suits your climate and growing season. Consider factors like size, sweetness, and disease resistance. Some popular choices include Sugar Baby (small and early maturing), Crimson Sweet (classic large watermelon), and Yellow Doll (smaller, yellow-fleshed variety).
- Select a sunny location: Watermelons need at least six to eight hours of direct sunlight per day. Choose a spot in your backyard that receives ample sun.
- Prepare the soil: Watermelons thrive in well-drained, fertile soil. Amend heavy clay soil with compost or other organic matter to improve drainage and aeration. Conduct a soil test to determine its pH level; watermelons prefer a slightly acidic to neutral pH (6.0-6.8).
- Gather your supplies: You’ll need watermelon seeds, gardening gloves, a trowel or shovel, a watering can, fertilizer (balanced, slow-release is best), and possibly some garden netting or stakes for support (depending on the variety).
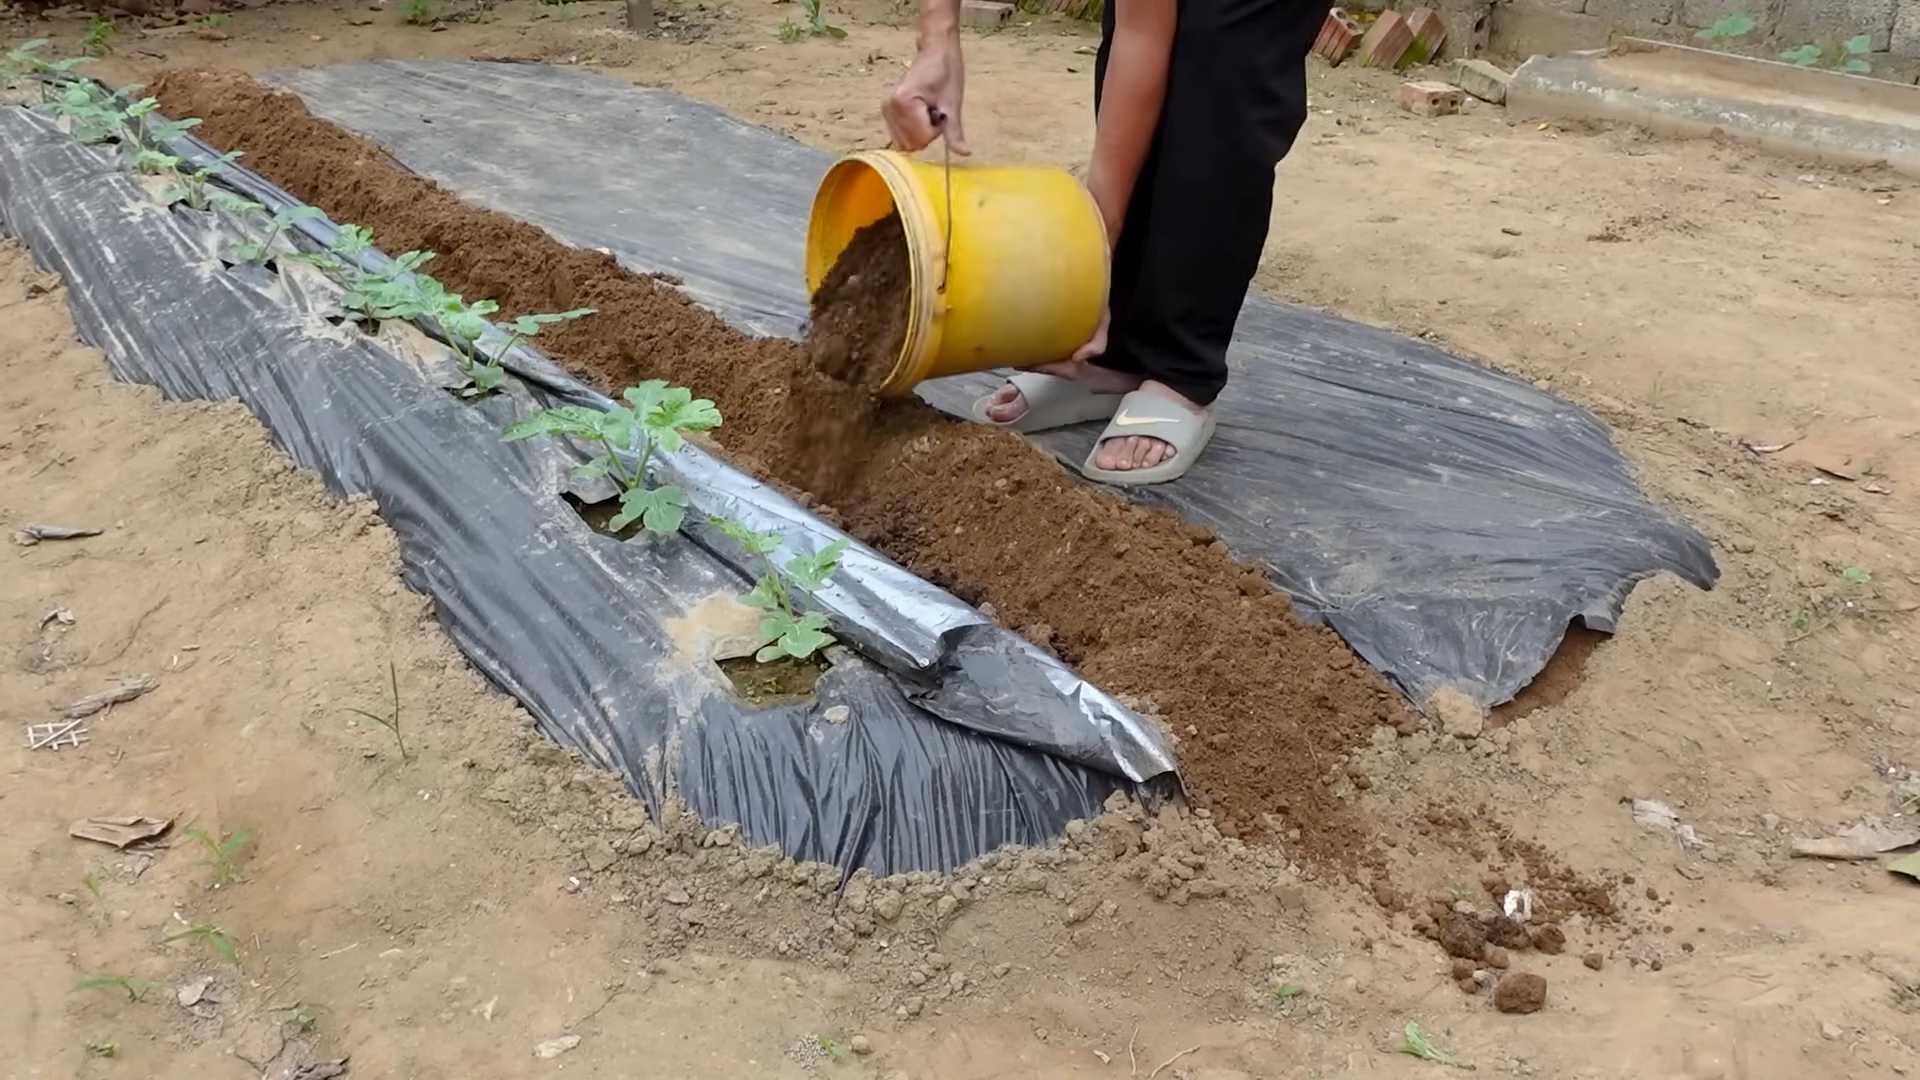
Phase 2: Planting Your Watermelon Seeds
- Start seeds indoors (optional): For an earlier harvest, start seeds indoors 2-3 weeks before the last expected frost. Use small pots or seed trays filled with seed-starting mix. Plant seeds about an inch deep and keep the soil moist.
- Direct sowing: Alternatively, you can sow seeds directly into the garden after the last frost. Wait until the soil temperature is consistently above 70°F (21°C). Plant seeds in hills, spacing them 2-3 feet apart. Each hill should contain 3-4 seeds.
- Thinning: Once seedlings emerge, thin each hill to the strongest 1-2 plants. This allows for better growth and fruit development.
- Watering: Water regularly, especially during dry periods. Aim for consistent moisture, but avoid overwatering, which can lead to root rot.
Phase 3: Nurturing Your Watermelon Plants
- Fertilizing: Apply a balanced fertilizer according to package instructions. Side-dress the plants (apply fertilizer along the sides of the plants) about a month after planting. Avoid over-fertilizing, which can lead to excessive foliage and fewer fruits.
- Weed control: Regularly remove weeds around the plants to prevent competition for nutrients and water. Mulching can help suppress weeds and retain soil moisture.
- Pest and disease management: Monitor your plants for pests like aphids, squash bugs, and cucumber beetles. Use appropriate organic pest control methods if necessary. Be vigilant for diseases like powdery mildew and anthracnose; good air circulation and proper watering can help prevent these issues.
- Support (if needed): Some watermelon varieties, especially larger ones, may require support. You can use garden netting or stakes to keep the vines off the ground and prevent rotting.
- Pollination: Watermelons are typically pollinated by bees. If you have few bees in your area, you might consider hand-pollination by transferring pollen from the male flowers (smaller flowers with no developing fruit) to the female flowers (flowers with a small fruit behind them).
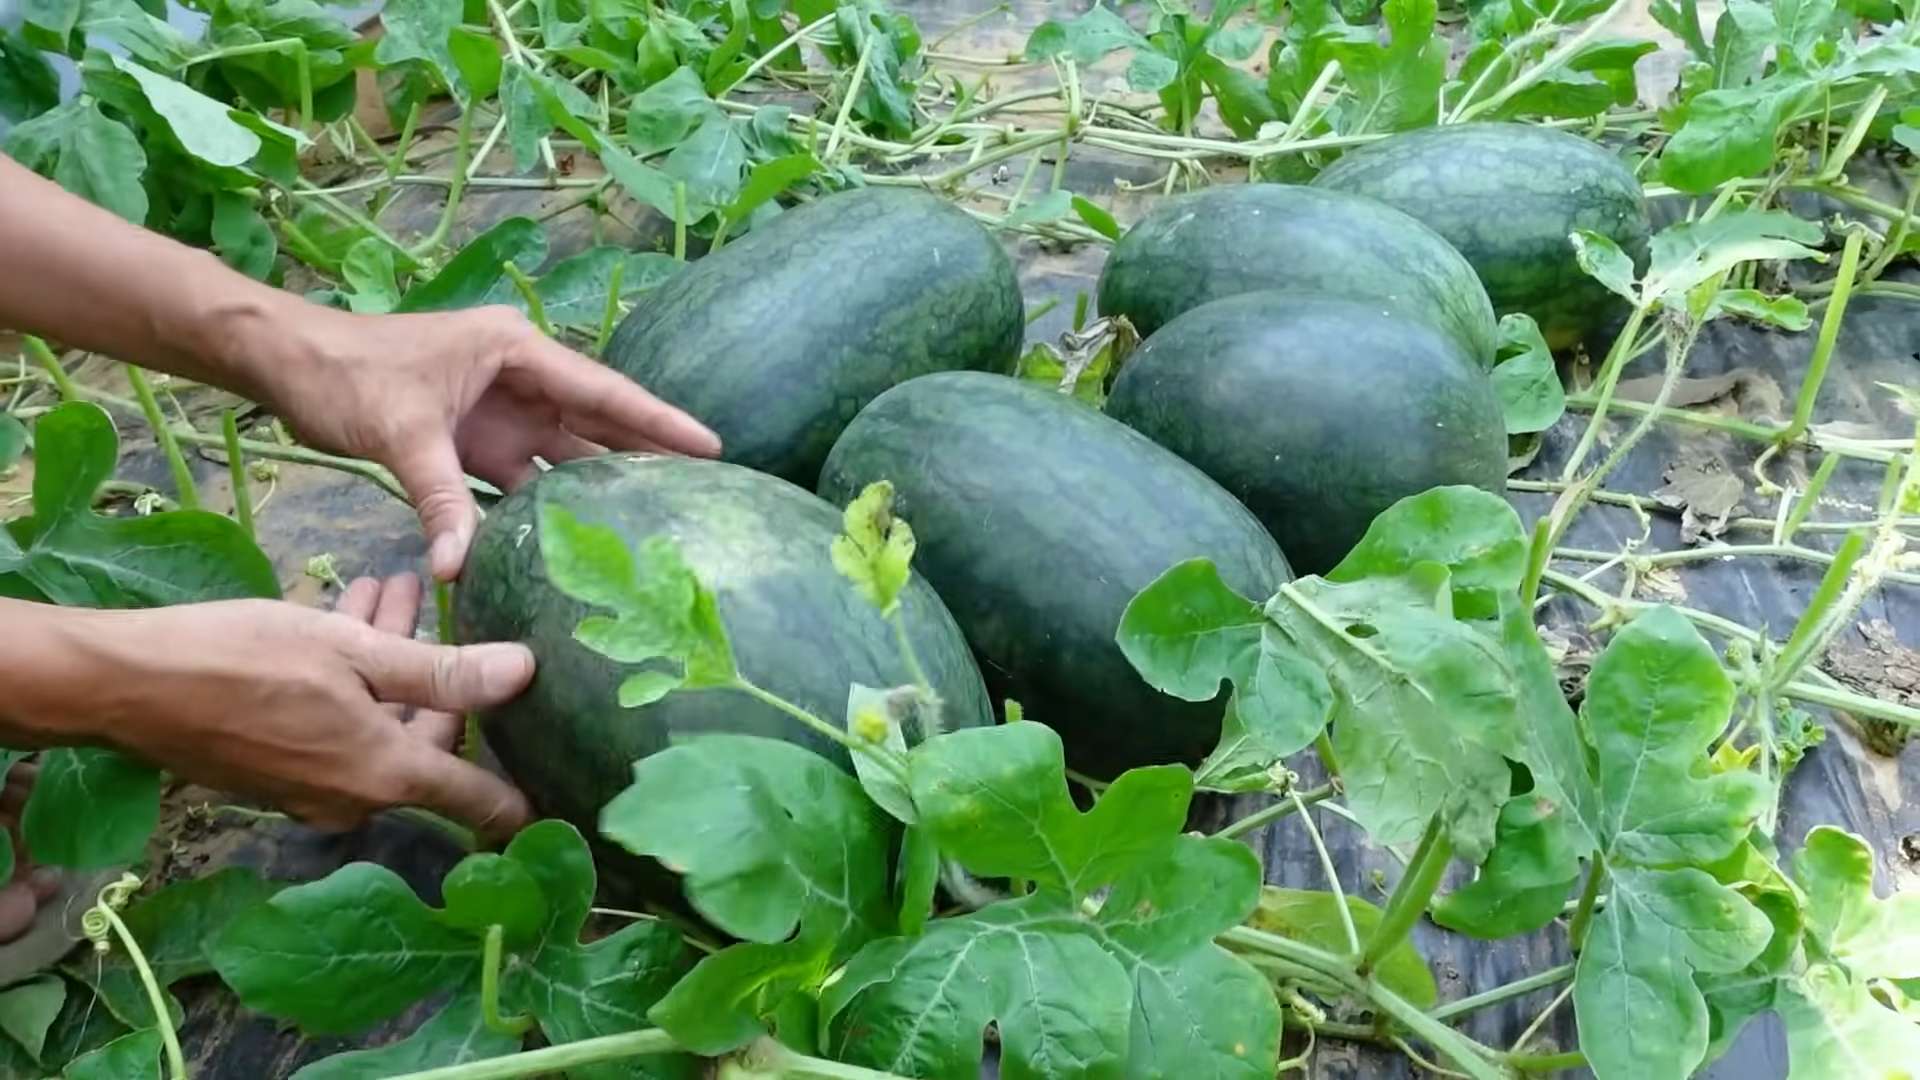
Phase 4: Harvesting Your Watermelons
- Identifying ripeness: The best way to tell if a watermelon is ripe is by its appearance and sound. The rind should be firm and have a dull appearance, not shiny. When you thump it, it should produce a deep, hollow sound. The tendril closest to the watermelon will turn brown and dry.
- Harvesting: Once ripe, carefully cut the watermelon from the vine using a sharp knife. Avoid damaging the fruit.
- Curing: Allow the harvested watermelons to cure for a few days in a cool, dry place. This improves their flavor and shelf life.
Phase 5: Troubleshooting Common Problems
- Yellowing leaves: This can indicate nutrient deficiencies, overwatering, or pest problems. Check your soil, watering habits, and look for pests.
- Wilting plants: This could be due to underwatering, pest damage, or disease. Check the soil moisture and inspect the plants for signs of pests or disease.
- Small or misshapen fruit: This can result from poor pollination, nutrient deficiencies, or overcrowding. Ensure adequate pollination and provide sufficient nutrients and space for the plants.
- Bitter tasting watermelons: This is often caused by inconsistent watering or stress during the growing season. Aim for consistent moisture and protect plants from extreme weather conditions.
Remember: Patience is key! Growing watermelons takes time and effort, but the reward of enjoying your homegrown fruit is well worth it. Happy growing!
Conclusion
So there you have it – your guide to successfully growing juicy, sweet watermelons right in your own backyard! This DIY approach to watermelon cultivation offers a rewarding experience unlike any other. You get to witness the entire life cycle of this amazing fruit, from tiny seed to ripe, ready-to-eat melon. Beyond the delicious payoff, the process itself is incredibly satisfying. There’s a unique sense of accomplishment in nurturing a plant from seed to harvest, and the taste of a homegrown watermelon is simply unparalleled. This backyard watermelon growing method is a must-try for anyone with even a small patch of land and a desire for fresh, flavorful fruit. It’s a fantastic project for families, a rewarding hobby for individuals, and a surprisingly simple way to enhance your summer.
Beyond the basic method outlined, there are countless opportunities for experimentation and personalization. Consider trying different watermelon varieties to discover your favorite flavor profiles. Some varieties are better suited to smaller spaces, while others thrive in larger gardens. Experiment with companion planting – certain plants, like basil or nasturtiums, can help deter pests and improve soil health. You can also explore different mulching techniques to retain moisture and suppress weeds. For those with limited space, consider vertical gardening methods or growing watermelons in large containers. The possibilities are truly endless!
Don’t be afraid to get creative and adapt the techniques to your specific environment and preferences. The beauty of this DIY approach is its flexibility. Whether you’re a seasoned gardener or a complete beginner, you’ll find this process accessible and rewarding. The key is to start with healthy seeds, provide adequate sunlight and water, and nurture your plants with care. Remember, patience is key – watermelons take time to mature, but the wait is absolutely worth it.
We strongly encourage you to try this backyard watermelon growing method and share your experience with us! Post pictures of your thriving vines and delicious harvests on social media using #BackyardWatermelonGrowing. We’d love to see your success stories and learn from your experiences. Let’s build a community of backyard watermelon enthusiasts, sharing tips, tricks, and the joy of homegrown goodness. This isn’t just about growing watermelons; it’s about connecting with nature, enjoying the fruits of your labor, and savoring the sweet taste of success. So grab your seeds, prepare your soil, and get ready for a summer filled with the delightful crunch and refreshing sweetness of homegrown watermelons. Happy growing!
Frequently Asked Questions
What type of soil is best for growing watermelons?
Watermelons thrive in well-drained, sandy loam soil with a slightly acidic pH (around 6.0-6.8). Amend heavy clay soils with organic matter like compost to improve drainage. Poorly drained soil can lead to root rot, so good drainage is crucial. Before planting, test your soil’s pH and amend as needed to ensure optimal conditions for watermelon growth.
How much sunlight do watermelons need?
Watermelons are sun-worshippers! They need at least six to eight hours of direct sunlight per day to produce abundant fruit. Choose a location in your backyard that receives ample sunlight throughout the day. Insufficient sunlight can result in poor fruit production and smaller, less flavorful melons.
How often should I water my watermelons?
Consistent watering is essential, especially during the fruiting stage. Aim for deep, infrequent watering rather than shallow, frequent watering. Water deeply at the base of the plant, avoiding wetting the leaves to prevent fungal diseases. The frequency of watering will depend on your climate and soil conditions; monitor the soil moisture and water when the top inch or two feels dry.
When can I expect to harvest my watermelons?
The time it takes for watermelons to mature varies depending on the variety, but generally ranges from 70 to 90 days from planting. Look for signs of ripeness, such as a deep color, a dull sound when thumped, and a slightly sweet aroma near the stem. A ripe watermelon will also have a yellowish spot where it rested on the ground.
What are some common problems when growing watermelons?
Common problems include pests like aphids, squash bugs, and cucumber beetles, as well as diseases like powdery mildew and anthracnose. Regularly inspect your plants for signs of pests or diseases and take appropriate action, such as using insecticidal soap or neem oil for pests, and ensuring good air circulation to prevent fungal diseases. Proper soil preparation and consistent watering can also help prevent many problems.
Can I grow watermelons in containers?
Yes, you can grow watermelons in large containers, but choose a variety specifically bred for container growing, as these tend to be smaller and more compact. Ensure the container is at least 18 inches in diameter and depth to accommodate the watermelon’s root system. Use a well-draining potting mix and provide ample sunlight and water.
What should I do if my watermelon plants are not producing fruit?
Several factors can affect fruit production, including insufficient sunlight, poor soil conditions, inadequate pollination, or improper watering. Ensure your plants are receiving enough sunlight, the soil is well-drained and fertile, and that you are watering consistently. Hand-pollination may be necessary if there are insufficient pollinators in your area. Consider consulting a local gardening expert for further assistance if problems persist.
How do I store my harvested watermelons?
Store harvested watermelons in a cool, dry place at room temperature. Avoid refrigerating watermelons until they are ready to be eaten, as refrigeration can affect their flavor and texture. A ripe watermelon should last for about a week or two at room temperature.


Leave a Comment