
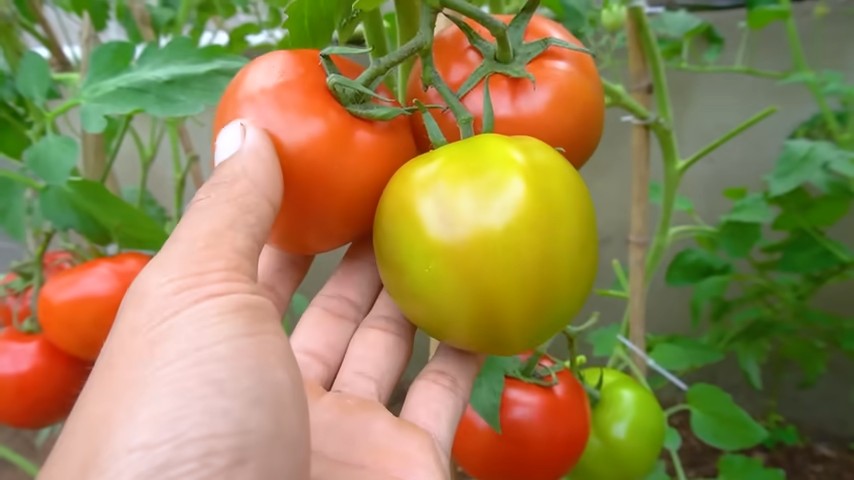
Container Tomatoes Clever Hack: Ever dream of harvesting juicy, sun-ripened tomatoes right from your patio, balcony, or even your kitchen windowsill? I know I have! But let’s be honest, growing tomatoes in containers can sometimes feel like a battle against the odds. You’re fighting limited space, nutrient deficiencies, and the ever-present threat of pests.
For centuries, humans have cultivated tomatoes, tracing their origins back to South America. From humble beginnings, they’ve become a global staple, a symbol of summer abundance and culinary delight. But the traditional in-ground garden isn’t always accessible, especially for urban dwellers. That’s where the magic of container gardening comes in!
That’s why I’m so excited to share this container tomatoes clever hack with you! This simple, yet effective trick will help you maximize your yield, minimize your effort, and finally achieve that bountiful tomato harvest you’ve always wanted. Forget complicated setups and expensive equipment. This DIY solution is all about working smarter, not harder. I’ll guide you through each step, ensuring even beginners can enjoy the satisfaction of growing their own delicious tomatoes. Get ready to transform your container tomato gardening game!
Container Tomatoes: The Clever Self-Watering Hack You NEED to Try!
Okay, tomato lovers, listen up! I’m about to share a game-changing hack that will transform your container tomato growing experience. Forget constant watering and wilting plants – this self-watering system is a lifesaver, especially during those scorching summer months. I’ve been using this method for years, and my tomato yields have skyrocketed. Trust me, you’ll thank me later!
This project is perfect for anyone, whether you’re a seasoned gardener or just starting out. It’s relatively inexpensive, uses readily available materials, and is surprisingly easy to put together. Let’s dive in!
What You’ll Need: The Supply List
Before we get started, let’s gather all the necessary materials. This will make the process smoother and prevent any frustrating mid-project trips to the hardware store.
* Two Plastic Storage Bins: You’ll need two bins of the same size. I recommend bins that are at least 18 inches deep and wide for optimal root growth. The deeper, the better! Choose food-grade plastic if possible, just to be extra safe.
* Drill with Various Drill Bits: A drill is essential for creating drainage and overflow holes. You’ll need a small bit for drainage and a larger one for the overflow.
* PVC Pipe (4-inch diameter): This will act as our watering reservoir. The length depends on the depth of your bins, but aim for a length that’s a few inches shorter than the bin’s height.
* PVC End Cap: To seal the bottom of the PVC pipe and prevent water leakage.
* Landscape Fabric or Weed Barrier: This will prevent soil from clogging the watering reservoir.
* Potting Mix: Choose a high-quality potting mix specifically formulated for vegetables. Avoid using garden soil, as it can compact in containers and hinder drainage.
* Tomato Seedling: Select a healthy tomato seedling of your favorite variety. Determinate (bush) or indeterminate (vining) varieties both work well.
* Measuring Tape or Ruler: For accurate measurements when drilling holes and cutting the PVC pipe.
* Utility Knife or Saw: For cutting the PVC pipe if necessary.
* Gloves: To protect your hands from dirt and potential scratches.
* Safety Glasses: Always wear safety glasses when drilling or cutting.
* Optional: Mulch (straw, wood chips, etc.) to help retain moisture and suppress weeds.
Phase 1: Preparing the Bins
This is where we transform ordinary storage bins into a self-watering haven for our tomato plants.
1. Drill Drainage Holes in the Bottom Bin: Take one of the bins (this will be the bottom bin) and drill several drainage holes in the bottom. I usually drill about 10-12 holes, evenly spaced. These holes are crucial for preventing waterlogging and ensuring proper drainage. Use a small drill bit (around 1/4 inch) for this step.
2. Drill an Overflow Hole in the Bottom Bin: Now, drill an overflow hole on the side of the bottom bin, about 2-3 inches from the bottom. This hole will allow excess water to escape, preventing the roots from sitting in standing water. Use a slightly larger drill bit (around 1/2 inch) for the overflow hole.
3. Prepare the Top Bin: The top bin will hold the potting mix and the tomato plant. We need to create a way for the water to wick up from the reservoir in the bottom bin. To do this, drill several holes in the bottom of the top bin. These holes should be smaller than the drainage holes in the bottom bin (around 1/8 inch). I usually drill about 15-20 holes, evenly spaced.
4. Line the Top Bin with Landscape Fabric: Cut a piece of landscape fabric that’s slightly larger than the bottom of the top bin. Place the fabric inside the top bin, covering the drainage holes. This will prevent the potting mix from falling into the water reservoir and clogging it.
Phase 2: Constructing the Watering Reservoir
The watering reservoir is the heart of this self-watering system. It provides a constant supply of water to the tomato plant, reducing the need for frequent watering.
1. Prepare the PVC Pipe: If your PVC pipe is too long, use a utility knife or saw to cut it to the desired length. Remember, the pipe should be a few inches shorter than the height of the bins.
2. Attach the End Cap: Securely attach the PVC end cap to one end of the PVC pipe. This will create a sealed bottom for the reservoir. You can use PVC cement for a permanent bond, but it’s not strictly necessary. A tight fit should suffice.
3. Position the PVC Pipe: Place the PVC pipe upright in the center of the bottom bin. This will be our watering reservoir.
Phase 3: Assembling the Self-Watering Container
Now comes the exciting part – putting everything together!
1. Place the Top Bin Inside the Bottom Bin: Carefully place the top bin inside the bottom bin, ensuring that it sits securely on top of the PVC pipe. The bottom of the top bin should be a few inches above the bottom of the bottom bin, creating a water reservoir.
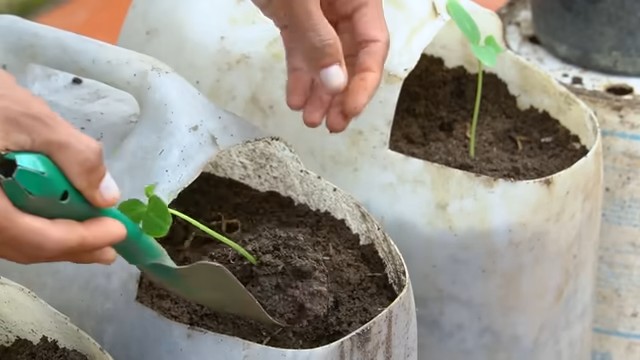
2. Fill the Top Bin with Potting Mix: Gradually fill the top bin with potting mix, leaving a few inches of space at the top. Gently pat down the soil to remove any air pockets.
3. Plant the Tomato Seedling: Dig a hole in the center of the potting mix, large enough to accommodate the root ball of the tomato seedling. Carefully remove the seedling from its container and place it in the hole. Gently backfill with potting mix and water thoroughly.
4. Add Mulch (Optional): Apply a layer of mulch around the base of the tomato plant. This will help retain moisture, suppress weeds, and regulate soil temperature.
Phase 4: Watering and Maintenance
Congratulations! You’ve successfully built your self-watering tomato container. Now, let’s talk about watering and maintenance.
1. Initial Watering: For the first few days, water the tomato plant from the top, as you normally would. This will help the roots establish themselves in the new potting mix.
2. Watering the Reservoir: After the initial watering, start filling the water reservoir through the PVC pipe. Use a watering can or hose to fill the pipe until the water reaches the overflow hole.
3. Monitoring the Water Level: Check the water level in the reservoir regularly, especially during hot weather. You can use a dipstick or simply look inside the PVC pipe. Refill the reservoir as needed.
4. Fertilizing: Tomato plants are heavy feeders, so it’s important to fertilize them regularly. Use a liquid fertilizer specifically formulated for tomatoes, following the instructions on the label. You can add the fertilizer to the water in the reservoir.
5. Pruning: Prune your tomato plant regularly to remove suckers (the small shoots that grow between the main stem and the branches). This will encourage the plant to focus its energy on producing fruit.
6. Staking or Caging: As the tomato plant grows, it will need support. Use stakes or a tomato cage to prevent the plant from falling over.
7. Pest and Disease Control: Keep an eye out for pests and diseases. If you notice any problems, take action immediately. There are many organic pest control and disease control options available.
Troubleshooting Tips
Even with the best planning, sometimes things don’t go exactly as expected. Here are a few troubleshooting tips to help you overcome common challenges:
* Water Not Wicking Up: If the water isn’t wicking up properly, make sure the drainage holes in the top bin are not clogged. You can also try adding a small amount of perlite or vermiculite to the potting mix to improve drainage.
* Too Much Water: If the potting mix is constantly soggy, you may have too many drainage holes in the top bin. Try covering some of the holes with landscape fabric.
* Root Rot: Root rot is a common problem in container gardening. To prevent root rot, make sure the drainage holes in the bottom bin are not clogged and avoid overwatering.
* Pest Infestations: Pests can be a nuisance in any garden. Regularly inspect your tomato plants for pests and take action immediately if you notice any problems.
Why This Hack Works So Well
This self-watering container hack is so effective because it provides a consistent supply of water to the tomato plant, reducing the stress of drought and overwatering. The water reservoir acts as a buffer, ensuring that the plant always has access to moisture. This leads to healthier plants, higher yields, and less work for you!
The benefits are numerous:
* Reduced Watering Frequency: Say goodbye to daily watering! This system significantly reduces the need for frequent watering, especially during hot weather.
* Healthier Plants: Consistent moisture
Conclusion
So, there you have it! This clever hack for growing container tomatoes is more than just a gardening shortcut; it’s a game-changer for anyone who dreams of vine-ripened goodness right outside their door, regardless of space constraints. We’ve explored how this simple technique can transform your patio, balcony, or even a sunny windowsill into a thriving tomato haven.
Why is this a must-try? Because it addresses the core challenges of container gardening: space limitations, nutrient management, and the need for consistent watering. By strategically placing your tomato seedlings deep within the container, you’re encouraging a robust root system that can access moisture and nutrients more efficiently. This translates to healthier plants, higher yields, and ultimately, more delicious tomatoes for your summer salads, sauces, and snacks.
But the beauty of this method lies in its adaptability. Feel free to experiment with different tomato varieties. Cherry tomatoes and other smaller varieties are particularly well-suited for container growing, but don’t let that stop you from trying your hand at larger heirloom varieties. Just be sure to provide adequate support, such as sturdy stakes or cages, as the plants mature.
Consider enriching your soil with compost or other organic matter to provide an extra boost of nutrients. You can also supplement with a balanced liquid fertilizer throughout the growing season, following the instructions on the product label. And don’t forget the importance of sunlight! Tomatoes thrive in at least six to eight hours of direct sunlight per day, so choose a location that receives plenty of sunshine.
Beyond the basic technique, there are countless ways to customize this approach to suit your specific needs and preferences. Try companion planting basil or marigolds in the same container to deter pests and attract beneficial insects. Or, experiment with different types of containers, from traditional terracotta pots to repurposed buckets or grow bags. The possibilities are endless!
Ultimately, the success of your container tomato garden depends on your willingness to experiment, observe, and adapt. Pay attention to your plants’ needs, and don’t be afraid to make adjustments along the way. With a little bit of care and attention, you’ll be rewarded with a bountiful harvest of homegrown tomatoes that are bursting with flavor.
We are confident that this clever hack will revolutionize your container gardening experience. It’s simple, effective, and incredibly rewarding. So, grab your supplies, get your hands dirty, and prepare to be amazed by the results.
Now, we want to hear from you! Have you tried this method for growing container tomatoes? What were your results? Do you have any tips or tricks to share? We encourage you to leave a comment below and share your experience with the community. Let’s learn from each other and create a world where everyone can enjoy the taste of homegrown tomatoes, no matter where they live. Your insights could be invaluable to other gardeners who are just starting out. Let’s cultivate a community of thriving container gardeners!
Frequently Asked Questions (FAQ)
What type of container is best for this method?
The ideal container size depends on the tomato variety you choose. For smaller varieties like cherry tomatoes, a 5-gallon container may suffice. However, for larger varieties, opt for a 10-gallon or even larger container to provide ample space for root growth. Ensure the container has drainage holes to prevent waterlogging. Terracotta pots, plastic containers, and even repurposed buckets can work well, as long as they meet these criteria. Grow bags are also a popular option, as they provide excellent drainage and aeration.
How deep should I plant the tomato seedling?
This is the key to the entire hack! Plant the tomato seedling much deeper than you normally would. Remove the lower leaves from the stem, leaving only the top few sets of leaves. Then, bury the stem up to the remaining leaves. The buried stem will develop roots, creating a stronger and more extensive root system. This allows the plant to access more nutrients and water, leading to healthier growth and higher yields.
What type of soil should I use?
Use a high-quality potting mix specifically formulated for containers. Avoid using garden soil, as it can become compacted in containers and hinder drainage. A good potting mix will be lightweight, well-draining, and contain essential nutrients. Consider amending the potting mix with compost or other organic matter to further enrich the soil and improve its water-holding capacity.
How often should I water my container tomatoes?
Water your container tomatoes regularly, especially during hot and dry weather. The frequency of watering will depend on factors such as the weather, the size of the container, and the type of soil. Check the soil moisture level regularly by sticking your finger into the soil. If the top inch or two feels dry, it’s time to water. Water deeply, until water drains out of the drainage holes. Avoid overwatering, as this can lead to root rot.
What kind of fertilizer should I use?
Use a balanced liquid fertilizer specifically formulated for tomatoes. Follow the instructions on the product label for application rates and frequency. Fertilize regularly throughout the growing season to provide your plants with the nutrients they need to thrive. You can also supplement with organic fertilizers such as compost tea or fish emulsion.
How much sunlight do container tomatoes need?
Tomatoes need at least six to eight hours of direct sunlight per day to thrive. Choose a location that receives plenty of sunshine. If you live in a particularly hot climate, you may need to provide some afternoon shade to prevent the plants from overheating.
How do I support my tomato plants?
As your tomato plants grow, they will need support to prevent them from falling over. Use sturdy stakes, cages, or trellises to support the plants. Tie the stems to the support structure with soft twine or plant ties.
How do I deal with pests and diseases?
Monitor your tomato plants regularly for signs of pests and diseases. Common pests include aphids, whiteflies, and tomato hornworms. Common diseases include early blight, late blight, and blossom end rot. Treat pests and diseases promptly with appropriate organic or chemical controls. Companion planting with basil or marigolds can help deter pests. Ensure good air circulation around the plants to prevent fungal diseases.
What is blossom end rot and how do I prevent it?
Blossom end rot is a common problem in tomatoes, characterized by a dark, leathery spot on the bottom of the fruit. It is caused by a calcium deficiency, which can be exacerbated by inconsistent watering. To prevent blossom end rot, ensure that your plants receive consistent watering and that the soil is rich in calcium. You can also add calcium supplements to the soil.
Can I grow container tomatoes indoors?
While it’s possible to grow container tomatoes indoors, it can be challenging to provide them with the amount of sunlight they need. If you choose to grow tomatoes indoors, you will need to supplement with grow lights. Choose a sunny location and use grow lights to provide at least 12 to 16 hours of light per day.
What are some good tomato varieties for containers?
Many tomato varieties are well-suited for container growing. Some popular choices include cherry tomatoes, grape tomatoes, patio tomatoes, and dwarf varieties. These varieties tend to be smaller and more compact, making them ideal for containers. However, you can also grow larger heirloom varieties in containers, as long as you provide them with adequate space and support.
How long does it take to grow tomatoes in containers?
The time it takes to grow tomatoes in containers depends on the variety you choose and the growing conditions. Generally, it takes about 60 to 85 days from transplanting to harvest. Cherry tomatoes tend to mature faster than larger varieties.
Can I reuse the soil from my container tomatoes?
It’s generally not recommended to reuse the soil from your container tomatoes, as it may be depleted of nutrients and harbor pests or diseases. However, if you choose to reuse the soil, you should amend it with fresh compost or other organic matter to replenish the nutrients. You should also sterilize the soil to kill any pests or diseases.
What if my tomato plant is not producing fruit?
There are several reasons why your tomato plant may not be producing fruit. Common causes include lack of pollination, insufficient sunlight, and nutrient deficiencies. Ensure that your plants are receiving adequate sunlight and nutrients. You can also hand-pollinate the flowers by gently shaking the plant or using a small brush to transfer pollen from one flower to another.
How do I know when my tomatoes are ripe?
Tomatoes are ripe when they have reached their full color and are slightly soft to the touch. The color will vary depending on the variety. Gently twist the tomato from the vine. If it comes off easily, it’s ripe.
Leave a Comment