
Grow Celery at Home? Absolutely! Imagine stepping into your backyard and snipping fresh, crisp celery stalks for your salads, soups, or even a healthy snack. No more limp, store-bought celery that’s been sitting on the shelf for days. This isn’t just a dream; it’s a reality you can easily achieve with a few simple tricks and a little bit of patience.
Celery, with its refreshing crunch and subtle flavor, has been cultivated for centuries. Originating in the Mediterranean region, it was initially valued for its medicinal properties before becoming a culinary staple. From ancient Roman banquets to modern-day kitchens, celery has consistently added a unique touch to our diets. But why rely on grocery stores when you can have a thriving celery patch right outside your door?
Let’s face it, buying fresh produce can be expensive, and sometimes the quality just isn’t there. Plus, knowing exactly where your food comes from and how it’s grown is incredibly satisfying. That’s where this DIY guide comes in! I’m going to share some easy-to-follow tips and tricks that will empower you to grow celery at home, regardless of your gardening experience. Whether you have a sprawling garden or just a small balcony, I’ll show you how to cultivate this versatile vegetable and enjoy the freshest celery you’ve ever tasted. Get ready to ditch the store-bought stuff and embrace the joy of homegrown goodness!
Grow Your Own Celery: A Beginner’s Guide
Hey there, fellow gardening enthusiasts! Ever thought about growing your own celery? It’s surprisingly easy and rewarding, and nothing beats the fresh, crisp taste of homegrown celery. I’m going to walk you through the whole process, from starting seeds to harvesting your crunchy stalks. Let’s get started!
Choosing Your Celery Variety
First things first, let’s talk about celery varieties. There are a few popular choices, each with its own characteristics:
* ‘Utah Tall Green’: This is a classic, reliable variety known for its tall, dark green stalks and strong celery flavor. It’s a great all-around choice.
* ‘Golden Self-Blanching’: If you prefer a milder flavor and lighter color, this variety is for you. It’s naturally paler and sweeter than green varieties.
* ‘Giant Red’: For something a little different, try ‘Giant Red’. It has beautiful reddish-purple stalks and a slightly peppery flavor.
I personally love ‘Utah Tall Green’ because of its robust flavor, but feel free to experiment and find your favorite!
Starting Celery Seeds Indoors
Celery has a long growing season, so you’ll need to start your seeds indoors about 10-12 weeks before the last expected frost. Here’s how:
1. Gather Your Supplies: You’ll need:
* Celery seeds
* Seed starting trays or small pots
* Seed starting mix (a fine, sterile soil mix)
* Spray bottle
* Heat mat (optional, but helpful)
* Grow lights (optional, but recommended)
2. Sow the Seeds: Celery seeds are tiny, so handle them carefully. Sprinkle them thinly over the surface of the seed starting mix in your trays or pots. Gently press them down, but don’t bury them too deeply. They need light to germinate.
3. Water Gently: Use a spray bottle to mist the soil thoroughly. You want it to be moist, but not soggy.
4. Provide Warmth and Light: Celery seeds germinate best in warm conditions (around 70-75°F). Place your trays on a heat mat if you have one. Also, provide plenty of light. If you don’t have a sunny windowsill, use grow lights. I usually keep my grow lights on for about 14-16 hours a day.
5. Maintain Moisture: Keep the soil consistently moist by misting it regularly. Don’t let it dry out.
6. Be Patient: Celery seeds can be slow to germinate. It may take 2-3 weeks for them to sprout. Don’t give up!
7. Thin the Seedlings: Once the seedlings have a few true leaves (the leaves that look like miniature celery stalks), thin them out so that they’re spaced about 1-2 inches apart. This will give them room to grow.
Transplanting Celery Seedlings Outdoors
Once the danger of frost has passed and your seedlings are about 6-8 inches tall, it’s time to transplant them outdoors.
1. Harden Off the Seedlings: Before transplanting, you need to “harden off” the seedlings. This means gradually exposing them to outdoor conditions so they can adjust. Start by placing them outside in a sheltered spot for an hour or two each day, gradually increasing the amount of time they spend outdoors over the course of a week.
2. Choose a Planting Location: Celery needs a sunny location with rich, well-drained soil. It also needs consistent moisture, so choose a spot where you can easily water it.
3. Prepare the Soil: Amend the soil with plenty of compost or well-rotted manure. Celery is a heavy feeder, so it needs lots of nutrients. I like to add a slow-release fertilizer as well.
4. Transplant the Seedlings: Dig holes that are slightly larger than the root balls of the seedlings. Gently remove the seedlings from their trays or pots and place them in the holes. Space them about 6-8 inches apart.
5. Water Thoroughly: After transplanting, water the seedlings thoroughly.
6. Mulch: Apply a layer of mulch around the plants to help retain moisture and suppress weeds. Straw, hay, or wood chips work well.
Caring for Your Celery Plants
Celery requires consistent care to thrive. Here’s what you need to do:
1. Water Regularly: Celery needs plenty of water, especially during hot, dry weather. Water deeply and regularly, aiming to keep the soil consistently moist. I usually water my celery plants every day or two, depending on the weather.
2. Fertilize: Celery is a heavy feeder, so you’ll need to fertilize it regularly. Use a balanced fertilizer or a fertilizer specifically formulated for vegetables. I like to fertilize my celery plants every 2-3 weeks.
3. Weed Regularly: Keep the area around your celery plants free of weeds. Weeds compete with the celery for water and nutrients.
4. Blanching (Optional): Blanching celery stalks makes them milder and more tender. About 2-3 weeks before harvest, you can blanch the stalks by wrapping them with newspaper, cardboard, or soil. Leave the tops of the stalks exposed to sunlight. This process deprives the stalks of sunlight, which reduces their chlorophyll content and makes them paler and sweeter. However, modern varieties are less bitter and blanching isn’t always necessary. I personally don’t usually blanch mine.
5. Watch Out for Pests and Diseases: Celery can be susceptible to a few pests and diseases, such as celery leaf tiers, aphids, and early blight. Inspect your plants regularly and take action if you see any problems. For aphids, a strong spray of water can often do the trick. For more serious infestations, you may need to use an insecticidal soap or other organic pesticide. For diseases, make sure your plants have good air circulation and avoid overhead watering.
Harvesting Your Celery
You can start harvesting celery when the stalks are at least 6 inches tall.
1. Harvest Individual Stalks: You can harvest individual stalks as needed by cutting them off at the base of the plant. This allows the remaining stalks to continue growing.
2. Harvest the Entire Plant: If you want to harvest the entire plant, cut it off at the base.
3. Store Your Celery: Freshly harvested celery can be stored in the refrigerator for up to 2 weeks. Wrap it in a damp paper towel and place it in a plastic bag.
Troubleshooting
Even with the best care, you might encounter a few problems when growing celery. Here are some common issues and how to address them:
* Bolting (Premature Flowering): Celery can bolt if it experiences stress, such as extreme temperatures or inconsistent watering. To prevent bolting, provide consistent moisture and protect your plants from extreme heat.
* Stringy Stalks: Stringy stalks can be caused by a lack of water or nutrients. Make sure your plants are getting enough water and fertilizer.
* Bitter Flavor: Bitter flavor can be caused by hot weather or a lack of blanching. Choose a heat-tolerant variety or blanch your stalks before harvest.
* Yellowing Leaves: Yellowing leaves can be a sign of nutrient deficiency or disease. Check the soil pH and nutrient levels and take action if necessary.
Enjoying Your Homegrown Celery
Now for the best part: enjoying your homegrown celery! Here are a few ideas:
* Eat it Raw: Celery is delicious raw, either on its own or with dips like hummus or peanut butter.
* Add it to Salads: Celery adds a refreshing crunch to salads.
* Use it in Soups and Stews: Celery is a staple ingredient in many soups and stews.
* Make Celery Juice: Celery juice is a popular health drink.
* Use the Leaves: Don’t throw away the celery leaves! They’re packed with flavor and can be used in salads, soups, or as a garnish.
Growing your own celery is a rewarding experience. With a little patience and care, you can enjoy fresh, delicious celery straight from your garden. Happy gardening!
Conclusion
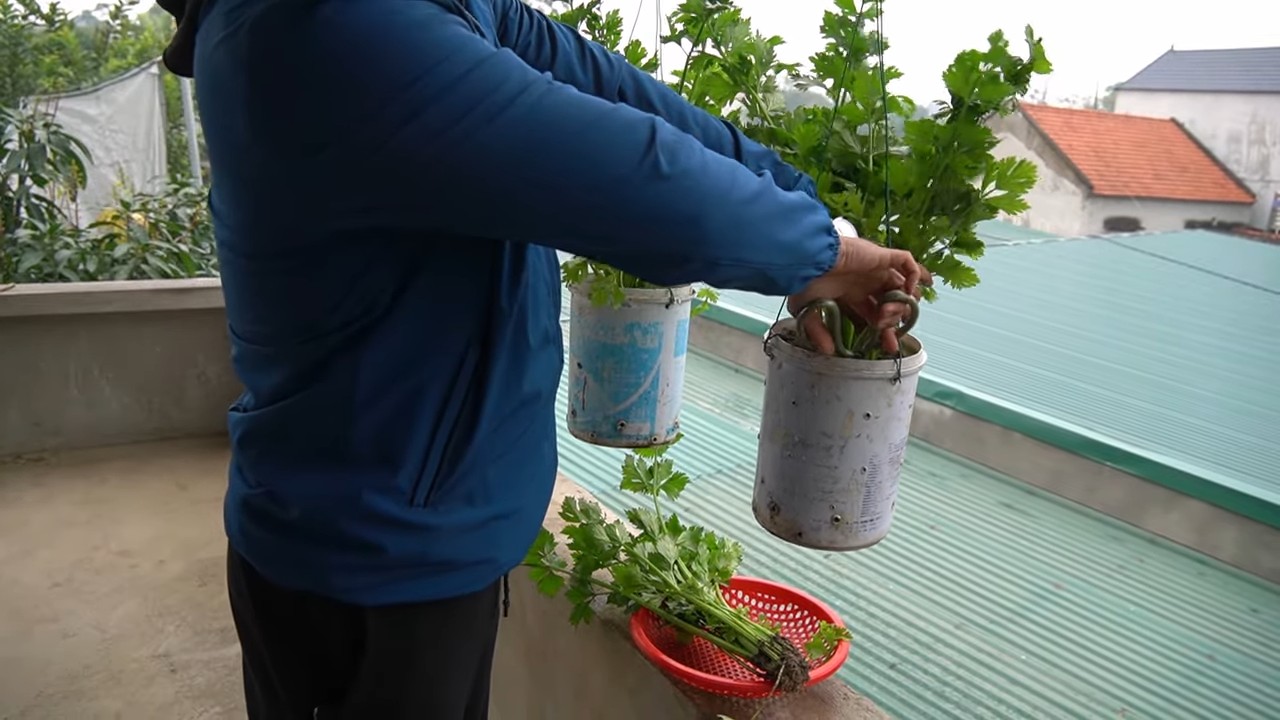
So, there you have it! Growing celery at home from scraps isn’t just a fun experiment; it’s a sustainable way to reduce food waste, enjoy fresh, crisp celery, and even impress your friends and family with your green thumb. It’s a simple process that yields surprisingly rewarding results. Think about it: instead of tossing those celery ends into the compost bin, you’re giving them a second life, transforming them into a vibrant, edible plant.
This DIY trick is a must-try for several reasons. First, it’s incredibly cost-effective. You’re essentially getting free celery from the scraps you would normally discard. Second, it’s environmentally friendly. By regrowing celery, you’re reducing your reliance on commercially grown produce, which often involves significant transportation and packaging. Third, it’s a fantastic learning experience, especially for kids. It teaches them about plant life cycles, sustainability, and the magic of gardening.
But the benefits don’t stop there. Homegrown celery often tastes better than store-bought varieties. It’s fresher, crisper, and has a more intense celery flavor. Plus, you have complete control over the growing conditions, ensuring that your celery is free from harmful pesticides and chemicals.
Looking for variations? Consider experimenting with different types of celery. While the standard green celery is the most common, you can also try regrowing red celery or even celeriac (celery root). You can also experiment with different growing mediums. While water propagation is a great starting point, you can eventually transplant your celery into soil or even a hydroponic system.
Another fun variation is to try growing celery in different locations. Experiment with growing it indoors in a sunny windowsill or outdoors in a garden bed. Just be sure to provide it with the right amount of sunlight and water.
Don’t be afraid to get creative with your celery. Use it in salads, soups, stews, smoothies, or as a crunchy snack with your favorite dip. The possibilities are endless!
We strongly encourage you to try this DIY trick and experience the joy of growing your own celery at home. It’s a simple, rewarding, and sustainable way to enjoy fresh, delicious produce. And most importantly, it’s a fantastic way to connect with nature and appreciate the magic of gardening.
Once you’ve tried it, we’d love to hear about your experience. Share your photos, tips, and tricks in the comments below. Let’s create a community of home gardeners who are passionate about growing their own food and reducing food waste. Let us know if you have any questions about how to **grow celery at home**! Happy growing!
Frequently Asked Questions (FAQ)
1. How long does it take to regrow celery from a base?
The initial regrowth phase, where you see new leaves sprouting from the celery base in water, typically takes about 1-2 weeks. After transplanting to soil, it can take another 2-3 months for the celery to mature and reach a harvestable size. However, this timeframe can vary depending on factors such as sunlight, temperature, and soil quality. Be patient and consistent with watering and care, and you’ll be rewarded with fresh celery in due time.
2. What kind of water should I use to regrow celery?
It’s best to use filtered or dechlorinated water to regrow celery. Tap water often contains chlorine and other chemicals that can inhibit root growth. If you don’t have filtered water, you can let tap water sit out in an open container for 24 hours to allow the chlorine to evaporate. Change the water every 1-2 days to keep it fresh and prevent the growth of bacteria.
3. How much sunlight does regrowing celery need?
Celery needs at least 6 hours of sunlight per day to thrive. When regrowing celery indoors, place it in a sunny windowsill that receives direct sunlight. If you don’t have a sunny windowsill, you can supplement with a grow light. When transplanting celery outdoors, choose a location that receives full sun. If you live in a hot climate, provide some afternoon shade to prevent the celery from scorching.
4. What kind of soil is best for regrowing celery?
Celery prefers rich, well-draining soil with a pH of 6.0 to 6.8. Before transplanting your celery base to soil, amend the soil with compost or other organic matter to improve its fertility and drainage. You can also add a slow-release fertilizer to provide the celery with essential nutrients. Avoid using heavy clay soil, as it can become waterlogged and suffocate the roots.
5. How often should I water regrowing celery?
Celery needs consistent moisture to thrive. Water your celery regularly, keeping the soil consistently moist but not waterlogged. Check the soil moisture level daily and water when the top inch of soil feels dry to the touch. Avoid letting the soil dry out completely, as this can stress the plant and stunt its growth. When watering, water deeply, allowing the water to soak into the soil and reach the roots.
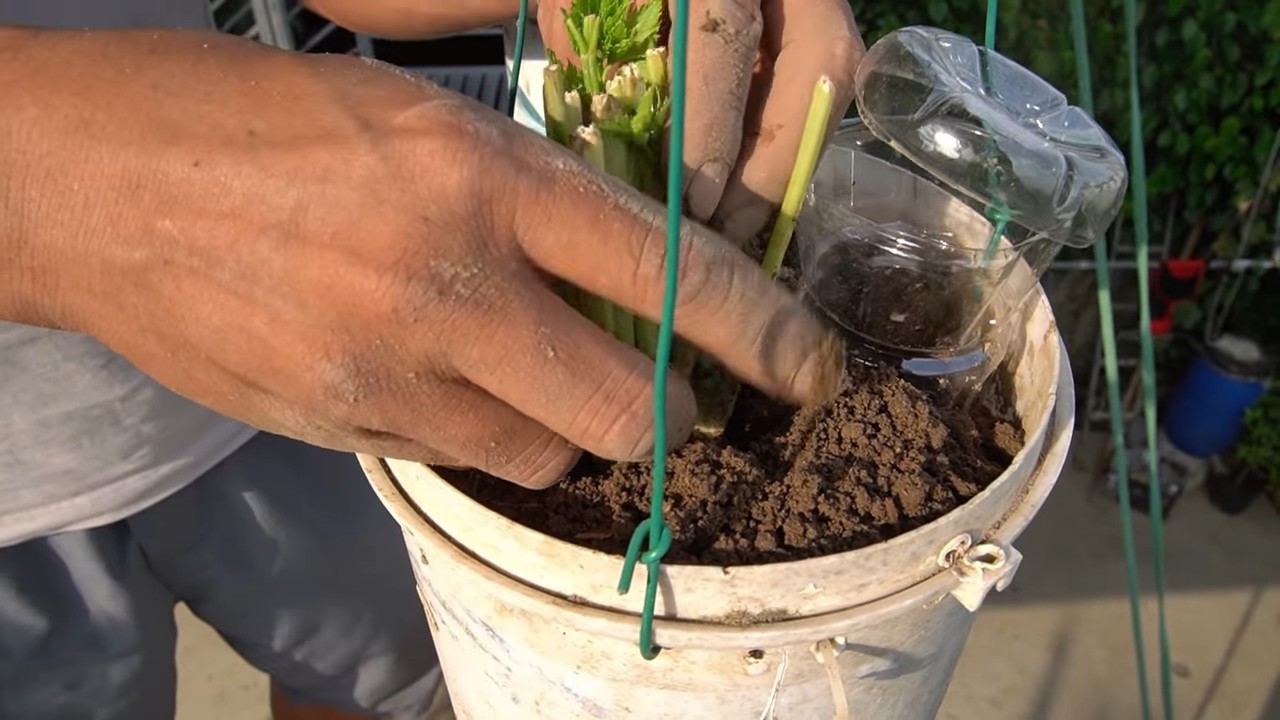
6. Can I regrow celery in a container?
Yes, you can definitely regrow celery in a container. Choose a container that is at least 8 inches deep and wide to accommodate the celery’s root system. Make sure the container has drainage holes to prevent waterlogging. Use a high-quality potting mix that is well-draining and rich in nutrients. Place the container in a sunny location and water regularly.
7. How do I know when my regrown celery is ready to harvest?
Your regrown celery is ready to harvest when the stalks are at least 6-8 inches long and have a firm, crisp texture. You can harvest the entire plant at once or harvest individual stalks as needed. To harvest, simply cut the stalks at the base of the plant with a sharp knife.
8. Can I regrow celery multiple times from the same base?
While it’s possible to get a second or even third harvest from the same celery base, the subsequent harvests will typically be smaller and less vigorous than the first. The celery base will eventually exhaust its nutrient reserves and stop producing new growth. For best results, it’s recommended to start with a fresh celery base each time you want to regrow celery.
9. What are some common problems when regrowing celery and how can I fix them?
Some common problems when regrowing celery include:
* **Yellowing leaves:** This can be caused by overwatering, underwatering, or nutrient deficiencies. Adjust your watering schedule and fertilize with a balanced fertilizer.
* **Stunted growth:** This can be caused by insufficient sunlight, poor soil quality, or pests. Provide more sunlight, amend the soil with compost, and inspect the plant for pests.
* **Pests:** Celery can be susceptible to pests such as aphids, spider mites, and celery leaf tiers. Inspect the plant regularly and treat with an appropriate insecticide or organic pest control method.
* **Bolting:** Bolting occurs when the celery plant prematurely produces a flower stalk. This is often caused by stress, such as extreme temperatures or drought. Provide consistent moisture and protect the plant from extreme temperatures.
10. Is regrowing celery organic?
Whether your regrown celery is organic depends on the methods you use to grow it. If you use organic soil, organic fertilizer, and organic pest control methods, then your regrown celery can be considered organic. However, if you use synthetic fertilizers or pesticides, then it will not be organic.


Leave a Comment