
Grow garlic fast and unlock a world of culinary possibilities right in your backyard! Imagine the satisfaction of harvesting plump, flavorful garlic cloves, knowing you nurtured them from tiny seed to pungent perfection. But let’s be honest, waiting for garlic to mature can feel like an eternity. That’s where our DIY tricks and hacks come in – we’re about to share secrets that will have you enjoying homegrown garlic much sooner than you ever thought possible.
Garlic has been cultivated for thousands of years, with roots tracing back to Central Asia. Ancient Egyptians revered it, feeding it to the pyramid builders for strength and endurance. From warding off vampires in folklore to adding zest to countless dishes across cultures, garlic’s history is as rich and complex as its flavor. But in today’s fast-paced world, who has time to wait months for a single harvest?
That’s why I’m so excited to share these simple yet effective methods to grow garlic fast. Whether you’re a seasoned gardener or just starting out, these tips will help you accelerate the growing process, maximize your yield, and enjoy the unparalleled taste of fresh, homegrown garlic. Say goodbye to bland store-bought cloves and hello to a garden bursting with flavor! Let’s get started!
Grow Garlic Like a Pro: My Foolproof Fast-Track Method
Hey there, fellow garlic lovers! Are you tired of waiting months for your garlic to mature? I was too! That’s why I’ve spent the last few years perfecting a method to significantly speed up the garlic-growing process. I’m talking about harvesting plump, flavorful bulbs weeks, even months, earlier than usual. And guess what? I’m going to share all my secrets with you!
This isn’t some magical, overnight trick. It involves a combination of techniques, from choosing the right variety to optimizing the growing environment. But trust me, the results are worth the effort. Get ready to impress your friends and family with your homegrown garlic bounty!
Choosing the Right Garlic Variety
The first step to growing garlic fast is selecting the right variety. Not all garlic is created equal! Some varieties are naturally faster growers than others.
* Softneck Garlic: Generally matures faster than hardneck varieties. They are also better suited for warmer climates. Think California Early or Artichoke garlic.
* Hardneck Garlic: While typically slower, some hardneck varieties can still be grown relatively quickly. Look for varieties adapted to your local climate.
* Consider Your Climate: Choose a variety that thrives in your region. Local nurseries are your best bet for finding suitable options.
Preparing Your Garlic Cloves for Planting
This is where the magic begins! We’re going to give our garlic a head start by pre-sprouting the cloves indoors.
* Timing is Key: Start this process about 4-6 weeks before your last expected frost date.
* Select the Best Cloves: Choose the largest, healthiest cloves from your garlic bulb. These will produce the strongest plants.
* Gentle Separation: Carefully separate the cloves from the bulb, leaving the papery skin intact. Avoid bruising or damaging the cloves.
Pre-Sprouting Your Garlic Cloves Indoors
This is the secret sauce that really speeds things up.
1. Prepare Your Planting Tray: Fill a shallow tray with a well-draining potting mix. I like to use a seed-starting mix.
2. Plant the Cloves: Plant the cloves pointy-end up, about 1 inch deep and 2 inches apart.
3. Water Gently: Water the tray thoroughly, but be careful not to overwater. The soil should be moist, not soggy.
4. Provide Light: Place the tray in a bright, sunny location or under grow lights. Aim for at least 6 hours of light per day.
5. Maintain Moisture: Keep the soil consistently moist, but not waterlogged. Check the soil moisture daily and water as needed.
6. Monitor Growth: You should start to see sprouts emerging within a week or two.
7. Harden Off: A week before transplanting outdoors, gradually acclimate the seedlings to outdoor conditions. Start by placing them outside for a few hours each day, increasing the time each day.
Preparing Your Garden Bed
Garlic needs a well-prepared bed to thrive.
* Sunlight is Essential: Choose a location that receives at least 6 hours of direct sunlight per day.
* Well-Draining Soil: Garlic hates wet feet! Ensure your soil drains well. Amend heavy clay soil with compost and other organic matter.
* Soil pH: Garlic prefers a slightly acidic to neutral soil pH (around 6.0-7.0). Test your soil and amend as needed.
* Add Nutrients: Incorporate plenty of compost and a balanced organic fertilizer into the soil before planting. Garlic is a heavy feeder.
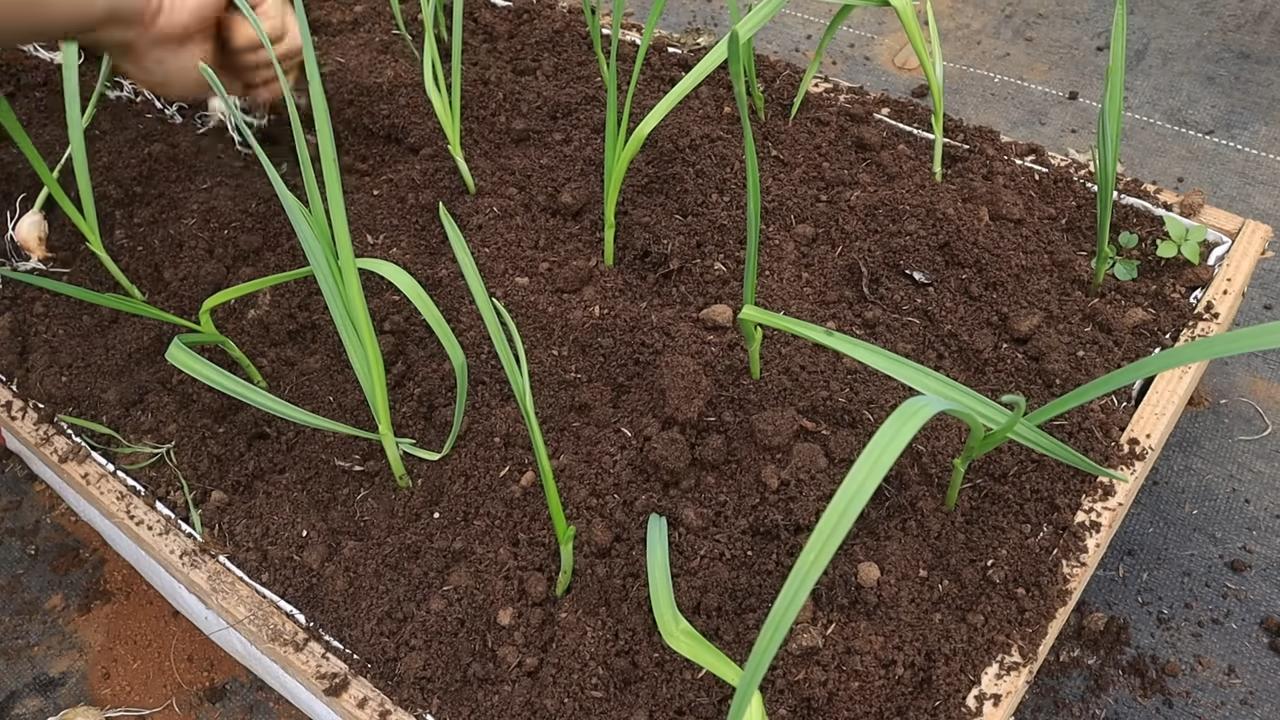
Transplanting Your Pre-Sprouted Garlic
Now it’s time to move your little garlic sprouts into their permanent home.
1. Timing is Crucial: Transplant your garlic seedlings after the last expected frost date.
2. Spacing: Plant the seedlings 6-8 inches apart in rows that are 12 inches apart.
3. Planting Depth: Plant the seedlings at the same depth they were growing in the tray.
4. Water Thoroughly: Water the newly transplanted seedlings thoroughly.
5. Mulch: Apply a layer of mulch around the plants to help retain moisture, suppress weeds, and regulate soil temperature. Straw, wood chips, or shredded leaves work well.
Ongoing Care and Maintenance
Consistent care is key to maximizing your garlic harvest.
* Watering: Water regularly, especially during dry periods. Garlic needs consistent moisture to develop large bulbs.
* Weeding: Keep the garden bed free of weeds, which can compete with the garlic for nutrients and water.
* Fertilizing: Side-dress the plants with a balanced organic fertilizer every few weeks.
* Scapes (Hardneck Varieties): If you’re growing hardneck garlic, remove the scapes (the curly flower stalks) as soon as they appear. This will redirect the plant’s energy into bulb development. They are also delicious to eat!
* Pest and Disease Control: Monitor your plants regularly for pests and diseases. Take action promptly if you notice any problems.
Harvesting Your Garlic
This is the moment you’ve been waiting for!
* Timing is Everything: Harvest your garlic when the lower leaves start to turn yellow and brown, but before the entire plant dies back. This usually happens in late spring or early summer.
* Gently Dig: Use a garden fork to gently lift the bulbs from the soil. Be careful not to damage the bulbs.
* Curing: Cure the garlic in a well-ventilated, dry place for 2-3 weeks. This allows the bulbs to dry and develop their flavor.
* Storage: Store cured garlic in a cool, dry, and dark place. Braiding softneck garlic is a great way to store it.
Troubleshooting Common Garlic Growing Problems
Even with the best planning, you might encounter some challenges. Here’s how to tackle them:
* Yellowing Leaves: Could be a sign of nutrient deficiency, overwatering, or disease. Check your soil, adjust your watering schedule, and inspect for pests or diseases.
* Small Bulbs: Often caused by insufficient sunlight, poor soil, or overcrowding. Ensure your plants are getting enough sunlight, amend your soil with compost, and space your plants properly.
* Pests: Common garlic pests include aphids, thrips, and nematodes. Use organic pest control methods, such as insecticidal soap or neem oil.
* Diseases: Garlic can be susceptible to fungal diseases, such as white rot and botrytis. Ensure good air circulation, avoid overwatering, and use disease-resistant varieties.
Extra Tips for Supercharged Garlic Growth
Here are a few extra tricks I’ve learned along the way to really boost your garlic growing game:
* Garlic Tea: Soak unplanted cloves in water for 24 hours before planting. Use this water to water your garlic after planting. This “garlic tea” is said to help deter pests and diseases.
* Companion Planting: Plant garlic alongside other beneficial plants, such as chamomile, marigolds, and beets. These plants can help deter pests and improve soil health.
* Soil Solarization: If you have a history of soilborne diseases, consider solarizing your soil before planting. Cover the garden bed with clear plastic for several weeks during the hottest part of the summer to kill off pathogens.
* Consistent Monitoring: Regularly check your plants for any signs of problems. Early detection is key to preventing serious issues.
My Personal Experience and Results
I started experimenting with this method a few years ago, and the results have been amazing. I’ve been able to harvest my garlic weeks earlier than I used to, and the bulbs are significantly larger and more flavorful. The pre-sprouting step makes a huge difference in the overall growth rate.
I’ve also found that choosing the right variety for my climate is crucial. I live in a relatively warm climate, so softneck varieties like California Early have performed exceptionally well for me.
Don’t be afraid to experiment and adapt this method to your own specific conditions. Every garden is different, and what works for me might not work perfectly for you. But with a little trial and error, you’ll be growing garlic like a pro in no time!
So, there you have it! My complete guide to growing garlic fast. I hope you found this helpful. Now get out there and start planting! Happy gardening!
Conclusion
So, there you have it! Mastering the art of growing garlic fast isn’t just a gardening hack; it’s a gateway to fresher, more flavorful meals and a deeper connection with the food you consume. We’ve explored a simple yet effective method that bypasses the often lengthy traditional planting process, allowing you to enjoy the pungent, aromatic goodness of homegrown garlic much sooner than you thought possible.
Why is this DIY trick a must-try? Because it empowers you to take control of your food source, even if you have limited space or time. Imagine the satisfaction of snipping fresh garlic greens to garnish your pasta, or adding a clove of your own homegrown garlic to your favorite stir-fry. The taste difference between store-bought and freshly grown garlic is undeniable – a vibrant, robust flavor that elevates any dish.
Beyond the immediate gratification of faster growth, this method also offers a fantastic opportunity to experiment and learn. Try different varieties of garlic to discover your favorite flavor profiles. Elephant garlic, with its milder taste and enormous cloves, is a great option for those who prefer a less intense flavor. Or, explore heirloom varieties for unique and complex flavors that you won’t find in your local supermarket.
Consider these variations to personalize your **grow garlic fast** experience:
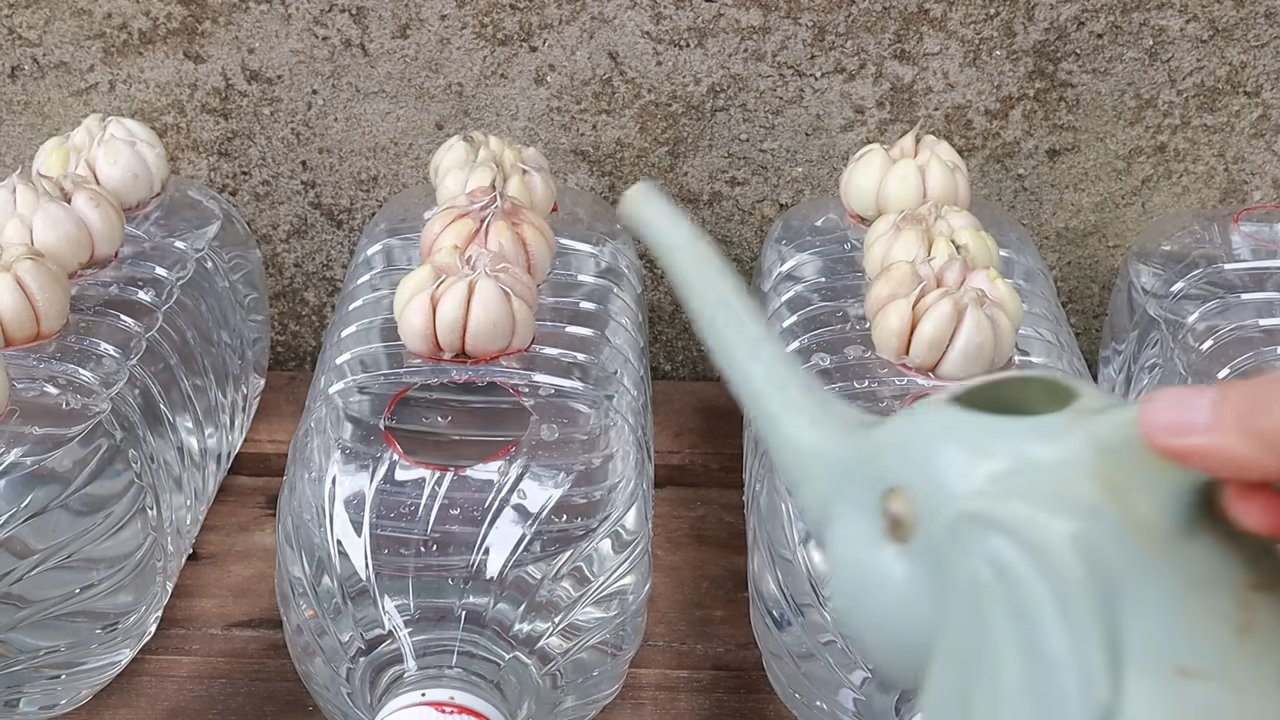
* **Hydroponics:** For an even faster and cleaner growing experience, try adapting this method to a hydroponic setup. Simply suspend the garlic cloves in a nutrient-rich water solution, ensuring the base of the clove is submerged but the top remains dry.
* **Container Gardening:** If you don’t have a garden, no problem! This method works beautifully in containers. Choose a pot that’s at least 6 inches deep and wide to accommodate the growing roots.
* **Successive Planting:** To ensure a continuous supply of fresh garlic greens, stagger your plantings. Plant a few cloves every week or two, and you’ll always have a fresh harvest ready to go.
* **Soil Amendments:** While not strictly necessary, adding some compost or well-rotted manure to your potting mix can provide extra nutrients and boost growth.
But the real magic happens when you share your experiences. We encourage you to try this DIY trick and document your journey. Take photos, track your progress, and share your successes (and even your challenges!) with the gardening community. Your insights can help others discover the joy of growing their own garlic and inspire them to embrace a more sustainable and flavorful way of life.
Don’t be intimidated if you’re a beginner. This method is incredibly forgiving and easy to learn. With a little patience and attention, you’ll be amazed at how quickly you can transform a simple garlic clove into a thriving plant. So, grab some garlic, gather your supplies, and get ready to experience the satisfaction of growing your own delicious, homegrown garlic. The possibilities are endless, and the rewards are well worth the effort. Happy gardening!
Frequently Asked Questions (FAQ)
What kind of garlic should I use for this method?
You can use any type of garlic you prefer! However, organic garlic is generally recommended to avoid any potential pesticide residue. Softneck varieties tend to be easier to braid and store, while hardneck varieties offer a more complex flavor and produce scapes (edible flower stalks) in the spring. Experiment with different varieties to find your favorite!
How long does it take to grow garlic using this method?
The time it takes to grow garlic using this method depends on several factors, including the variety of garlic, the growing conditions (temperature, light, humidity), and the specific technique you use. Generally, you can expect to see sprouts within a week or two. You can harvest the garlic greens for use in cooking within a few weeks of sprouting. If you’re aiming to grow full bulbs, it will still take several months, but this method gives you a head start.
Can I grow garlic indoors using this method?
Yes, you can absolutely grow garlic indoors! Just make sure to provide adequate light. A sunny windowsill or a grow light will work well. Indoor-grown garlic may not produce as large bulbs as outdoor-grown garlic, but you can still enjoy the fresh greens and smaller cloves.
What kind of soil should I use?
A well-draining potting mix is ideal for growing garlic in containers. You can also amend your soil with compost or well-rotted manure to provide extra nutrients. Avoid using heavy clay soil, as it can retain too much moisture and lead to rot.
How often should I water the garlic?
Water the garlic regularly, keeping the soil consistently moist but not waterlogged. Allow the top inch of soil to dry out between waterings. Overwatering can lead to root rot, so it’s important to monitor the moisture level carefully.
What if my garlic cloves start to rot?
If you notice any signs of rot, such as soft spots or a foul odor, remove the affected cloves immediately to prevent the rot from spreading. Ensure that the soil is well-draining and that you’re not overwatering. You can also try treating the cloves with a fungicide before planting.
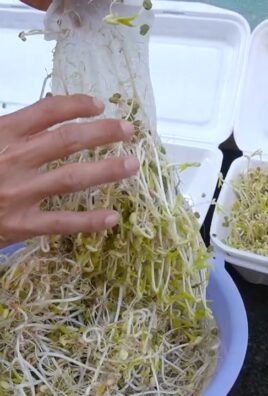
Can I eat the garlic greens?
Yes, the garlic greens are perfectly edible and delicious! They have a milder flavor than the cloves and can be used in salads, soups, stir-fries, and as a garnish. Snip off the greens as needed, and the plant will continue to produce more.
What are garlic scapes and how do I use them?
Garlic scapes are the curly flower stalks that hardneck garlic varieties produce in the spring. They have a mild garlic flavor and can be used in a variety of dishes, such as pesto, stir-fries, and grilled vegetables. Simply cut off the scapes when they start to curl and use them as you would garlic cloves. Removing the scapes also encourages the plant to focus its energy on bulb development.
How do I know when the garlic bulbs are ready to harvest?
The garlic bulbs are typically ready to harvest when the leaves start to turn yellow and brown, usually in late summer or early fall. Gently dig up a bulb to check its size and maturity. If the bulb is well-formed and the cloves are plump, it’s time to harvest the rest.
How do I store my harvested garlic?
After harvesting, cure the garlic by laying it out in a well-ventilated area for a few weeks to allow the outer layers to dry and harden. Once cured, you can store the garlic in a cool, dry, and dark place for several months. Braiding the garlic is a traditional way to store it and also makes it look beautiful.
Can I use this method to grow garlic from store-bought garlic?
While you can try growing garlic from store-bought garlic, it’s not always successful. Store-bought garlic may have been treated to prevent sprouting, or it may be a variety that’s not well-suited to your climate. For best results, use organic garlic from a reputable source.
What are some common pests and diseases that affect garlic?
Common pests that affect garlic include aphids, thrips, and nematodes. Diseases include white rot, downy mildew, and rust. Monitor your plants regularly for signs of pests or diseases and take appropriate action if necessary. Organic pest control methods, such as neem oil and insecticidal soap, can be effective for controlling many pests.
Is growing garlic fast worth the effort?
Absolutely! Even if you don’t get massive bulbs right away, the fresh garlic greens alone are worth the effort. Plus, the satisfaction of growing your own food is incredibly rewarding. This method is a great way to get started with gardening and enjoy the delicious flavor of homegrown garlic.
Leave a Comment