
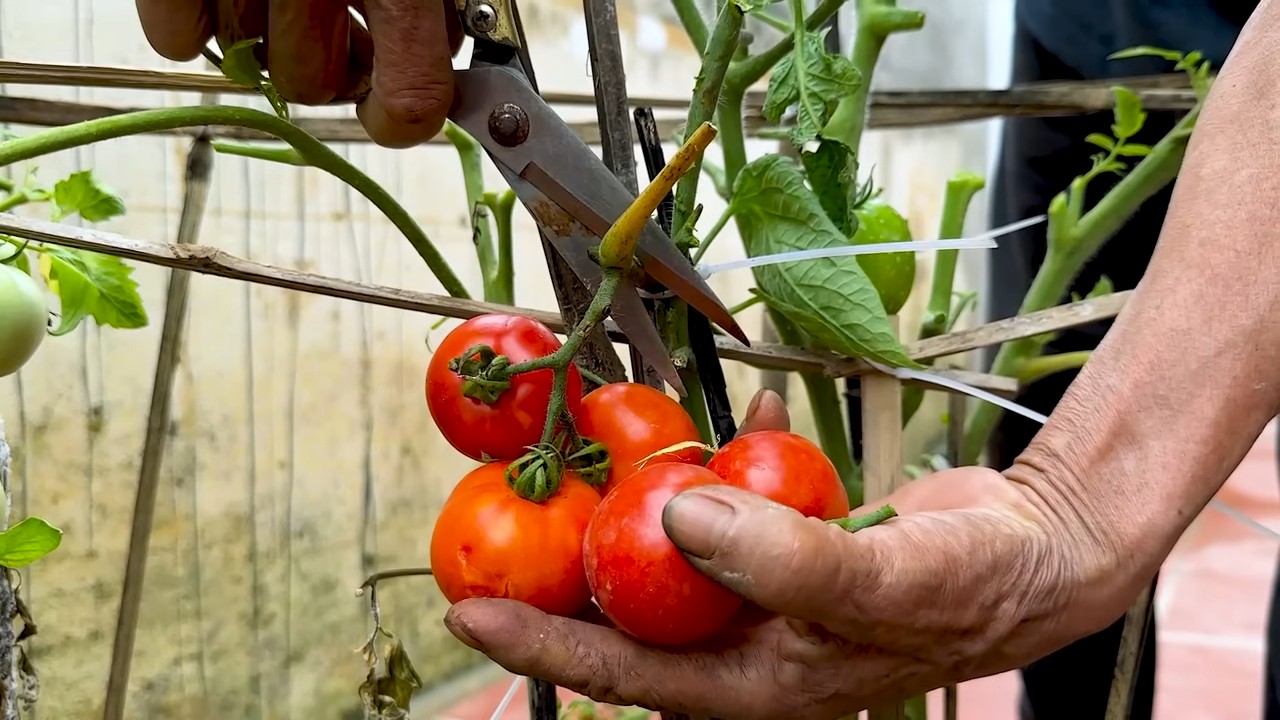
Can gardening tomato harvest time got you feeling overwhelmed? I know the feeling! You’ve nurtured those little seedlings, watched them blossom, and now you’re facing a mountain of ripe, juicy tomatoes. But don’t let the abundance intimidate you! This isn’t just about picking fruit; it’s about maximizing your yield, preserving your hard work, and enjoying the fruits (literally!) of your labor for weeks to come.
For centuries, cultivating tomatoes has been a cherished tradition, dating back to the Aztecs and Incas. These vibrant fruits have journeyed across continents, becoming a staple in cuisines worldwide. But even with generations of knowledge, knowing the best time and methods for can gardening tomato harvest can still be tricky. That’s why I’m sharing my favorite DIY tricks and hacks to ensure you get the most out of your tomato harvest.
Why is this so important? Because a poorly timed or executed harvest can lead to wasted produce, reduced flavor, and even plant damage. Imagine putting in all that effort, only to have your tomatoes rot on the vine or lose their delicious taste! These simple, yet effective, DIY tips will help you avoid those pitfalls, extend your harvest season, and savor the incredible flavor of homegrown tomatoes. Let’s dive in and make this your most successful tomato harvest yet!
DIY Tomato Cage Trellis for a Bountiful Harvest
Hey there, fellow gardening enthusiasts! Are you tired of your tomato plants sprawling all over the ground, becoming a tangled mess and susceptible to pests and diseases? I know I was! That’s why I decided to build my own super-sturdy and effective tomato cage trellis. Not only does it keep your plants upright and healthy, but it also maximizes sunlight exposure and makes harvesting a breeze. Plus, it’s way cheaper than buying those flimsy store-bought cages that collapse under the weight of a single ripe tomato. Let’s get started!
Materials You’ll Need
Before we dive in, let’s gather our supplies. This project is relatively inexpensive, and you might even have some of these items lying around already.
* Concrete Reinforcement Mesh (Remesh): This is the key ingredient! You can usually find it at your local home improvement store. A single sheet is often quite large, so you might want to ask them to cut it in half for easier transport. I usually buy a 5ft x 7ft sheet and cut it in half.
* Bolt Cutters: Essential for cutting the remesh. Trust me, you won’t get far with regular wire cutters.
* Gloves: Protect your hands from the sharp edges of the remesh. Gardening gloves or work gloves will do the trick.
* Measuring Tape: For accurate measurements and consistent cage sizes.
* Zip Ties (Heavy Duty): To secure the overlapping edges of the cage. I prefer the heavy-duty ones for extra strength.
* Safety Glasses: Always a good idea when working with metal and tools.
* Optional: Metal Stakes or Rebar: For extra support, especially in windy areas or for very heavy tomato varieties.
* Optional: Brightly Colored Spray Paint: To make the cages more visible and prevent accidental tripping.
Planning Your Cage Size
The size of your tomato cage will depend on the type of tomatoes you’re growing. Determinate varieties (bush tomatoes) generally need smaller cages than indeterminate varieties (vining tomatoes). I usually aim for cages that are at least 18-24 inches in diameter and 4-5 feet tall. This provides ample space for the plants to grow and prevents them from becoming overcrowded.
Cutting and Shaping the Remesh
This is where the bolt cutters come in handy. Be careful and take your time to avoid any accidents.
1. Measure and Mark: Using your measuring tape and a marker, determine the length of remesh you need to create your desired cage diameter. Remember, the circumference of a circle is calculated as πd (pi times diameter). So, if you want a 24-inch diameter cage, you’ll need a piece of remesh approximately 75 inches long (3.14 x 24). Add a few extra inches for overlap.
2. Cut the Remesh: Carefully use the bolt cutters to cut the remesh along your marked line. Make sure to cut one wire at a time. It’s easier to cut along the welded joints.
3. Shape the Cage: Now, gently bend the remesh into a cylindrical shape. This might take a little bit of effort, but the remesh is surprisingly flexible.
4. Overlap the Edges: Overlap the cut edges of the remesh by a few inches. This will create a secure seam for your cage.
Securing the Cage
Now that you have your cylindrical cage, it’s time to secure the overlapping edges.
1. Attach Zip Ties: Using your heavy-duty zip ties, secure the overlapping edges of the remesh. Start at the top and bottom of the cage, and then add zip ties every few inches along the seam.
2. Tighten and Trim: Make sure the zip ties are nice and tight. Use pliers if needed to get a good grip. Once they’re secure, trim off the excess zip tie tails with your bolt cutters or wire cutters.
3. Inspect for Sharp Edges: Run your hand along the cage to check for any sharp edges or protruding wires. Use the bolt cutters to trim them down or bend them inward.
Adding Extra Support (Optional)
For extra support, especially in windy areas or for heavy tomato varieties, you can add metal stakes or rebar to your cages.
1. Insert Stakes: Drive the metal stakes or rebar into the ground around the outside of the cage.
2. Attach to Cage: Use zip ties or wire to attach the cage to the stakes. This will provide additional stability and prevent the cage from tipping over.
Painting the Cages (Optional)
Painting your tomato cages can make them more visible and prevent accidental tripping. It also adds a touch of color to your garden.
1. Choose Your Paint: Select a brightly colored spray paint that is suitable for outdoor use.
2. Prepare the Cages: Clean the cages with a wire brush to remove any dirt or debris.
3. Apply the Paint: Spray the cages with an even coat of paint. Let them dry completely before using them in your garden.
Installing the Cages in Your Garden
Now for the fun part – putting your new tomato cages to work!
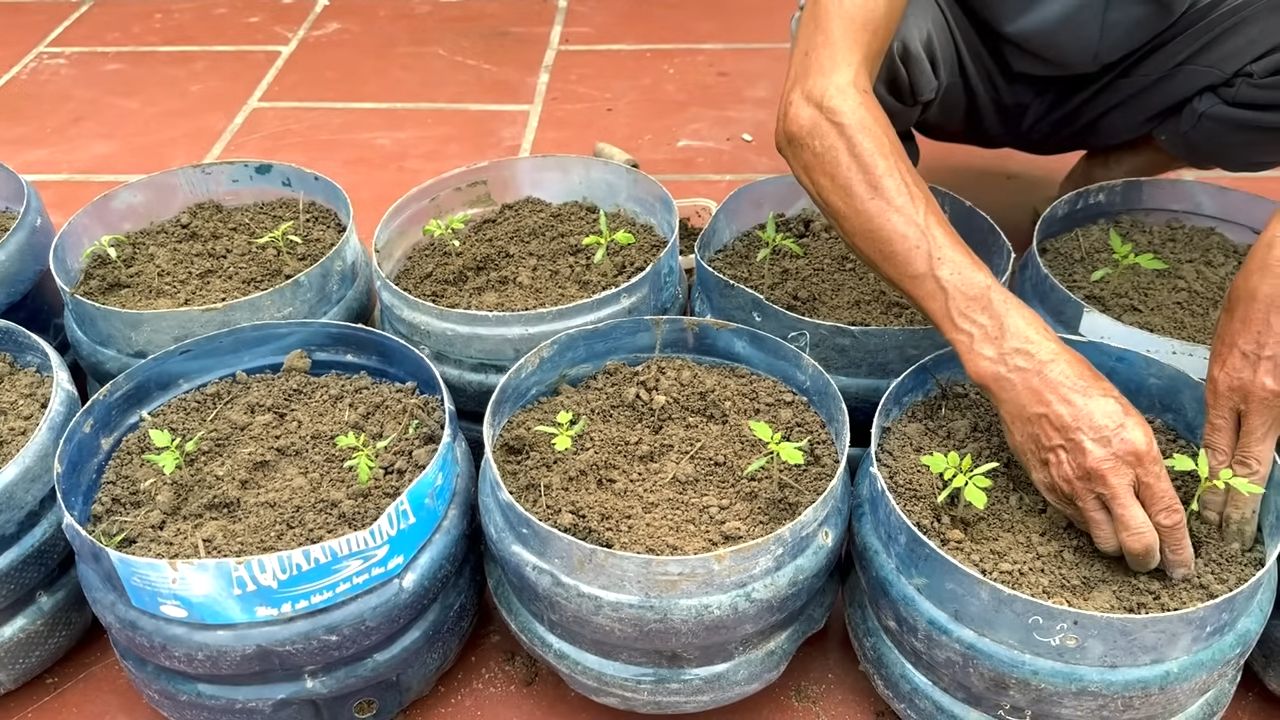
1. Plant Your Tomatoes: Plant your tomato seedlings in your garden bed, spacing them according to the variety.
2. Place the Cages: Carefully place the tomato cages over the seedlings, making sure the plants are centered inside the cage.
3. Secure the Cages: Gently push the bottom of the cages into the soil to secure them in place. If you’re using stakes, make sure they are firmly planted in the ground.
4. Water Your Plants: Water your tomato plants thoroughly after installing the cages.
Maintaining Your Tomato Cages
Your tomato cages should last for many years with proper care.
* Inspect Regularly: Check the cages regularly for any damage or loose zip ties.
* Repair as Needed: Replace any damaged zip ties or repair any broken wires.
* Store Properly: At the end of the growing season, clean the cages and store them in a dry place.
Troubleshooting
Sometimes things don’t go exactly as planned. Here are a few common issues and how to fix them:
* Cage is too small: If your tomato plant outgrows the cage, you can add a second cage on top of the first one. Secure them together with zip ties.
* Cage is unstable: If the cage is wobbly, add more stakes or rebar for extra support.
* Remesh is difficult to cut: Make sure your bolt cutters are sharp and in good working condition. You might also try using a metal cutting blade on a reciprocating saw.
Alternative Materials
While I highly recommend using concrete reinforcement mesh for its durability and affordability, here are a few alternative materials you can use to build your tomato cages:
* Hog Wire Fencing: This is a heavier-duty option than remesh and will last even longer.
* Cattle Panels: These are very strong and sturdy, but they can be more expensive and difficult to work with.
* Wooden Stakes and Twine: You can create a simple trellis system using wooden stakes and twine. This is a more natural and rustic option.
Benefits of Using Tomato Cages
Using tomato cages offers numerous benefits for your tomato plants:
* Improved Air Circulation: Cages keep the plants off the ground, improving air circulation and reducing the risk of fungal diseases.
* Increased Sunlight Exposure: Cages allow sunlight to reach all parts of the plant, promoting healthy growth and fruit production.
* Easier Harvesting: Cages make it easier to harvest your tomatoes, as the fruits are more accessible and visible.
* Reduced Pest Problems: Cages can help to deter pests from reaching your tomato plants.
* Stronger Plants: Cages provide support for the plants, preventing them from bending or breaking under the weight of the fruit.
Different Tomato Varieties and Cage Needs
As I mentioned earlier, the type of tomato you’re growing will influence the size and type of cage you need. Here’s a quick guide:
* Determinate Tomatoes (Bush Tomatoes): These tomatoes grow to a certain size and then stop. They typically don’t need as much support as indeterminate varieties. A smaller cage, around 18 inches in diameter and 4 feet tall, should be sufficient. Examples include Roma, Celebrity, and Better Bush.
* Indeterminate Tomatoes (Vining Tomatoes): These tomatoes continue to grow and produce fruit throughout the growing season. They can get very large and require substantial support. A larger cage, around 24 inches in diameter and 5 feet tall or taller, is recommended. Examples include Beefsteak, Big Boy, and most heirloom varieties.
* Dwarf Tomatoes: These are compact varieties that are perfect for small spaces or containers. They may not even need a cage, but a small stake or support system can help keep them
Conclusion
So, there you have it! Mastering the art of extending your tomato harvest isn’t just about squeezing every last drop of summer flavor; it’s about taking control of your garden’s bounty and enjoying the fruits (or rather, vegetables!) of your labor for as long as possible. This DIY trick, focusing on strategic pruning, careful monitoring of weather conditions, and providing supplemental support, is a game-changer for any tomato enthusiast, regardless of experience level.
Why is this a must-try? Because it empowers you to defy the natural limitations of the growing season. Imagine savoring vine-ripened tomatoes well into the autumn months, long after your neighbors’ plants have withered and faded. Think of the satisfaction of sharing your late-season harvest with friends and family, a testament to your gardening prowess. And consider the cost savings – fewer trips to the grocery store for those perfectly ripe tomatoes you crave.
But the beauty of this DIY approach lies in its adaptability. Feel free to experiment with different pruning techniques to see what works best for your specific tomato variety and local climate. For example, if you live in an area with particularly cool autumn nights, consider covering your plants with frost blankets to provide extra protection. You could also try succession planting, starting new tomato seedlings indoors a few weeks before the end of the main growing season, to ensure a continuous supply of young plants ready to take over when the older ones start to decline. Another variation involves focusing on determinate tomato varieties, which tend to produce their fruit all at once, making them ideal for canning or preserving. By carefully planning your planting schedule and employing these techniques, you can significantly extend your tomato harvest and enjoy a delicious supply of homegrown tomatoes for months to come.
Don’t be afraid to get creative with your support systems, either. While traditional tomato cages work well, you might find that staking or using the Florida weave method provides better support for larger, more sprawling plants. Consider using recycled materials like old pantyhose or t-shirts to tie up your tomato plants, minimizing damage to the stems.
Ultimately, the key to success is observation and responsiveness. Regularly inspect your plants for signs of pests or diseases, and take action promptly to prevent problems from spreading. Pay attention to the weather forecast and be prepared to protect your plants from extreme temperatures or heavy rain. The more attuned you are to your garden’s needs, the more successful you’ll be in extending your tomato harvest.
We wholeheartedly encourage you to give this DIY trick a try. It’s a simple, effective, and rewarding way to maximize your tomato yield and enjoy the taste of summer for longer. And most importantly, we want to hear about your experiences! Share your tips, tricks, and triumphs in the comments below. Let us know what worked for you, what challenges you faced, and any variations you discovered along the way. Together, we can learn from each other and become even better tomato gardeners. So, grab your pruning shears, get out into your garden, and start extending that tomato harvest today!
Frequently Asked Questions (FAQ)
What are the most important factors in extending my tomato harvest?
The key factors are strategic pruning, consistent watering and fertilization, pest and disease control, and protection from extreme weather. Pruning helps redirect the plant’s energy towards fruit production rather than foliage growth. Consistent watering and fertilization provide the necessary nutrients for healthy growth and fruit development. Vigilant pest and disease control prevents problems that can weaken the plant and reduce yield. And protecting your plants from frost, excessive heat, or heavy rain can prevent damage and extend the growing season.
How often should I prune my tomato plants to extend the harvest?
Regular pruning is essential. Remove suckers (the shoots that grow between the main stem and branches) weekly to encourage fruit production. As the season progresses, you can also prune away yellowing or diseased leaves to improve air circulation and prevent the spread of disease. Towards the end of the season, consider topping the plants (cutting off the top growth) to encourage the remaining green tomatoes to ripen.
What kind of fertilizer should I use to extend my tomato harvest?
Use a balanced fertilizer with a slightly higher phosphorus content (the middle number in the NPK ratio) to promote fruit development. Avoid fertilizers that are too high in nitrogen, as this can lead to excessive foliage growth at the expense of fruit production. Consider using a liquid fertilizer diluted to half strength and applying it every 1-2 weeks. Organic options like compost tea or fish emulsion are also excellent choices.
How do I protect my tomato plants from frost?
Frost is a major threat to tomato plants, especially in the late season. Cover your plants with frost blankets, old sheets, or even cardboard boxes to provide insulation. Make sure the covering extends all the way to the ground to trap heat. Remove the coverings during the day to allow sunlight and air circulation. You can also use a cloche or cold frame to protect individual plants. If a hard freeze is predicted, consider harvesting any mature green tomatoes and bringing them indoors to ripen.
What are some common tomato pests and diseases, and how can I control them?
Common tomato pests include aphids, whiteflies, tomato hornworms, and spider mites. Diseases include early blight, late blight, Septoria leaf spot, and blossom end rot. Regularly inspect your plants for signs of pests or diseases. Use insecticidal soap or neem oil to control pests. Remove and destroy any infected leaves or plants. Ensure good air circulation around your plants to prevent fungal diseases. Blossom end rot is caused by calcium deficiency, so ensure your soil has adequate calcium and water your plants consistently.
Can I ripen green tomatoes indoors?
Yes, you can ripen green tomatoes indoors. Harvest mature green tomatoes (those that are full size and starting to show a slight blush of color) before the first frost. Place them in a single layer in a cardboard box or paper bag, along with a ripe apple or banana (which release ethylene gas, a natural ripening agent). Store the box in a cool, dark place (around 60-70°F). Check the tomatoes regularly and remove any that show signs of rotting. They should ripen within a week or two.
What are some good tomato varieties for extending the harvest?
Some tomato varieties are naturally more productive and disease-resistant, making them ideal for extending the harvest. Consider planting indeterminate varieties like ‘Brandywine,’ ‘Cherokee Purple,’ ‘San Marzano,’ or ‘Sungold.’ These varieties continue to produce fruit throughout the growing season. Also, look for varieties that are known for their tolerance to cool weather or disease resistance.
How important is watering for extending the tomato harvest?
Consistent and adequate watering is crucial. Tomatoes need about 1-2 inches of water per week, especially during fruit development. Water deeply and regularly, avoiding overhead watering, which can promote fungal diseases. Mulch around your plants to help retain moisture in the soil. Uneven watering can lead to problems like blossom end rot.
What if I don’t have a lot of space for gardening? Can I still extend my tomato harvest?
Absolutely! Even if you have limited space, you can still extend your tomato harvest by growing tomatoes in containers. Choose compact or dwarf varieties that are well-suited for container gardening. Use a large container (at least 10 gallons) with good drainage. Provide adequate support for the plants, such as a tomato cage or stake. Water and fertilize regularly, and place the container in a sunny location.
How can I improve the soil for better tomato production and an extended harvest?
Healthy soil is the foundation for a successful tomato harvest. Amend your soil with compost or other organic matter to improve drainage, aeration, and nutrient content. Perform a soil test to determine the pH level and nutrient deficiencies. Tomatoes prefer a slightly acidic soil pH (around 6.0-6.8). Add lime to raise the pH or sulfur to lower it. Consider using raised beds to improve drainage and soil warming.
Leave a Comment