
Onion planting harvest boost – who doesn’t dream of a garden overflowing with plump, juicy onions? I know I do! Imagine the satisfaction of pulling those beauties straight from the earth, knowing you nurtured them from tiny seedlings to culinary superstars. But let’s be honest, sometimes our onion dreams don’t quite match reality. We end up with spindly greens and bulbs that are, well, less than impressive.
For centuries, onions have been a staple in cuisines around the world, from the humble French onion soup to the vibrant curries of India. They’re not just delicious; they’re packed with nutrients and have even been used for medicinal purposes throughout history. But getting a truly bountiful harvest can feel like a secret passed down through generations.
That’s where these DIY tricks come in! I’m going to share some simple, yet incredibly effective, hacks that will give your onion planting harvest boost a serious upgrade. We’ll delve into everything from soil preparation to companion planting, ensuring you maximize your yield and minimize common onion-growing woes. Forget disappointing harvests – get ready to impress your friends and family with your onion-growing prowess. Let’s get digging!
Zwiebelanbau-Hack: Ernte maximieren mit einfachen DIY-Methoden
Hallo liebe Gartenfreunde! Ich bin total begeistert, euch heute einen super einfachen und effektiven DIY-Hack zu zeigen, mit dem ihr eure Zwiebelernte deutlich steigern könnt. Wir alle lieben doch eine reiche Ernte, oder? Und mit diesen Tipps und Tricks wird das Zwiebelanbauen zum Kinderspiel und eure Ernte zum absoluten Knaller!
Was wir brauchen: Die Zutaten für eine reiche Zwiebelernte
Bevor wir loslegen, hier eine Liste mit den Dingen, die wir benötigen. Keine Sorge, es sind alles Sachen, die man leicht besorgen kann:
* Zwiebelsetzlinge oder Zwiebelsamen (je nachdem, was ihr bevorzugt)
* Gartenhandschuhe (zum Schutz eurer Hände)
* Eine Schaufel oder Pflanzkelle
* Kompost oder gut verrotteter Mist (für den extra Nährstoffkick)
* Holzasche (ein Geheimtipp für gesunde Zwiebeln!)
* Mulchmaterial (z.B. Stroh oder Grasschnitt)
* Eine Gießkanne oder ein Gartenschlauch
* Ein Maßband oder Lineal (für den richtigen Abstand)
* Eine Sprühflasche
* Backpulver
* Pflanzenöl (z.B. Rapsöl)
* Spülmittel
Die Vorbereitung: Der Schlüssel zum Erfolg
Bevor wir die Zwiebeln in die Erde bringen, ist eine gute Vorbereitung das A und O. Das ist wie beim Kochen – die richtigen Zutaten und die richtige Vorbereitung machen den Unterschied!
* Boden vorbereiten: Zwiebeln lieben einen lockeren, gut durchlässigen Boden. Wenn euer Boden eher schwer und lehmig ist, solltet ihr ihn mit Kompost oder Sand auflockern. Das sorgt dafür, dass die Wurzeln gut wachsen können.
* Nährstoffe hinzufügen: Zwiebeln sind hungrig! Mischt ordentlich Kompost oder gut verrotteten Mist unter die Erde. Das gibt ihnen den nötigen Boost für ein kräftiges Wachstum.
* Holzasche einarbeiten: Holzasche ist ein echter Geheimtipp! Sie enthält wichtige Mineralien und Spurenelemente, die Zwiebeln lieben. Außerdem hilft sie, den pH-Wert des Bodens zu regulieren. Einfach eine Handvoll Holzasche pro Quadratmeter in die Erde einarbeiten.
* Standort wählen: Zwiebeln brauchen Sonne, Sonne, Sonne! Wählt einen sonnigen Standort in eurem Garten, an dem die Zwiebeln mindestens sechs Stunden Sonne am Tag bekommen.
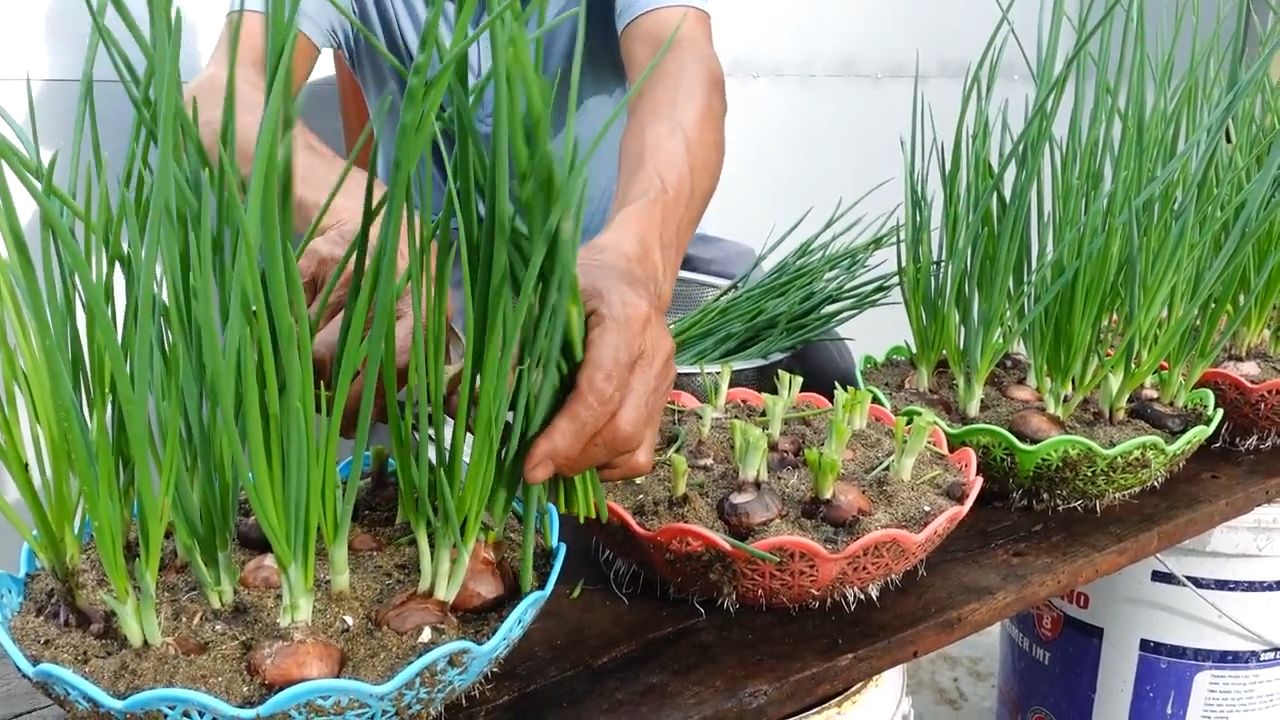
Die Pflanzung: Schritt für Schritt zur Zwiebelpracht
Jetzt geht es ans Eingemachte! Wir pflanzen die Zwiebeln ein und legen den Grundstein für eine reiche Ernte.
1. Abstand beachten: Zwiebeln brauchen Platz zum Wachsen. Pflanzt die Zwiebelsetzlinge oder -samen in einem Abstand von etwa 10-15 cm zueinander. Zwischen den Reihen solltet ihr etwa 20-30 cm Platz lassen.
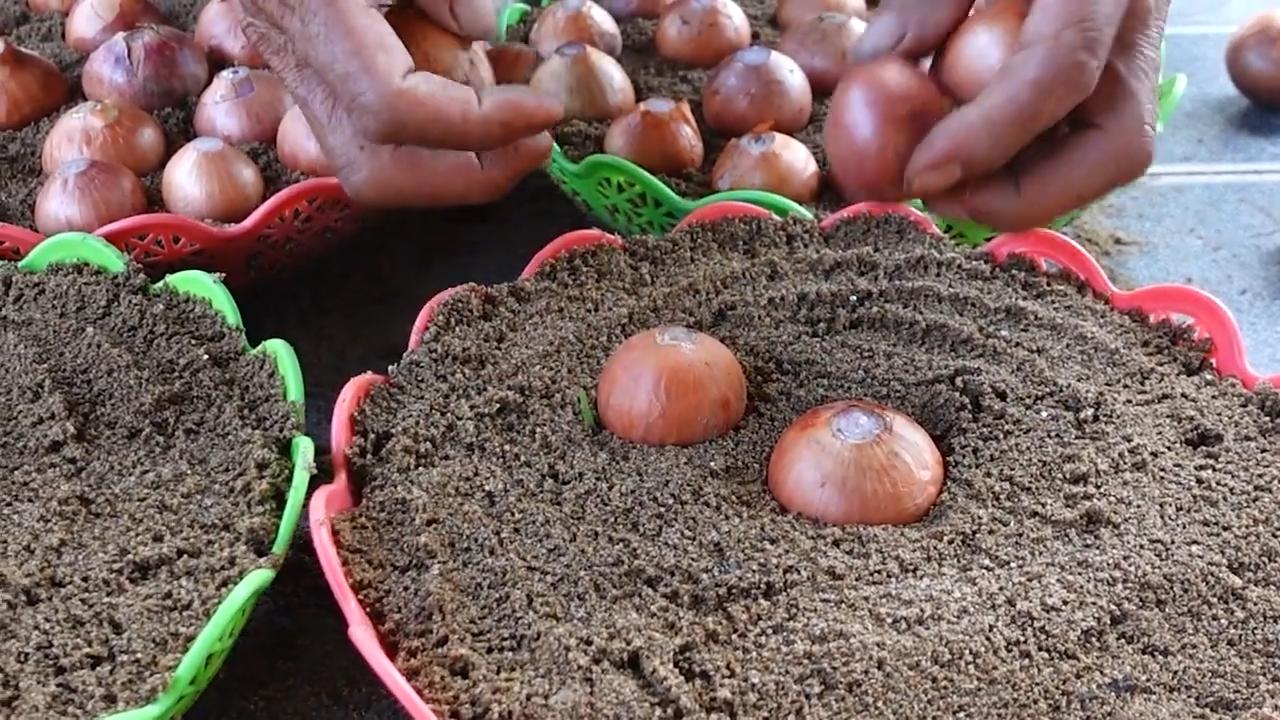
2. Pflanztiefe: Die Zwiebelsetzlinge sollten so tief in die Erde, dass nur die Spitze herausschaut. Bei Samen beachtet die Angaben auf der Packung.
3. Angießen: Nach dem Pflanzen solltet ihr die Zwiebeln ordentlich angießen. Das hilft ihnen, sich im Boden zu verwurzeln.
4. Mulchen: Eine Mulchschicht aus Stroh oder Grasschnitt hält den Boden feucht, unterdrückt Unkraut und schützt die Zwiebeln vor extremen Temperaturen.
Die Pflege: Damit die Zwiebeln sich wohlfühlen
Zwiebeln sind zwar relativ pflegeleicht, aber ein bisschen Aufmerksamkeit brauchen sie trotzdem.
* Gießen: Zwiebeln brauchen regelmäßig Wasser, besonders in trockenen Perioden. Achtet darauf, dass der Boden immer leicht feucht ist, aber nicht zu nass. Staunässe mögen Zwiebeln gar nicht!
* Unkraut jäten: Haltet das Unkraut in Schach! Unkraut konkurriert mit den Zwiebeln um Nährstoffe und Wasser.
* Düngen: Nach etwa vier Wochen könnt ihr die Zwiebeln noch einmal mit einem organischen Dünger düngen. Das gibt ihnen einen zusätzlichen Wachstumsschub.
DIY-Hack: Backpulver-Spray für gesunde Zwiebeln
Hier kommt mein absoluter Geheimtipp für gesunde und widerstandsfähige Zwiebeln: ein selbstgemachtes Backpulver-Spray!
* Warum Backpulver? Backpulver wirkt fungizid und kann Pilzkrankheiten vorbeugen, die Zwiebeln befallen können. Außerdem stärkt es die Pflanzen und macht sie widerstandsfähiger gegen Schädlinge.
* Das Rezept:
* 1 Liter Wasser
* 1 Teelöffel Backpulver
* 1 Teelöffel Pflanzenöl (z.B. Rapsöl)
* Ein paar Tropfen Spülmittel
* Zubereitung: Alle Zutaten in eine Sprühflasche geben und gut schütteln, bis sich das Backpulver aufgelöst hat.
* Anwendung: Sprüht die Zwiebeln alle zwei Wochen mit dem Backpulver-Spray ein. Achtet darauf, dass ihr auch die Unterseite der Blätter besprüht. Am besten sprüht ihr am frühen Morgen oder am späten Abend, wenn die Sonne nicht mehr so stark scheint.
Schutz vor Schädlingen: Zwiebelfliege und Co.
Leider sind Zwiebeln auch bei Schädlingen beliebt. Die Zwiebelfliege ist einer der häufigsten Schädlinge. Aber keine Panik, auch hier gibt es einfache Lösungen!
* Zwiebelfliege: Die Zwiebelfliege legt ihre Eier an den Zwiebeln ab. Die Larven fressen sich dann in die Zwiebeln und können großen Schaden anrichten.
* Vorbeugung:
* Fruchtfolge beachten: Pflanzt Zwiebeln nicht jedes Jahr am selben Standort.
* Schutznetz: Ein feinmaschiges Schutznetz über den Zwiebeln verhindert, dass die Zwiebelfliege ihre Eier ablegen kann.
* Begleitpflanzen: Karotten und Ringelblumen sollen die Zwiebelfliege abwehren. Pflanzt diese einfach zwischen die Zwiebeln.
* Bekämpfung:
* Nematoden: Nematoden sind winzige Fadenwürmer, die die Larven der Zwiebelfliege bekämpfen. Sie sind im Fachhandel erhältlich.
* Gelbtafeln: Gelbtafeln locken die Zwiebelfliegen an und fangen sie ein.
* Lauchmotte: Die Lauchmotte befällt nicht nur Lauch, sondern auch Zwiebeln.
* Vorbeugung:
* Schutznetz: Auch hier hilft ein Schutznetz, die Lauchmotte fernzuhalten.
* Regelmäßige Kontrolle: Kontrolliert die Zwiebeln regelmäßig auf Befall.
* Bekämpfung:
* Befallene Blätter entfernen: Entfernt befallene Blätter sofort.
* Nützlinge fördern: Fördert Nützlinge wie Schlupfwespen, die die Larven der Lauchmotte parasitieren.
Die Ernte: Der Lohn der Mühe
Endlich ist es soweit! Die Zwiebeln sind reif und bereit für die Ernte.
* Wann ernten? Die Zwiebeln sind reif, wenn das Laub gelb wird und umknickt.
* Wie ernten? Zieht die Zwiebeln vorsichtig aus der Erde.
* Trocknen: Lasst die Zwiebeln nach der Ernte ein paar Tage an einem trockenen, luftigen Ort trocknen. Das macht sie haltbarer.
* Lagern: Lagert die getrockneten Zwiebeln an einem kühlen, trockenen und dunklen Ort. So halten sie sich mehrere Monate.
Ich hoffe, diese Tipps und Tricks helfen euch dabei, eine reiche Zwiebelernte zu erzielen. Viel Spaß beim Gärtnern! Und denkt daran: Mit ein bisschen Liebe und Geduld wird euer Garten zum Paradies!
Conclusion
So, there you have it! This simple yet incredibly effective DIY trick for boosting your onion planting harvest is a game-changer for any gardener, whether you’re a seasoned pro or just starting out. We’ve walked you through the process, highlighting the science behind why it works and demonstrating how easy it is to implement.
Why is this a must-try? Because who doesn’t want bigger, healthier, and more abundant onions? This method addresses common issues that can hinder onion growth, such as nutrient deficiencies and poor root development. By giving your onion seedlings a head start with this nutrient-rich boost, you’re setting them up for success from the very beginning. Imagine the satisfaction of harvesting onions that are significantly larger and more flavorful than you’ve ever grown before. Think of the delicious meals you can create with your bountiful harvest!
But the benefits extend beyond just size and yield. This DIY trick also promotes stronger, healthier plants that are more resistant to pests and diseases. A robust root system is the foundation of a healthy plant, and this method ensures that your onions develop the strong roots they need to thrive. This means less time spent battling problems and more time enjoying the fruits (or rather, vegetables!) of your labor.
Looking for variations? Absolutely! While the basic recipe is highly effective, you can customize it to suit your specific needs and preferences. For example, if you’re growing organic onions, be sure to use organic fertilizers and compost. You can also experiment with adding other beneficial ingredients to the mixture, such as seaweed extract or bone meal, to further enhance nutrient availability. Consider the specific needs of your onion variety and adjust the recipe accordingly. Some varieties may benefit from a slightly higher concentration of phosphorus, while others may prefer a boost of potassium.
Another variation to consider is the timing of the application. While we recommend applying the mixture at planting, you can also use it as a foliar spray throughout the growing season to provide your onions with an extra boost of nutrients. Just be sure to dilute the mixture appropriately to avoid burning the leaves.
Don’t be afraid to experiment and find what works best for you and your garden. Gardening is all about learning and adapting, and this DIY trick is a great starting point for exploring new ways to improve your onion harvest.
We are confident that this DIY trick will revolutionize your onion growing experience. It’s easy, affordable, and incredibly effective. So, what are you waiting for? Give it a try and see the difference for yourself!
We’re eager to hear about your results! Share your experiences, tips, and photos in the comments below. Let’s create a community of gardeners who are passionate about growing the best onions possible. Your feedback will not only help us improve this guide but also inspire other gardeners to try this amazing DIY trick. Let’s work together to unlock the full potential of our onion planting harvest boost!
Frequently Asked Questions (FAQ)
What exactly does this DIY trick do for my onions?
This DIY trick provides a concentrated dose of essential nutrients directly to the roots of your onion seedlings at planting time. This jumpstarts their growth, promotes strong root development, and helps them establish themselves quickly. It also helps to prevent nutrient deficiencies that can stunt growth and reduce yields. Essentially, it’s like giving your onions a super-powered breakfast to set them up for a successful growing season. The boost helps the plant develop a strong foundation, making it more resilient to environmental stressors and pests.
What kind of fertilizer should I use?
A balanced fertilizer with an NPK ratio (Nitrogen, Phosphorus, Potassium) of around 10-10-10 or 14-14-14 is a good starting point. However, you can also use a fertilizer specifically formulated for vegetable gardens. For organic gardening, consider using compost tea, fish emulsion, or bone meal. The key is to choose a fertilizer that provides a good balance of nutrients to support overall plant growth. Remember to always follow the manufacturer’s instructions for application rates.
Can I use this trick for other plants besides onions?
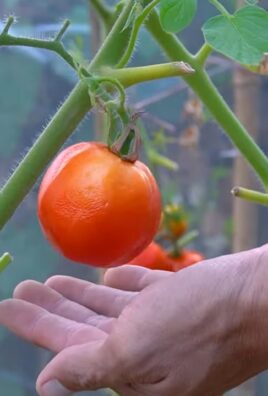
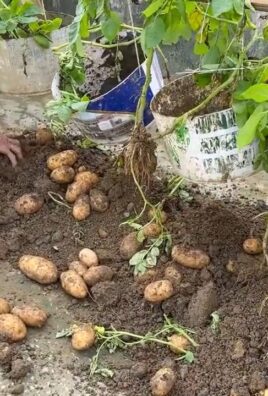
While this trick is specifically designed for onions, the underlying principles can be applied to other plants as well. Many vegetables, especially those with high nutrient requirements like tomatoes and peppers, can benefit from a similar nutrient boost at planting time. However, you may need to adjust the recipe and application rate based on the specific needs of the plant. Research the nutrient requirements of the plant you’re growing and choose a fertilizer that meets those needs.
How often should I apply this mixture?
The primary application is at planting time. However, you can also use a diluted version of the mixture as a foliar spray every few weeks throughout the growing season. This will provide your onions with an extra boost of nutrients and help to keep them healthy and strong. When using as a foliar spray, dilute the mixture to about half strength to avoid burning the leaves.
What if I don’t have all the ingredients listed?
Don’t worry! You can still use this trick with just a few basic ingredients. The most important components are the fertilizer and compost. If you don’t have access to specific types of fertilizer, use what you have on hand, but be sure to dilute it appropriately. The compost provides essential micronutrients and beneficial microbes that will help to improve soil health and promote plant growth.
My onion seedlings are already planted. Is it too late to use this trick?
No, it’s not too late! While it’s best to apply the mixture at planting time, you can still benefit from using it as a side dressing or foliar spray. Gently dig a shallow trench around the base of your onion plants and pour the mixture into the trench. Then, cover the trench with soil. Alternatively, you can dilute the mixture and use it as a foliar spray.
How do I know if my onions are getting enough nutrients?
Look for signs of nutrient deficiencies, such as yellowing leaves, stunted growth, or poor bulb development. If you notice any of these symptoms, it’s a good idea to test your soil to determine which nutrients are lacking. You can purchase a soil testing kit at most garden centers or send a sample to a professional soil testing lab.
What are some common mistakes to avoid when using this trick?
One common mistake is using too much fertilizer, which can burn the roots of your onion seedlings. Always follow the manufacturer’s instructions for application rates and dilute the mixture appropriately. Another mistake is not providing adequate drainage, which can lead to root rot. Make sure your soil is well-draining and avoid overwatering.
How long will it take to see results?
You should start to see results within a few weeks of applying the mixture. Your onion seedlings will be noticeably larger and healthier than those that didn’t receive the treatment. You’ll also notice improved root development and increased resistance to pests and diseases. The ultimate payoff will be a larger and more abundant onion harvest.
Can I use this trick in containers?
Yes, this trick works well in containers as well as in the ground. Just be sure to use a well-draining potting mix and provide adequate drainage. You may need to water your container-grown onions more frequently than those grown in the ground, as containers tend to dry out more quickly.
This DIY trick for onion planting harvest boost is a simple and effective way to improve your onion growing success. By following these tips and answering these frequently asked questions, you’ll be well on your way to harvesting a bumper crop of delicious, homegrown onions. Happy gardening!
Leave a Comment