
Balcony Cabbage Growing Tips: Dreaming of fresh, homegrown cabbage but short on space? You’re not alone! Many urban dwellers crave the satisfaction of harvesting their own vegetables, and thankfully, you don’t need acres of land to make it happen. This DIY guide unlocks the secrets to successfully cultivating delicious cabbages right on your balcony.
Cabbage, a staple in cuisines worldwide, boasts a rich history dating back thousands of years. From ancient Rome to medieval Europe, cabbage has been a symbol of sustenance and resilience. Imagine carrying on that tradition, but with a modern, space-saving twist! Forget the sprawling farm; we’re bringing the farm-to-table experience to your doorstep.
Why should you embrace these balcony cabbage growing tips? Because fresh, organic produce shouldn’t be a luxury. Store-bought cabbage can be expensive and often lacks the vibrant flavor of homegrown varieties. Plus, there’s immense satisfaction in nurturing a plant from seed to harvest. I’m here to show you how to overcome common challenges like limited sunlight, small spaces, and pest control, ensuring you enjoy a bountiful cabbage harvest, even on the tiniest balcony. Let’s get growing!
Balkonkohl: Dein eigener kleiner Gemüsegarten auf dem Balkon
Hey Gartenfreunde! Träumt ihr auch davon, frischen, knackigen Kohl direkt vom Balkon zu ernten? Dann seid ihr hier genau richtig! Ich zeige euch, wie ihr mit ein paar einfachen Tricks und Kniffen euren Balkon in ein kleines Kohlparadies verwandeln könnt. Keine Angst, es ist einfacher als ihr denkt!
Warum Kohl auf dem Balkon anbauen?
Kohl vom Balkon zu ernten, hat viele Vorteile:
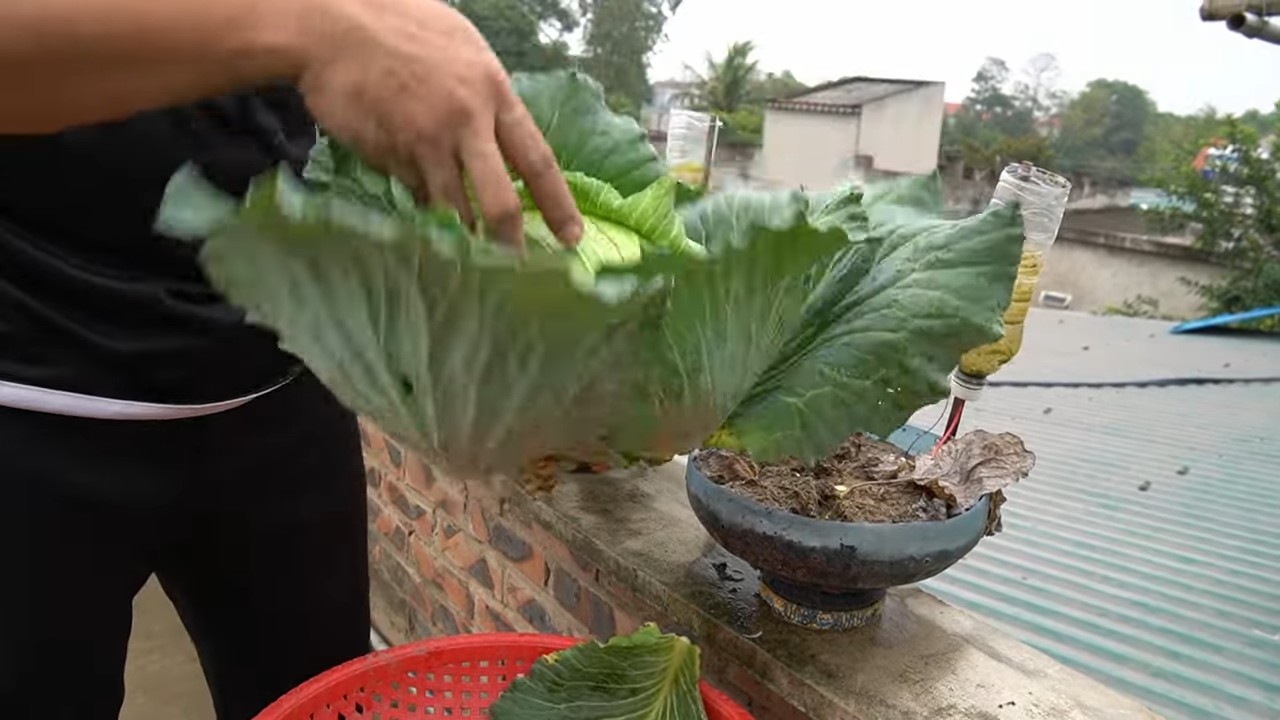
* Frische Ernte: Ihr habt immer frischen Kohl zur Hand, ohne lange Wege zum Supermarkt.
* Kontrolle über Anbau: Ihr wisst genau, was in eurem Kohl steckt, ohne Pestizide oder chemische Dünger.
* Platzsparend: Auch auf kleinen Balkonen lässt sich Kohl anbauen.
* Nachhaltigkeit: Ihr reduziert Transportwege und unterstützt einen nachhaltigen Lebensstil.
* Es macht Spaß!: Das Gärtnern ist eine tolle Möglichkeit, sich zu entspannen und die Natur zu genießen.
Welche Kohlsorten eignen sich für den Balkon?
Nicht jeder Kohl fühlt sich auf dem Balkon wohl. Hier sind ein paar Sorten, die sich besonders gut eignen:
* Blumenkohl: ‘Snowball’ oder ‘Erfurter Zwerg’ sind kompakte Sorten, die gut in Töpfen wachsen.
* Brokkoli: ‘Calabrese’ oder ‘De Cicco’ sind frühreifende Sorten, die sich gut für den Balkon eignen.
* Rosenkohl: ‘Jade Cross’ ist eine robuste Sorte, die auch mit kühleren Temperaturen zurechtkommt.
* Grünkohl: ‘Lacinato’ (Palmkohl) oder ‘Red Russian’ sind dekorative und pflegeleichte Sorten.
* Kopfkohl: Mini-Kopfkohl wie ‘Caraflex’ oder ‘Brunswick’ sind ideal für den Anbau in Töpfen.
* Chinakohl: ‘Kasumi’ oder ‘Optiko’ sind schnellwachsende Sorten, die sich gut für den Balkon eignen.
Wichtig: Achtet beim Kauf auf Zwergsorten oder Sorten, die als “balkongeeignet” gekennzeichnet sind. Diese bleiben kleiner und sind besser für den Anbau in Töpfen geeignet.
Die richtige Vorbereitung: Was ihr braucht
Bevor es losgeht, solltet ihr euch mit dem richtigen Equipment ausstatten:
* Saatgut oder Jungpflanzen: Wählt eure Lieblingskohlsorten aus. Jungpflanzen sind besonders für Anfänger eine gute Wahl.
* Töpfe oder Kübel: Wählt ausreichend große Töpfe mit einem Durchmesser von mindestens 30 cm. Kübel sind ideal für größere Kohlsorten.
* Pflanzerde: Verwendet hochwertige Gemüseerde oder mischt eure eigene Erde aus Kompost, Gartenerde und Sand.
* Dünger: Organischer Dünger wie Hornspäne oder Kompost sorgt für eine gute Nährstoffversorgung.
* Gießkanne oder Gartenschlauch: Zum regelmäßigen Gießen.
* Schere oder Messer: Zum Ernten.
* Eventuell: Rankhilfe für Grünkohl oder Rosenkohl, falls die Pflanzen zu groß werden.
Schritt-für-Schritt-Anleitung: So pflanzt ihr euren Balkonkohl
Jetzt geht’s ans Eingemachte! Hier ist eine detaillierte Anleitung, wie ihr euren Balkonkohl erfolgreich anpflanzt:
1. Die Aussaat (optional)
Wenn ihr euren Kohl selbst aussäen möchtet, solltet ihr damit im Frühjahr (Februar/März) beginnen.
1. Aussaatgefäße vorbereiten: Füllt kleine Töpfe oder Anzuchtschalen mit Anzuchterde.
2. Samen aussäen: Legt die Samen in die Erde und bedeckt sie leicht mit Erde.
3. Gießen: Befeuchtet die Erde vorsichtig mit einer Sprühflasche.
4. Warm stellen: Stellt die Anzuchtschalen an einen warmen, hellen Ort (z.B. Fensterbank).
5. Feucht halten: Haltet die Erde feucht, aber nicht nass.
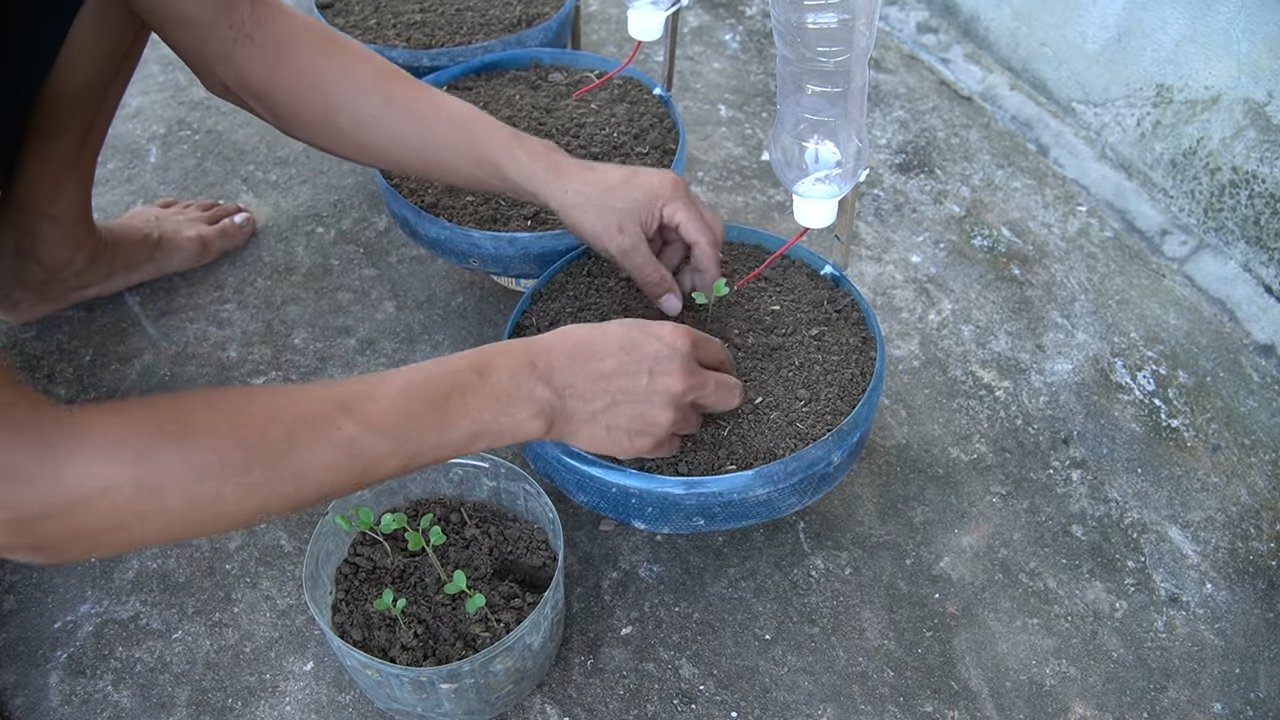
6. Pikieren: Sobald die Keimlinge einige Blätter haben, könnt ihr sie in größere Töpfe pikieren.
2. Das Pflanzen
Egal ob ihr Jungpflanzen gekauft oder selbst gezogen habt, das Pflanzen ist der nächste Schritt.
1. Töpfe vorbereiten: Füllt die Töpfe oder Kübel mit Pflanzerde. Lasst oben einen Rand von ca. 5 cm frei.
2. Pflanzen einsetzen: Grabt ein Loch in die Erde, das groß genug für den Wurzelballen der Pflanze ist. Setzt die Pflanze ein und füllt das Loch mit Erde auf.
3. Andrücken: Drückt die Erde leicht an.
4. Gießen: Gießt die Pflanzen gründlich an.
3. Der richtige Standort
Kohl liebt die Sonne!
1. Sonniger Standort: Wählt einen sonnigen Standort für eure Kohlpflanzen. Mindestens 6 Stunden Sonne pro Tag sind ideal.
2. Windschutz: Achtet darauf, dass die Pflanzen vor starkem Wind geschützt sind. Ein windgeschützter Balkon oder eine Hauswand sind ideal.
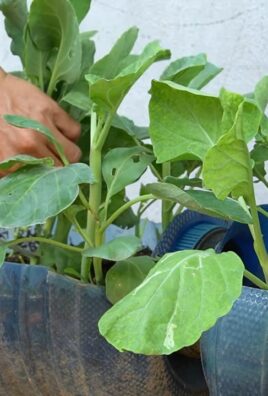
4. Die Pflege
Damit euer Kohl prächtig gedeiht, ist die richtige Pflege entscheidend.
1. Gießen: Gießt die Pflanzen regelmäßig, besonders an heißen Tagen. Die Erde sollte immer leicht feucht sein, aber nicht nass. Vermeidet Staunässe.
2. Düngen: Düngt die Pflanzen regelmäßig mit organischem Dünger. Beginnt damit ca. 2-3 Wochen nach dem Pflanzen.
3. Schädlinge bekämpfen: Kontrolliert die Pflanzen regelmäßig auf Schädlinge wie Kohlweißlinge, Blattläuse oder Schnecken. Bei Bedarf könnt ihr biologische Schädlingsbekämpfungsmittel einsetzen.
4. Ausgeizen: Bei einigen Kohlsorten (z.B. Rosenkohl) solltet ihr die Seitentriebe entfernen, um die Bildung der Röschen zu fördern.
5. Stützen: Bei Bedarf könnt ihr die Pflanzen mit Stäben oder Rankhilfen stützen, um zu verhindern, dass sie umknicken.
Schädlinge und Krankheiten: Was tun, wenn’s brennt?
Auch auf dem Balkon ist euer Kohl nicht vor Schädlingen und Krankheiten gefeit. Hier sind ein paar häufige Probleme und wie ihr sie in den Griff bekommt:
* Kohlweißling: Die Raupen des Kohlweißlings fressen Löcher in die Blätter. Ihr könnt die Raupen absammeln oder die Pflanzen mit einem Netz schützen.
* Blattläuse: Blattläuse saugen Pflanzensaft und können die Pflanzen schwächen. Ihr könnt die Blattläuse mit einem Wasserstrahl abspülen oder mit einem biologischen Insektizid bekämpfen.
* Schnecken: Schnecken lieben Kohl! Ihr könnt Schneckenkorn streuen oder Schneckenfallen aufstellen.
* Kohlhernie: Kohlhernie ist eine Pilzkrankheit, die die Wurzeln befällt. Befallene Pflanzen sollten entsorgt werden. Achtet auf eine gute Fruchtfolge und verwendet resistente Sorten.
* Falscher Mehltau: Falscher Mehltau ist eine Pilzkrankheit, die sich durch gelbliche Flecken auf den Blättern äußert. Sorgt für eine gute Belüftung und entfernt befallene Blätter.
Wichtig: Setzt bei der Schädlingsbekämpfung immer auf biologische Mittel. Chemische Pestizide sind schädlich für die Umwelt und eure Gesundheit.
Die Ernte: Der Lohn eurer Mühe
Endlich ist es soweit! Die Erntezeit ist gekommen.
1. Reife erkennen: Achtet auf die Reifezeichen der jeweiligen Kohlsorte. Blumenkohl ist reif, wenn die Röschen fest und geschlossen sind. Brokkoli ist reif, wenn die Röschen noch grün und fest sind. Rosenkohl ist reif, wenn die Röschen fest und geschlossen sind. Grünkohl kann geerntet werden, sobald die Blätter groß genug sind. Kopfkohl ist reif, wenn der Kopf fest und geschlossen ist. Chinakohl ist reif, wenn der Kopf fest und geschlossen ist.
2.
Conclusion
So, there you have it! Growing cabbage on your balcony isn’t just a whimsical dream; it’s a tangible reality within your reach. We’ve explored the ins and outs of cultivating these leafy greens in a limited space, from selecting the right varieties to providing the optimal growing conditions. But why should you even bother with this endeavor?
The answer is multifaceted. Firstly, imagine the unparalleled satisfaction of harvesting fresh, crisp cabbage right outside your door. No more trips to the grocery store, no more wondering about the origin of your produce. You’ll have complete control over the growing process, ensuring that your cabbage is free from harmful pesticides and bursting with natural flavor. This is especially important if you are health-conscious and prefer organic options.
Secondly, balcony gardening, and specifically growing cabbage, is a fantastic way to connect with nature, even in the heart of the city. The simple act of nurturing a plant from seed to harvest can be incredibly therapeutic, offering a welcome respite from the stresses of daily life. Watching your cabbage heads slowly unfurl, day by day, is a rewarding experience that fosters patience and appreciation for the natural world.
Thirdly, growing your own cabbage is surprisingly economical. While there’s an initial investment in seeds, soil, and containers, the long-term savings on grocery bills can be significant. Plus, you can save seeds from your harvest to replant in subsequent seasons, creating a sustainable cycle of homegrown goodness.
But the benefits don’t stop there. Balcony cabbage growing is also a fantastic way to reduce your carbon footprint. By growing your own food, you’re minimizing the environmental impact associated with transporting produce from distant farms to your local supermarket. You’re also reducing your reliance on plastic packaging, which is a major source of pollution.
Now, let’s talk about variations. While we’ve focused on general cabbage growing tips, feel free to experiment with different varieties. Red cabbage adds a vibrant splash of color to your balcony garden and offers a slightly sweeter flavor. Savoy cabbage, with its crinkled leaves, is another excellent choice for its unique texture and taste. You can also try growing smaller, more compact varieties specifically bred for container gardening.
Consider companion planting to maximize your balcony space and deter pests naturally. Marigolds, for example, are known to repel cabbage moths, while dill can attract beneficial insects that prey on aphids. Interplanting your cabbage with herbs like rosemary or thyme can also enhance their flavor and aroma.
Don’t be afraid to get creative with your container choices. While traditional pots and planters work well, you can also repurpose old buckets, crates, or even laundry baskets. Just make sure that your chosen container has adequate drainage holes to prevent waterlogging.
Finally, remember that growing cabbage on your balcony is a learning process. Don’t be discouraged if you encounter challenges along the way. Every gardener, even the most experienced, faces setbacks from time to time. The key is to learn from your mistakes, adapt your techniques, and never give up on your green dreams.
So, what are you waiting for? Grab some seeds, prepare your containers, and embark on your balcony cabbage growing adventure today! We’re confident that you’ll be amazed by the results. And once you’ve harvested your first crop, be sure to share your experience with us. We’d love to hear your tips, tricks, and triumphs. Post photos of your balcony cabbage garden on social media using #BalconyCabbage or tag us in your posts. Let’s create a community of balcony gardeners and inspire others to grow their own food, one cabbage head at a time. Embrace the joy of **balcony cabbage growing** and savor the taste of homegrown goodness!
Frequently Asked Questions (FAQ)
1. What is the best type of cabbage to grow on a balcony?
The best type of cabbage for balcony growing is typically a smaller, more compact variety. Some excellent choices include:
* **Dwarf varieties:** These are specifically bred for container gardening and won’t outgrow their space.
* **Early varieties:** These mature quickly, allowing you to harvest them before the end of the growing season.
* **Red cabbage:** Adds visual appeal and a slightly sweeter flavor.
* **Savoy cabbage:** Offers a unique texture and taste.
* **’Golden Acre’:** A popular early variety that produces small, round heads.
* **’Red Express’:** A fast-growing red cabbage that’s perfect for containers.
Consider your local climate and growing season when selecting a variety. Check seed packets for information on days to maturity and recommended growing conditions.
2. What size container do I need for growing cabbage on my balcony?
Cabbage needs a fairly large container to accommodate its root system. A good rule of thumb is to use a container that is at least 12 inches in diameter and 12 inches deep. Larger containers are generally better, as they provide more room for the roots to grow and retain moisture more effectively.
Ensure the container has adequate drainage holes to prevent waterlogging, which can lead to root rot. You can also use a self-watering container to help maintain consistent moisture levels.
3. What kind of soil should I use for growing cabbage in containers?
Use a high-quality potting mix specifically formulated for container gardening. Avoid using garden soil, as it can be too heavy and compacted for containers. A good potting mix should be well-draining, lightweight, and rich in organic matter.
You can also amend your potting mix with compost or other organic materials to improve its fertility and water-holding capacity. Consider adding a slow-release fertilizer to provide your cabbage plants with a steady supply of nutrients throughout the growing season.
4. How much sunlight does cabbage need when grown on a balcony?
Cabbage needs at least 6 hours of direct sunlight per day to thrive. Choose a location on your balcony that receives ample sunlight throughout the day. If your balcony is shaded for part of the day, try to position your cabbage plants so that they receive the most sunlight possible.
If you don’t have enough natural sunlight, you can supplement with grow lights. LED grow lights are energy-efficient and can provide your cabbage plants with the light they need to grow and develop properly.
5. How often should I water my cabbage plants on the balcony?
Water your cabbage plants regularly, especially during hot, dry weather. The soil should be kept consistently moist but not waterlogged. Check the soil moisture level by sticking your finger into the soil. If the top inch of soil feels dry, it’s time to water.
Water deeply, allowing the water to drain out of the drainage holes. Avoid watering the foliage, as this can promote fungal diseases. Water in the morning to allow the foliage to dry before nightfall.
6. How do I fertilize my cabbage plants on the balcony?
Cabbage is a heavy feeder, so it’s important to fertilize your plants regularly. Use a balanced fertilizer, such as a 10-10-10 or 20-20-20, according to the package directions. You can also use a liquid fertilizer, such as fish emulsion or seaweed extract, to provide your plants with a quick boost of nutrients.
Fertilize your cabbage plants every 2-3 weeks throughout the growing season. Avoid over-fertilizing, as this can lead to excessive foliage growth and reduced head formation.
7. What are some common pests and diseases that affect cabbage, and how can I control them?
Some common pests that affect cabbage include cabbage worms, aphids, and flea beetles. Diseases include black rot, clubroot, and downy mildew.
* **Cabbage worms:** Handpick them off the plants or use Bacillus thuringiensis (Bt), a biological insecticide.
* **Aphids:** Spray with insecticidal soap or neem oil.
* **Flea beetles:** Cover plants with row covers or use insecticidal soap.
* **Black rot:** Plant disease-resistant varieties and avoid overhead watering.
* **Clubroot:** Improve soil drainage and add lime to raise the soil pH.
* **Downy mildew:** Improve air circulation and avoid overhead watering.
Regularly inspect your plants for signs of pests and diseases. Early detection and treatment can help prevent serious problems.
8. How do I know when my cabbage is ready to harvest?
Cabbage is ready to harvest when the head is firm and solid. The size of the head will vary depending on the variety. Gently squeeze the head to check for firmness. If it feels solid, it’s ready to harvest.
Cut the head off the plant with a sharp knife, leaving a few outer leaves attached. You can store harvested cabbage in the refrigerator for several weeks.
9. Can I grow cabbage on my balcony in the winter?
In mild climates, you may be able to grow cabbage on your balcony in the winter. Choose cold-hardy varieties and provide protection from frost and freezing temperatures. You can use row covers, cold frames, or greenhouses to extend the growing season.
In colder climates, you can start cabbage seeds indoors in late winter and transplant them to your balcony in the spring.
10. What are some companion plants for cabbage?
Companion planting can help improve the health and productivity of your cabbage plants. Some good companion plants for cabbage include:
* **Marigolds:** Repel cabbage moths.
* **Dill:** Attracts beneficial insects that prey


Leave a Comment