
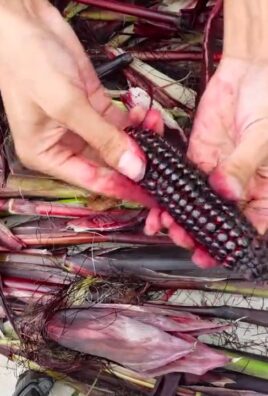
Easy sweet melon growing – sounds like a dream, right? Imagine biting into a juicy, perfectly ripe melon, bursting with sweetness, all thanks to your own green thumb! Forget those bland, store-bought melons; we’re diving into the world of DIY to unlock the secrets of cultivating the most delicious melons you’ve ever tasted.
Melons have a rich history, dating back to ancient civilizations in Africa and Asia. They were prized for their refreshing qualities and even depicted in ancient Egyptian art! For centuries, people have been perfecting the art of melon cultivation, and now, I’m excited to share some of the most effective and easy-to-implement tricks with you.
Why do you need these DIY hacks for easy sweet melon growing? Well, let’s face it: melons can be a bit finicky. They need the right conditions, the right nutrients, and a little bit of TLC to truly thrive. Many gardeners struggle with getting their melons to reach their full potential, resulting in small, tasteless fruits. But fear not! With these simple yet effective techniques, you’ll be well on your way to harvesting a bumper crop of sweet, juicy melons that will impress your friends and family. I’m going to show you how to maximize your yield and sweetness, even if you’re a beginner gardener!
So einfach ziehst du deine eigenen süßen Melonen!
Hallo liebe Gartenfreunde! Ich liebe Melonen, und es gibt nichts Besseres, als eine saftige, selbst angebaute Melone an einem heißen Sommertag zu genießen. Viele denken, Melonenanbau sei kompliziert, aber ich zeige euch, dass es mit ein paar Tricks und Kniffen kinderleicht ist. Lasst uns gemeinsam in die Welt des Melonenanbaus eintauchen!
Die richtige Melonensorte wählen
Bevor wir loslegen, ist die Wahl der richtigen Melonensorte entscheidend. Nicht jede Sorte ist für jedes Klima geeignet.
* Kürze Vegetationsperiode: Wenn ihr in einer Region mit kurzen Sommern wohnt, solltet ihr Sorten mit einer kurzen Vegetationsperiode (70-80 Tage) wählen. Wassermelonen wie ‘Sugar Baby’ oder Honigmelonen wie ‘Early Dew’ sind gute Optionen.
* Längere Vegetationsperiode: In wärmeren Regionen könnt ihr euch an Sorten mit längerer Vegetationsperiode (85-100 Tage) wagen, wie z.B. ‘Crimson Sweet’ (Wassermelone) oder ‘Honeydew’ (Honigmelone).
* Resistenz gegen Krankheiten: Achtet auf Sorten, die resistent gegen häufige Melonen-Krankheiten wie Mehltau sind. Das spart euch später viel Ärger.
* Platzbedarf: Bedenkt, dass Melonen viel Platz brauchen. Wenn ihr nur einen kleinen Garten habt, wählt kompaktere Sorten oder zieht sie vertikal an einem Rankgitter.
Vorbereitung ist alles: Der perfekte Standort und Boden
Melonen sind Sonnenanbeter und brauchen einen warmen, sonnigen Standort mit mindestens 6-8 Stunden direkter Sonneneinstrahlung pro Tag. Der Boden sollte gut durchlässig, locker und reich an organischen Stoffen sein.
* Standortwahl: Sucht einen Platz in eurem Garten, der den ganzen Tag Sonne abbekommt. Vermeidet Standorte, an denen sich Wasser staut.
* Bodenverbesserung: Melonen lieben nährstoffreichen Boden. Mischt vor dem Pflanzen reichlich Kompost oder gut verrotteten Mist in den Boden ein. Das verbessert die Drainage und versorgt die Pflanzen mit wichtigen Nährstoffen.
* pH-Wert: Der ideale pH-Wert für Melonen liegt zwischen 6,0 und 6,8. Ihr könnt den pH-Wert mit einem Bodentest überprüfen und gegebenenfalls mit Kalk (bei zu saurem Boden) oder Schwefel (bei zu alkalischem Boden) anpassen.
* Hügelbeet: Ich persönlich pflanze Melonen gerne auf Hügelbeeten. Das verbessert die Drainage und erwärmt den Boden schneller, was besonders in kühleren Regionen von Vorteil ist.
Aussaat und Vorziehen: Der frühe Vogel fängt den Wurm
Um die Melonen-Saison zu verlängern, ziehe ich meine Melonenpflanzen gerne im Haus vor. Das gibt ihnen einen Vorsprung und ermöglicht eine frühere Ernte.
* Aussaatzeitpunkt: Beginnt mit der Aussaat etwa 4-6 Wochen vor dem letzten erwarteten Frost.
* Aussaatgefäße: Verwendet Anzuchttöpfe oder -platten mit guter Drainage. Ich bevorzuge biologisch abbaubare Töpfe, da ich die Pflanzen später direkt in den Garten pflanzen kann, ohne die Wurzeln zu stören.
* Aussaaterde: Verwendet spezielle Anzuchterde, die locker und nährstoffarm ist.
* Aussaattiefe: Säet die Melonensamen etwa 1-2 cm tief in die Erde.
* Keimung: Haltet die Erde feucht, aber nicht nass. Die Keimung dauert in der Regel 7-10 Tage bei einer Temperatur von 21-27°C. Eine Heizmatte kann helfen, die Keimung zu beschleunigen.
* Standort: Sobald die Sämlinge gekeimt sind, stellt sie an einen hellen, sonnigen Standort.
* Pikieren: Wenn die Sämlinge ihre ersten echten Blätter entwickelt haben, könnt ihr sie in größere Töpfe pikieren, falls ihr sie in Anzuchtplatten ausgesät habt.
Pflanzzeit: Raus in den Garten!
Sobald die Frostgefahr vorüber ist und der Boden sich erwärmt hat (mindestens 18°C), können die Melonenpflanzen in den Garten umziehen.
* Abhärten: Bevor ihr die Pflanzen auspflanzt, solltet ihr sie etwa eine Woche lang abhärten. Stellt sie tagsüber für ein paar Stunden ins Freie und holt sie abends wieder rein. Das hilft ihnen, sich an die Bedingungen im Freien zu gewöhnen.
* Pflanzabstand: Melonen brauchen viel Platz. Pflanzt die Pflanzen in einem Abstand von 90-120 cm zueinander. Bei Reihenpflanzung solltet ihr einen Abstand von 1,5-2 Metern zwischen den Reihen einhalten.
* Pflanzloch: Grabt ein Pflanzloch, das etwas größer ist als der Wurzelballen der Pflanze.
* Einsetzen: Setzt die Pflanze vorsichtig in das Pflanzloch und füllt es mit Erde auf. Achtet darauf, dass der Wurzelballen vollständig bedeckt ist.
* Angießen: Gießt die Pflanzen nach dem Einsetzen gründlich an.
* Mulchen: Mulcht den Boden um die Pflanzen herum mit Stroh oder Mulchfolie. Das hilft, die Feuchtigkeit im Boden zu halten, Unkraut zu unterdrücken und den Boden zu erwärmen.
Pflege: Gießen, Düngen, Schützen
Melonen brauchen regelmäßige Pflege, um gut zu wachsen und viele Früchte zu tragen.
* Gießen: Melonen brauchen viel Wasser, besonders während der Fruchtbildung. Gießt die Pflanzen regelmäßig, aber vermeidet Staunässe. Am besten gießt ihr morgens, damit die Blätter über Tag abtrocknen können.
* Düngen: Düngt die Melonenpflanzen regelmäßig mit einem ausgewogenen Dünger. Ich verwende gerne organischen Dünger wie Komposttee oder verdünnte Brennnesseljauche. Düngt etwa alle 2-3 Wochen.
* Unkrautbekämpfung: Haltet den Bereich um die Melonenpflanzen unkrautfrei. Unkraut konkurriert mit den Melonen um Wasser und Nährstoffe.
* Schutz vor Schädlingen und Krankheiten: Melonen können von verschiedenen Schädlingen und Krankheiten befallen werden. Kontrolliert die Pflanzen regelmäßig und ergreift bei Bedarf Maßnahmen. Gegen Schnecken helfen Schneckenkorn oder Schneckenzäune. Gegen Mehltau könnt ihr die Pflanzen mit einer Lösung aus Wasser und Backpulver besprühen.
* Bestäubung: Melonen sind auf die Bestäubung durch Bienen und andere Insekten angewiesen. Wenn ihr wenig Insekten in eurem Garten habt, könnt ihr die Blüten auch von Hand bestäuben. Nehmt dazu einen weichen Pinsel und übertragt den Pollen von den männlichen auf die weiblichen Blüten. Männliche Blüten haben einen dünnen Stiel, während weibliche Blüten einen kleinen Fruchtansatz unterhalb der Blüte haben.
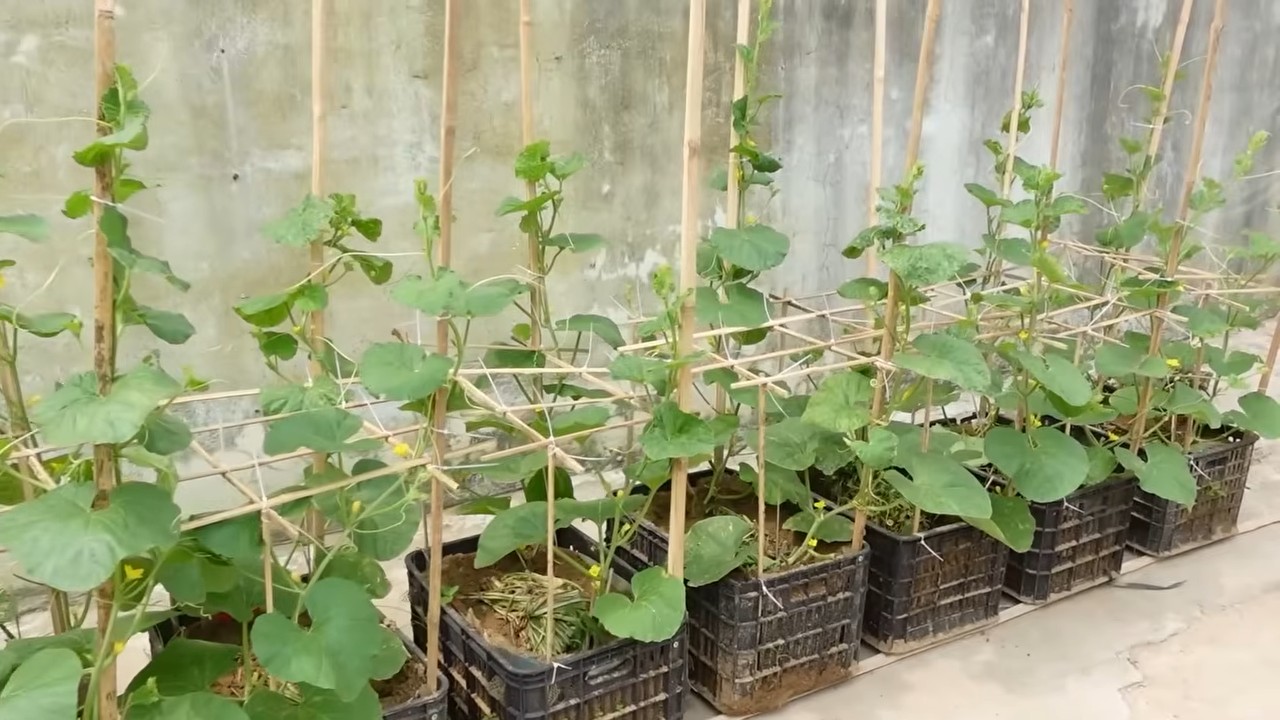
Rankhilfe: Melonen in die Höhe!
Wenn ihr wenig Platz habt oder einfach nur eine interessante Gartengestaltung wünscht, könnt ihr Melonen auch vertikal an einem Rankgitter ziehen.
* Rankgitter: Verwendet ein stabiles Rankgitter, das das Gewicht der Melonen tragen kann.
* Anbinden: Bindet die Melonenpflanzen regelmäßig an das Rankgitter an.
* Fruchtstützen: Wenn die Melonen größer werden, solltet ihr sie mit Fruchtstützen versehen, um zu verhindern, dass sie abbrechen. Ihr könnt dafür alte Strumpfhosen, Netze oder spezielle Fruchtstützen verwenden.
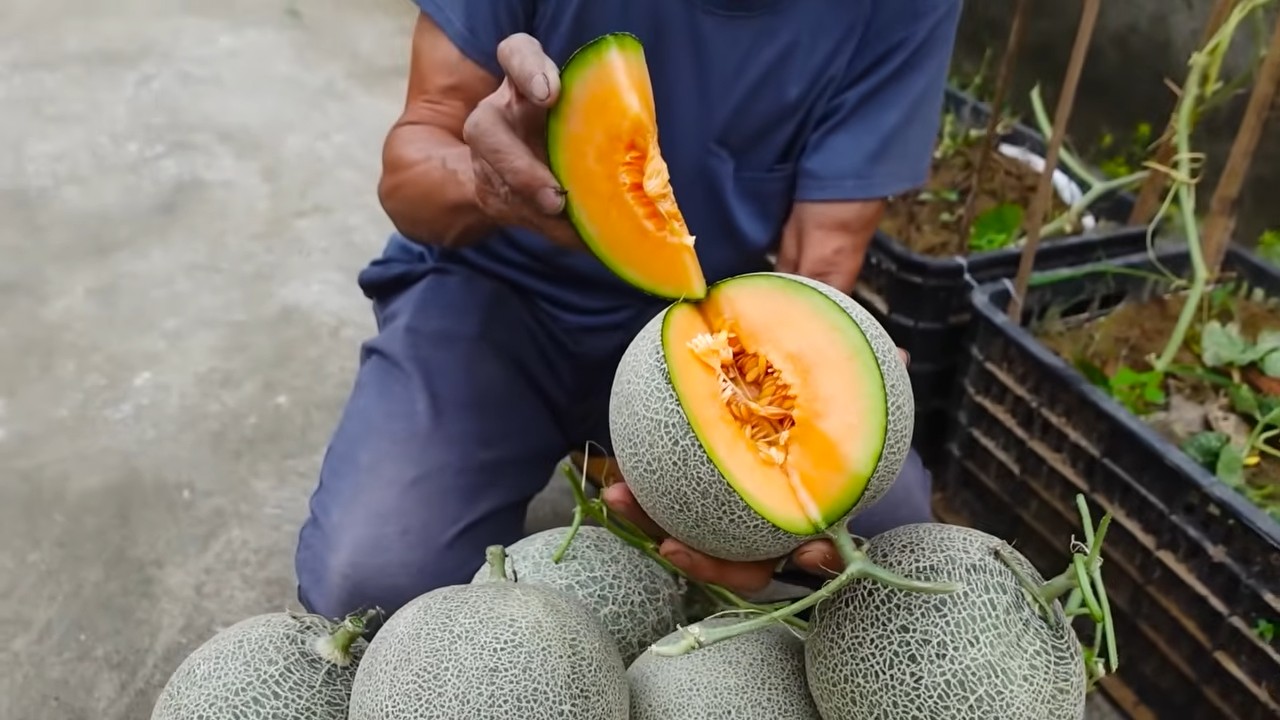
Erntezeit: Der Lohn der Mühe
Die Erntezeit ist der aufregendste Teil des Melonenanbaus. Aber wann sind die Melonen reif?
* Wassermelonen: Eine reife Wassermelone klingt hohl, wenn man darauf klopft. Der Fleck, auf dem die Melone auf dem Boden lag, sollte gelblich sein. Die Ranke, die mit der Melone verbunden ist, sollte trocken und braun sein.
* Honigmelonen: Eine reife Honigmelone duftet süßlich und gibt auf leichten Druck am Blütenende nach. Die Schale sollte eine cremefarbene oder gel
Conclusion
So, there you have it! Mastering the art of easy sweet melon growing doesn’t require a green thumb blessed by the gardening gods. It’s about understanding a few key principles, implementing these simple DIY tricks, and giving your melon plants the love and attention they deserve. We’ve shown you how to boost sweetness, protect your precious fruits, and even extend your growing season, all with readily available materials and minimal effort.
Why is this a must-try? Because the reward is immeasurable. Imagine biting into a perfectly ripe, intensely sweet melon that you nurtured from seed to table. The flavor is simply unmatched by anything you can buy in a store. Plus, you’ll have the satisfaction of knowing exactly what went into growing your food, free from harmful chemicals and pesticides.
But the benefits extend beyond just taste. Gardening is a fantastic stress reliever, a great way to get some exercise, and a wonderful opportunity to connect with nature. Growing your own melons can be a truly rewarding experience for the whole family.
Don’t be afraid to experiment! Try different varieties of melons to find your favorites. Watermelons, cantaloupes, honeydews – the possibilities are endless. You can also adjust the DIY tricks to suit your specific climate and growing conditions. For example, if you live in a particularly hot and sunny area, you might want to use a lighter-colored mulch to reflect some of the heat. Or, if you’re growing melons in containers, you might need to water them more frequently.
Consider adding companion plants like marigolds or basil to deter pests and attract pollinators. These natural allies can help your melons thrive without the need for harsh chemicals. You can also try succession planting, sowing new seeds every few weeks, to extend your harvest season and enjoy fresh melons for longer.
We’re confident that with these DIY tricks, you’ll be well on your way to harvesting a bumper crop of delicious, sweet melons. But don’t just take our word for it – try it yourself! We encourage you to get your hands dirty, experiment with different techniques, and discover the joy of growing your own food.
And most importantly, share your experience with us! We’d love to hear about your successes, your challenges, and any variations you’ve tried. Post your photos and stories in the comments section below. Let’s create a community of melon-growing enthusiasts and learn from each other. Together, we can all become masters of easy sweet melon growing.
Now, let’s address some frequently asked questions to ensure your melon-growing journey is smooth and successful.
Frequently Asked Questions (FAQ)
What is the best time to start melon seeds indoors?
The ideal time to start melon seeds indoors is typically 4-6 weeks before the last expected frost in your area. This gives the seedlings a head start and allows them to establish a strong root system before being transplanted outdoors. Check your local frost dates to determine the appropriate timing for your region. Starting seeds indoors provides a controlled environment, protecting them from harsh weather conditions and pests. Use a seed-starting mix and provide adequate light, either natural or artificial, to ensure healthy germination and growth.
How much sunlight do melon plants need?
Melon plants are sun-loving crops and require at least 6-8 hours of direct sunlight per day to thrive. Insufficient sunlight can lead to weak growth, reduced fruit production, and less sweet melons. Choose a planting location that receives full sun throughout the day. If you live in a particularly hot climate, providing some afternoon shade can help prevent the plants from overheating. Monitor your plants regularly and adjust their position if necessary to ensure they are receiving adequate sunlight.
What kind of soil is best for growing melons?
Melons prefer well-drained, fertile soil that is rich in organic matter. The ideal soil pH is between 6.0 and 7.0. Before planting, amend the soil with compost, aged manure, or other organic materials to improve drainage, fertility, and water retention. Avoid heavy clay soils, as they can become waterlogged and inhibit root growth. If you have clay soil, consider growing melons in raised beds or containers with a well-draining potting mix. Regular soil testing can help you determine if any nutrient deficiencies need to be addressed.
How often should I water my melon plants?
Melon plants need consistent watering, especially during fruit development. Water deeply and regularly, aiming to keep the soil consistently moist but not waterlogged. The frequency of watering will depend on the weather conditions, soil type, and stage of growth. During hot, dry periods, you may need to water daily. Use a soaker hose or drip irrigation to deliver water directly to the roots, minimizing water loss through evaporation and reducing the risk of fungal diseases. Avoid overhead watering, as it can wet the foliage and create a favorable environment for diseases.
How do I know when my melons are ripe?
Determining when a melon is ripe can be tricky, but there are several indicators to look for. For watermelons, check the underside where it rests on the ground. It should be a creamy yellow color. Also, thump the melon – a ripe watermelon will have a deep, hollow sound. For cantaloupes, the stem should slip easily from the vine when the melon is ripe. The skin will also turn from green to tan or yellow, and the melon will have a fragrant aroma. Honeydew melons are ripe when the skin turns from green to creamy white or yellow, and the blossom end is slightly soft.
What are some common pests and diseases that affect melon plants?
Melon plants can be susceptible to various pests and diseases, including aphids, squash bugs, cucumber beetles, powdery mildew, and fusarium wilt. Regularly inspect your plants for signs of infestation or disease. Use organic pest control methods, such as insecticidal soap or neem oil, to control pests. Ensure good air circulation and avoid overhead watering to prevent fungal diseases. Choose disease-resistant varieties whenever possible. Crop rotation can also help reduce the risk of soilborne diseases.
Can I grow melons in containers?
Yes, you can successfully grow melons in containers, especially smaller varieties like personal watermelons or cantaloupes. Choose a large container with good drainage, at least 20 gallons in size. Use a high-quality potting mix and provide adequate support for the vines. Container-grown melons may require more frequent watering and fertilization than those grown in the ground. Place the container in a sunny location and monitor the plants regularly for signs of stress.
How can I increase the sweetness of my melons?
Several factors contribute to the sweetness of melons, including genetics, sunlight, water, and nutrients. Choose melon varieties that are known for their sweetness. Ensure your plants receive at least 6-8 hours of direct sunlight per day. Water deeply and regularly, but reduce watering as the fruits begin to ripen. Avoid over-fertilizing with nitrogen, as it can promote leafy growth at the expense of fruit development. Adding potassium to the soil can help increase the sugar content of the melons.
What are some good companion plants for melons?
Companion planting can help improve the health and productivity of your melon plants. Some good companion plants for melons include marigolds, basil, nasturtiums, and radishes. Marigolds deter nematodes and other soil pests. Basil repels aphids and other insects. Nasturtiums attract beneficial insects, such as pollinators and predators. Radishes can help break up the soil and improve drainage. Avoid planting melons near members of the cucurbit family, such as cucumbers and squash, as they can attract the same pests and diseases.
How do I save seeds from my melons for next year?
Saving seeds from your melons is a great way to preserve your favorite varieties and save money. Choose ripe, healthy melons from plants that exhibited desirable traits. Scoop out the seeds and rinse them thoroughly to remove any pulp. Spread the seeds on a paper towel to dry completely. Once dry, store the seeds in an airtight container in a cool, dark, and dry place. Label the container with the variety and date. Melon seeds can remain viable for several years if stored properly. Note that hybrid varieties may not produce true-to-type offspring, so it’s best to save seeds from open-pollinated varieties.
Leave a Comment