
Soil bag corn growing – sounds a little unconventional, right? But trust me, it’s a game-changer! Forget tilling, weeding, and all the back-breaking labor traditionally associated with growing corn. I’m about to share a super simple, space-saving, and surprisingly effective method that will have you harvesting sweet, juicy corn right from your own backyard (or even balcony!).
Corn, a staple crop for millennia, holds a special place in many cultures. From ancient Mesoamerica, where it was revered as a sacred gift, to its modern-day role in countless cuisines, corn has nourished and sustained civilizations. While large-scale farming is the norm, bringing this iconic plant into our home gardens allows us to connect with this rich history on a personal level.
But why should you try growing corn in a soil bag? Well, let’s face it, not everyone has acres of land or the time for extensive gardening. This method is perfect for urban dwellers, apartment residents, or anyone looking for a low-effort, high-reward gardening experience. Plus, it’s a fantastic way to recycle those empty soil bags! Soil bag corn growing is also a great solution for areas with poor soil quality, as you have complete control over the growing medium. So, ditch the traditional garden bed and get ready to embrace this innovative and fun way to grow your own delicious corn!
DIY: Maisanbau im Sack – So geht’s!
Hey Leute! Habt ihr auch keinen Garten, aber trotzdem Lust auf frischen Mais? Kein Problem! Ich zeige euch, wie ihr Mais ganz einfach in einem Sack anbauen könnt. Das ist super platzsparend und funktioniert sogar auf dem Balkon oder der Terrasse. Los geht’s!
Was du brauchst:
* Einen großen, stabilen Sack (z.B. einen Futtersack, Kartoffelsack oder einen robusten Müllsack)
* Hochwertige Pflanzerde (am besten Bio-Qualität)
* Maiskörner (Saatgut) – achtet auf eine Sorte, die für den Anbau im Topf geeignet ist (z.B. Zuckermais)
* Kompost oder organischen Dünger
* Gießkanne oder Schlauch
* Messer oder Schere
* Optional: Drainagematerial (Kies, Blähton)
Schritt-für-Schritt-Anleitung:
1. Den Sack vorbereiten: Zuerst müsst ihr den Sack vorbereiten. Wenn ihr einen neuen Sack verwendet, könnt ihr ihn direkt nutzen. Bei gebrauchten Säcken solltet ihr ihn vorher gründlich reinigen, um eventuelle Rückstände zu entfernen.
2. Drainage schaffen (optional, aber empfohlen): Um Staunässe zu vermeiden, solltet ihr eine Drainageschicht am Boden des Sacks anlegen. Füllt dazu eine Schicht Kies oder Blähton (ca. 5-10 cm hoch) in den Sack. Das sorgt dafür, dass überschüssiges Wasser ablaufen kann.
3. Den Sack befüllen: Jetzt kommt die Erde! Füllt den Sack mit Pflanzerde. Lasst oben ca. 10-15 cm Platz, damit ihr später noch gießen könnt, ohne dass die Erde gleich überläuft. Mischt am besten direkt etwas Kompost oder organischen Dünger unter die Erde, um den Maispflanzen einen guten Start zu ermöglichen.
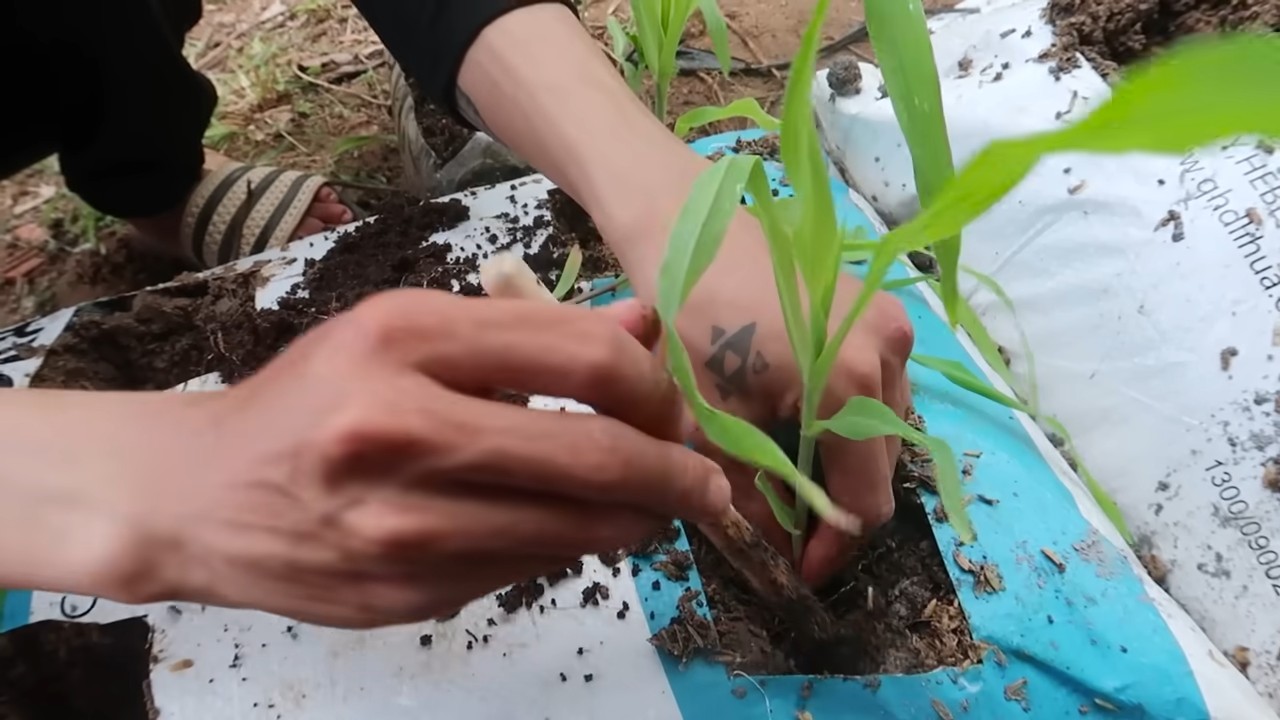
4. Die Maiskörner säen: Nun geht es ans Säen. Macht mit dem Finger oder einem kleinen Stock kleine Löcher in die Erde (ca. 3-5 cm tief). Der Abstand zwischen den Löchern sollte etwa 15-20 cm betragen. Legt in jedes Loch 2-3 Maiskörner. Das erhöht die Wahrscheinlichkeit, dass mindestens ein Korn keimt. Bedeckt die Körner mit Erde und drückt sie leicht an.
5. Angießen: Gießt die Erde vorsichtig an, sodass sie gut durchfeuchtet ist. Achtet darauf, dass ihr nicht zu viel Wasser verwendet, damit die Körner nicht weggeschwemmt werden.
6. Der richtige Standort: Mais braucht viel Sonne! Stellt den Sack an einen sonnigen Standort, an dem er mindestens 6-8 Stunden Sonne pro Tag bekommt. Ein windgeschützter Platz ist ideal, da die Maispflanzen später recht hoch werden und bei starkem Wind umknicken könnten.
7. Gießen und Düngen: In den ersten Wochen, bis die Keimlinge aufgegangen sind, solltet ihr die Erde feucht halten. Sobald die Pflanzen größer werden, müsst ihr regelmäßig gießen, besonders an heißen Tagen. Achtet darauf, dass die Erde nicht austrocknet. Düngt die Pflanzen alle 2-3 Wochen mit einem organischen Dünger oder speziellem Maisdünger.
8. Ausdünnen: Wenn mehrere Körner in einem Loch gekeimt sind, solltet ihr die schwächsten Pflanzen entfernen, damit die stärkste Pflanze genügend Platz und Nährstoffe hat.
9. Stützen (optional): Wenn die Maispflanzen sehr hoch werden, kann es sinnvoll sein, sie mit Stäben zu stützen, um zu verhindern, dass sie umknicken.
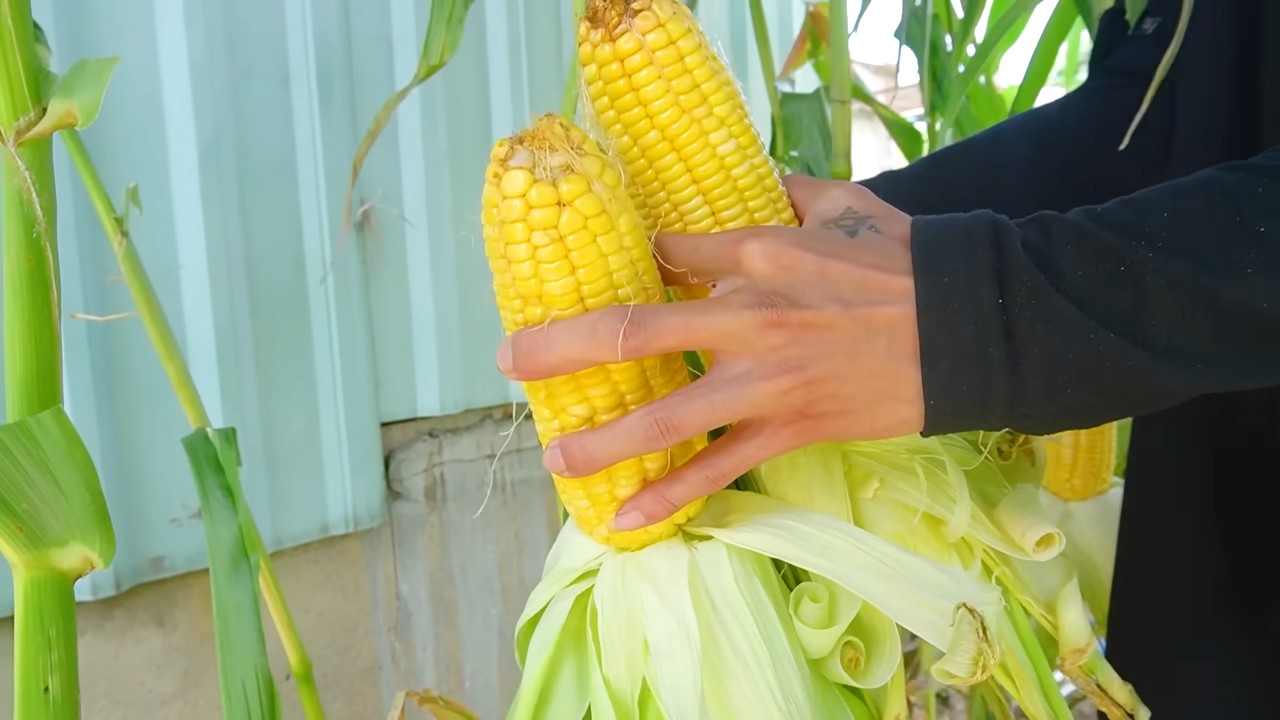
10. Erntezeit: Die Erntezeit hängt von der Maissorte ab. In der Regel könnt ihr den Mais ernten, wenn die Maiskolben prall gefüllt sind und die Seidenfäden braun und trocken sind. Drückt leicht auf die Kolben – wenn sie sich fest anfühlen, sind sie reif.
Weitere Tipps für den erfolgreichen Maisanbau im Sack:
* Die richtige Erde: Verwendet unbedingt hochwertige Pflanzerde. Billige Erde kann zu wenig Nährstoffe enthalten und die Pflanzen nicht optimal versorgen.
* Regelmäßiges Gießen: Mais braucht viel Wasser, besonders während der Blütezeit und der Kolbenbildung. Gießt regelmäßig und ausreichend.
* Schutz vor Schädlingen: Achtet auf Schädlinge wie Blattläuse oder Maiszünsler. Bei Bedarf könnt ihr biologische Schädlingsbekämpfungsmittel einsetzen.
* Sortenwahl: Wählt eine Maissorte, die für den Anbau im Topf oder Sack geeignet ist. Zuckermais ist eine gute Wahl.
* Bestäubung: Mais ist windbestäubt. Wenn ihr nur wenige Pflanzen habt, könnt ihr die Bestäubung unterstützen, indem ihr die männlichen Blütenstände (die Fahnen oben an der Pflanze) vorsichtig schüttelt, damit der Pollen auf die weiblichen Blütenstände (die Seidenfäden an den Kolben) gelangt.
Häufige Probleme und Lösungen:
* Gelbe Blätter: Gelbe Blätter können ein Zeichen für Nährstoffmangel sein. Düngt die Pflanzen mit einem geeigneten Dünger.
* Schlechte Kolbenbildung: Eine schlechte Kolbenbildung kann verschiedene Ursachen haben, z.B. Nährstoffmangel, Wassermangel oder schlechte Bestäubung. Achtet auf eine ausreichende Versorgung mit Nährstoffen und Wasser und unterstützt die Bestäubung.
* Schädlinge: Kontrolliert die Pflanzen regelmäßig auf Schädlinge und bekämpft sie bei Bedarf mit biologischen Mitteln.
Noch ein paar persönliche Erfahrungen:
Ich habe meinen Mais im Sack letztes Jahr auf dem Balkon angebaut und war total begeistert! Es war wirklich einfach und hat super viel Spaß gemacht, den Pflanzen beim Wachsen zuzusehen. Ich habe Zuckermais angebaut und die Kolben waren unglaublich lecker. Das war definitiv nicht mein letzter Maisanbau im Sack!
Wichtig: Denkt daran, dass der Maisanbau im Sack etwas mehr Aufmerksamkeit erfordert als im Garten. Aber mit ein bisschen Pflege und Geduld werdet ihr mit einer reichen Ernte belohnt!
Ich hoffe, diese Anleitung hilft euch dabei, euren eigenen Mais im Sack anzubauen. Viel Erfolg und lasst es euch schmecken!
Conclusion
So, there you have it! Growing corn in a soil bag is not just a quirky gardening experiment; it’s a game-changer for anyone looking to maximize their yield, minimize their space, and enjoy the freshest, sweetest corn imaginable. This method offers a fantastic alternative to traditional in-ground planting, especially if you’re dealing with poor soil quality, limited space, or simply want a more controlled growing environment.
Think about it: no more back-breaking tilling, less weeding, and the satisfaction of harvesting plump, juicy ears of corn right from your patio or balcony. The beauty of this DIY trick lies in its simplicity and adaptability. You can easily adjust the size of your soil bag to accommodate different corn varieties, from compact dwarf corn to towering heirloom types.
Ready to take your corn growing to the next level?
Don’t be afraid to experiment! Try adding different organic amendments to your soil mix, such as compost or worm castings, to boost nutrient levels and improve drainage. You can also explore companion planting by tucking in some nitrogen-fixing beans or fragrant herbs around the base of your corn stalks.
For those in hotter climates, consider using a lighter-colored soil bag to reflect sunlight and prevent the soil from overheating. And if you’re in a cooler region, a dark-colored bag can help warm the soil early in the season, giving your corn a head start.
But the real magic happens when you finally bite into that first ear of homegrown corn. The flavor is simply unparalleled – a burst of sweetness and freshness that you just can’t find in store-bought varieties. It’s a taste of summer that you’ll want to savor all season long.
We wholeheartedly encourage you to give this DIY soil bag corn growing method a try. It’s a rewarding and surprisingly easy way to enjoy the bounty of your own garden, no matter how small your space may be. And once you’ve experienced the joy of harvesting your own corn, we’re confident you’ll be hooked!
Don’t forget to share your experiences with us! We’d love to hear about your successes, your challenges, and any variations you’ve tried. Post photos of your soil bag corn, tell us about your favorite corn varieties, and let’s create a community of passionate corn growers who are pushing the boundaries of what’s possible in the world of home gardening. Happy growing!
Frequently Asked Questions (FAQ)
What type of soil bag should I use for growing corn?
Ideally, you should use a heavy-duty polypropylene woven bag, similar to those used for animal feed or construction materials. These bags are durable, breathable, and can withstand the weight of the soil and plants. Avoid using thin plastic bags, as they can easily tear and don’t provide adequate drainage. You can often find suitable bags at farm supply stores, garden centers, or online retailers. Make sure the bag is clean and free of any harmful chemicals before filling it with soil. The size of the bag will depend on the variety of corn you’re growing, but a bag that holds at least 20 gallons of soil is generally recommended.
How many corn plants can I grow in one soil bag?
This depends on the size of the bag and the variety of corn you’re growing. As a general rule, you can plant 3-4 corn plants in a 20-gallon bag. Make sure to space the plants evenly around the bag to allow for adequate sunlight and air circulation. Overcrowding can lead to stunted growth and increased susceptibility to diseases. If you’re growing a larger variety of corn, you may need to reduce the number of plants per bag. Observe your plants carefully and thin them out if they appear to be struggling.
What type of soil mix is best for growing corn in a soil bag?
A well-draining and nutrient-rich soil mix is essential for successful corn growing. A good starting point is a mix of equal parts garden soil, compost, and peat moss or coco coir. You can also add some perlite or vermiculite to improve drainage and aeration. Corn is a heavy feeder, so it’s important to amend the soil with a slow-release fertilizer or organic amendments such as bone meal and blood meal. Avoid using soil that is too heavy or compacted, as this can restrict root growth and lead to waterlogging.
How often should I water my soil bag corn?
Corn requires consistent moisture, especially during germination and ear development. Water your soil bag corn deeply whenever the top inch of soil feels dry to the touch. The frequency of watering will depend on the weather conditions, the size of the bag, and the type of soil mix you’re using. In hot, dry weather, you may need to water daily. Avoid overwatering, as this can lead to root rot. A good way to check if your corn needs watering is to stick your finger into the soil near the base of the plants. If the soil feels dry, it’s time to water.
Does soil bag corn need fertilizer?
Yes, corn is a heavy feeder and requires regular fertilization to produce a good yield. Start by incorporating a slow-release fertilizer into the soil mix at planting time. Then, side-dress your corn plants with a nitrogen-rich fertilizer every 2-3 weeks during the growing season. You can use a commercial fertilizer or organic options such as fish emulsion or compost tea. Follow the instructions on the fertilizer label carefully to avoid over-fertilizing. Monitor your plants for signs of nutrient deficiencies, such as yellowing leaves, and adjust your fertilization schedule accordingly.
How do I prevent pests and diseases in my soil bag corn?
Growing corn in a soil bag can actually help reduce the risk of pests and diseases compared to traditional in-ground planting. However, it’s still important to take preventative measures. Inspect your plants regularly for signs of pests such as aphids, corn earworms, and spider mites. You can control these pests with insecticidal soap, neem oil, or by hand-picking them off the plants. To prevent fungal diseases, ensure good air circulation around your plants and avoid overwatering. You can also apply a fungicide if necessary. Consider companion planting with herbs like basil or marigolds, which can help repel pests.
When is the best time to harvest my soil bag corn?
The best time to harvest corn is when the silks have turned brown and dry, and the kernels are plump and milky. You can test the kernels by piercing one with your fingernail. If the liquid that comes out is milky, the corn is ready to harvest. If the liquid is clear, the corn needs more time to mature. To harvest, simply grasp the ear firmly and twist it downward until it snaps off the stalk. Enjoy your freshly harvested corn as soon as possible for the best flavor.
Can I reuse the soil bag for growing corn next year?
Yes, you can reuse the soil bag for growing corn or other crops next year. However, it’s important to amend the soil with fresh compost and fertilizer to replenish the nutrients that were used by the previous crop. You may also want to sterilize the soil to kill any pests or diseases that may be present. You can do this by solarizing the soil, which involves covering the bag with clear plastic and leaving it in the sun for several weeks. Alternatively, you can replace the soil entirely with a fresh mix.
Leave a Comment