
Grow Malabar Spinach Faster and unlock a world of vibrant, leafy greens right in your own backyard! Have you ever dreamt of harvesting basketfuls of delicious, nutritious spinach without the endless wait? I know I have! This isn’t just about gardening; it’s about connecting with nature, enjoying fresh, homegrown food, and feeling the satisfaction of nurturing life from a tiny seed.
Malabar Spinach, also known as Basella alba, isn’t actually a true spinach, but its succulent leaves offer a similar taste and texture, making it a fantastic alternative, especially in warmer climates. Its history stretches back centuries, with roots in Asia and Africa, where it’s been a staple in traditional cuisines and even used for its medicinal properties. Imagine, you’re not just growing a plant; you’re cultivating a piece of history!
But why do you need these DIY tricks and hacks to grow Malabar Spinach faster? Well, let’s face it, patience isn’t always a gardener’s strongest suit! We all want to see results, and sometimes, nature needs a little nudge. Plus, a faster harvest means more spinach for your salads, stir-fries, and smoothies. In this article, I’m going to share my tried-and-true methods to accelerate the growth of your Malabar Spinach, from seed to table, ensuring you enjoy a bountiful harvest in record time. Get ready to roll up your sleeves and transform your garden into a spinach paradise!
Malabarspinat schneller anbauen: Dein DIY-Leitfaden für eine üppige Ernte
Ich liebe Malabarspinat! Er ist nicht nur super gesund, sondern auch unglaublich vielseitig in der Küche. Aber was, wenn ich dir sage, dass du ihn noch schneller und üppiger anbauen kannst? In diesem Artikel zeige ich dir meine bewährten DIY-Tricks, mit denen du im Handumdrehen eine reiche Ernte einfahren wirst. Keine Sorge, es ist einfacher als du denkst!
Was du brauchst:
* Malabarspinatsamen oder Stecklinge
* Anzuchttöpfe oder -schalen
* Hochwertige Anzuchterde
* Kompost oder gut verrotteter Mist
* Gartenerde
* Rankhilfe (z.B. Bambusstäbe, Spalier oder Zaun)
* Gießkanne oder Gartenschlauch
* Mulchmaterial (z.B. Stroh, Holzhackschnitzel)
* Optional: Bewurzelungshormon für Stecklinge
* Optional: Flüssigdünger für Gemüse
Die Vorbereitung: Der Schlüssel zum Erfolg
Bevor wir loslegen, ist eine gute Vorbereitung das A und O. Malabarspinat ist zwar relativ pflegeleicht, aber ein paar Vorbereitungen helfen ihm ungemein, schnell und kräftig zu wachsen.
1. Samen oder Stecklinge?
Du hast die Wahl! Samen sind natürlich die klassische Variante, aber mit Stecklingen kannst du den Prozess deutlich beschleunigen.
* Samen: Kaufe hochwertige Samen von einem vertrauenswürdigen Anbieter. Achte darauf, dass sie frisch sind, um eine gute Keimrate zu gewährleisten.
* Stecklinge: Wenn du bereits Malabarspinat hast oder jemanden kennst, der ihn anbaut, kannst du Stecklinge schneiden. Wähle gesunde, kräftige Triebe mit mehreren Blättern aus. Schneide sie knapp unterhalb eines Blattknotens ab.
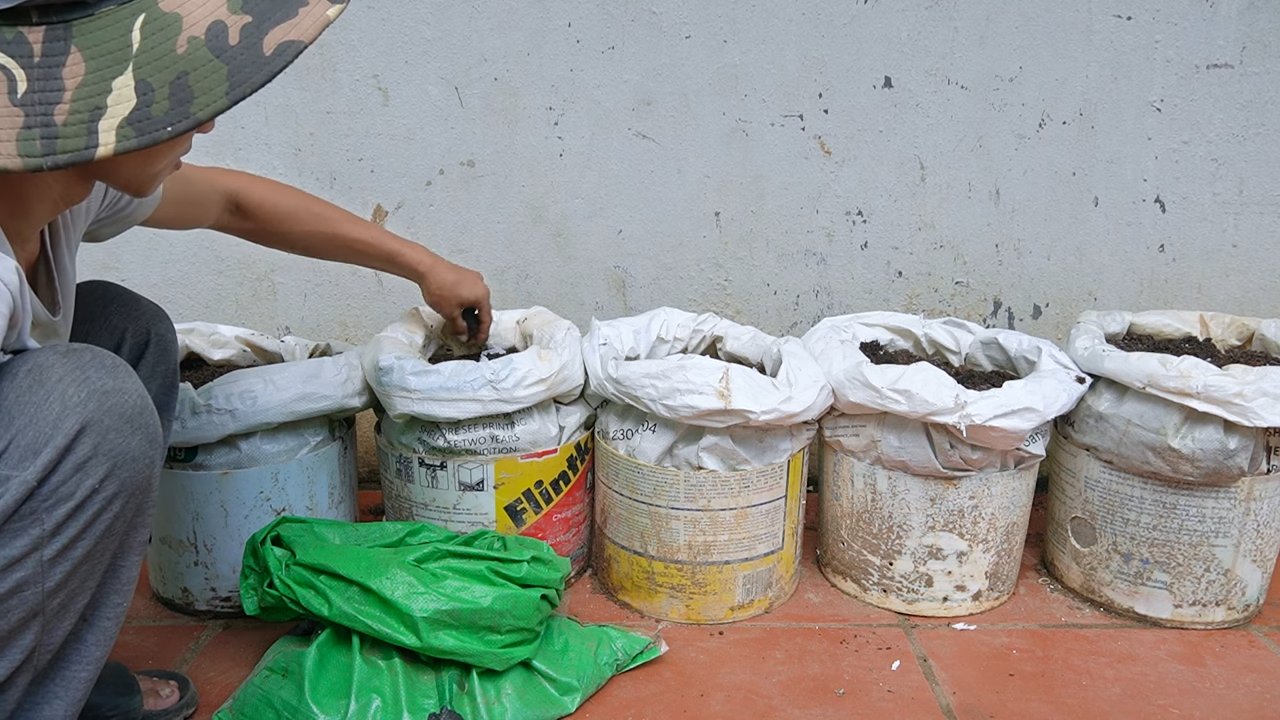
2. Die richtige Erde: Das Fundament für starkes Wachstum
Malabarspinat liebt nährstoffreiche, gut durchlässige Erde.
* Anzuchterde: Für die Anzucht verwende ich immer spezielle Anzuchterde. Sie ist locker und enthält genau die richtige Menge an Nährstoffen für junge Pflänzchen.
* Gartenerde: Für das Auspflanzen im Garten mische ich die Gartenerde mit Kompost oder gut verrottetem Mist. Das sorgt für eine optimale Nährstoffversorgung.
3. Der Standort: Sonne, Sonne, Sonne!
Malabarspinat ist ein Sonnenanbeter! Je mehr Sonne er bekommt, desto besser wächst er.
* Wähle einen sonnigen Standort: Ideal sind mindestens 6 Stunden Sonne pro Tag.
* Schütze ihn vor starkem Wind: Ein windgeschützter Standort verhindert, dass die Blätter austrocknen.
Die Anzucht: Der Start ins Leben
Jetzt geht’s ans Eingemachte! Egal, ob du dich für Samen oder Stecklinge entschieden hast, die Anzucht ist ein wichtiger Schritt.
1. Anzucht aus Samen:
1. Samen vorbereiten: Um die Keimung zu beschleunigen, kannst du die Samen vor dem Aussäen für 24 Stunden in lauwarmem Wasser einweichen.
2. Aussaat: Fülle die Anzuchttöpfe mit Anzuchterde und säe die Samen etwa 1 cm tief ein.
3. Angießen: Gieße die Erde vorsichtig an, sodass sie feucht, aber nicht nass ist.
4. Warm und hell stellen: Stelle die Töpfe an einen warmen, hellen Ort. Ideal ist eine Temperatur zwischen 20 und 25 Grad Celsius.
5. Feucht halten: Halte die Erde gleichmäßig feucht, aber vermeide Staunässe.
6. Pikieren: Sobald die Pflänzchen 2-3 echte Blätter haben, kannst du sie in größere Töpfe pikieren.
2. Anzucht aus Stecklingen:
1. Stecklinge vorbereiten: Entferne die unteren Blätter von den Stecklingen, sodass nur noch die oberen Blätter übrig bleiben.
2. Bewurzelungshormon (optional): Tauche das untere Ende der Stecklinge in Bewurzelungshormon. Das fördert die Wurzelbildung.
3. Einpflanzen: Stecke die Stecklinge in Anzuchterde oder direkt in kleine Töpfe mit Gartenerde.
4. Angießen: Gieße die Erde vorsichtig an.
5. Hohe Luftfeuchtigkeit: Um die Luftfeuchtigkeit zu erhöhen, kannst du eine Plastiktüte über die Töpfe stülpen oder ein Mini-Gewächshaus verwenden.
6. Warm und hell stellen: Stelle die Töpfe an einen warmen, hellen Ort.
7. Regelmäßig lüften: Lüfte die Töpfe regelmäßig, um Schimmelbildung zu vermeiden.
8. Wurzelbildung: Nach etwa 2-3 Wochen sollten sich Wurzeln gebildet haben. Du erkennst das daran, dass die Pflänzchen neue Blätter bilden.
Das Auspflanzen: Ab ins Freie!
Sobald die Pflänzchen kräftig genug sind, können sie ins Freie umziehen.
1. Abhärten: Bevor du die Pflänzchen auspflanzt, solltest du sie einige Tage lang abhärten. Stelle sie dazu tagsüber ins Freie und hole sie nachts wieder rein.
2. Der richtige Zeitpunkt: Warte mit dem Auspflanzen, bis keine Frostgefahr mehr besteht. Ideal ist es, wenn die Bodentemperatur mindestens 15 Grad Celsius beträgt.
3. Pflanzabstand: Pflanze die Malabarspinatpflanzen in einem Abstand von etwa 30-40 cm zueinander.
4. Pflanzloch vorbereiten: Grabe ein ausreichend großes Pflanzloch und mische die Erde mit Kompost oder gut verrottetem Mist.
5. Einpflanzen: Setze die Pflänzchen vorsichtig in die Pflanzlöcher und fülle sie mit Erde auf.
6. Angießen: Gieße die Pflanzen gründlich an.
Die Pflege: So bleibt dein Malabarspinat glücklich
Malabarspinat ist relativ pflegeleicht, aber ein paar Dinge solltest du beachten, um eine reiche Ernte zu erzielen.
1. Gießen:
* Regelmäßig gießen: Malabarspinat braucht regelmäßig Wasser, besonders während trockener Perioden. Achte darauf, dass die Erde immer leicht feucht ist.
* Nicht übertreiben: Vermeide Staunässe, da dies zu Wurzelfäule führen kann.
2. Düngen:
* Regelmäßig düngen: Malabarspinat ist ein Starkzehrer und benötigt regelmäßig Nährstoffe. Dünge ihn alle 2-3 Wochen mit einem Flüssigdünger für Gemüse.
* Organische Dünger: Alternativ kannst du auch organische Dünger wie Komposttee oder Brennnesseljauche verwenden.
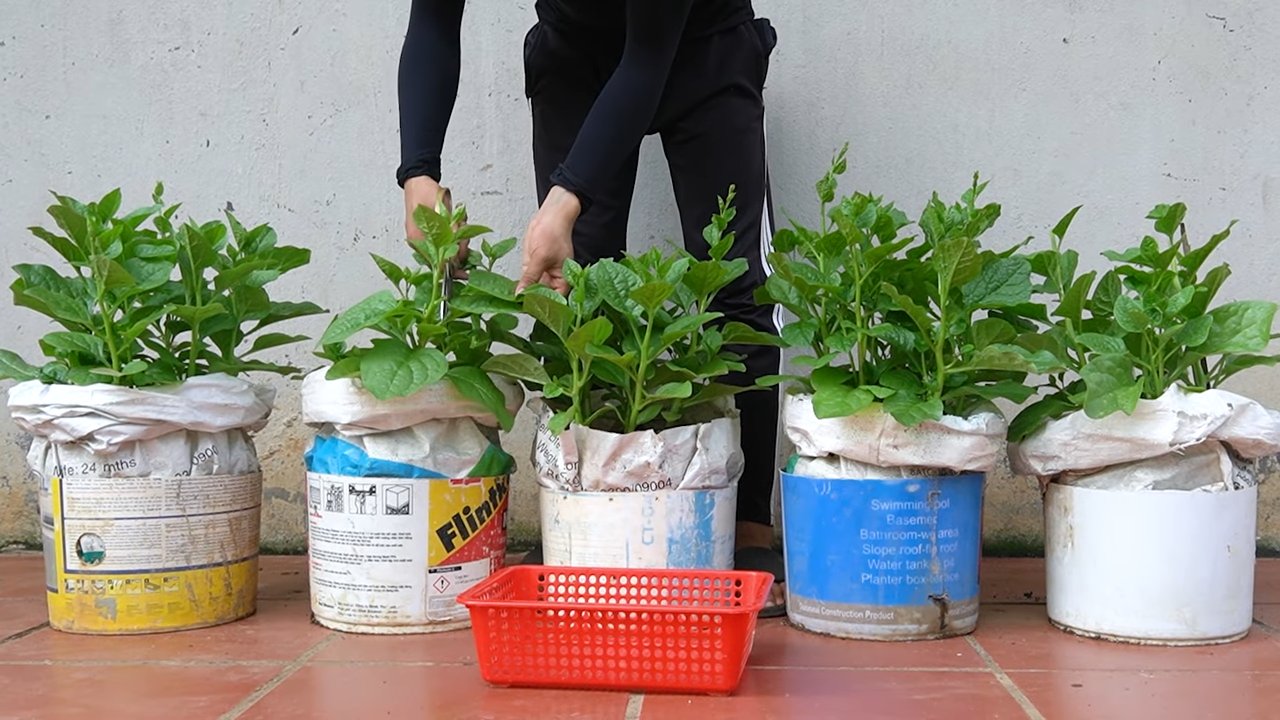
3. Rankhilfe:
* Unbedingt notwendig: Malabarspinat ist eine Kletterpflanze und benötigt eine Rankhilfe. Biete ihm einen Zaun, ein Spalier oder Bambusstäbe an.
* Frühzeitig anbringen: Bringe die Rankhilfe frühzeitig an, damit die Pflanze sich daran festhalten kann.
4. Mulchen:
* Vorteile des Mulchens: Mulchen hilft, die Feuchtigkeit im Boden zu halten, Unkraut zu unterdrücken und den Boden zu düngen.
* Geeignete Materialien: Verwende Stroh, Holzhackschnitzel oder Rasenschnitt als Mulchmaterial.
5. Schädlinge und Krankheiten:
* Relativ resistent: Malabarspinat ist relativ resistent gegen Schädlinge und Krankheiten.
* Achte auf Blattläuse: Gelegentlich können Blattläuse auftreten. Bekämpfe sie mit einem natürlichen Insektizid oder spritze die Pflanzen mit einem starken Wasserstrahl ab.
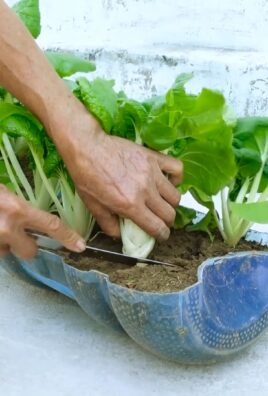
Die Ernte: Endlich genießen!
Nach etwa 6-8 Wochen kannst du mit der Ernte beginnen.
1. Regelmäßig ernten: Ernte die Blätter regelmäßig, um das Wachstum der Pflanze anzuregen.
2. Junge Blätter bevorzugen: Die jungen Blätter sind zarter und aromatischer als die älteren.
3. Nicht
Conclusion
So, there you have it! Mastering the art of faster Malabar spinach growth isn’t some elusive secret reserved for seasoned gardeners. It’s a tangible goal achievable with a few simple, yet impactful, DIY tricks. We’ve explored methods that address crucial aspects of Malabar spinach cultivation, from optimizing soil conditions and providing adequate support to maximizing sunlight exposure and implementing strategic pruning techniques.
Why is this a must-try? Because growing your own Malabar spinach offers a multitude of benefits. Beyond the satisfaction of nurturing a plant from seed to harvest, you gain access to a fresh, nutritious, and readily available source of leafy greens. Store-bought spinach simply can’t compare to the vibrant flavor and superior nutritional value of homegrown Malabar spinach. Plus, you have complete control over the growing process, ensuring that your spinach is free from harmful pesticides and chemicals.
But the advantages extend beyond personal consumption. Imagine the joy of sharing your bountiful harvest with friends, family, and neighbors. Or perhaps you’re a culinary enthusiast eager to experiment with new and exciting recipes featuring this versatile leafy green. The possibilities are endless!
Now, let’s talk about variations. While the techniques we’ve discussed provide a solid foundation for accelerating Malabar spinach growth, feel free to experiment and adapt them to your specific environment and preferences. For instance, if you live in a region with intense sunlight, consider using shade cloth during the hottest part of the day to prevent leaf scorch. Alternatively, if your soil is naturally acidic, you may need to amend it with lime to raise the pH level to the optimal range for Malabar spinach.
Another exciting variation involves exploring different trellising methods. While a simple trellis made from bamboo stakes or netting works well, you could also get creative and construct a more elaborate structure using recycled materials. This not only provides support for your Malabar spinach but also adds a unique aesthetic element to your garden.
Furthermore, consider experimenting with different companion plants. Planting basil, marigolds, or nasturtiums near your Malabar spinach can help deter pests and attract beneficial insects, further enhancing its growth and overall health.
Ultimately, the key to success lies in observation and adaptation. Pay close attention to your Malabar spinach plants, monitor their growth patterns, and adjust your techniques accordingly. Don’t be afraid to experiment and learn from your mistakes. Gardening is a journey of continuous learning and discovery.
We are confident that by implementing these DIY tricks, you’ll be well on your way to enjoying a bountiful harvest of delicious and nutritious Malabar spinach in no time. So, what are you waiting for? Grab your gardening tools, gather your supplies, and embark on this exciting adventure!
We wholeheartedly encourage you to try these methods for faster Malabar spinach growth. And most importantly, we want to hear about your experiences! Share your successes, challenges, and any unique variations you’ve discovered in the comments section below. Let’s create a vibrant community of Malabar spinach enthusiasts and learn from each other’s experiences. Happy gardening!
Frequently Asked Questions (FAQ)
What exactly is Malabar spinach, and why should I grow it?
Malabar spinach (Basella alba or Basella rubra) isn’t actually a true spinach, but a heat-loving vine native to tropical Asia and Africa. It’s prized for its succulent, slightly peppery leaves and stems, which can be used in salads, stir-fries, soups, and other culinary creations. Growing it yourself offers several advantages:
* **Freshness and Flavor:** Homegrown Malabar spinach boasts a superior flavor and texture compared to store-bought varieties, which often suffer from wilting and bruising during transportation.
* **Nutritional Value:** Malabar spinach is packed with vitamins A and C, iron, and calcium, making it a healthy addition to your diet.
* **Control over Growing Practices:** You can ensure that your Malabar spinach is grown organically, without the use of harmful pesticides or herbicides.
* **Ornamental Value:** The vine’s attractive foliage and vibrant red stems (in the case of Basella rubra) add visual appeal to your garden.
* **Sustainability:** Growing your own food reduces your carbon footprint and promotes sustainable living.
How long does it typically take for Malabar spinach to grow?
Under optimal conditions, Malabar spinach can grow relatively quickly. You can expect to start harvesting leaves within 60-70 days from sowing seeds. However, the exact time frame can vary depending on factors such as climate, soil quality, and watering practices. By implementing the DIY tricks discussed in this article, you can significantly accelerate the growth rate and potentially harvest leaves even sooner.
What are the ideal growing conditions for Malabar spinach?
Malabar spinach thrives in warm, sunny locations with well-drained soil. Here’s a breakdown of the key requirements:
* **Sunlight:** It needs at least 6-8 hours of direct sunlight per day.
* **Soil:** The soil should be fertile, well-draining, and slightly acidic to neutral (pH 6.0-7.0). Amend heavy clay soils with compost or other organic matter to improve drainage.
* **Watering:** Water regularly, especially during hot, dry weather. Keep the soil consistently moist but not waterlogged.
* **Temperature:** Malabar spinach prefers warm temperatures (70-85°F). It is frost-sensitive and will not tolerate freezing temperatures.
* **Support:** As a vining plant, Malabar spinach requires a trellis or other support structure to climb on.
How do I start Malabar spinach from seed?
Starting Malabar spinach from seed is relatively easy. Here’s a step-by-step guide:
1. **Soak the seeds:** Soak the seeds in warm water for 24 hours before planting to improve germination rates.
2. **Sow the seeds:** Sow the seeds directly into the garden or in seed trays, about 1/2 inch deep.
3. **Keep the soil moist:** Keep the soil consistently moist until the seeds germinate.
4. **Thin the seedlings:** Once the seedlings emerge, thin them to about 12-18 inches apart.
5. **Transplant (if necessary):** If you started the seeds in seed trays, transplant the seedlings to the garden after the last frost.
What are some common pests and diseases that affect Malabar spinach, and how can I prevent them?
Malabar spinach is generally resistant to pests and diseases, but it can occasionally be affected by aphids, spider mites, or fungal diseases. Here are some preventative measures:
* **Inspect plants regularly:** Check your plants regularly for signs of pests or diseases.
* **Provide good air circulation:** Ensure good air circulation around the plants to prevent fungal diseases.
* **Use organic pest control methods:** If you encounter pests, try using organic pest control methods such as insecticidal soap or neem oil.
* **Remove infected leaves:** Remove any infected leaves promptly to prevent the spread of disease.
* **Companion planting:** Plant companion plants such as basil, marigolds, or nasturtiums to deter pests.
How do I harvest Malabar spinach?
You can start harvesting Malabar spinach leaves once the plants are established and have reached a sufficient size. Simply snip off the leaves and stems as needed, leaving a few inches of stem to encourage new growth. Regular harvesting will promote bushier growth and a more abundant yield.
Can I grow Malabar spinach in containers?
Yes, Malabar spinach can be successfully grown in containers, provided that the containers are large enough (at least 12 inches in diameter) and have adequate drainage. Use a high-quality potting mix and provide a trellis or other support structure for the vine to climb on. Water regularly and fertilize every few weeks with a balanced fertilizer.
Is Malabar spinach a perennial or an annual?
In tropical and subtropical climates, Malabar spinach can be grown as a perennial. However, in colder climates, it is typically grown as an annual, as it is not frost-tolerant.
How can I store Malabar spinach?
Freshly harvested Malabar spinach leaves can be stored in the refrigerator for up to a week. Wrap the leaves in a damp paper towel and place them in a plastic bag or container. You can also freeze Malabar spinach leaves for longer storage. Blanch the leaves in boiling water for a few minutes, then cool them in ice water before freezing.
What are some creative ways to use Malabar spinach in cooking?
Malabar spinach is a versatile ingredient that can be used in a variety of dishes. Here are a few ideas:
* **Salads:** Add fresh Malabar spinach leaves to salads for a slightly peppery flavor and a boost of nutrients.
* **Stir-fries:** Use Malabar spinach in stir-fries as a substitute for regular spinach or other leafy greens.
* **Soups and stews:** Add Malabar spinach to soups and stews for added flavor and nutrition.
* **Smoothies:** Blend Malabar spinach into smoothies for a healthy and refreshing drink.
* **Sauteed:** Saute Malabar spinach with garlic and olive oil for a simple and delicious side dish.
* **Indian Cuisine:** Malabar spinach is commonly used in Indian dishes like dal and curries.
By following these tips and tricks,
Leave a Comment