
Growing Healthy Backyard Kohlrabi doesn’t have to be a daunting task! Have you ever walked through a farmer’s market and been intrigued by that alien-looking vegetable with the funny stems? That’s kohlrabi, and I’m here to tell you that you can easily cultivate this nutritional powerhouse right in your own backyard. Forget expensive grocery store prices; with a few simple tricks and DIY hacks, you’ll be harvesting a bounty of fresh, crisp kohlrabi in no time.
Kohlrabi, a member of the cabbage family, has a fascinating history, dating back to ancient Rome. It was later cultivated in Northern Europe, where it became a staple in many cuisines. Today, it’s gaining popularity worldwide for its unique flavor and impressive health benefits. But why should *you* bother growing it yourself? Well, store-bought kohlrabi can sometimes be tough and woody. By growing your own, you control the growing conditions, ensuring a tender, flavorful harvest. Plus, there’s nothing quite like the satisfaction of eating something you’ve nurtured from seed to table!
This DIY guide is packed with practical tips and tricks to help you succeed in growing healthy backyard kohlrabi, even if you’re a complete beginner. We’ll cover everything from choosing the right variety and preparing your soil to pest control and harvesting techniques. So, grab your gardening gloves, and let’s get started on this exciting journey to homegrown kohlrabi goodness!
Kohlrabi im eigenen Garten anbauen: Eine Schritt-für-Schritt-Anleitung
Hallo Gartenfreunde! Ich liebe es, frisches Gemüse direkt aus meinem Garten zu ernten, und Kohlrabi ist da keine Ausnahme. Er ist knackig, saftig und super vielseitig in der Küche. Außerdem ist er wirklich einfach anzubauen, selbst wenn du noch nicht so viel Erfahrung hast. In diesem Artikel zeige ich dir, wie du gesunden und leckeren Kohlrabi in deinem eigenen Garten ziehen kannst. Los geht’s!
Die Vorbereitung: Der richtige Standort und Boden
Bevor wir mit dem Pflanzen beginnen, müssen wir sicherstellen, dass der Kohlrabi den bestmöglichen Start hat. Das beginnt mit der Wahl des richtigen Standorts und der Vorbereitung des Bodens.
* Sonniger Standort: Kohlrabi liebt die Sonne! Wähle einen Standort in deinem Garten, der mindestens sechs Stunden direkte Sonneneinstrahlung pro Tag erhält. Je mehr Sonne, desto besser.
* Gut durchlässiger Boden: Kohlrabi mag keine Staunässe. Der Boden sollte gut durchlässig sein, damit das Wasser gut abfließen kann.
* Bodenverbesserung: Wenn dein Boden schwer und lehmig ist, solltest du ihn vor dem Pflanzen verbessern. Arbeite Kompost oder gut verrotteten Mist ein, um die Bodenstruktur zu verbessern und die Drainage zu fördern. Das gibt dem Kohlrabi einen Nährstoffschub und hilft ihm, kräftig zu wachsen.
* pH-Wert: Kohlrabi bevorzugt einen leicht sauren bis neutralen pH-Wert zwischen 6,0 und 7,5. Du kannst den pH-Wert deines Bodens mit einem Bodentest überprüfen und ihn gegebenenfalls anpassen. Kalk erhöht den pH-Wert, während Schwefel ihn senkt.
Aussaat und Anzucht: Der Grundstein für eine reiche Ernte
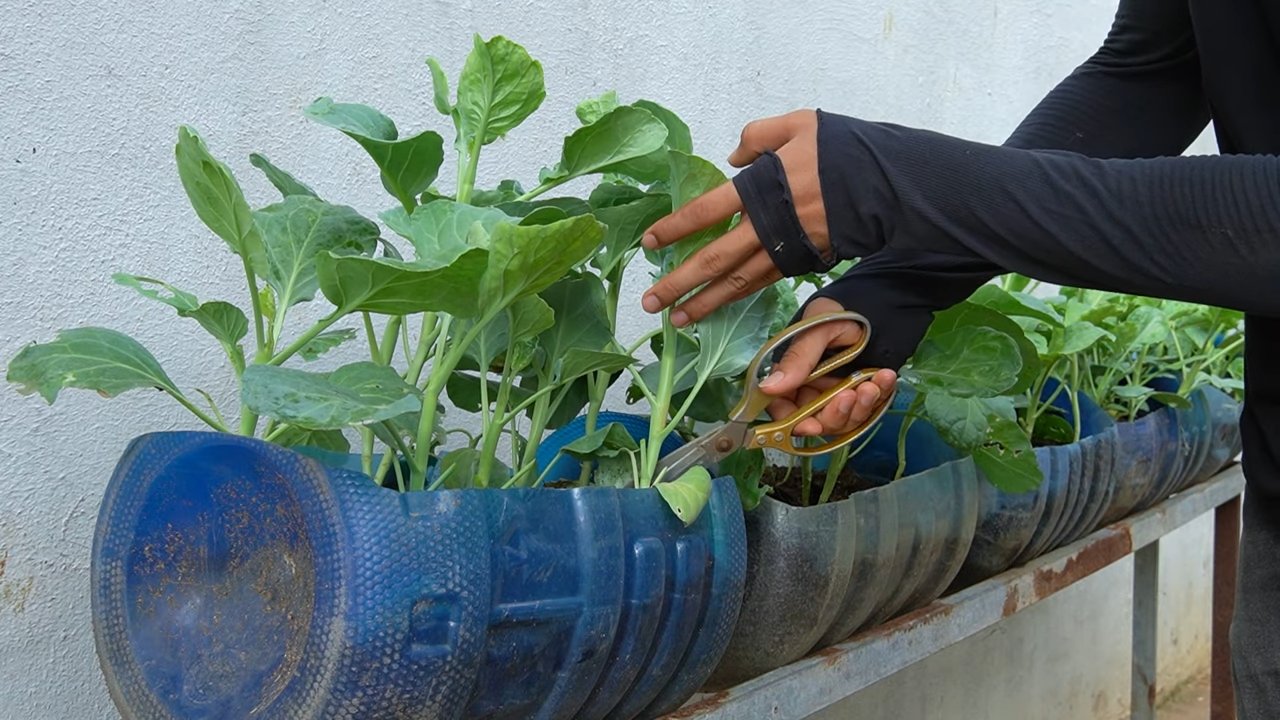
Es gibt zwei Möglichkeiten, Kohlrabi anzubauen: Entweder du säst die Samen direkt ins Beet oder du ziehst die Jungpflanzen vor. Ich bevorzuge die Voranzucht, da sie mir mehr Kontrolle über den Wachstumsprozess gibt und die Pflanzen einen Vorsprung haben.
* Aussaatzeitpunkt: Für eine frühe Ernte kannst du die Samen ab Februar oder März im Haus vorziehen. Für eine spätere Ernte kannst du sie ab April oder Mai direkt ins Beet säen.
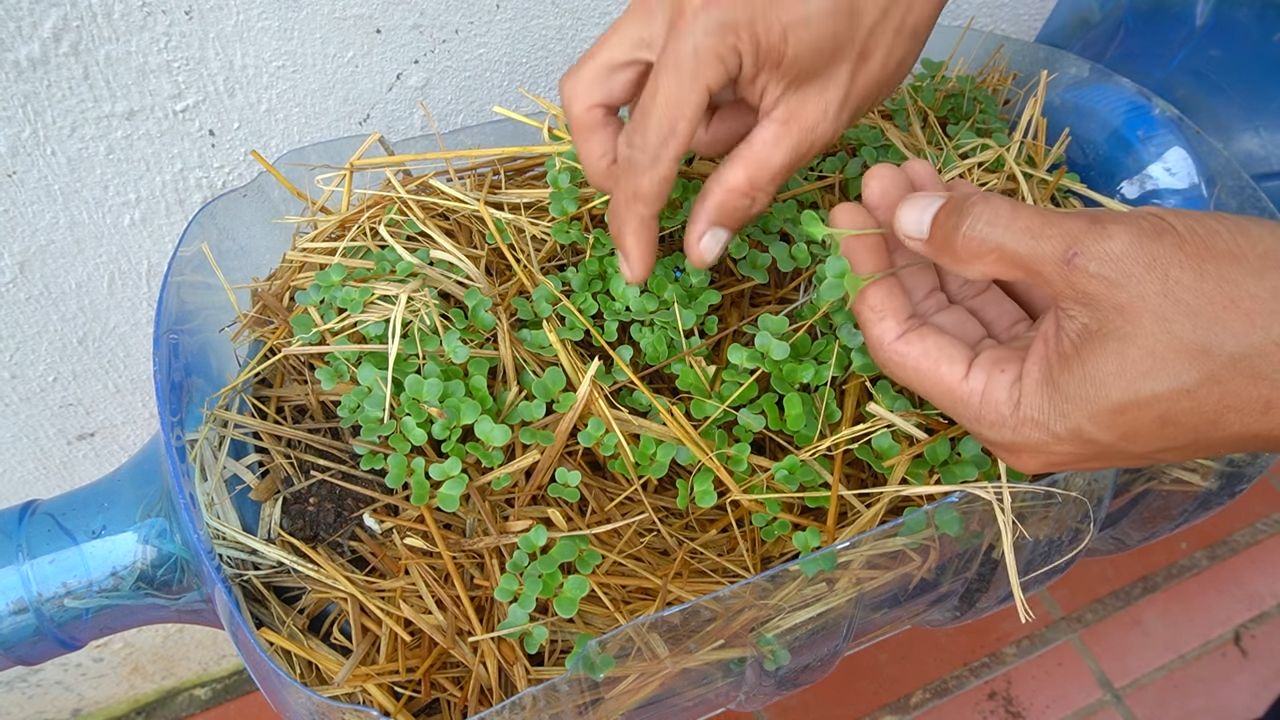
* Voranzucht im Haus:
1. Fülle kleine Anzuchttöpfe oder eine Anzuchtschale mit Anzuchterde.
2. Säe die Samen etwa 1 cm tief in die Erde.
3. Befeuchte die Erde vorsichtig mit einer Sprühflasche.
4. Stelle die Töpfe an einen hellen und warmen Ort (ca. 18-20°C).
5. Halte die Erde feucht, aber nicht nass.
6. Nach etwa einer Woche sollten die Samen keimen.
7. Sobald die Jungpflanzen ein paar Blätter haben, kannst du sie in größere Töpfe umtopfen.
* Direktsaat im Beet:
1. Bereite das Beet vor, indem du den Boden lockerst und von Unkraut befreist.
2. Ziehe Saatrillen im Abstand von etwa 25-30 cm.
3. Säe die Samen etwa 1 cm tief in die Rillen.
4. Bedecke die Samen mit Erde und drücke sie leicht an.
5. Gieße die Erde vorsichtig an.
6. Sobald die Pflanzen aufgegangen sind, vereinzele sie auf einen Abstand von etwa 20-25 cm.
Das Auspflanzen: Der Umzug ins Freie
Sobald die Jungpflanzen kräftig genug sind (etwa 10-15 cm hoch), können sie ins Freie umziehen.
* Abhärten: Bevor du die Pflanzen ins Beet setzt, solltest du sie einige Tage lang abhärten. Stelle sie tagsüber für einige Stunden ins Freie und hole sie abends wieder herein. So gewöhnen sie sich langsam an die Bedingungen im Freien.
* Pflanzabstand: Pflanze die Kohlrabipflanzen im Abstand von etwa 20-25 cm in Reihen mit einem Abstand von 30-40 cm.
* Pflanzloch: Grabe ein Loch, das etwas größer ist als der Wurzelballen der Pflanze.
* Einsetzen: Setze die Pflanze vorsichtig in das Loch und fülle es mit Erde auf. Drücke die Erde leicht an.
* Angießen: Gieße die Pflanzen nach dem Einsetzen gründlich an.
Die Pflege: Gießen, Düngen und Unkrautbekämpfung
Kohlrabi ist relativ pflegeleicht, aber ein paar Dinge solltest du beachten, um eine reiche Ernte zu erzielen.
* Gießen: Kohlrabi braucht regelmäßig Wasser, besonders während trockener Perioden. Achte darauf, dass der Boden immer leicht feucht ist, aber vermeide Staunässe.
* Düngen: Kohlrabi ist ein Starkzehrer und benötigt ausreichend Nährstoffe. Dünge die Pflanzen regelmäßig mit einem organischen Dünger oder Kompost. Ich verwende gerne Brennnesseljauche, die ich selbst herstelle.
* Unkrautbekämpfung: Halte das Beet unkrautfrei, damit der Kohlrabi nicht um Nährstoffe und Wasser konkurrieren muss. Jäten ist wichtig!
* Schutz vor Schädlingen: Kohlrabi kann von verschiedenen Schädlingen befallen werden, wie z.B. Kohlweißlingen oder Erdflöhen. Schütze die Pflanzen mit einem Insektenschutznetz oder bekämpfe die Schädlinge mit natürlichen Mitteln.
* Häufeln: Häufle die Erde um die Stängel der Pflanzen an, um sie zu stabilisieren und die Bildung von Seitentrieben zu fördern.
Die Ernte: Der Lohn der Mühe
Die Erntezeit für Kohlrabi hängt von der Sorte und dem Aussaatzeitpunkt ab. In der Regel kannst du den Kohlrabi etwa 8-10 Wochen nach der Aussaat ernten.
* Erntezeitpunkt: Ernte den Kohlrabi, wenn die Knollen etwa die Größe eines Tennisballs haben. Wenn du ihn zu lange wachsen lässt, kann er holzig und faserig werden.
* Erntemethode: Schneide die Knolle mit einem scharfen Messer knapp über dem Boden ab.
* Lagerung: Kohlrabi lässt sich im Kühlschrank einige Tage lagern. Du kannst ihn auch einfrieren, nachdem du ihn blanchiert hast.
Sortenempfehlungen: Für jeden Geschmack etwas dabei
Es gibt viele verschiedene Kohlrabisorten, die sich in Farbe, Größe und Geschmack unterscheiden. Hier sind ein paar meiner Favoriten:
* ‘Superschmelz’: Eine sehr frühe und ertragreiche Sorte mit zarten, weißen Knollen.
* ‘Blauer Delikatess’: Eine Sorte mit violetten Knollen und einem milden, süßen Geschmack.
* ‘Gigant’: Eine sehr große Sorte, die bis zu 5 kg schwer werden kann.
* ‘Lanro’: Eine robuste und widerstandsfähige Sorte, die sich gut für den Anbau im Freien eignet.
Häufige Probleme und Lösungen: Was tun, wenn etwas schief geht?
Auch beim Kohlrabianbau kann es zu Problemen kommen. Hier sind ein paar häufige Probleme und wie du sie lösen kannst:
* Schädlinge: Kohlweißlinge, Erdflöhe, Blattläuse. Lösung: Insektenschutznetz, natürliche Schädlingsbekämpfungsmittel (z.B. Neemöl).
* Krankheiten: Kohlhernie, Falscher Mehltau. Lösung: Fruchtfolge einhalten, resistente Sorten wählen, befallene Pflanzen entfernen.
* Holzige Knollen: Zu späte Ernte, Wassermangel. Lösung: Rechtzeitig ernten, regelmäßig gießen.
* Platzende Knollen: Unregelmäßige Bewässerung, zu viel Dünger. Lösung: Gleichmäßig gießen, weniger düngen.
Zusätzliche Tipps und Tricks: Für noch mehr Erfolg
* Fruchtfolge: Baue Kohlrabi nicht jedes Jahr am selben Standort an, um Krankheiten und Schädlingen vorzubeugen.
* Mischkultur: Pflanze Kohlrabi zusammen mit anderen Pflanzen, die sich gegenseitig unterstützen. Gute Partner sind z.B. Salat, Radieschen oder Ringelblumen.
* Mulchen:
Conclusion
So, there you have it! Mastering the art of growing healthy backyard kohlrabi is not only achievable but also incredibly rewarding. From the initial seed selection to the final harvest, every step contributes to the creation of crisp, delicious, and nutritious kohlrabi bulbs right in your own backyard. This isn’t just about saving money at the grocery store; it’s about connecting with your food, understanding its origins, and enjoying the unparalleled flavor of freshly grown produce.
Why is this DIY approach a must-try? Because store-bought kohlrabi simply can’t compare to the vibrant taste and texture of homegrown varieties. You control the growing environment, ensuring optimal conditions for healthy development. You can choose organic methods, avoiding harmful pesticides and herbicides. And, perhaps most importantly, you experience the satisfaction of nurturing a plant from seed to table.
But the journey doesn’t end with the basic techniques. Feel free to experiment with different kohlrabi varieties. ‘Early White Vienna’ is a classic choice, known for its mild flavor and early maturity. ‘Purple Vienna’ adds a splash of color to your garden and offers a slightly sweeter taste. For those in warmer climates, consider ‘Gigante,’ a larger variety that can withstand higher temperatures.
Beyond variety selection, consider companion planting. Kohlrabi thrives alongside herbs like dill and chamomile, which can help deter pests and attract beneficial insects. Planting it near onions or garlic can also offer protection from common kohlrabi predators.
Don’t be afraid to get creative with your kohlrabi recipes, too! While the bulbs are delicious raw in salads or slaws, they can also be steamed, roasted, or even stir-fried. The leaves are equally versatile, adding a peppery kick to soups, stews, or sautéed greens. Consider pickling kohlrabi for a tangy treat, or grating it into fritters for a unique and flavorful side dish.
We strongly encourage you to embark on this kohlrabi-growing adventure. It’s a fantastic way to enhance your gardening skills, enjoy fresh, healthy produce, and connect with nature. Remember to pay close attention to soil quality, watering needs, and pest control. With a little patience and dedication, you’ll be harvesting a bountiful crop of kohlrabi in no time.
And now, we want to hear from you! Have you tried growing kohlrabi in your backyard? What varieties have you had success with? What are your favorite kohlrabi recipes? Share your experiences, tips, and tricks in the comments below. Let’s create a community of kohlrabi enthusiasts and learn from each other’s successes and challenges. Your insights could be invaluable to other gardeners just starting out. Let’s cultivate a thriving community around the joy of growing healthy backyard kohlrabi!
Frequently Asked Questions (FAQ)
What is the best time to plant kohlrabi?
The timing of planting kohlrabi depends largely on your climate. For a spring harvest, start seeds indoors 4-6 weeks before the last expected frost. Transplant seedlings outdoors 2-3 weeks before the last frost. For a fall harvest, direct sow seeds in mid-summer, about 6-8 weeks before the first expected frost. In warmer climates, you can often grow kohlrabi throughout the winter. The key is to avoid planting during the hottest part of the summer, as high temperatures can cause the bulbs to become tough and bitter.
How much sunlight does kohlrabi need?
Kohlrabi thrives in full sun, requiring at least 6 hours of direct sunlight per day. While it can tolerate partial shade, especially in hotter climates, insufficient sunlight can lead to leggy growth and smaller bulbs. Choose a planting location that receives ample sunlight throughout the day. If you’re growing kohlrabi indoors, use grow lights to supplement natural sunlight.
What kind of soil is best for growing kohlrabi?
Kohlrabi prefers well-drained, fertile soil with a pH between 6.0 and 7.5. Amend your soil with compost or other organic matter to improve drainage and fertility. Avoid heavy clay soils, as they can become waterlogged and hinder bulb development. A soil test can help you determine the pH and nutrient levels of your soil, allowing you to make necessary adjustments before planting.
How often should I water kohlrabi?
Kohlrabi needs consistent moisture to produce plump, juicy bulbs. Water deeply and regularly, especially during dry periods. Aim to keep the soil consistently moist but not waterlogged. Mulching around the plants can help retain moisture and suppress weeds. Check the soil moisture regularly by sticking your finger into the soil about an inch deep. If it feels dry, it’s time to water.
What are common pests and diseases that affect kohlrabi?
Common pests that affect kohlrabi include cabbage worms, aphids, flea beetles, and cabbage root maggots. Diseases include clubroot, black rot, and downy mildew. To prevent pest and disease problems, practice crop rotation, use row covers to protect plants from insects, and choose disease-resistant varieties. Inspect your plants regularly for signs of pests or diseases and take action promptly. Organic pest control methods, such as insecticidal soap or neem oil, can be effective in controlling many common pests.
How do I know when kohlrabi is ready to harvest?
Kohlrabi is typically ready to harvest when the bulbs are about 2-3 inches in diameter. Check the seed packet or plant tag for the specific maturity date of your chosen variety. The bulbs should be firm and smooth. If you wait too long to harvest, the bulbs can become tough and woody. To harvest, simply cut the bulb from the stem just above the soil line.
Can I eat the leaves of kohlrabi?
Yes, the leaves of kohlrabi are edible and nutritious. They have a similar flavor to cabbage or kale. Harvest young, tender leaves for the best flavor and texture. You can use kohlrabi leaves in salads, soups, stews, or sautéed greens.
How do I store kohlrabi after harvesting?
Store kohlrabi bulbs in the refrigerator for up to several weeks. Remove the leaves before storing, as they can draw moisture from the bulbs. Place the bulbs in a plastic bag or container to prevent them from drying out. Kohlrabi leaves can also be stored in the refrigerator for a few days.
Can I grow kohlrabi in containers?
Yes, kohlrabi can be grown in containers. Choose a container that is at least 12 inches deep and wide to accommodate the bulb’s growth. Use a well-draining potting mix and provide regular watering and fertilization. Container-grown kohlrabi may require more frequent watering than plants grown in the ground.
What are some good companion plants for kohlrabi?
Good companion plants for kohlrabi include dill, chamomile, onions, garlic, rosemary, and thyme. These plants can help deter pests, attract beneficial insects, and improve the overall health of your kohlrabi plants. Avoid planting kohlrabi near other members of the cabbage family, such as broccoli, cauliflower, and Brussels sprouts, as they can attract the same pests and diseases.
Leave a Comment