
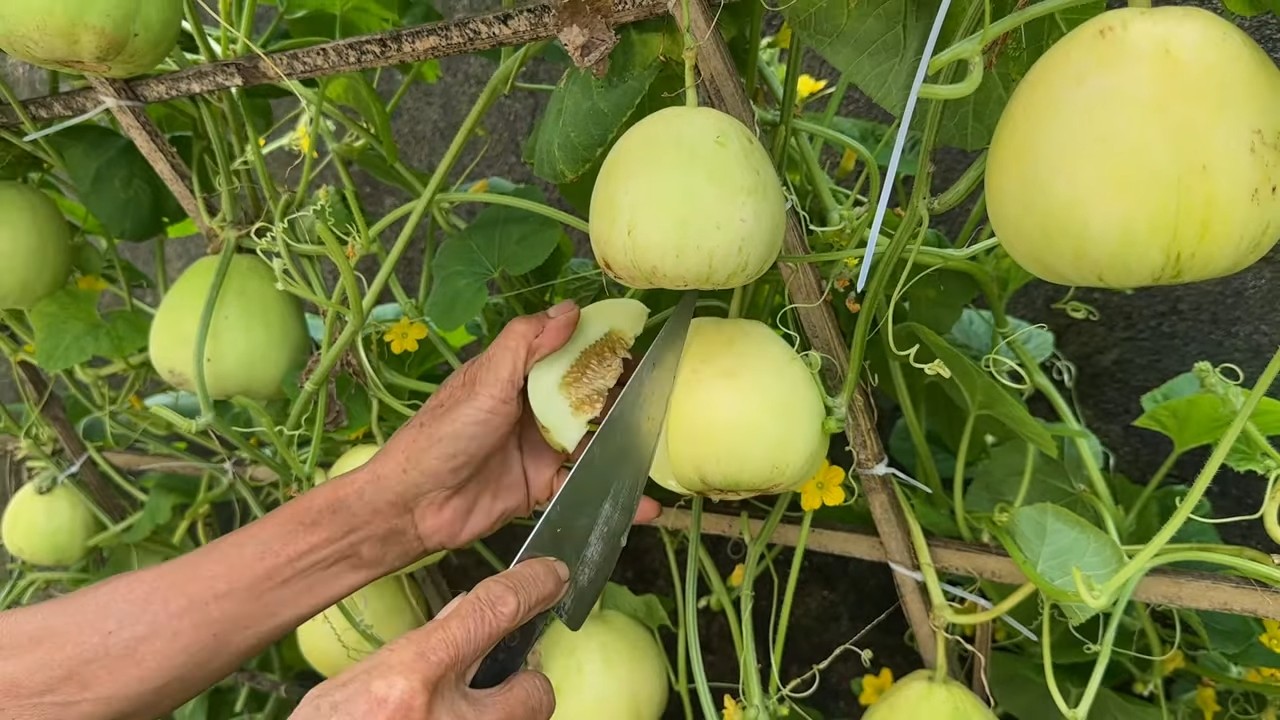
Unusual melon huge harvest dreams can become a reality, even if you think your green thumb is more of a brown thumb! Have you ever looked at those prize-winning melons at the farmer’s market and wondered how on earth they got so big and bountiful? I know I have! It’s easy to feel intimidated, but trust me, with a few clever DIY tricks and a little know-how, you can be harvesting a surprisingly impressive melon crop right in your own backyard.
Melons have a rich history, dating back thousands of years, with evidence of cultivation found in Africa and Asia. They’ve been prized for their sweetness and refreshing qualities across cultures, often symbolizing abundance and prosperity. But achieving that abundance in your own garden can sometimes feel like a challenge.
That’s where this article comes in! We’re diving deep into simple, yet effective, DIY hacks that will help you unlock the secrets to an unusual melon huge harvest. From soil preparation to clever watering techniques and even some surprising support systems, I’ll share my favorite tips and tricks that have helped me grow melons bigger and better than I ever thought possible. Forget complicated gardening jargon – we’re keeping it practical, fun, and totally achievable. So, grab your gardening gloves, and let’s get ready to grow some seriously impressive melons!
Verwandle deine riesige Melonenernte in köstliche Köstlichkeiten: DIY-Rezepte und Konservierungstipps
Hallo liebe Gartenfreunde! Habt ihr auch so eine unglaubliche Melonenernte dieses Jahr? Ich schon! Und ehrlich gesagt, ich war erstmal ein bisschen überwältigt. Was macht man mit so vielen Melonen? Wegwerfen ist keine Option, also habe ich mich auf die Suche nach kreativen und leckeren Möglichkeiten gemacht, meine riesige Melonenernte zu verwerten. Und was soll ich sagen, ich habe einige tolle Sachen entdeckt, die ich gerne mit euch teilen möchte!
Melonen-Limonade: Der perfekte Sommer-Durstlöscher
Nichts ist erfrischender als eine selbstgemachte Limonade an einem heißen Tag. Und mit so vielen Melonen zur Hand, ist es die perfekte Gelegenheit, eine Melonen-Limonade zu zaubern.
Was du brauchst:
* Melone (Wassermelone oder Honigmelone, oder eine Mischung)
* Zucker (oder Honig, Ahornsirup, je nach Geschmack)
* Zitronen oder Limetten
* Wasser
* Eiswürfel
* Optional: Minze, Basilikum oder andere Kräuter
Schritt-für-Schritt Anleitung:
1. Melone vorbereiten: Schneide die Melone in Stücke und entferne die Kerne. Ich finde, ein Entkerner macht das Leben hier viel einfacher, aber ein Messer tut es auch.
2. Melone pürieren: Gib die Melonenstücke in einen Mixer oder eine Küchenmaschine und püriere sie, bis sie glatt sind.
3. Saft sieben (optional): Wenn du eine besonders feine Limonade möchtest, kannst du den Melonensaft durch ein feines Sieb oder ein Mulltuch passieren, um Fruchtfleisch zu entfernen. Ich persönlich mag es, wenn noch ein bisschen Fruchtfleisch drin ist, aber das ist Geschmackssache.
4. Zitronen- oder Limettensaft auspressen: Presse die Zitronen oder Limetten aus, um frischen Saft zu erhalten. Die Menge hängt davon ab, wie säuerlich du deine Limonade magst. Ich nehme meistens den Saft von 2-3 Zitronen pro großer Melone.
5. Süßen: Gib den Melonensaft, Zitronen- oder Limettensaft und Zucker (oder Honig, Ahornsirup) in einen Krug. Beginne mit einer kleinen Menge Zucker und schmecke ab, bis die Limonade die gewünschte Süße hat. Denk daran, dass die Melone selbst auch schon süß ist.
6. Mit Wasser verdünnen: Füge Wasser hinzu, bis die Limonade die gewünschte Konsistenz hat. Ich mag sie nicht zu dickflüssig, also gebe ich meistens relativ viel Wasser dazu.
7. Kühlen und servieren: Stelle die Limonade in den Kühlschrank, damit sie gut durchkühlen kann. Serviere sie mit Eiswürfeln und garniere sie eventuell mit Minze, Basilikum oder anderen Kräutern.
Melonen-Chutney: Süß-sauerer Genuss für den Winter
Ein Chutney ist eine tolle Möglichkeit, Melonen haltbar zu machen und gleichzeitig einen leckeren Begleiter zu Käse, Gegrilltem oder Currys zu haben.
Was du brauchst:
* Melone (am besten eine etwas festere Sorte wie Honigmelone)
* Zwiebeln
* Essig (Apfelessig oder Weißweinessig)
* Zucker
* Gewürze (z.B. Ingwer, Chili, Senfsaat, Koriandersamen, Zimt)
* Salz
* Pfeffer
Schritt-für-Schritt Anleitung:
1. Melone vorbereiten: Schäle die Melone, entferne die Kerne und schneide sie in kleine Würfel.
2. Zwiebeln vorbereiten: Schäle die Zwiebeln und schneide sie ebenfalls in kleine Würfel.
3. Zutaten andünsten: Erhitze etwas Öl in einem Topf und dünste die Zwiebeln darin glasig an. Füge dann die Melonenwürfel und die Gewürze hinzu und dünste alles kurz mit an.
4. Mit Essig und Zucker ablöschen: Gieße den Essig und den Zucker in den Topf und verrühre alles gut.
5. Köcheln lassen: Bringe das Chutney zum Kochen und reduziere dann die Hitze. Lasse es unter gelegentlichem Rühren köcheln, bis die Melone weich ist und die Flüssigkeit eingedickt ist. Das kann je nach Melonensorte und gewünschter Konsistenz 30-60 Minuten dauern.
6. Abschmecken: Schmecke das Chutney mit Salz und Pfeffer ab. Wenn es dir zu sauer ist, kannst du noch etwas Zucker hinzufügen. Wenn es dir zu süß ist, kannst du noch etwas Essig hinzufügen.
7. Heiß abfüllen: Fülle das heiße Chutney in sterilisierte Gläser. Verschließe die Gläser sofort und stelle sie für 5-10 Minuten auf den Kopf. Dadurch entsteht ein Vakuum, das das Chutney haltbarer macht.
Melonen-Marmelade: Süßer Brotaufstrich mit dem gewissen Etwas
Marmelade aus Melone? Ja, das geht! Und es schmeckt überraschend lecker.
Was du brauchst:
* Melone (Wassermelone oder Honigmelone)
* Gelierzucker (2:1 oder 3:1, je nach gewünschter Süße)
* Zitronensaft
* Optional: Vanille, Ingwer, Minze
Schritt-für-Schritt Anleitung:
1. Melone vorbereiten: Schäle die Melone, entferne die Kerne und schneide sie in kleine Würfel.
2. Melone pürieren: Gib die Melonenwürfel in einen Mixer oder eine Küchenmaschine und püriere sie, bis sie glatt sind.
3. Mit Gelierzucker mischen: Gib das Melonenpüree in einen Topf und mische es mit dem Gelierzucker.
4. Zum Kochen bringen: Bringe die Mischung unter Rühren zum Kochen.
5. Kochen lassen: Lasse die Marmelade unter ständigem Rühren 3-5 Minuten sprudelnd kochen. Mache eine Gelierprobe, um zu prüfen, ob die Marmelade fest wird. Gib dazu einen kleinen Löffel Marmelade auf einen kalten Teller. Wenn sie nach kurzer Zeit fest wird, ist die Marmelade fertig.
6. Abschmecken: Schmecke die Marmelade mit Zitronensaft und eventuell Vanille, Ingwer oder Minze ab.
7. Heiß abfüllen: Fülle die heiße Marmelade in sterilisierte Gläser. Verschließe die Gläser sofort und stelle sie für 5-10 Minuten auf den Kopf.
Melonen-Gazpacho: Kalte Suppe für heiße Tage
Gazpacho ist eine spanische kalte Suppe, die traditionell aus Tomaten, Gurken, Paprika und Zwiebeln zubereitet wird. Aber warum nicht mal eine Melonen-Gazpacho ausprobieren?
Was du brauchst:
* Melone (Wassermelone oder Honigmelone)
* Gurke
* Paprika (rot oder gelb)
* Zwiebel (rot oder weiß)
* Knoblauch
* Essig (Sherryessig oder Weißweinessig)
* Olivenöl
* Salz
* Pfeffer
* Optional: Chili, Minze, Basilikum
Schritt-für-Schritt Anleitung:
1. Gemüse vorbereiten: Schäle die Gurke, entferne die Kerne der Paprika und schäle die Zwiebel und den Knoblauch. Schneide alles in grobe Stücke.
2. Melone vorbereiten: Schäle die Melone, entferne die Kerne und schneide sie ebenfalls in grobe Stücke.
3. Alles pürieren: Gib das Gemüse, die Melone, den Knoblauch, den Essig und das Olivenöl in einen Mixer oder eine Küchenmaschine und püriere alles, bis es glatt ist.
4. Abschmecken: Schmecke die Gazpacho mit Salz, Pfeffer und eventuell Chili ab.
5. Kühlen: Stelle die Gaz
Conclusion
So, there you have it! Transforming an unusually large melon harvest from a potential problem into a pantry full of delicious possibilities is not only achievable but surprisingly rewarding. This DIY trick, focusing on creating a versatile melon preserve, is a game-changer for anyone facing a glut of these summertime fruits. Forget letting those oversized melons go to waste; instead, embrace the opportunity to craft something truly special.
Why is this a must-try? Because it’s more than just a recipe; it’s a solution. It addresses the common issue of what to do with an abundance of melons, particularly those unusually large specimens that might seem daunting to tackle. It’s a sustainable approach to food preservation, minimizing waste and maximizing flavor. And, perhaps most importantly, it’s a chance to get creative in the kitchen and discover new culinary horizons.
But the beauty of this DIY melon preserve lies in its adaptability. Feel free to experiment with different flavor combinations. Add a touch of ginger for warmth, a sprinkle of chili flakes for a subtle kick, or a handful of toasted nuts for added texture. Consider incorporating other fruits like peaches or plums for a mixed fruit preserve. The possibilities are truly endless! You can also adjust the sweetness level to your liking, using less sugar for a more tart preserve or adding a touch of honey or maple syrup for a richer flavor.
Don’t be afraid to get adventurous with your spices, either. A pinch of cardamom, a star anise, or even a few sprigs of rosemary can elevate your melon preserve to a whole new level. Think about what flavors complement melon well and let your imagination run wild.
Beyond the flavor variations, consider the different ways you can use your homemade melon preserve. Spread it on toast or scones for a delightful breakfast treat. Use it as a filling for pastries or pies. Serve it alongside grilled meats or cheeses for a sweet and savory contrast. Or simply enjoy it straight from the jar as a delicious and refreshing snack.
This DIY trick for preserving your unusual melon harvest is not just about saving food; it’s about creating something unique and delicious that you can enjoy for months to come. It’s about embracing the bounty of the season and transforming it into a culinary masterpiece.
So, what are you waiting for? Gather your unusually large melons, roll up your sleeves, and get ready to embark on a preserving adventure. We’re confident that you’ll be amazed by the results. And once you’ve created your own signature melon preserve, we encourage you to share your experience with us. Tell us about your favorite flavor combinations, your creative uses for the preserve, and any tips or tricks you’ve discovered along the way. Let’s build a community of melon-preserving enthusiasts and inspire others to embrace the delicious possibilities of this simple yet transformative DIY trick. We can’t wait to hear your stories!
Frequently Asked Questions (FAQ)
What kind of melons work best for this preserve?
While this recipe is designed to handle an unusually large melon harvest, it works well with a variety of melon types. Watermelons, cantaloupes, honeydews, and even specialty melons like Galia or Charentais can all be used. The key is to choose melons that are ripe but not overripe, as overripe melons can become mushy during the preserving process. If you’re using a mix of melons, be sure to adjust the cooking time accordingly, as different melons have different textures and water content.
How long will the melon preserve last?
When properly processed and stored, your homemade melon preserve can last for up to a year. It’s crucial to follow proper canning procedures to ensure a safe and shelf-stable product. This includes using sterilized jars and lids, processing the jars in a boiling water bath for the recommended time, and checking the seals to ensure they are airtight. Once opened, the preserve should be refrigerated and consumed within a few weeks.
Can I reduce the amount of sugar in the recipe?
Yes, you can definitely reduce the amount of sugar in the recipe, but keep in mind that sugar plays a role in both the flavor and preservation of the preserve. It helps to draw out the moisture from the melon, creating a thicker consistency, and it also acts as a natural preservative. If you reduce the sugar too much, the preserve may not set properly and may have a shorter shelf life. You can experiment with using alternative sweeteners like honey, maple syrup, or agave nectar, but be aware that these sweeteners may affect the flavor and texture of the final product. A good starting point is to reduce the sugar by about 25% and see how it turns out. You can always add more sweetener later if needed.
What if my melon preserve doesn’t set properly?
If your melon preserve doesn’t set properly, don’t panic! There are a few things you can try to fix it. First, make sure you’ve cooked the preserve long enough. The mixture should reach a gel-like consistency when a small spoonful is placed on a chilled plate. If it’s still too runny, continue cooking it for a few more minutes, testing the set every few minutes. Another common cause of unset preserve is not enough pectin. Pectin is a natural substance found in fruits that helps them to gel. If your melon is low in pectin, you can add commercial pectin to the recipe. Follow the instructions on the pectin package for the correct amount to use. Finally, make sure you’re using the correct type of sugar. Granulated sugar works best for most preserves, but some recipes may call for specific types of sugar like preserving sugar or jam sugar.
Can I add alcohol to the melon preserve?
Yes, adding a splash of alcohol to your melon preserve can add a unique flavor and depth. A tablespoon or two of rum, brandy, or even a fruit liqueur like Grand Marnier can complement the sweetness of the melon and enhance the overall taste. Add the alcohol towards the end of the cooking process, after the preserve has reached its desired consistency. Be sure to stir it in well to ensure it’s evenly distributed. Keep in mind that adding alcohol may slightly reduce the shelf life of the preserve, so it’s best to store it in the refrigerator after opening.
What are some creative ways to use the melon preserve?
Beyond the traditional uses like spreading it on toast or using it as a filling for pastries, there are many creative ways to incorporate your homemade melon preserve into your cooking. Try using it as a glaze for grilled chicken or pork, or as a topping for ice cream or yogurt. You can also add it to smoothies or cocktails for a touch of sweetness and flavor. For a savory twist, try using it as a chutney alongside cheese and crackers, or as a condiment for sandwiches and wraps. The possibilities are endless!
Is it necessary to peel the melons before making the preserve?
Yes, it is generally recommended to peel the melons before making the preserve. The rind of the melon can be tough and bitter, and it can also affect the texture and appearance of the final product. However, if you’re using a melon with a very thin and tender rind, you may be able to leave some of it on for added flavor and texture. Just be sure to wash the melon thoroughly before cutting it and remove any seeds or tough spots.
Can I freeze the melon preserve instead of canning it?
Yes, you can freeze the melon preserve instead of canning it. Freezing is a great option if you don’t have the time or equipment for canning, or if you simply prefer the taste of fresh-frozen preserve. To freeze the preserve, let it cool completely and then transfer it to freezer-safe containers or bags. Be sure to leave some headspace in the containers to allow for expansion during freezing. The preserve can be stored in the freezer for up to 6 months. When you’re ready to use it, thaw it in the refrigerator overnight or at room temperature for a few hours. Keep in mind that the texture of the preserve may change slightly after freezing, but it will still be delicious.


Leave a Comment