
Growing Water Spinach Bottles: Unlock the secrets to a thriving, space-saving garden right in your own home! Have you ever dreamed of harvesting fresh, vibrant greens without the hassle of a traditional garden plot? I know I have! This DIY guide will show you how to cultivate delicious water spinach (also known as Ong Choy) using recycled bottles – a sustainable and incredibly rewarding project.
Water spinach, a staple in Asian cuisine, boasts a rich history. Originating in Southeast Asia, it has been cultivated for centuries, prized for its nutritional value and versatility in dishes like stir-fries and soups. But you don’t need to travel to Asia to enjoy this leafy green. With our simple method of growing water spinach bottles, you can bring a taste of the exotic to your kitchen table.
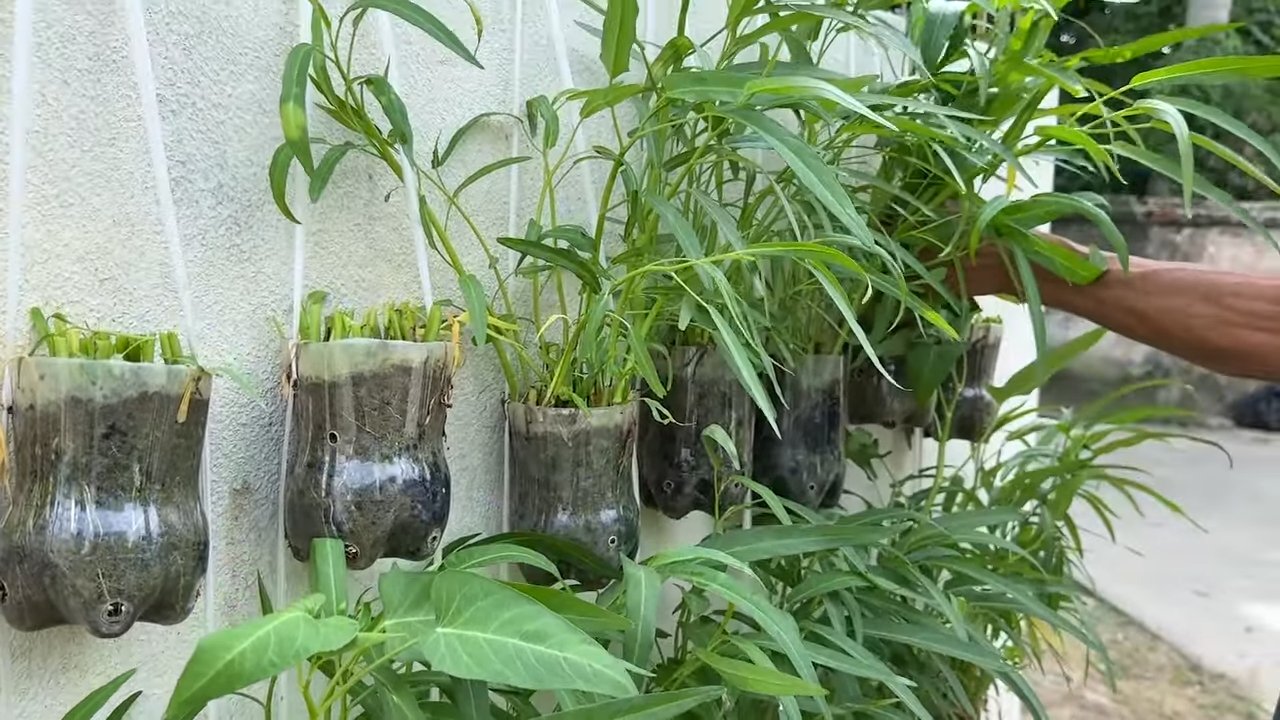
Why should you try this DIY trick? Well, for starters, it’s perfect for urban dwellers with limited space. Balconies, patios, even sunny windowsills can become miniature water spinach farms! Plus, it’s an eco-friendly way to repurpose plastic bottles, reducing waste and contributing to a greener lifestyle. Imagine the satisfaction of harvesting your own organic vegetables, knowing exactly where they came from and how they were grown. This guide will empower you to take control of your food source and enjoy the freshest, most flavorful water spinach imaginable. Let’s get started!
Wasser-Spinat in Flaschen ziehen: Ein DIY-Leitfaden für den urbanen Gärtner
Hallo liebe Gartenfreunde! Habt ihr Lust auf frischen, knackigen Wasser-Spinat, aber keinen Platz für ein großes Gemüsebeet? Keine Sorge, ich zeige euch, wie ihr diesen leckeren und nahrhaften Blattspinat ganz einfach in recycelten Plastikflaschen anbauen könnt. Es ist ein super Projekt für Balkone, Terrassen oder sogar Fensterbänke! Und das Beste daran: Es ist umweltfreundlich und spart Geld. Los geht’s!
Was du brauchst:
* Plastikflaschen: Am besten eignen sich 1,5-Liter- oder 2-Liter-Flaschen. Je größer, desto besser, aber achtet darauf, dass sie stabil stehen.
* Wasser-Spinat-Samen oder Stecklinge: Samen sind online oder in Gartencentern erhältlich. Stecklinge könnt ihr von bereits gewachsenen Pflanzen nehmen.
* Erde: Eine Mischung aus Gartenerde, Kompost und Kokosfaser ist ideal. Sie sorgt für gute Drainage und Nährstoffe.
* Blähton oder Kies: Für die Drainage am Boden der Flasche.
* Schere oder Messer: Zum Zuschneiden der Flaschen.
* Bohrmaschine oder Nagel: Für die Drainagelöcher.
* Wasser: Zum Gießen.
* Optional: Flüssigdünger: Für zusätzliches Wachstum.
Vorbereitung der Flaschen:
1. Reinigung: Zuerst müsst ihr die Plastikflaschen gründlich reinigen. Entfernt alle Etiketten und spült sie mit warmem Seifenwasser aus. Achtet darauf, dass keine Seifenreste zurückbleiben.
2. Drainagelöcher: Nun bohrt ihr mit einer Bohrmaschine oder einem Nagel mehrere Drainagelöcher in den Boden der Flaschen. Diese Löcher sind wichtig, damit überschüssiges Wasser ablaufen kann und die Wurzeln nicht faulen. Ich empfehle 4-5 Löcher pro Flasche.
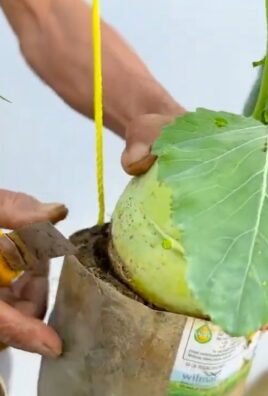
3. Zuschneiden (optional): Ihr könnt die Flaschen so lassen, wie sie sind, oder sie zuschneiden, um den Zugang zur Erde zu erleichtern. Wenn ihr sie zuschneidet, schneidet den oberen Teil der Flasche ab, etwa 10-15 cm unterhalb des Flaschenhalses. Dieser abgeschnittene Teil kann später als eine Art Mini-Gewächshaus verwendet werden.
Pflanzen des Wasser-Spinats:
1. Drainageschicht: Gebt eine Schicht Blähton oder Kies (ca. 2-3 cm hoch) auf den Boden der Flasche. Diese Schicht sorgt für eine gute Drainage und verhindert Staunässe.
2. Erde einfüllen: Füllt die Flasche mit der vorbereiteten Erde. Lasst etwa 2-3 cm Platz bis zum Rand. Drückt die Erde leicht an.
3. Samen säen oder Stecklinge pflanzen:
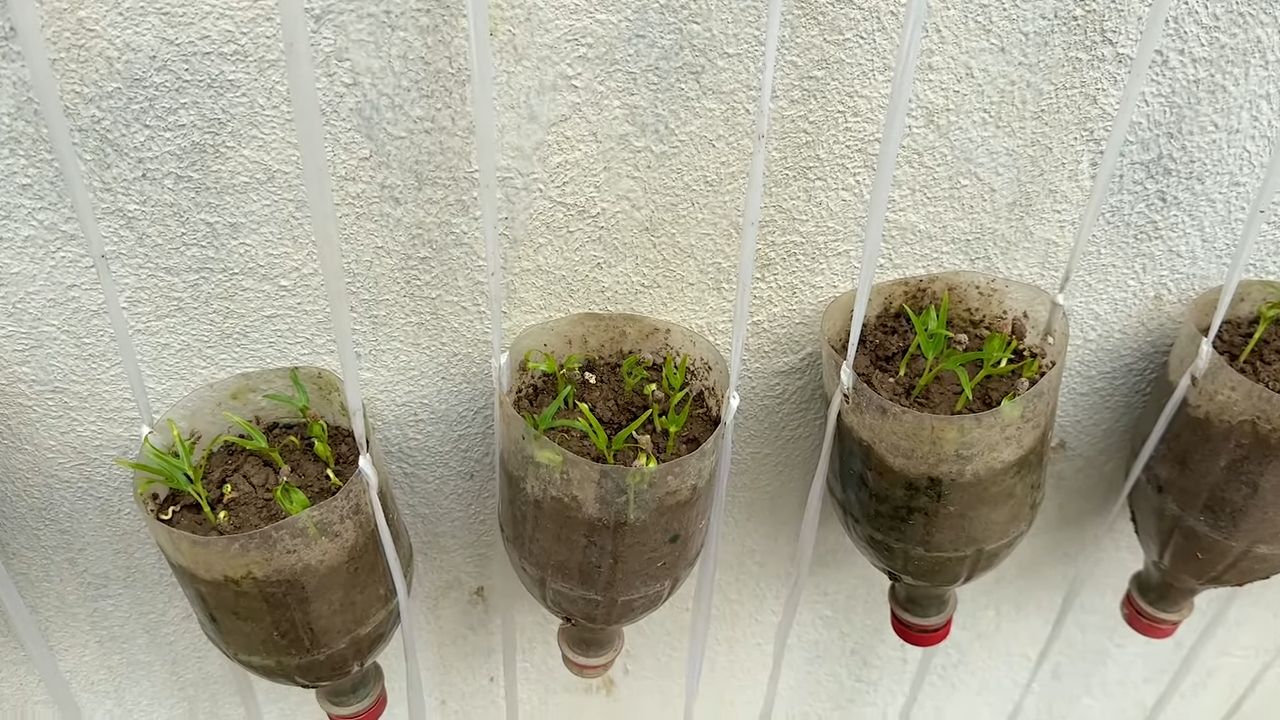
* Samen: Verteilt die Wasser-Spinat-Samen gleichmäßig auf der Erde. Bedeckt sie leicht mit einer dünnen Schicht Erde (ca. 0,5 cm). Gießt die Erde vorsichtig an, sodass sie feucht, aber nicht nass ist.
* Stecklinge: Wenn ihr Stecklinge verwendet, macht mit dem Finger oder einem kleinen Werkzeug ein kleines Loch in die Erde. Setzt den Steckling hinein und drückt die Erde um ihn herum fest. Gießt die Erde vorsichtig an.
4. Mini-Gewächshaus (optional): Wenn ihr die Flaschen zugeschnitten habt, könnt ihr den abgeschnittenen Teil umgedreht über die bepflanzte Flasche stülpen. Dies schafft ein Mini-Gewächshaus, das die Keimung der Samen oder das Anwachsen der Stecklinge beschleunigt. Achtet darauf, dass genügend Luftzirkulation vorhanden ist, indem ihr den Deckel leicht geöffnet lasst oder kleine Löcher hineinbohrt.
Pflege des Wasser-Spinats:
1. Gießen: Wasser-Spinat liebt Feuchtigkeit. Gießt die Pflanzen regelmäßig, sodass die Erde immer feucht ist, aber nicht nass. An heißen Tagen müsst ihr möglicherweise täglich gießen. Überprüft die Feuchtigkeit der Erde, indem ihr mit dem Finger hineinsticht.
2. Standort: Wasser-Spinat braucht viel Sonne. Stellt die Flaschen an einen sonnigen Standort, idealerweise mit mindestens 6 Stunden direkter Sonneneinstrahlung pro Tag.
3. Düngen (optional): Um das Wachstum zu fördern, könnt ihr die Pflanzen alle zwei Wochen mit einem Flüssigdünger düngen. Achtet darauf, dass der Dünger für Blattgemüse geeignet ist.
4. Schädlinge: Kontrolliert die Pflanzen regelmäßig auf Schädlinge wie Blattläuse oder Schnecken. Bei Bedarf könnt ihr natürliche Schädlingsbekämpfungsmittel verwenden.
5. Ernten: Wasser-Spinat kann geerntet werden, sobald die Blätter groß genug sind. Schneidet die Blätter einfach mit einer Schere ab. Die Pflanze wird weiterwachsen und neue Blätter produzieren.
Zusätzliche Tipps und Tricks:
* Sortenwahl: Es gibt verschiedene Sorten von Wasser-Spinat. Informiert euch, welche Sorte am besten für eure Region geeignet ist.
* Umpflanzen: Wenn die Pflanzen zu groß für die Flaschen werden, könnt ihr sie in größere Töpfe oder Kübel umpflanzen.
* Winterfest machen: Wasser-Spinat ist nicht winterhart. In kälteren Regionen müsst ihr die Pflanzen ins Haus holen oder sie als einjährige Pflanze behandeln.
* Vertikale Gärten: Ihr könnt die Flaschen auch an einer Wand oder einem Zaun befestigen, um einen vertikalen Garten zu schaffen.
* Kreative Gestaltung: Bemalt die Flaschen oder beklebt sie mit bunten Papieren, um euren Garten noch individueller zu gestalten.
Häufige Probleme und Lösungen:
* Gelbe Blätter: Gelbe Blätter können ein Zeichen für Überwässerung oder Nährstoffmangel sein. Reduziert das Gießen oder düngt die Pflanzen.
* Schimmel: Schimmel kann auftreten, wenn die Luftzirkulation schlecht ist. Sorgt für eine bessere Belüftung, indem ihr die Pflanzen nicht zu dicht beieinander stellt oder einen Ventilator verwendet.
* Schädlinge: Bei Schädlingsbefall könnt ihr natürliche Schädlingsbekämpfungsmittel wie Neemöl oder Seifenlauge verwenden.
Ernte und Verwendung:
Der Wasser-Spinat ist erntereif, sobald die Blätter eine ansehnliche Größe erreicht haben. Ihr könnt die Blätter einzeln oder ganze Triebe abschneiden. Die Pflanze wird weiterwachsen und neue Blätter bilden, sodass ihr über einen längeren Zeitraum ernten könnt.
Wasser-Spinat ist vielseitig verwendbar. Ihr könnt ihn roh in Salaten essen, gedünstet als Beilage servieren oder in Suppen und Wok-Gerichten verwenden. Er ist reich an Vitaminen und Mineralstoffen und schmeckt leicht nussig.
Fazit:
Wasser-Spinat in Flaschen anzubauen ist eine einfache und lohnende Möglichkeit, frisches Gemüse auf kleinem Raum zu ziehen. Es ist ein tolles Projekt für Anfänger und erfahrene Gärtner gleichermaßen. Probiert es aus und genießt euren eigenen, selbst angebauten Wasser-Spinat! Viel Spaß beim Gärtnern!
Conclusion
So, there you have it! Growing water spinach in bottles isn’t just a quirky gardening experiment; it’s a genuinely effective and rewarding way to cultivate fresh, delicious greens right in your own home, regardless of space constraints. We’ve walked through the simple steps, highlighting the ease and accessibility of this method. Forget complicated setups and expensive equipment. All you need are some recycled bottles, water, sunlight, and a little bit of patience.
Why is this DIY trick a must-try? Because it democratizes access to fresh produce. It empowers you to take control of your food source, even if you live in an apartment with a tiny balcony or no garden at all. Imagine the satisfaction of harvesting crisp, vibrant water spinach that you nurtured from seed to table. Think of the money you’ll save by reducing your grocery bills. And consider the environmental impact of reducing your reliance on commercially grown produce that often travels long distances.
But the benefits extend beyond mere practicality. This project is also incredibly engaging and educational. It’s a fantastic way to teach children about plant life cycles, sustainability, and the importance of healthy eating. It’s a therapeutic activity that can help you de-stress and reconnect with nature. And it’s a conversation starter that will impress your friends and neighbors.
Don’t be afraid to experiment with variations! Try using different types of bottles – larger ones for bigger yields, or colored ones to see if they affect growth. You can also explore different nutrient solutions to optimize the flavor and nutritional content of your water spinach. Consider adding a small air pump to oxygenate the water, which can further enhance growth. You can even try growing other leafy greens like lettuce or kale using this method. The possibilities are endless!
We’ve provided you with the knowledge and inspiration to embark on this exciting gardening adventure. Now, it’s your turn to put it into practice. Gather your bottles, source your seeds, and get ready to experience the joy of growing your own water spinach. We are confident that you’ll be amazed by the results.
We encourage you to try this **DIY water spinach** growing method and share your experiences with us. Post photos of your bottle gardens on social media using #BottleSpinach and tag us so we can see your amazing creations. Let’s build a community of urban gardeners who are passionate about sustainable food production. We can’t wait to see what you grow!
Frequently Asked Questions (FAQ)
What kind of water spinach seeds should I use?
The best type of water spinach seeds to use for bottle gardening are those specifically labeled for hydroponic or container gardening. These varieties tend to be more compact and well-suited for growing in limited spaces. Look for terms like “hydroponic water spinach” or “dwarf water spinach” on the seed packet. You can typically find these seeds at your local garden center or online retailers specializing in gardening supplies. Ensure the seeds are fresh for optimal germination rates. Older seeds may have a lower chance of sprouting.
How often should I change the water in my water spinach bottles?
The frequency of water changes depends on several factors, including the size of your bottles, the amount of sunlight they receive, and the temperature. As a general rule, you should change the water every 1-2 weeks. However, it’s essential to monitor the water quality regularly. If the water becomes cloudy, discolored, or develops an unpleasant odor, it’s time for a change. When changing the water, be careful not to disturb the roots of the water spinach plants. Gently pour out the old water and replace it with fresh, clean water. You can also add a diluted nutrient solution to the water to provide the plants with essential nutrients.
What kind of nutrient solution should I use for growing water spinach in bottles?
For optimal growth, use a balanced hydroponic nutrient solution specifically formulated for leafy greens. These solutions typically contain a mix of essential macronutrients (nitrogen, phosphorus, potassium) and micronutrients (iron, manganese, zinc, copper, boron, molybdenum). You can find these solutions at most garden centers or online retailers. Follow the instructions on the nutrient solution packaging carefully to ensure you’re using the correct concentration. Over-fertilizing can damage your plants, while under-fertilizing can lead to nutrient deficiencies. Start with a diluted solution and gradually increase the concentration as your plants grow.
How much sunlight does water spinach need when grown in bottles?
Water spinach thrives in bright, indirect sunlight. Aim for at least 6-8 hours of sunlight per day. If you don’t have access to a sunny windowsill or balcony, you can supplement with artificial grow lights. LED grow lights are an energy-efficient option that provides the full spectrum of light needed for plant growth. Position the grow lights about 12-18 inches above the water spinach plants. Rotate the bottles regularly to ensure that all sides of the plants receive adequate sunlight.
How long does it take for water spinach to grow in bottles?
From seed to harvest, water spinach typically takes about 4-6 weeks to mature when grown in bottles. The exact time will depend on factors such as temperature, sunlight, and nutrient availability. You can start harvesting the leaves when they are about 6-8 inches long. To harvest, simply cut the stems a few inches above the water line. The plants will continue to produce new growth, allowing you to harvest multiple times.
Can I grow water spinach indoors in bottles?
Yes, you can absolutely grow water spinach indoors in bottles. The key is to provide adequate light and ventilation. If you don’t have access to a sunny window, use artificial grow lights to supplement the natural light. Ensure that the plants receive at least 6-8 hours of light per day. Good ventilation is also important to prevent fungal diseases. You can improve ventilation by opening a window or using a small fan to circulate the air.
What are some common problems I might encounter when growing water spinach in bottles, and how can I fix them?
Some common problems include algae growth, nutrient deficiencies, and pest infestations. Algae growth can be prevented by keeping the bottles clean and avoiding direct sunlight on the water. Nutrient deficiencies can be addressed by using a balanced hydroponic nutrient solution. Pest infestations can be treated with organic pesticides or by manually removing the pests. Regularly inspect your plants for signs of problems and take action promptly to prevent them from escalating.
Can I use tap water for growing water spinach in bottles?
While tap water can be used, it’s best to let it sit for 24 hours to allow chlorine to evaporate. Alternatively, you can use filtered water or rainwater. Avoid using softened water, as it contains high levels of sodium, which can be harmful to plants.
Is growing water spinach in bottles sustainable?
Yes, growing water spinach in bottles is a very sustainable practice. It utilizes recycled materials, reduces your reliance on commercially grown produce, and minimizes transportation costs. It’s a great way to reduce your environmental footprint and promote sustainable food production.


Leave a Comment