
Fresh ginger storage tips are about to become your new best friend in the kitchen! Have you ever bought a beautiful, plump piece of ginger, ready to add that zing to your stir-fry or soothing warmth to your tea, only to find it shriveled and sad in the crisper drawer a few days later? I know I have, and it’s incredibly frustrating. That’s why I’m so excited to share these simple, effective DIY tricks for keeping your ginger fresh for weeks, even months!
Ginger has been prized for centuries, not just for its culinary uses, but also for its medicinal properties. Originating in South Asia, ginger has been used in traditional medicine for thousands of years, and its vibrant flavor has made it a staple in cuisines around the world. From ancient remedies to modern-day recipes, ginger’s versatility is undeniable. But its delicate nature means proper storage is key to unlocking its full potential.
Let’s face it, nobody wants to waste food, especially when it comes to flavorful ingredients like ginger. These fresh ginger storage tips will not only save you money by preventing spoilage, but they’ll also ensure you always have fresh ginger on hand whenever inspiration strikes. Imagine being able to whip up a delicious ginger-infused dish or a comforting cup of ginger tea at a moment’s notice, without having to run to the store. That’s the power of these simple DIY hacks! So, let’s dive in and discover the secrets to keeping your ginger fresh and flavorful for longer.

Frischer Ingwer: So bleibt er länger frisch!
Hey Leute! Ich liebe Ingwer. Ob im Tee, im Curry oder als kleiner Frischekick im Smoothie – Ingwer ist einfach ein Alleskönner. Aber kennt ihr das Problem? Man kauft ein schönes Stück Ingwer, benutzt nur einen kleinen Teil und der Rest vergammelt im Kühlschrank. Das muss nicht sein! Ich zeige euch heute meine besten Tricks, wie ihr euren frischen Ingwer länger haltbar machen könnt. Und das Beste: Es ist super einfach!
Die Herausforderung: Ingwer richtig lagern
Ingwer ist empfindlich. Er mag es weder zu trocken noch zu feucht. Im Kühlschrank trocknet er schnell aus und wird schrumpelig. Bei Zimmertemperatur kann er schimmeln. Die Lösung? Es gibt mehrere!
Methode 1: Die Kühlschrank-Methode (mit Papier)
Diese Methode ist super einfach und funktioniert gut, wenn ihr den Ingwer innerhalb von ein bis zwei Wochen verbrauchen wollt.
Was ihr braucht:
* Frischer Ingwer
* Küchenpapier oder ein sauberes Geschirrtuch
* Ein wiederverschließbarer Plastikbeutel oder eine Frischhaltebox
Schritt-für-Schritt-Anleitung:
1. Ingwer vorbereiten: Achtet darauf, dass der Ingwer sauber ist. Ihr müsst ihn nicht schälen, aber entfernt eventuelle Erd- oder Schmutzreste mit einem feuchten Tuch.
2. Einwickeln: Wickelt den Ingwer locker in das Küchenpapier oder Geschirrtuch ein. Das Papier saugt überschüssige Feuchtigkeit auf und verhindert, dass der Ingwer schimmelt.
3. Verpacken: Legt den eingewickelten Ingwer in den Plastikbeutel oder die Frischhaltebox. Achtet darauf, dass der Beutel nicht komplett luftdicht verschlossen ist. Ein kleiner Spalt sollte offen bleiben, damit die Luft zirkulieren kann.
4. Lagern: Platziert den Beutel oder die Box im Gemüsefach eures Kühlschranks.
Wichtige Tipps:
* Kontrolliert den Ingwer regelmäßig. Wenn das Papier feucht wird, wechselt es aus.
* Verwendet nur frischen Ingwer. Wenn er schon beim Kauf weich oder schrumpelig ist, wird er auch im Kühlschrank nicht besser.
Methode 2: Die Wasser-Methode
Diese Methode ist etwas aufwendiger, aber sie hält den Ingwer wirklich lange frisch.
Was ihr braucht:
* Frischer Ingwer
* Ein Glas mit Wasser
* Ein Kühlschrank
Schritt-für-Schritt-Anleitung:
1. Ingwer vorbereiten: Auch hier gilt: Ingwer säubern, aber nicht schälen.
2. Glas vorbereiten: Füllt das Glas mit frischem, kaltem Wasser.
3. Ingwer eintauchen: Legt den Ingwer in das Glas, sodass er komplett mit Wasser bedeckt ist.
4. Lagern: Stellt das Glas mit dem Ingwer in den Kühlschrank.
5. Wasser wechseln: Wechselt das Wasser alle paar Tage (alle 2-3 Tage), um zu verhindern, dass es trüb wird und sich Bakterien bilden.
Wichtige Tipps:
* Achtet darauf, dass der Ingwer immer komplett mit Wasser bedeckt ist.
* Diese Methode funktioniert am besten mit Ingwer, der noch nicht angeschnitten ist.
* Der Ingwer kann durch das Wasser etwas weicher werden, aber er bleibt trotzdem frisch und aromatisch.
Methode 3: Die Gefrier-Methode (ganz oder gerieben)
Wenn ihr den Ingwer nicht innerhalb weniger Wochen verbrauchen könnt, ist das Einfrieren die beste Option. Ihr könnt den Ingwer entweder im Ganzen einfrieren oder ihn vorher reiben.
Ingwer im Ganzen einfrieren
Was ihr braucht:
* Frischer Ingwer
* Ein Gefrierbeutel oder eine Frischhaltebox
Schritt-für-Schritt-Anleitung:
1. Ingwer vorbereiten: Ingwer säubern, aber nicht schälen.
2. Trocknen: Trocknet den Ingwer gründlich ab, bevor ihr ihn einfriert. Das verhindert, dass sich Eiskristalle bilden.
3. Verpacken: Legt den Ingwer in den Gefrierbeutel oder die Frischhaltebox. Achtet darauf, dass so wenig Luft wie möglich im Beutel ist.
4. Einfrieren: Legt den Beutel oder die Box in den Gefrierschrank.
Wichtige Tipps:
* Gefrorener Ingwer lässt sich leichter schälen. Ihr könnt ihn direkt aus dem Gefrierschrank schälen und verwenden.
* Gefrorener Ingwer hält sich mehrere Monate im Gefrierschrank.
Ingwer gerieben einfrieren
Was ihr braucht:
* Frischer Ingwer
* Eine Reibe
* Ein Backblech
* Backpapier
* Ein Gefrierbeutel oder eine Frischhaltebox
Schritt-für-Schritt-Anleitung:
1. Ingwer schälen: Schäle den Ingwer. Das geht am besten mit einem kleinen Löffel.
2. Ingwer reiben: Reibe den Ingwer fein.
3. Vorbereiten: Lege das Backblech mit Backpapier aus.
4. Verteilen: Verteile den geriebenen Ingwer in kleinen Häufchen auf dem Backpapier. So kannst du ihn später portionsweise entnehmen.
5. Vor-Einfrieren: Stelle das Backblech für ca. 1-2 Stunden in den Gefrierschrank, bis die Ingwerhäufchen gefroren sind.
6. Verpacken: Fülle die gefrorenen Ingwerhäufchen in den Gefrierbeutel oder die Frischhaltebox.
7. Einfrieren: Lege den Beutel oder die Box zurück in den Gefrierschrank.
Wichtige Tipps:
* Geriebener Ingwer ist super praktisch, da ihr ihn direkt in eure Gerichte geben könnt.
* Die kleinen Ingwerhäufchen verhindern, dass der Ingwer zu einem großen Klumpen zusammenfriert.
Methode 4: Die Einlege-Methode (eingelegter Ingwer)
Wenn ihr Ingwer nicht nur frisch halten, sondern auch noch einen leckeren Snack daraus machen wollt, ist das Einlegen eine tolle Option. Eingelegter Ingwer (Gari) ist besonders in der japanischen Küche beliebt und passt hervorragend zu Sushi.
Was ihr braucht:
* Frischer Ingwer (junger Ingwer ist am besten)
* Reisessig
* Zucker
* Salz
* Ein sauberes Glas mit Deckel
Schritt-für-Schritt-Anleitung:
1. Ingwer vorbereiten: Schäle den Ingwer und schneide ihn in sehr dünne Scheiben. Am besten geht das mit einem Gemüsehobel oder einem scharfen Messer.
2. Salzen: Lege die Ingwerscheiben in eine Schüssel und bestreue sie mit Salz. Lasse sie für ca. 30 Minuten ziehen. Das Salz entzieht dem Ingwer Wasser und macht ihn knackiger.
3. Marinade vorbereiten: Während der Ingwer zieht, kannst du die Marinade vorbereiten. Mische in einem Topf Reisessig, Zucker und eine Prise Salz. Das Verhältnis von Essig zu Zucker kann variieren, je nachdem wie süß oder sauer du den Ingwer magst. Ich nehme meistens 100 ml Reisessig, 50 g Zucker und eine Prise Salz.
4. Marinade erhitzen: Erhitze die Marinade unter Rühren, bis sich der Zucker aufgelöst hat. Lasse die Marinade abkühlen.
5. Ingwer abspülen: Spüle die Ingwerscheiben unter kaltem Wasser ab, um das Salz zu entfernen. Drücke sie leicht aus, um überschüssiges Wasser zu entfernen.
6. Einlegen: Lege die Ingwerscheiben in das saubere Glas und gieße die abgekühlte Marinade darüber, sodass der Ingwer komplett bedeckt ist.
7. Lagern: Verschließe das Glas und stelle es für mindestens 24 Stunden in den Kühlschrank. Je länger der Ingwer zieht, desto intensiver wird der Geschmack.
Wichtige Tipps:
* Junger Ingwer hat eine zarte Haut und ist weniger faserig.
Conclusion
So, there you have it! Mastering the art of fresh ginger storage is no longer a culinary mystery. By employing these simple yet effective techniques, you can bid farewell to shriveled, unusable ginger and say hello to a consistently fresh and flavorful ingredient, ready to elevate your dishes at a moment’s notice.
Why is this DIY approach a must-try? Because it’s economical, reduces food waste, and ensures you always have vibrant ginger on hand. Think about it: no more last-minute grocery runs for a single knob of ginger, no more tossing out half-used pieces that have turned to mush. This method empowers you to be a more resourceful and efficient cook.
Beyond the core methods we’ve discussed – freezing, pickling, and proper refrigeration – there are a few exciting variations you can explore. For instance, consider infusing your vodka or gin with ginger for a spicy kick in your cocktails. Simply add thinly sliced ginger to a bottle of your favorite spirit and let it steep for a few days, tasting periodically until you achieve the desired level of ginger flavor. Strain out the ginger before serving.
Another variation involves creating a ginger syrup. This is perfect for adding a touch of warmth and sweetness to beverages, desserts, or even savory dishes. To make ginger syrup, combine equal parts water and sugar in a saucepan. Add peeled and sliced ginger and bring to a simmer over medium heat. Cook until the sugar is dissolved and the syrup has thickened slightly. Let it cool completely, then strain out the ginger. Store the syrup in an airtight container in the refrigerator.
For those who enjoy a bit of heat, consider making candied ginger. This sweet and spicy treat is a delicious snack on its own or can be used as a garnish for cakes and other desserts. The process involves simmering ginger slices in sugar syrup until they become translucent and then coating them in granulated sugar.
But the real magic happens when you put these techniques into practice. We wholeheartedly encourage you to try these fresh ginger storage methods and discover the difference they make in your cooking. Experiment with the variations, find what works best for your lifestyle and culinary preferences, and most importantly, have fun!
We’re confident that you’ll be amazed at how much longer your ginger stays fresh and flavorful. And we’re equally excited to hear about your experiences. Share your tips, tricks, and favorite ginger-infused recipes in the comments below. Let’s create a community of ginger enthusiasts, all dedicated to maximizing the flavor and longevity of this incredible ingredient. Don’t forget to tell us which **fresh ginger storage** method worked best for you!
Frequently Asked Questions (FAQ)
1. How long does ginger typically last if stored improperly?
Improperly stored ginger, left at room temperature or in a poorly sealed container, typically lasts only a few days to a week before it starts to shrivel, dry out, or become moldy. The exact timeframe depends on the humidity and temperature of your environment. You’ll notice the skin becoming wrinkled and the flesh losing its firmness. This is why proper storage is crucial to extend its shelf life.
2. Can I freeze ginger whole, or do I need to prepare it first?
You can freeze ginger whole, peeled or unpeeled. Freezing it whole is the easiest option. Simply place the whole ginger root in a freezer-safe bag or container, removing as much air as possible. However, freezing peeled and chopped or grated ginger offers more convenience. You can then easily grab the amount you need without having to thaw the entire root. Consider freezing grated ginger in small portions using an ice cube tray for easy use in recipes.
3. How do I thaw frozen ginger?
The best way to thaw frozen ginger depends on how you plan to use it. For grating or mincing, you can often use it directly from frozen. The frozen ginger grates easily and thaws quickly. If you need larger pieces, you can thaw it in the refrigerator for a few hours or at room temperature for a shorter period. Keep in mind that thawed ginger may be slightly softer than fresh ginger, but the flavor will remain intact.
4. What’s the best way to peel ginger?
The easiest and most efficient way to peel ginger is with a spoon. The thin skin of ginger can be easily scraped away with the edge of a spoon, minimizing waste compared to using a knife. Simply hold the ginger root firmly in one hand and use the edge of a spoon to scrape away the skin. Follow the contours of the ginger root to remove the skin effectively.
5. How long does pickled ginger last in the refrigerator?
Properly pickled ginger, stored in an airtight container in the refrigerator, can last for several months. The acidity of the pickling brine acts as a preservative, inhibiting the growth of bacteria and extending the shelf life of the ginger. Make sure the ginger is fully submerged in the brine to prevent spoilage. Check for any signs of mold or discoloration before using.
6. Can I use old or slightly shriveled ginger?
Yes, you can often use slightly shriveled ginger, but it may not have the same vibrant flavor and texture as fresh ginger. If the ginger is only slightly shriveled, you can try soaking it in water for a few hours to rehydrate it. However, if the ginger is very dry, moldy, or has a strong, unpleasant odor, it’s best to discard it.
7. What are the signs that ginger has gone bad?
The signs that ginger has gone bad include:
* **Mold:** Any visible mold growth on the surface of the ginger.
* **Soft or mushy texture:** Ginger that is excessively soft or mushy to the touch.
* **Unpleasant odor:** A strong, musty, or rotten smell.
* **Discoloration:** Significant discoloration or dark spots on the flesh.
* **Dried out and woody:** Extremely dry and hard ginger that is difficult to cut or grate.
If you notice any of these signs, it’s best to discard the ginger to avoid any potential health risks.
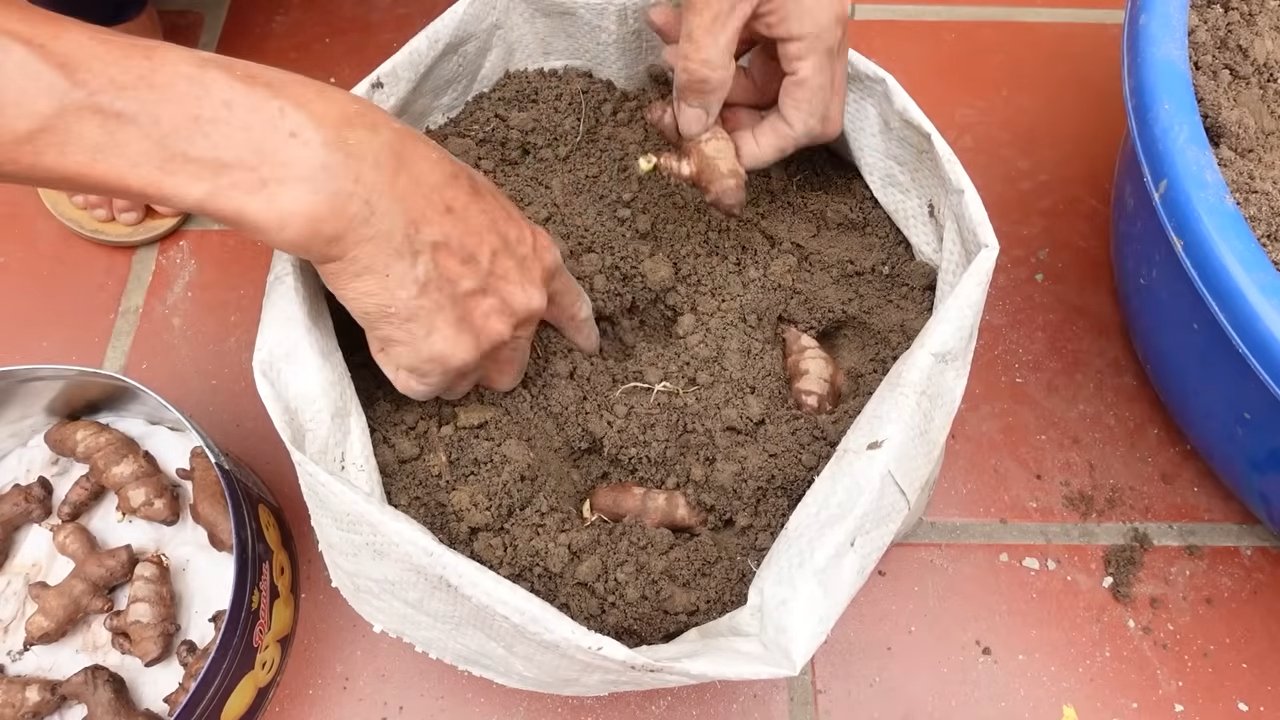
8. Can I grow my own ginger?
Yes, you can grow your own ginger! It’s a fun and rewarding project. Start with a healthy piece of ginger root with visible “eyes” (small buds). Soak it in water overnight, then plant it in a pot filled with well-draining soil. Keep the soil moist but not waterlogged, and place the pot in a warm, humid location with indirect sunlight. Ginger typically takes several months to mature, but you can harvest small pieces as needed.
9. What are some other uses for ginger besides cooking?
Ginger has a wide range of uses beyond cooking. It’s known for its medicinal properties and is often used to relieve nausea, reduce inflammation, and boost the immune system. Ginger tea is a popular remedy for colds and flu. Ginger essential oil is used in aromatherapy for its calming and energizing effects. Ginger is also used in skincare products for its antioxidant and anti-inflammatory properties.
10. Is organic ginger better for storage?
Whether organic ginger stores better than non-organic ginger is debatable. The storage life primarily depends on the freshness of the ginger at the time of purchase and the storage method used. Organic ginger, grown without synthetic pesticides, may appeal to those concerned about chemical residues. However, both organic and non-organic ginger can be stored using the methods described above to maximize their shelf life. Choose the ginger that looks freshest and healthiest, regardless of whether it’s organic or not.


Leave a Comment