
Grow grape tomatoes at home, even if you think you don’t have a green thumb! Have you ever dreamed of plucking juicy, sun-ripened grape tomatoes straight from your own backyard, ready to pop into a salad or enjoy as a healthy snack? It’s easier than you think, and this DIY guide is packed with simple tricks and hacks to make your home gardening dreams a reality. Forget those bland, store-bought tomatoes – imagine the burst of flavor from your own homegrown bounty!
The history of tomato cultivation is fascinating, dating back to ancient South America. While they weren’t always as popular as they are today, tomatoes have become a staple in cuisines worldwide. Now, you can participate in this rich history by cultivating your own little piece of tomato paradise.
Why should you bother with this DIY project? Because fresh, homegrown produce is simply better! Not only will you enjoy superior taste and quality, but you’ll also know exactly what’s going into your food – no harmful pesticides or artificial additives. Plus, gardening is a fantastic way to relieve stress, connect with nature, and add a touch of beauty to your home. So, let’s dive in and discover how to grow grape tomatoes at home with ease and confidence. I’m excited to share my favorite tips and tricks to help you succeed!
“`html
Tomaten-Glück: So ziehst du saftige Cherrytomaten selbst!
Ich liebe Cherrytomaten! Diese kleinen, süßen Dinger sind einfach perfekt für Salate, zum Naschen oder als Topping für Bruschetta. Und das Beste? Du kannst sie ganz einfach selbst zu Hause anbauen! Keine Sorge, du brauchst keinen riesigen Garten. Ein sonniger Balkon oder eine Terrasse reichen völlig aus. Ich zeige dir, wie’s geht!
Was du brauchst:
* Cherrytomaten-Samen oder Jungpflanzen: Samen sind günstiger, aber Jungpflanzen sparen Zeit. Ich empfehle, mit Jungpflanzen zu starten, wenn du Anfänger bist.
* Anzuchterde: Spezielle Erde für die Anzucht von Sämlingen. Sie ist nährstoffarm und locker, ideal für die empfindlichen Wurzeln.
* Töpfe oder Anzuchtschalen: Für die Anzucht der Samen oder Jungpflanzen.
* Größere Töpfe oder Kübel: Für die ausgewachsenen Pflanzen. Mindestens 10 Liter Volumen pro Pflanze!
* Tomatenerde: Nährstoffreiche Erde, die speziell auf die Bedürfnisse von Tomaten abgestimmt ist.
* Tomatenstäbe oder Rankgitter: Cherrytomaten können ganz schön hoch werden und brauchen Unterstützung.
* Flüssigdünger für Tomaten: Für eine reiche Ernte.
* Gießkanne oder Gartenschlauch: Zum Bewässern.
* Sprühflasche: Zum Befeuchten der Blätter.
* Geduld und Liebe: Das Wichtigste!
Phase 1: Die Anzucht (wenn du mit Samen startest)
Wenn du dich für Samen entschieden hast, musst du sie vorziehen. Das geht ganz einfach:
1. Vorbereitung der Anzuchtschalen: Fülle die Anzuchtschalen oder kleinen Töpfe mit Anzuchterde. Drücke die Erde leicht an.
2. Aussaat der Samen: Lege pro Töpfchen 2-3 Samen auf die Erde. Bedecke sie mit einer dünnen Schicht Erde (ca. 0,5 cm).
3. Bewässerung: Befeuchte die Erde vorsichtig mit einer Sprühflasche. Sie sollte feucht, aber nicht nass sein.
4. Standort: Stelle die Anzuchtschalen an einen warmen und hellen Ort. Ideal ist eine Fensterbank über der Heizung oder ein beheiztes Gewächshaus. Die Temperatur sollte zwischen 20 und 25 Grad Celsius liegen.
5. Feuchtigkeit: Halte die Erde feucht, indem du sie regelmäßig mit der Sprühflasche befeuchtest. Du kannst die Anzuchtschalen auch mit Frischhaltefolie abdecken, um die Luftfeuchtigkeit zu erhöhen. Vergiss aber nicht, die Folie regelmäßig zu lüften, um Schimmelbildung zu vermeiden.
6. Geduld: Nach ca. 1-2 Wochen sollten die ersten Keimlinge zu sehen sein.
7. Pikieren: Sobald die Keimlinge ihre ersten richtigen Blätter (nach den Keimblättern) entwickelt haben, musst du sie pikieren. Das bedeutet, dass du die schwächeren Pflänzchen entfernst und die kräftigeren in separate Töpfe umpflanzt. Fülle die Töpfe mit Anzuchterde und setze die Pflänzchen vorsichtig ein. Achte darauf, die Wurzeln nicht zu beschädigen.
Phase 2: Das Umpflanzen (für Samen und Jungpflanzen)
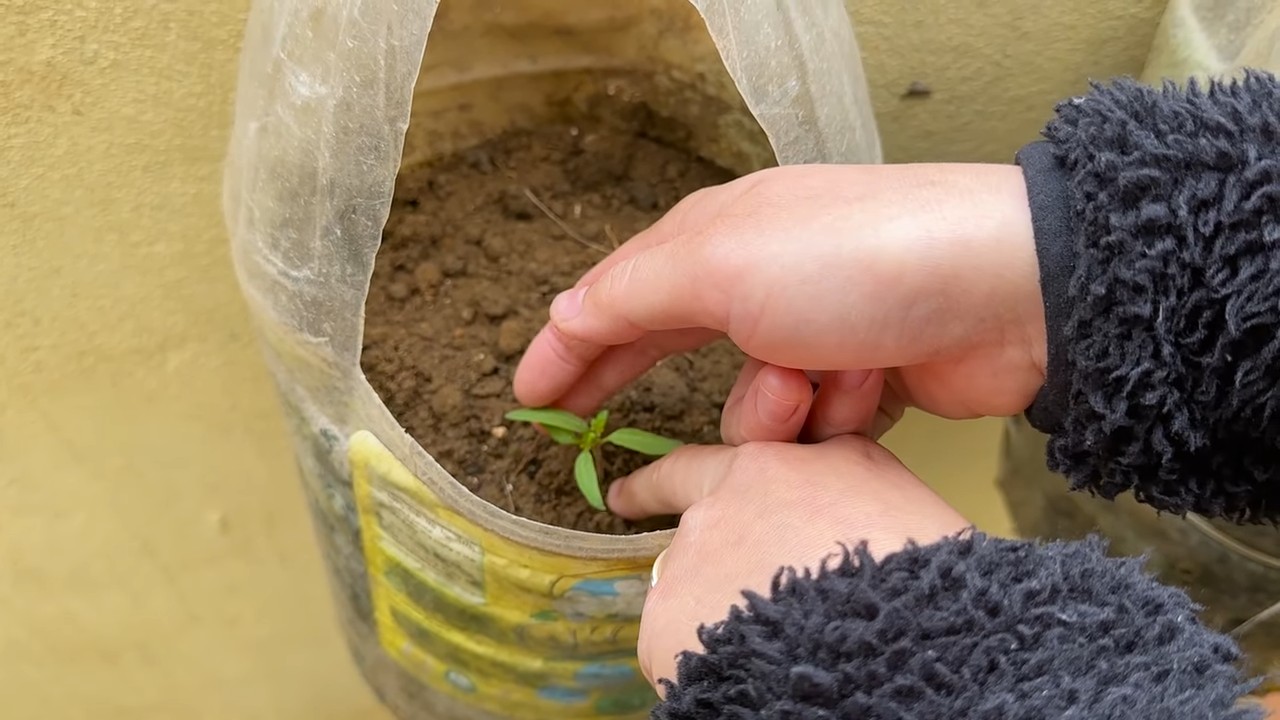
Sobald die Jungpflanzen kräftig genug sind (ca. 15-20 cm hoch) und keine Frostgefahr mehr besteht (Mitte Mai), können sie ins Freie umziehen.
1. Vorbereitung der Töpfe oder Kübel: Fülle die größeren Töpfe oder Kübel mit Tomatenerde. Achte darauf, dass die Töpfe Abzugslöcher haben, damit überschüssiges Wasser ablaufen kann.
2. Umpflanzen: Grabe ein Loch in die Erde, das groß genug ist, um den Wurzelballen der Jungpflanze aufzunehmen. Setze die Pflanze vorsichtig ein und fülle das Loch mit Erde auf. Drücke die Erde leicht an.
3. Tomatenstab: Stecke einen Tomatenstab oder ein Rankgitter in die Erde, um die Pflanze zu stützen.
4. Bewässerung: Gieße die Pflanze gründlich an.
5. Standort: Stelle die Töpfe an einen sonnigen und windgeschützten Ort. Tomaten lieben die Sonne!
Phase 3: Die Pflege
Damit deine Cherrytomaten prächtig gedeihen und eine reiche Ernte bringen, ist die richtige Pflege entscheidend.
1. Bewässerung: Tomaten brauchen regelmäßig Wasser, besonders an heißen Tagen. Gieße am besten morgens oder abends, wenn die Sonne nicht mehr so stark scheint. Vermeide es, die Blätter zu gießen, da dies Pilzkrankheiten fördern kann. Gieße stattdessen direkt an die Wurzeln.
2. Düngung: Tomaten sind Starkzehrer und brauchen viele Nährstoffe. Dünge sie regelmäßig mit einem Flüssigdünger für Tomaten. Beginne damit ca. 2 Wochen nach dem Umpflanzen und wiederhole die Düngung alle 2-3 Wochen.
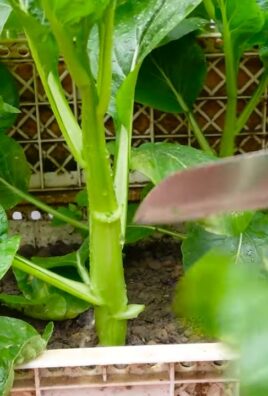
3. Ausgeizen: Cherrytomaten bilden viele Seitentriebe, die sogenannte “Geiztriebe”. Diese Triebe nehmen der Pflanze Kraft und sollten regelmäßig ausgegeizt werden. Breche die Geiztriebe einfach mit den Fingern aus, sobald sie eine Länge von ca. 5 cm erreicht haben. Die Triebe wachsen in den Blattachseln, also zwischen Haupttrieb und Blatt.
4. Blätter entfernen: Entferne die unteren Blätter der Pflanze, sobald sie gelb werden oder den Boden berühren. Dies verbessert die Belüftung und beugt Pilzkrankheiten vor.
5. Kontrolle: Kontrolliere deine Pflanzen regelmäßig auf Schädlinge und Krankheiten. Typische Schädlinge sind Blattläuse, Weiße Fliege und Spinnmilben. Bei Befall kannst du natürliche Schädlingsbekämpfungsmittel einsetzen.
6. Bestäubung: Tomaten sind Selbstbestäuber, aber du kannst die Bestäubung unterstützen, indem du die Pflanzen regelmäßig leicht schüttelst. Dies hilft, den Pollen zu verteilen.
Phase 4: Die Ernte
Endlich! Nach ca. 2-3 Monaten kannst du die ersten reifen Cherrytomaten ernten.
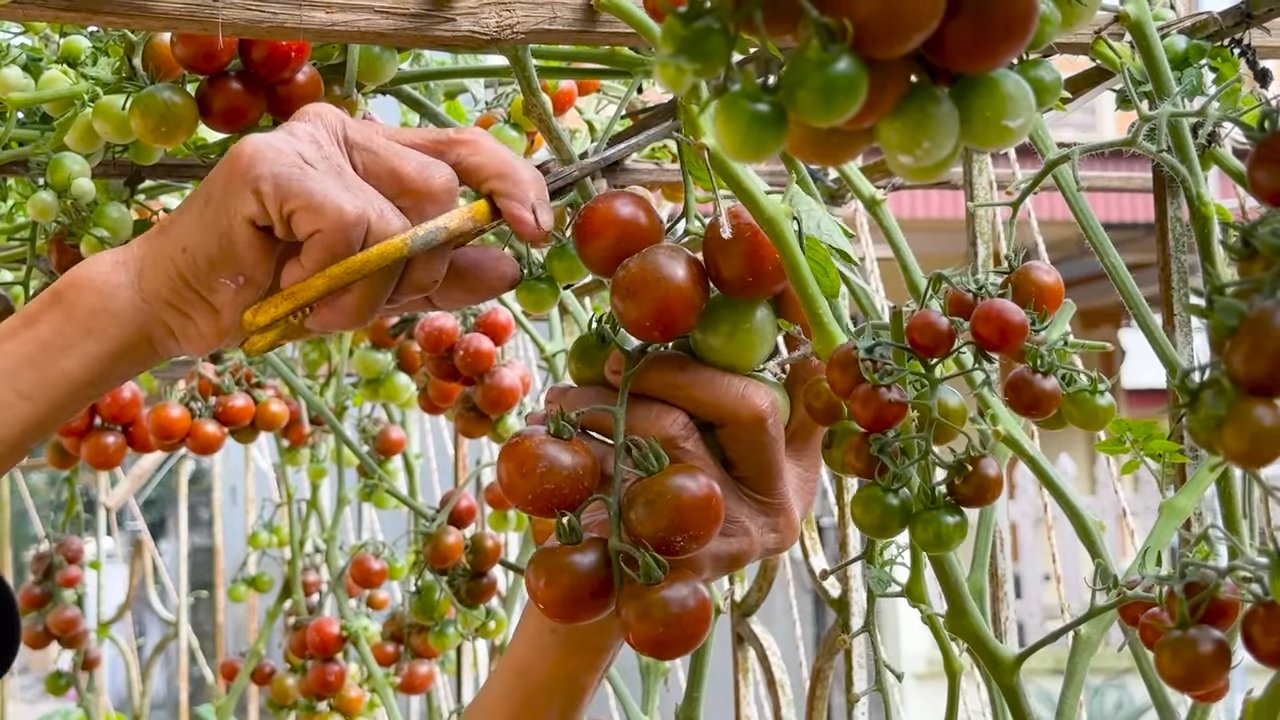
1. Reife erkennen: Reife Cherrytomaten haben eine intensive Farbe (rot, gelb, orange, je nach Sorte) und sind leicht weich, wenn du sie leicht drückst.
2. Ernten: Pflücke die reifen Tomaten vorsichtig ab. Du kannst sie entweder einzeln oder in ganzen Rispen ernten.
3. Genießen: Genieße deine selbstgezogenen Cherrytomaten! Sie schmecken am besten frisch vom Strauch. Du kannst sie aber auch zu Soßen, Suppen oder Salaten verarbeiten.
Zusätzliche Tipps für eine reiche Ernte:
* Wähle die richtige Sorte: Es gibt unzählige Cherrytomaten-Sorten. Informiere dich, welche Sorten für deinen Standort und deine Bedürfnisse am besten geeignet sind. Einige Sorten sind besonders robust und widerstandsfähig gegen Krankheiten.
* Sorge für ausreichend Licht: Tomaten brauchen mindestens 6 Stunden Sonne pro Tag.
* Vermeide Staunässe: Achte darauf, dass das Wasser gut ablaufen kann.
* Mulche die Erde: Eine Mulchschicht aus Stroh oder Rasenschnitt hält die Erde feucht und unterdrückt Unkraut.
* Sei geduldig: Tomaten brauchen Zeit, um zu wachsen und zu reifen. Lass dich nicht entmutigen, wenn es nicht sofort klappt.
Ich hoffe, diese Anleitung hilft dir dabei, deine eigenen Cherrytomaten zu ziehen. Es ist wirklich ein tolles Gefühl, die Früchte seiner Arbeit zu ernten! Viel Erfolg und guten Appetit!
“`
Conclusion
So, there you have it! Growing grape tomatoes at home isn’t just a gardening project; it’s an investment in flavor, freshness, and a rewarding connection to the food you eat. Forget those bland, store-bought tomatoes that lack personality. With a little effort and the right approach, you can cultivate a bounty of sweet, juicy grape tomatoes right in your own backyard, balcony, or even on a sunny windowsill.
This DIY trick, focusing on optimal sunlight, well-draining soil, and consistent watering, is a game-changer for anyone looking to elevate their tomato game. It’s not about complex techniques or expensive equipment; it’s about understanding the fundamental needs of your plants and providing them with the environment they need to thrive. The satisfaction of harvesting your own homegrown grape tomatoes is unparalleled. Imagine popping those sun-warmed gems straight into your mouth, adding them to a vibrant salad, or using them to create a delicious homemade sauce. The possibilities are endless!
But don’t stop there! Experiment with different varieties of grape tomatoes to discover your personal favorites. Try growing yellow grape tomatoes for a milder, sweeter flavor, or opt for a red variety known for its intense tomato taste. Consider companion planting with basil or marigolds to deter pests and enhance the flavor of your tomatoes. You can also explore different growing methods, such as using self-watering containers or vertical gardening systems, to maximize your space and yield.
The key to success is observation and adaptation. Pay attention to your plants, monitor their growth, and adjust your care routine as needed. If you notice any signs of pests or diseases, take action promptly to prevent them from spreading. Remember, gardening is a learning process, and every season brings new challenges and opportunities.
We wholeheartedly encourage you to try this DIY trick for growing grape tomatoes at home. It’s a simple, effective, and incredibly rewarding way to enjoy the taste of summer all season long. And once you’ve experienced the joy of harvesting your own homegrown tomatoes, we’re confident you’ll be hooked!
Don’t keep your success a secret! Share your experiences with us and other gardening enthusiasts. Post photos of your thriving tomato plants, share your tips and tricks, and let us know what varieties you’re growing. Together, we can create a community of passionate gardeners who are dedicated to growing the best grape tomatoes possible. Let’s spread the love of homegrown tomatoes and inspire others to get their hands dirty! We are eager to hear about your journey and celebrate your harvest. Happy gardening!
Frequently Asked Questions (FAQ)
What is the best time to start growing grape tomatoes?
The ideal time to start growing grape tomatoes depends on your local climate. In general, you should start seeds indoors 6-8 weeks before the last expected frost. If you’re buying seedlings from a nursery, wait until after the last frost to transplant them outdoors. The soil temperature should be at least 60°F (15°C) for optimal growth. Starting early indoors gives the plants a head start, allowing them to mature and produce fruit sooner. However, be sure to harden off your seedlings before transplanting them outdoors to acclimate them to the outdoor environment.
How much sunlight do grape tomatoes need?
Grape tomatoes require at least 6-8 hours of direct sunlight per day to thrive. Choose a location in your garden or on your balcony that receives ample sunlight throughout the day. If you’re growing tomatoes indoors, place them near a sunny window or use grow lights to supplement natural light. Insufficient sunlight can lead to leggy growth, reduced fruit production, and bland-tasting tomatoes. Rotate your plants regularly to ensure even exposure to sunlight.
What type of soil is best for growing grape tomatoes?
Grape tomatoes prefer well-draining soil that is rich in organic matter. Amend your soil with compost, aged manure, or other organic materials to improve its fertility and drainage. Avoid heavy clay soils, as they can retain too much moisture and lead to root rot. A slightly acidic soil pH of 6.0-6.8 is ideal for tomato growth. You can test your soil pH using a soil testing kit and adjust it accordingly.
How often should I water my grape tomato plants?
Water your grape tomato plants deeply and regularly, especially during hot, dry weather. Aim to keep the soil consistently moist but not waterlogged. Water at the base of the plants to avoid wetting the foliage, which can increase the risk of fungal diseases. Mulching around the plants can help retain moisture in the soil and suppress weed growth. Check the soil moisture regularly by sticking your finger into the soil. If the top inch feels dry, it’s time to water.
Do I need to fertilize my grape tomato plants?
Yes, grape tomatoes benefit from regular fertilization. Use a balanced fertilizer that is specifically formulated for tomatoes. Apply fertilizer according to the package instructions, typically every 2-3 weeks during the growing season. Avoid over-fertilizing, as this can lead to excessive foliage growth and reduced fruit production. Consider using a slow-release fertilizer at planting time to provide a steady supply of nutrients throughout the season.
How do I prevent pests and diseases from affecting my grape tomato plants?
There are several steps you can take to prevent pests and diseases from affecting your grape tomato plants. Choose disease-resistant varieties, practice crop rotation, and keep your garden clean and free of debris. Monitor your plants regularly for signs of pests or diseases and take action promptly if you notice any problems. Use organic pest control methods, such as insecticidal soap or neem oil, to control common pests like aphids and whiteflies. Provide good air circulation around your plants to prevent fungal diseases.
How do I prune my grape tomato plants?
Pruning grape tomato plants can help improve air circulation, promote fruit production, and prevent diseases. Remove suckers (the small shoots that grow between the main stem and the branches) to encourage the plant to focus its energy on producing fruit. Prune away any yellowing or diseased leaves to prevent the spread of disease. You can also prune the lower branches of the plant to improve air circulation and prevent soil-borne diseases.
When are grape tomatoes ready to harvest?
Grape tomatoes are typically ready to harvest when they are fully colored and slightly soft to the touch. Gently twist or cut the tomatoes from the vine, being careful not to damage the plant. Harvest tomatoes regularly to encourage continued fruit production. The flavor of grape tomatoes is best when they are allowed to ripen fully on the vine. Store harvested tomatoes at room temperature for the best flavor.
Leave a Comment