
Growing gourds at home might seem like a whimsical endeavor, but trust me, it’s incredibly rewarding! Have you ever imagined crafting your own birdhouses, bowls, or even musical instruments from something you grew in your backyard? This isn’t just a gardening project; it’s a journey into a craft that connects you to traditions stretching back centuries.
Gourds have a rich history, playing vital roles in various cultures around the world. From ancient civilizations using them as water containers to indigenous communities crafting intricate art, gourds have always been more than just plants. They’re a testament to human ingenuity and our ability to find beauty and utility in nature.
But why should you consider growing gourds at home? In today’s world, where we’re increasingly disconnected from the natural world, cultivating your own gourds offers a unique opportunity to reconnect. Plus, with rising costs and a desire for more sustainable living, learning to create your own functional and decorative items is a fantastic way to save money and reduce your environmental impact. I’m going to share some simple, effective DIY tricks and hacks that will help you successfully grow and harvest your own gourds, even if you’re a complete beginner. Get ready to unleash your inner artist and gardener!
Growing Gourds: A Comprehensive DIY Guide
Hey there, fellow gardening enthusiasts! Ever dreamt of growing your own quirky, unique gourds? Well, you’ve come to the right place! I’m going to walk you through everything you need to know to cultivate these fascinating plants right in your backyard. Get ready to unleash your inner artist and create some amazing crafts from your homegrown gourds!
Choosing Your Gourd Variety
First things first, let’s talk about the different types of gourds you can grow. There are two main categories: ornamental gourds and hard-shelled gourds.
* **Ornamental Gourds:** These are the smaller, colorful gourds you often see in fall decorations. They come in a wide array of shapes, sizes, and colors, making them perfect for adding a touch of whimsy to your home.
* **Hard-Shelled Gourds:** These are the larger gourds that, when dried, can be used for a variety of purposes, such as birdhouses, bowls, dippers, and even musical instruments! The most popular hard-shelled gourd is the Lagenaria siceraria, also known as the bottle gourd.
I personally love growing both types, but for this guide, I’ll focus primarily on growing hard-shelled gourds, as they require a bit more attention and care.
Preparing Your Gourd-Growing Paradise
Gourds are sun-loving, hungry plants, so proper preparation is key to a successful harvest.
* **Sunlight:** Gourds need at least 6-8 hours of direct sunlight per day. Choose a location in your yard that receives plenty of sunshine.
* **Soil:** Gourds thrive in well-drained, fertile soil. Amend your soil with plenty of compost or well-rotted manure to improve its fertility and drainage. I usually add a generous layer of compost in the fall before planting in the spring.
* **Space:** Gourds are vining plants that can spread quite a bit, so they need plenty of space to grow. Allow at least 6-8 feet between plants. If you’re short on space, you can train your gourds to grow on a trellis or fence.
* **Support:** Hard-shelled gourds, especially the larger varieties, can become quite heavy. Providing support for the vines will help prevent them from breaking under the weight of the gourds. A sturdy trellis, fence, or even a strong arbor can work well.
Planting Your Gourd Seeds
Now for the fun part – planting!
1. **Start Seeds Indoors (Optional):** Gourds have a long growing season, so starting seeds indoors 4-6 weeks before the last expected frost can give them a head start. I usually soak my gourd seeds in warm water for 24 hours before planting to help them germinate faster.
2. **Planting Seeds Indoors:** Fill small pots or seed trays with a good quality seed-starting mix. Plant the seeds about 1 inch deep and keep the soil moist but not soggy. Place the pots in a warm, sunny location or under grow lights.
3. **Direct Sowing:** If you live in a warmer climate with a longer growing season, you can direct sow gourd seeds directly into the garden after the last frost. Make sure the soil is warm (at least 65°F) before planting.
4. **Planting Seeds Outdoors:** Sow the seeds about 1 inch deep and 6-8 feet apart. Water thoroughly after planting.
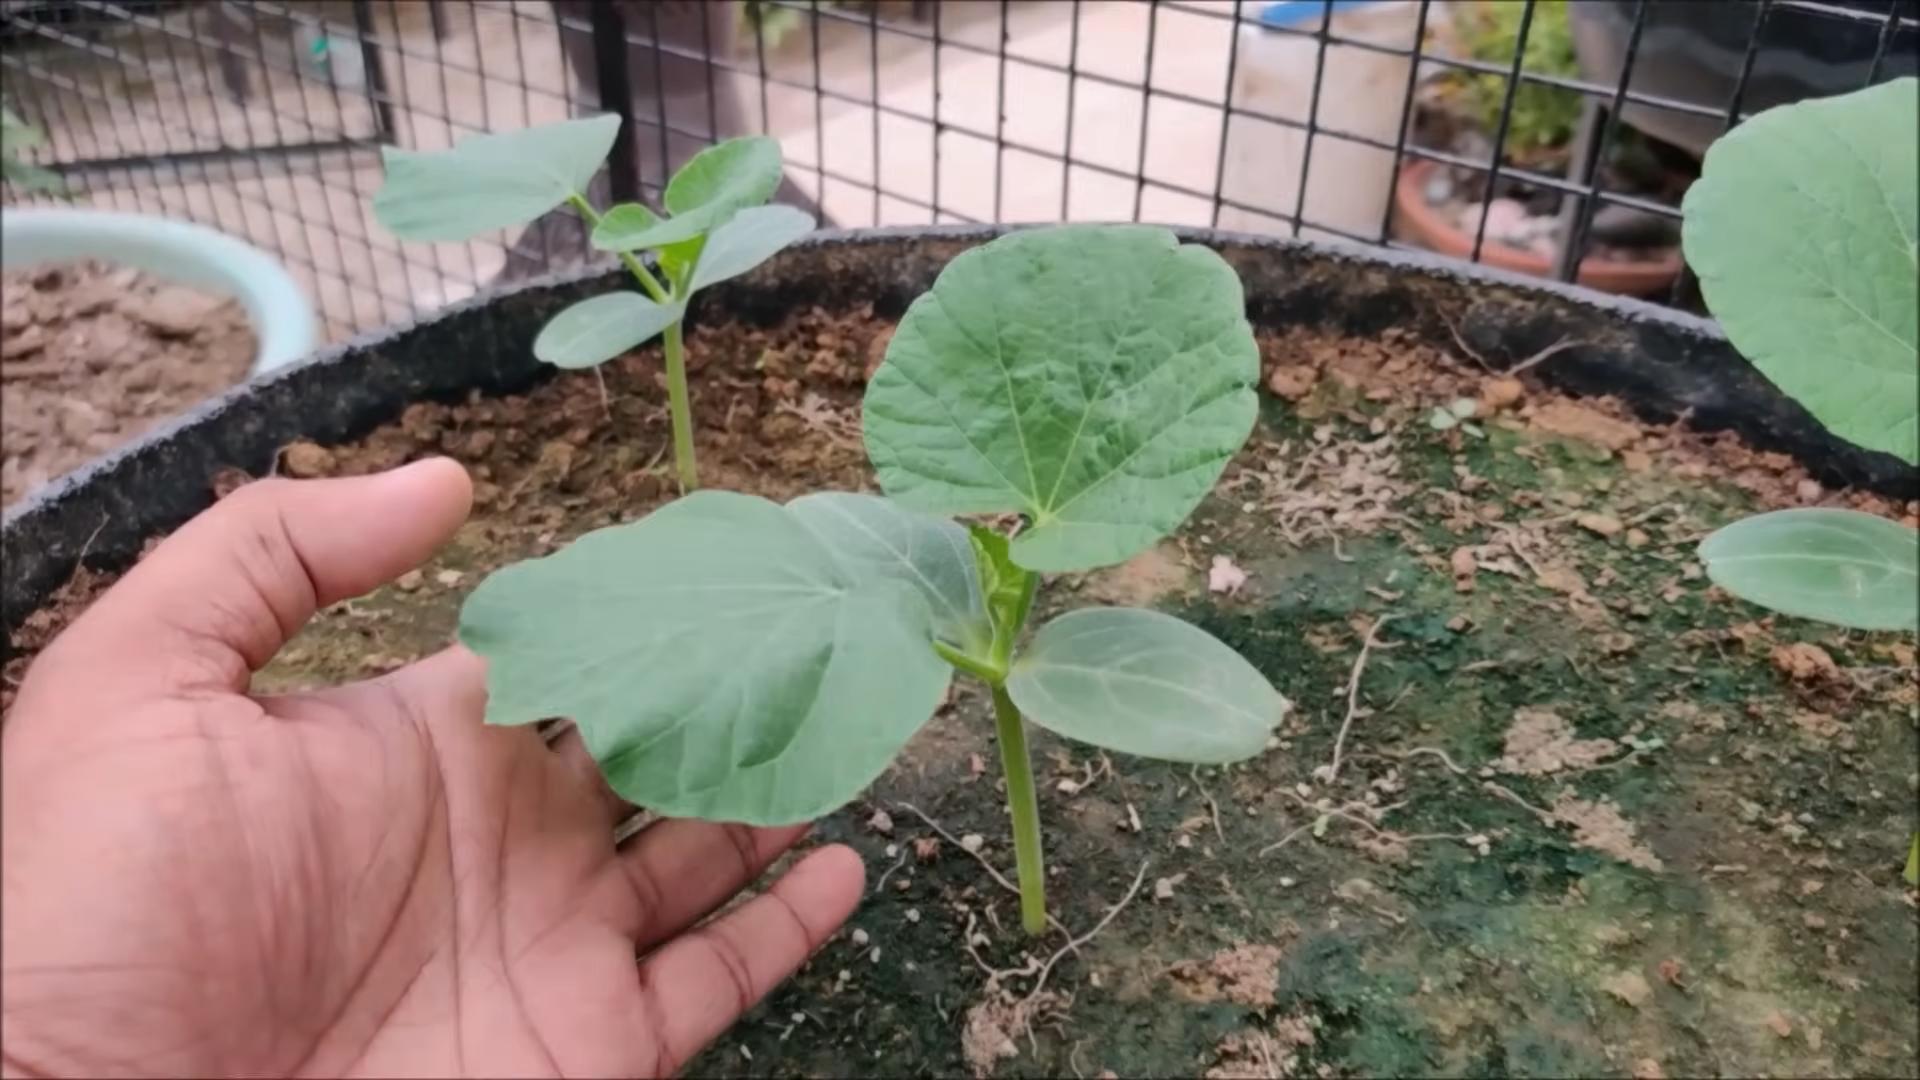
5. **Thinning Seedlings:** Once the seedlings emerge, thin them to one plant per hill or pot. Choose the strongest, healthiest-looking seedling to keep.
Caring for Your Growing Gourds
Once your gourd seedlings are established, it’s time to provide them with the care they need to thrive.
1. **Watering:** Gourds need consistent moisture, especially during hot, dry weather. Water deeply and regularly, aiming to keep the soil consistently moist but not waterlogged. I like to water early in the morning to allow the foliage to dry before nightfall, which helps prevent fungal diseases.
2. **Fertilizing:** Gourds are heavy feeders, so they benefit from regular fertilization. Use a balanced fertilizer or a fertilizer specifically formulated for vegetables. I usually fertilize my gourds every 2-3 weeks throughout the growing season.
3. **Weeding:** Keep the area around your gourd plants free of weeds. Weeds compete with the gourds for water and nutrients. Mulching around the plants can help suppress weeds and retain moisture.
4. **Pest Control:** Gourds can be susceptible to various pests, such as squash bugs, squash vine borers, and cucumber beetles. Inspect your plants regularly for signs of pests and take action promptly. I prefer to use organic pest control methods whenever possible, such as hand-picking pests, using insecticidal soap, or applying neem oil.
5. **Pollination:** Gourds have separate male and female flowers. The female flowers need to be pollinated in order to produce fruit. Bees and other pollinators usually take care of this, but if you’re not seeing many bees in your garden, you may need to hand-pollinate the flowers.
6. **Hand Pollination:** To hand-pollinate, use a small paintbrush to transfer pollen from the male flowers to the female flowers. The female flowers have a small gourd-like structure at the base of the flower, while the male flowers do not.
Training Your Gourd Vines
As your gourd vines grow, you’ll need to train them to grow in the direction you want them to go.
1. **Trellising:** If you’re growing your gourds on a trellis or fence, gently guide the vines up the support structure and tie them in place with soft twine or plant ties.
2. **Pruning:** You can prune your gourd vines to encourage branching and fruit production. Pinch off the tips of the vines to promote side growth. You can also remove any yellowing or damaged leaves.
3. **Supporting the Gourds:** As the gourds grow larger, they may need additional support to prevent the vines from breaking. You can use slings made from old pantyhose or netting to support the gourds.
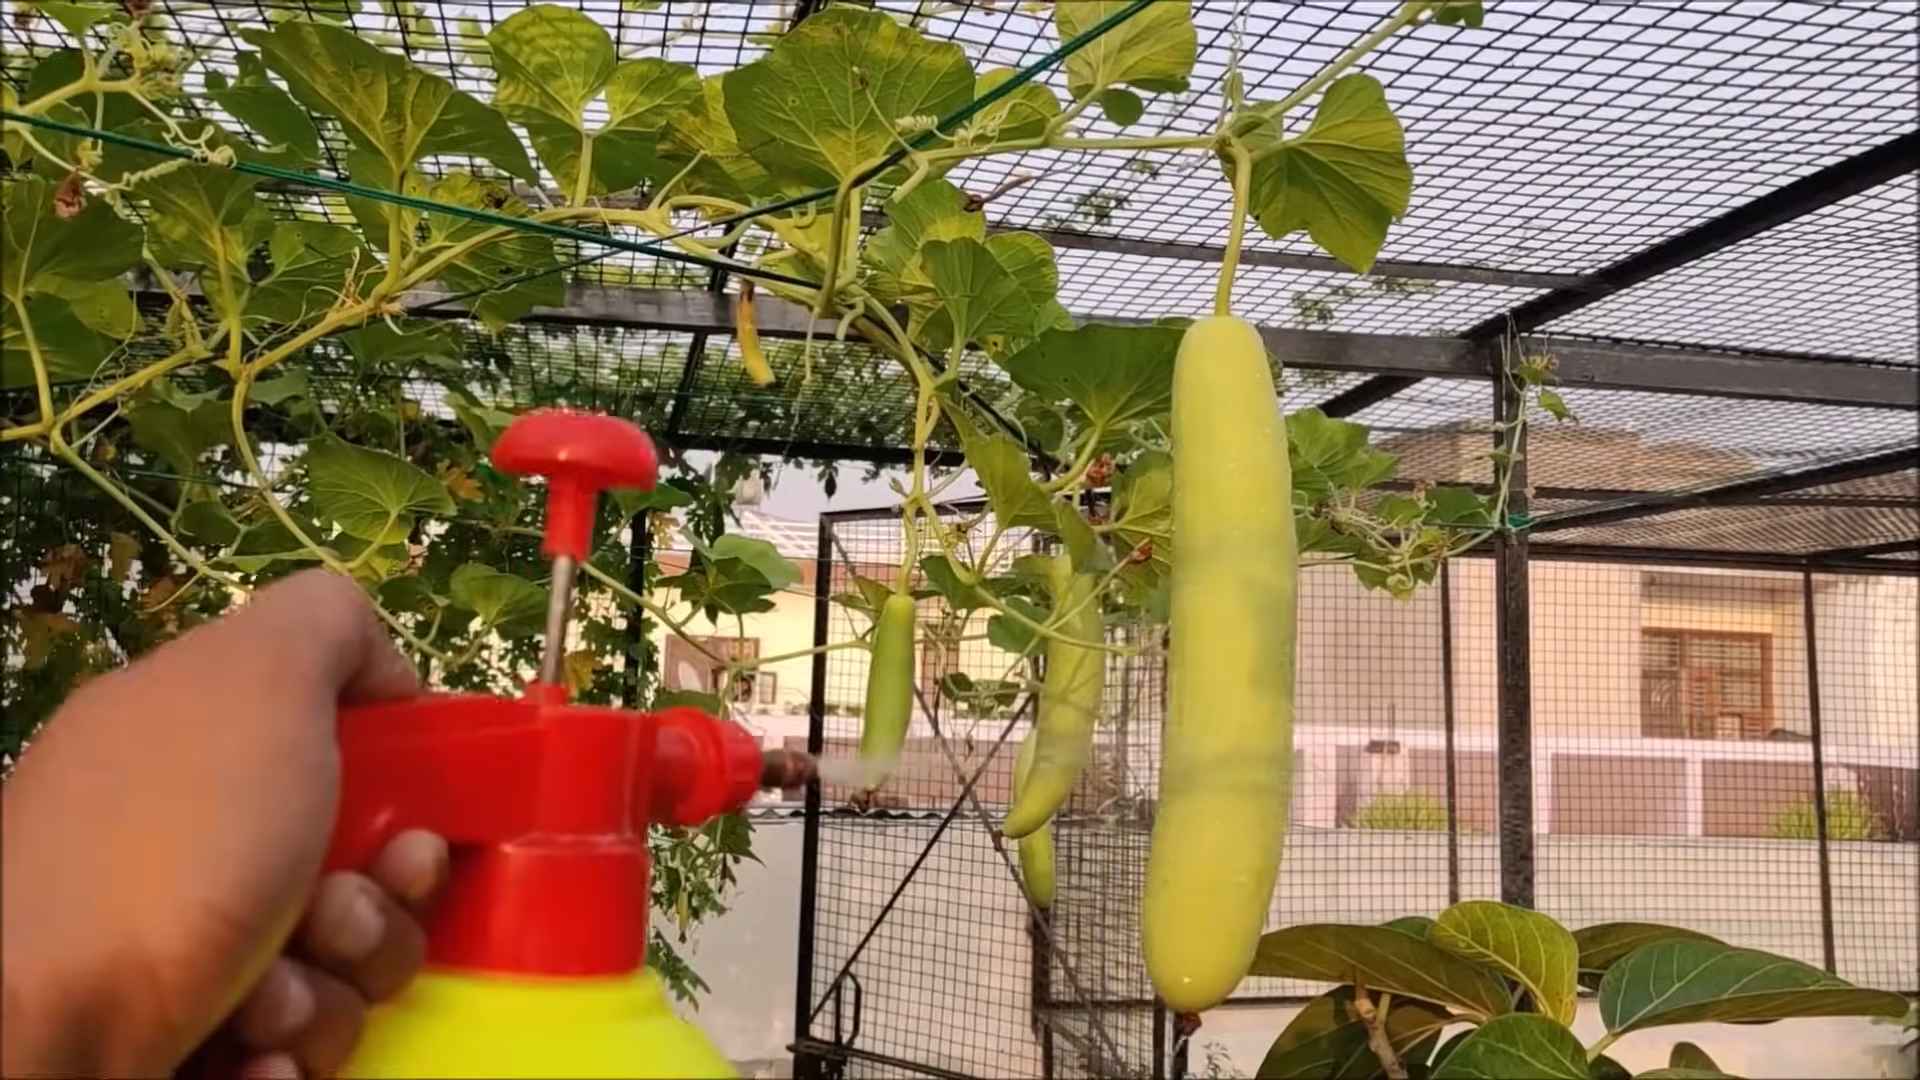
Harvesting Your Gourds
The timing of your gourd harvest depends on the type of gourd you’re growing and what you plan to do with it.
1. **Ornamental Gourds:** Ornamental gourds can be harvested when they are fully mature and their stems have started to dry out. Cut the gourds from the vine, leaving a few inches of stem attached.
2. **Hard-Shelled Gourds:** Hard-shelled gourds need to be left on the vine until they are fully mature and their stems have completely dried out. This usually takes several months. The gourds should feel hard and lightweight when they are ready to harvest.
3. **Harvesting Hard-Shelled Gourds:** Cut the gourds from the vine, leaving a few inches of stem attached. Be careful not to damage the gourds during harvest.
Drying and Curing Your Hard-Shelled Gourds
Drying and curing is a crucial step in preparing hard-shelled gourds for crafting. This process can take several weeks or even months, depending on the size and thickness of the gourd
Hey there, fellow gardening enthusiasts! Ever dreamt of growing your own quirky, unique gourds? Well, you’ve come to the right place! I’m going to walk you through everything you need to know to cultivate these fascinating plants right in your backyard. Get ready to unleash your inner artist and create some amazing crafts from your homegrown gourds!
Choosing Your Gourd Variety
First things first, let’s talk about the different types of gourds you can grow. There are two main categories: ornamental gourds and hard-shelled gourds.
* **Ornamental Gourds:** These are the smaller, colorful gourds you often see in fall decorations. They come in a wide array of shapes, sizes, and colors, making them perfect for adding a touch of whimsy to your home.
* **Hard-Shelled Gourds:** These are the larger gourds that, when dried, can be used for a variety of purposes, such as birdhouses, bowls, dippers, and even musical instruments! The most popular hard-shelled gourd is the Lagenaria siceraria, also known as the bottle gourd.
I personally love growing both types, but for this guide, I’ll focus primarily on growing hard-shelled gourds, as they require a bit more attention and care.
Preparing Your Gourd-Growing Paradise
Gourds are sun-loving, hungry plants, so proper preparation is key to a successful harvest.
* **Sunlight:** Gourds need at least 6-8 hours of direct sunlight per day. Choose a location in your yard that receives plenty of sunshine.
* **Soil:** Gourds thrive in well-drained, fertile soil. Amend your soil with plenty of compost or well-rotted manure to improve its fertility and drainage. I usually add a generous layer of compost in the fall before planting in the spring.
* **Space:** Gourds are vining plants that can spread quite a bit, so they need plenty of space to grow. Allow at least 6-8 feet between plants. If you’re short on space, you can train your gourds to grow on a trellis or fence.
* **Support:** Hard-shelled gourds, especially the larger varieties, can become quite heavy. Providing support for the vines will help prevent them from breaking under the weight of the gourds. A sturdy trellis, fence, or even a strong arbor can work well.
Planting Your Gourd Seeds
Now for the fun part – planting!
1. **Start Seeds Indoors (Optional):** Gourds have a long growing season, so starting seeds indoors 4-6 weeks before the last expected frost can give them a head start. I usually soak my gourd seeds in warm water for 24 hours before planting to help them germinate faster.
2. **Planting Seeds Indoors:** Fill small pots or seed trays with a good quality seed-starting mix. Plant the seeds about 1 inch deep and keep the soil moist but not soggy. Place the pots in a warm, sunny location or under grow lights.
3. **Direct Sowing:** If you live in a warmer climate with a longer growing season, you can direct sow gourd seeds directly into the garden after the last frost. Make sure the soil is warm (at least 65°F) before planting.
4. **Planting Seeds Outdoors:** Sow the seeds about 1 inch deep and 6-8 feet apart. Water thoroughly after planting.
5. **Thinning Seedlings:** Once the seedlings emerge, thin them to one plant per hill or pot. Choose the strongest, healthiest-looking seedling to keep.
Caring for Your Growing Gourds
Once your gourd seedlings are established, it’s time to provide them with the care they need to thrive.
1. **Watering:** Gourds need consistent moisture, especially during hot, dry weather. Water deeply and regularly, aiming to keep the soil consistently moist but not waterlogged. I like to water early in the morning to allow the foliage to dry before nightfall, which helps prevent fungal diseases.
2. **Fertilizing:** Gourds are heavy feeders, so they benefit from regular fertilization. Use a balanced fertilizer or a fertilizer specifically formulated for vegetables. I usually fertilize my gourds every 2-3 weeks throughout the growing season.
3. **Weeding:** Keep the area around your gourd plants free of weeds. Weeds compete with the gourds for water and nutrients. Mulching around the plants can help suppress weeds and retain moisture.
4. **Pest Control:** Gourds can be susceptible to various pests, such as squash bugs, squash vine borers, and cucumber beetles. Inspect your plants regularly for signs of pests and take action promptly. I prefer to use organic pest control methods whenever possible, such as hand-picking pests, using insecticidal soap, or applying neem oil.
5. **Pollination:** Gourds have separate male and female flowers. The female flowers need to be pollinated in order to produce fruit. Bees and other pollinators usually take care of this, but if you’re not seeing many bees in your garden, you may need to hand-pollinate the flowers.
6. **Hand Pollination:** To hand-pollinate, use a small paintbrush to transfer pollen from the male flowers to the female flowers. The female flowers have a small gourd-like structure at the base of the flower, while the male flowers do not.
Training Your Gourd Vines
As your gourd vines grow, you’ll need to train them to grow in the direction you want them to go.
1. **Trellising:** If you’re growing your gourds on a trellis or fence, gently guide the vines up the support structure and tie them in place with soft twine or plant ties.
2. **Pruning:** You can prune your gourd vines to encourage branching and fruit production. Pinch off the tips of the vines to promote side growth. You can also remove any yellowing or damaged leaves.
3. **Supporting the Gourds:** As the gourds grow larger, they may need additional support to prevent the vines from breaking. You can use slings made from old pantyhose or netting to support the gourds.
Harvesting Your Gourds
The timing of your gourd harvest depends on the type of gourd you’re growing and what you plan to do with it.
1. **Ornamental Gourds:** Ornamental gourds can be harvested when they are fully mature and their stems have started to dry out. Cut the gourds from the vine, leaving a few inches of stem attached.
2. **Hard-Shelled Gourds:** Hard-shelled gourds need to be left on the vine until they are fully mature and their stems have completely dried out. This usually takes several months. The gourds should feel hard and lightweight when they are ready to harvest.
3. **Harvesting Hard-Shelled Gourds:** Cut the gourds from the vine, leaving a few inches of stem attached. Be careful not to damage the gourds during harvest.
Drying and Curing Your Hard-Shelled Gourds
Drying and curing is a crucial step in preparing hard-shelled gourds for crafting. This process can take several weeks or even months, depending on the size and thickness of the gourd.
1. **Cleaning:** Gently wash the gourds with soapy water to remove any dirt or debris.
2. **Drying Location:** Choose a well-ventilated, dry location to dry your gourds. A shed, garage, or attic works well. Avoid drying gourds in direct sunlight, as this can cause them to crack.
3. **Elevating the Gourds:** Place the gourds on a wire rack or wooden pallet to allow air to circulate around them.
4. **Turning the Gourds:** Turn the gourds regularly to ensure even drying.
5. **Patience is Key:** Be patient! The drying process can take several weeks or even months. You’ll know the gourds are dry when they are lightweight and you can hear the seeds rattling inside.
6. **Mold Prevention:** Keep an eye out for mold during the drying process. If you see any mold, wipe it off with a solution of bleach and water.
Crafting with Your Homegrown Gourds
Once your gourds are dry and cured, the real fun begins! There are endless possibilities for crafting with gourds.
* **Birdhouses:** Gourds make excellent birdhouses. Simply cut a hole in the gourd, clean out the inside, and add a perch.
* **Bowls and Dippers:** Larger gourds can be used to make bowls and dippers. Cut the gourd in half, clean out the inside, and sand the edges smooth.
* **Musical Instruments:** Gourds can be used to make a variety of musical instruments, such as rattles, drums, and even stringed instruments.
* **Decorative Items:** Gourds can be painted, carved, or decorated with beads, shells, or other embellishments to create unique decorative items.
I hope this guide has inspired you to try growing your own gourds. It’s a rewarding experience that will provide you with a unique and versatile crafting material. Happy gardening!
Conclusion
So, there you have it! Growing gourds at home isn’t just a fun gardening project; it’s a gateway to creativity, sustainability, and a deeper connection with nature. From the satisfaction of nurturing a tiny seed into a sprawling vine laden with unique fruits to the endless possibilities of crafting those gourds into beautiful and functional objects, this DIY endeavor offers rewards that extend far beyond the garden.
Why is this a must-try? Because it’s accessible, adaptable, and incredibly fulfilling. You don’t need acres of land or a green thumb of mythical proportions. With a little planning, patience, and our guide, you can successfully cultivate your own gourd patch, even in a relatively small space. Imagine the pride of displaying your homegrown creations, knowing that you nurtured them from seed to stunning centerpiece.
But the real magic lies in the versatility of gourds. Once harvested and dried, they transform into blank canvases for your imagination. Think birdhouses, bowls, lamps, musical instruments, decorative ornaments – the possibilities are truly limitless. And the best part? Each gourd is unique, ensuring that your creations are one-of-a-kind.
Looking for variations? Consider exploring different gourd varieties. Luffa gourds offer a natural alternative to synthetic sponges, while bottle gourds can be crafted into durable containers. Ornamental gourds, with their vibrant colors and quirky shapes, add a touch of whimsy to any space. Experiment with different growing techniques, such as vertical gardening, to maximize your yield in limited areas. You can also try companion planting, pairing your gourds with beneficial herbs and flowers to deter pests and attract pollinators.
Don’t be afraid to get creative with your gourd crafts. Explore different painting techniques, carving methods, and embellishments. Add beads, feathers, or natural fibers to create unique textures and patterns. Let your imagination run wild and transform your gourds into works of art that reflect your personal style.
We wholeheartedly encourage you to embark on this rewarding journey of growing gourds at home. It’s an opportunity to connect with nature, unleash your creativity, and create something truly special. So, grab some seeds, prepare your garden, and get ready to experience the joy of watching your own gourd patch flourish.
And most importantly, we want to hear about your experiences! Share your photos, tips, and creations with us in the comments below. Let’s build a community of gourd enthusiasts and inspire each other with our unique projects. Happy growing!
Frequently Asked Questions (FAQ)
What is the best time to start growing gourds?
The ideal time to start growing gourds depends on your climate. Generally, you should start seeds indoors 4-6 weeks before the last expected frost. Gourds require a long growing season (typically 90-120 days), so starting them early gives them a head start. If you live in a warmer climate with a longer growing season, you can direct sow the seeds after the last frost. Make sure the soil temperature is consistently above 65°F (18°C) for optimal germination.
How much space do gourds need to grow?
Gourds are vigorous vines that require ample space to spread. As a general rule, allow at least 6-8 feet between plants. If you’re growing them on a trellis or fence, space them closer together, about 3-4 feet apart. Consider the specific variety you’re growing, as some gourds are more compact than others. Providing adequate space ensures proper air circulation, reduces the risk of disease, and allows the vines to produce a healthy crop of gourds.
What kind of soil is best for growing gourds?
Gourds thrive in well-drained, fertile soil that is rich in organic matter. Before planting, amend your soil with compost, aged manure, or other organic amendments to improve its structure and nutrient content. A slightly acidic to neutral soil pH (6.0-7.0) is ideal. Avoid heavy clay soils, as they can retain too much moisture and lead to root rot. If you have clay soil, consider growing your gourds in raised beds or containers with a well-draining potting mix.
How often should I water my gourd plants?
Gourds need consistent moisture, especially during hot, dry weather. Water deeply and regularly, aiming to keep the soil consistently moist but not waterlogged. Water at the base of the plants to avoid wetting the foliage, which can increase the risk of fungal diseases. Mulching around the plants with straw or wood chips can help retain moisture and suppress weeds. Check the soil moisture regularly and adjust your watering schedule accordingly.
What are some common pests and diseases that affect gourds?
Gourds can be susceptible to various pests and diseases, including squash bugs, squash vine borers, aphids, powdery mildew, and downy mildew. Regularly inspect your plants for signs of infestation or disease. Use organic pest control methods, such as handpicking pests, using insecticidal soap, or introducing beneficial insects like ladybugs. To prevent fungal diseases, ensure good air circulation, avoid overhead watering, and apply a fungicide if necessary. Crop rotation and choosing disease-resistant varieties can also help minimize problems.
How do I know when my gourds are ready to harvest?
The timing of harvest depends on the type of gourd you’re growing and its intended use. Ornamental gourds are typically harvested when they are fully mature and their stems have begun to dry and turn brown. Hard-shelled gourds, such as bottle gourds, should be left on the vine until the stems are completely dry and the gourds feel lightweight. Luffa gourds are harvested when they are still green and tender for use as sponges. Avoid harvesting gourds after a frost, as this can damage them.
How do I dry gourds properly?
Proper drying is essential for preserving gourds and preventing them from rotting. After harvesting, wash the gourds with soapy water and allow them to air dry completely. Place them in a well-ventilated area, such as a shed or garage, away from direct sunlight and moisture. Elevate the gourds on racks or pallets to allow air to circulate around them. The drying process can take several weeks or even months, depending on the size and type of gourd. Check the gourds regularly for signs of mold or rot and discard any that are affected. Once the gourds are completely dry, they will be lightweight and their seeds will rattle inside.
Can I eat gourds?
While some gourds are edible, many ornamental gourds are not. It’s important to identify the specific variety you’re growing before consuming any part of the plant. Some edible gourds include zucchini, squash, and pumpkins, which are all members of the gourd family. Luffa gourds can also be eaten when they are young and tender. However, it’s crucial to avoid eating any gourds that are bitter or have a strange odor, as they may contain toxic compounds. When in doubt, it’s best to err on the side of caution and avoid consuming any gourds that you are unsure about.
How can I prevent my gourds from rotting on the vine?
Preventing gourds from rotting on the vine involves several key strategies. First, ensure proper air circulation by spacing plants adequately and pruning excess foliage. Avoid overhead watering, as this can create a humid environment that promotes fungal growth. Elevate the gourds off the ground by placing them on straw, wood chips, or small platforms. Regularly inspect the gourds for signs of rot or damage and remove any affected fruits promptly. Applying a fungicide can also help prevent fungal diseases.
What are some creative ways to use dried gourds?
The possibilities for using dried gourds are endless! They can be transformed into birdhouses, bowls, lamps, musical instruments, decorative ornaments, and much more. You can paint, carve, burn, or embellish them with beads, feathers, or other materials to create unique and personalized creations. Luffa gourds can be used as natural sponges or exfoliating scrubbers. Let your imagination run wild and explore the many creative ways to incorporate dried gourds into your home and garden.
Leave a Comment