
Easy Homegrown Carrots: Imagine plucking vibrant, sweet carrots straight from your own backyard, bursting with flavor and freshness that no store-bought carrot can match. Sounds dreamy, right? Well, it doesn’t have to be just a dream! This guide is packed with simple, effective DIY tricks and hacks to help you cultivate a thriving carrot patch, even if you’re a complete beginner.
For centuries, carrots have been a staple in diets worldwide, with their cultivation dating back to ancient times. Originally, they weren’t even orange! The vibrant hue we know and love today is a relatively modern development, thanks to Dutch growers in the 17th century. But regardless of their color, carrots have always been prized for their nutritional value and versatility in the kitchen.
Let’s face it, growing your own food is incredibly rewarding, but sometimes it can feel a little intimidating. Many people struggle with getting the right soil conditions, dealing with pests, or simply knowing where to start. That’s where these DIY tricks come in! I’m going to share my favorite, tried-and-true methods for achieving easy homegrown carrots that are perfectly crisp, sweet, and ready to enjoy. From clever seed-sowing techniques to natural pest control solutions, you’ll discover how to overcome common gardening challenges and reap a bountiful harvest. So, grab your gardening gloves, and let’s get started on your journey to delicious, homegrown carrots!

Growing Carrots at Home: A Beginner’s Guide
Hey there, fellow gardening enthusiasts! I’m so excited to share my tried-and-true method for growing delicious, homegrown carrots right in your backyard (or even in containers!). Forget those bland, store-bought carrots – nothing beats the sweet, crisp taste of a carrot you’ve nurtured yourself. This guide will walk you through every step, from choosing the right variety to harvesting your bounty. Let’s get our hands dirty!
Choosing the Right Carrot Variety
Before we even think about planting, we need to pick the perfect carrot variety. Not all carrots are created equal, and some are better suited for certain climates and soil types than others. Here’s a breakdown to help you decide:
* Nantes: These are my personal favorites! Nantes carrots are cylindrical, smooth, and have a sweet flavor. They’re relatively short (around 6-7 inches) and do well in a variety of soil conditions. They also mature quickly, which is a bonus.
* Danvers: These are the classic, tapered carrots you often see in the grocery store. They’re longer than Nantes (around 7-8 inches) and have a slightly stronger flavor. Danvers carrots are known for their good storage capabilities.
* Chantenay: These are shorter, thicker carrots with broad shoulders. They’re a good choice for heavier, rockier soils because they don’t need to grow as deep. They have a robust flavor and are great for juicing.
* Baby Carrots: If you’re short on space or just want a quick harvest, consider growing baby carrot varieties like ‘Thumbelina’ or ‘Parisian’. These are small, round carrots that mature in just a few weeks.
* Novelty Colors: Want to add some fun to your garden? Try growing purple, yellow, or white carrots! These varieties are just as easy to grow as orange carrots and add a unique touch to your meals.
Important Considerations:
* Soil Type: If you have heavy clay soil, choose shorter, stouter varieties like Chantenay or baby carrots. For loose, sandy soil, you can grow longer varieties like Nantes or Danvers.
* Climate: Carrots are cool-season crops, so they thrive in temperatures between 60-70°F (15-21°C). If you live in a warmer climate, choose heat-tolerant varieties.
* Days to Maturity: This is the number of days it takes for the carrots to reach maturity after planting. Choose varieties with shorter days to maturity if you want a quicker harvest.
Preparing the Soil: The Key to Success
Carrots need loose, well-drained soil to grow properly. Rocky or compacted soil will result in stunted, misshapen carrots. Trust me, I’ve learned this the hard way! Here’s how to prepare your soil for success:
1. Choose a Sunny Location: Carrots need at least 6 hours of sunlight per day.
2. Clear the Area: Remove any rocks, weeds, and debris from the planting area.
3. Loosen the Soil: Use a garden fork or tiller to loosen the soil to a depth of at least 12 inches. This is crucial for allowing the carrots to grow long and straight.
4. Amend the Soil: Add plenty of compost or well-rotted manure to improve soil drainage and fertility. Carrots are heavy feeders, so they need a nutrient-rich soil. I usually add a generous amount of compost – it makes a huge difference!
5. Create Raised Beds (Optional): If you have heavy clay soil, consider creating raised beds to improve drainage. Raised beds also warm up faster in the spring, which can give your carrots a head start.
6. Smooth the Surface: Use a rake to smooth the surface of the soil and remove any large clumps. A smooth surface will make it easier to sow the seeds evenly.
Planting the Carrot Seeds
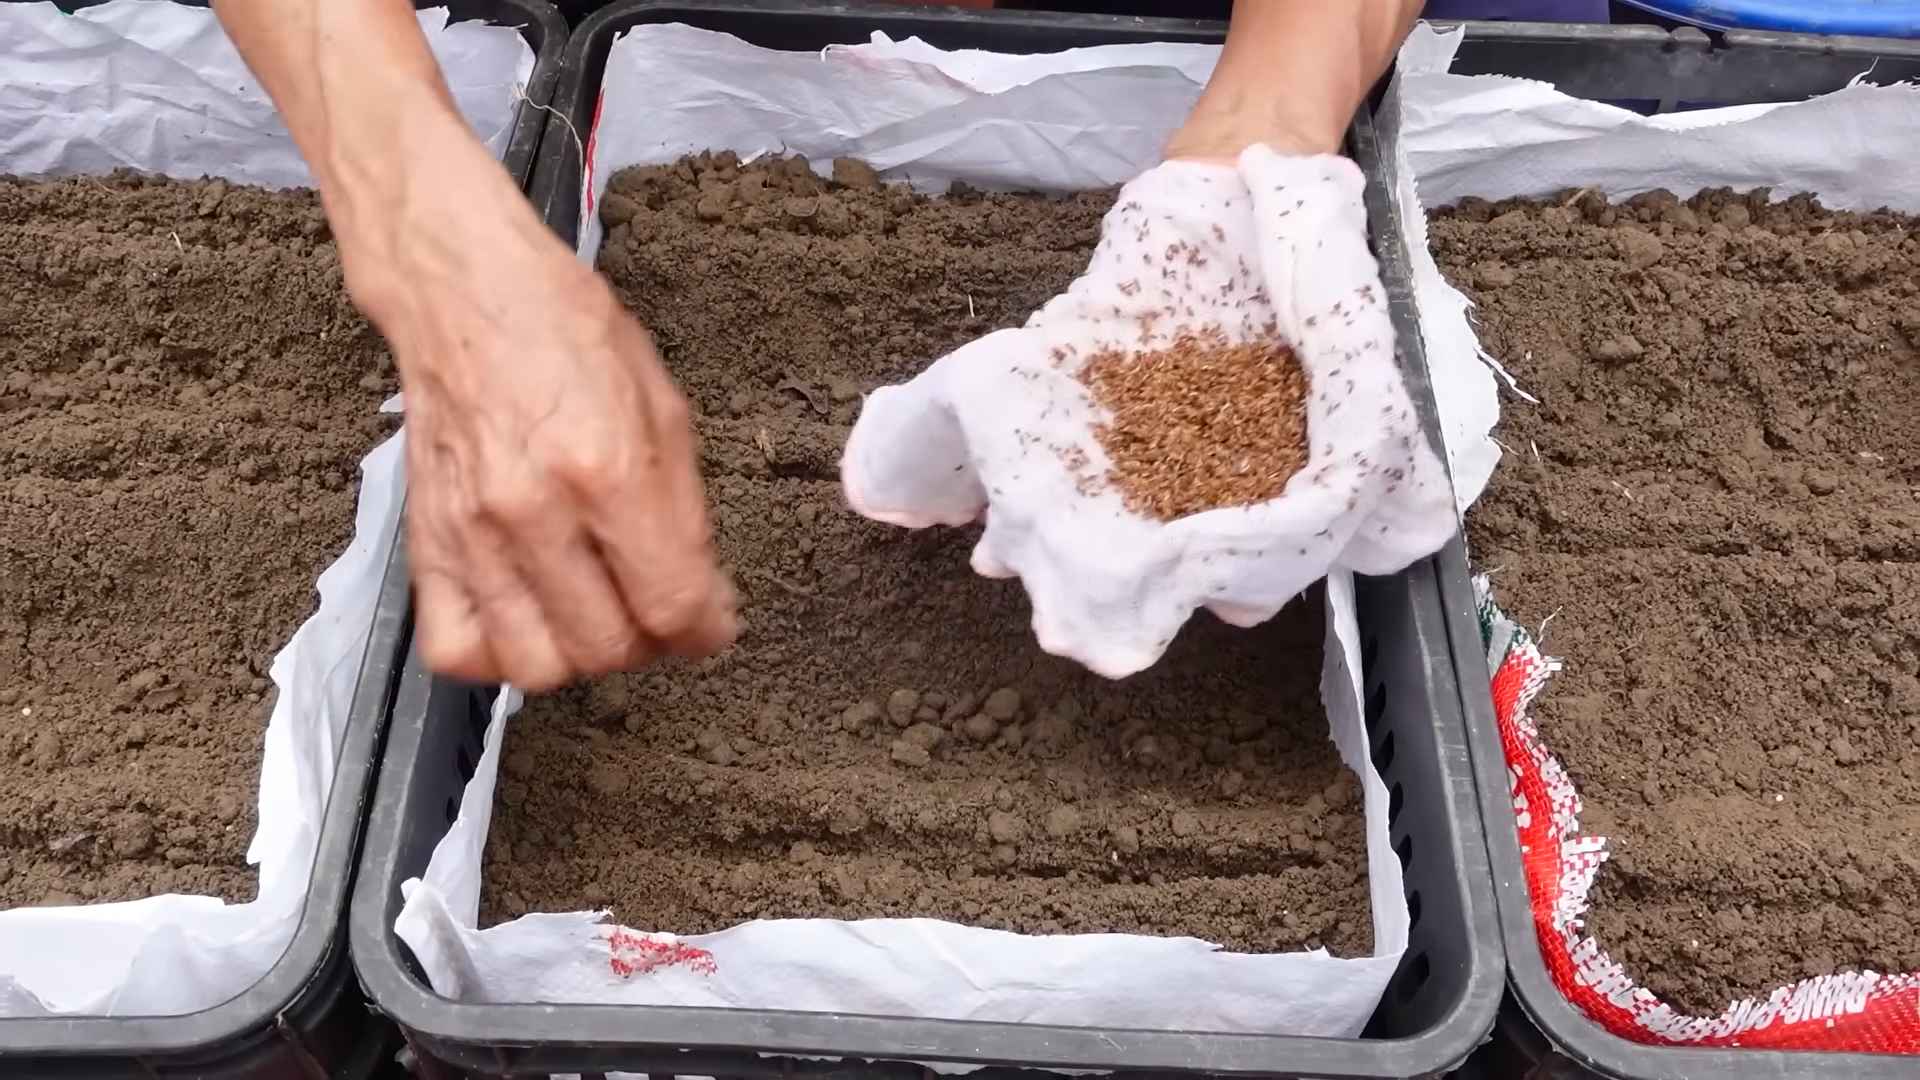
Carrot seeds are tiny, so planting them can be a bit tricky. But don’t worry, I’ve got some tips to help you get it right:
1. Sow the Seeds: Create shallow furrows about 1/4 inch deep and 1-2 inches apart. Sprinkle the carrot seeds evenly into the furrows. I like to use a seed dispenser to avoid overcrowding.
2. Cover the Seeds: Gently cover the seeds with a thin layer of soil.
3. Water Gently: Water the soil gently with a watering can or hose with a gentle spray nozzle. Be careful not to wash away the seeds.
4. Keep the Soil Moist: Carrots need consistent moisture to germinate. Keep the soil moist but not soggy until the seedlings emerge. I usually water them every day or two, depending on the weather.
5. Thin the Seedlings: Once the seedlings are about 2 inches tall, thin them to about 1-2 inches apart. This will give the carrots enough space to grow. I know it’s hard to thin out your precious seedlings, but it’s essential for getting good-sized carrots. You can use small scissors to snip the unwanted seedlings at the soil line.
Caring for Your Carrots
Once your carrots are planted, it’s important to provide them with the right care to ensure a bountiful harvest.
1. Watering: Carrots need consistent moisture, especially during hot, dry weather. Water them deeply once or twice a week, or more often if the soil dries out quickly.
2. Weeding: Keep the area around your carrots free of weeds. Weeds compete with carrots for nutrients and water. I like to hand-pull weeds carefully to avoid disturbing the carrot roots.
3. Fertilizing: Carrots benefit from regular fertilization. Use a balanced fertilizer or side-dress with compost every few weeks.
4. Mulching: Apply a layer of mulch around your carrots to help retain moisture, suppress weeds, and regulate soil temperature. Straw, hay, or shredded leaves are all good choices for mulch.
5. Pest Control: Carrots are susceptible to a few pests, such as carrot rust flies and aphids. Inspect your plants regularly for signs of pests and take action if necessary. You can use insecticidal soap or neem oil to control aphids. For carrot rust flies, consider using row covers to protect your plants.
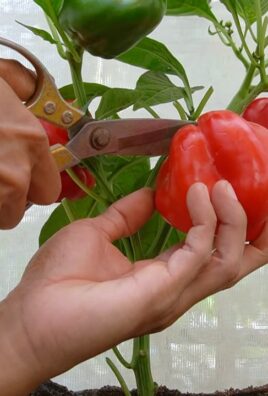
Harvesting Your Carrots
The moment we’ve all been waiting for! Harvesting your homegrown carrots is so rewarding.
1. Check for Maturity: Carrots are typically ready to harvest when they reach the size specified on the seed packet. You can also gently brush away the soil around the top of the carrot to check its size.
2. Loosen the Soil: Before pulling the carrots, loosen the soil around them with a garden fork. This will make it easier to pull them out without breaking them.
3. Pull the Carrots: Grasp the carrot tops firmly and gently pull the carrots out of the ground. If the carrots are difficult to pull, use the garden fork to loosen the soil further.
4. Clean the Carrots: Brush off any excess soil from the carrots.
5. Store the Carrots: Store the carrots in a cool, dark place. You can store them in the refrigerator for several weeks or in a root cellar for several months. To store them in the refrigerator, wrap them in a damp paper towel and place them in a plastic bag.
Troubleshooting Common Carrot Problems
Even with the best care, you might encounter some problems while growing carrots. Here are a few common issues and how to address them:
* Forked or Stunted Carrots: This is usually caused by rocky or compacted soil. Make sure to prepare your soil properly before planting.
* Bitter Carrots: This can be caused by hot weather or inconsistent watering. Keep the soil consistently moist and provide shade during the hottest part of the day.
* Cracked Carrots: This is often caused by uneven watering. Water your carrots regularly and consistently.
* Pest Damage: Inspect your plants regularly for signs of pests and take action if necessary.
Enjoying Your Homegrown Carrots
Now that you’ve harvested your delicious homegrown carrots, it’s time to enjoy them! Here are a few ideas:
* Eat them raw: Freshly harvested carrots are incredibly sweet and crisp.
* Roast them: Roasting carrots brings out their natural sweetness.
* Steam them: Steamed carrots are a healthy and delicious side dish.
* Add them to soups and stews: Carrots add flavor and nutrients to soups and stews.
* Make carrot juice: Fresh carrot juice is a healthy and refreshing drink.
* Bake them into cakes and muffins: Carrots add moisture and sweetness to baked goods.
Growing carrots at home is a rewarding experience that anyone can enjoy. With a little bit of planning and effort, you can have a bountiful harvest of delicious, homegrown carrots. Happy gardening!
Conclusion
So, there you have it! Growing your own carrots at home is not only achievable, but surprisingly easy and incredibly rewarding. Forget those bland, store-bought carrots that lack that vibrant, earthy sweetness. With this simple DIY trick, you can cultivate a bounty of delicious, homegrown carrots bursting with flavor and packed with nutrients, right in your own backyard (or even on your balcony!).
This isn’t just about saving money; it’s about connecting with your food, understanding where it comes from, and enjoying the unparalleled taste of freshly harvested produce. Imagine the satisfaction of pulling those vibrant orange roots from the soil, knowing you nurtured them from tiny seeds to plump, juicy vegetables. It’s a truly fulfilling experience.
Why is this DIY trick a must-try? Because it simplifies the process, making it accessible to even the most novice gardeners. We’ve eliminated the common pitfalls that often discourage beginners, such as poor germination and stunted growth. By focusing on well-draining soil, consistent watering, and strategic thinning, you’ll be well on your way to a successful carrot harvest.
But don’t stop there! Feel free to experiment with different carrot varieties. Nantes carrots are known for their cylindrical shape and sweet flavor, while Chantenay carrots are shorter and sturdier, perfect for heavier soils. Rainbow carrots offer a beautiful mix of colors and a slightly different flavor profile for each hue. You can also try succession planting, sowing seeds every few weeks to ensure a continuous harvest throughout the growing season. Consider companion planting too! Marigolds can help deter nematodes, while onions and garlic can repel carrot root flies.
And if you’re short on space, don’t despair! Carrots can thrive in containers, as long as they’re deep enough to accommodate the root growth. Choose a pot that’s at least 12 inches deep and filled with a well-draining potting mix.
We’re confident that this DIY trick will transform your carrot-growing experience. It’s a simple, effective, and enjoyable way to bring fresh, healthy produce to your table. So, grab your seeds, prepare your soil, and get ready to enjoy the delicious rewards of your labor.
Now, we want to hear from you! Have you tried growing carrots at home before? What challenges did you face? What successes did you celebrate? We encourage you to try this DIY trick and share your experience with us in the comments below. Let’s build a community of carrot-growing enthusiasts and learn from each other’s successes and failures. Share your photos, your tips, and your favorite carrot recipes. Together, we can all enjoy the bounty of homegrown carrots! This method for easy homegrown carrots is sure to be a winner.
Frequently Asked Questions (FAQ)
What kind of soil is best for growing carrots?
Carrots thrive in loose, well-draining soil that is free of rocks and clumps. Rocky soil can cause the carrots to fork or become misshapen. Sandy loam is ideal, but you can amend heavier soils with compost, peat moss, or sand to improve drainage. Avoid using soil that is too rich in nitrogen, as this can lead to excessive foliage growth at the expense of root development. The pH of the soil should be between 6.0 and 7.0 for optimal growth. Before planting, till the soil to a depth of at least 12 inches to ensure that the carrots have plenty of room to grow downwards.
How often should I water my carrots?
Consistent watering is crucial for carrot growth, especially during germination and early development. Keep the soil consistently moist, but not waterlogged. Water deeply whenever the top inch of soil feels dry to the touch. Avoid overhead watering, as this can promote fungal diseases. Instead, use a soaker hose or drip irrigation to deliver water directly to the roots. During hot, dry weather, you may need to water more frequently. Mulching around the plants can help retain moisture and suppress weeds.
When should I thin my carrot seedlings?
Thinning is essential to prevent overcrowding and ensure that each carrot has enough space to develop properly. When the seedlings are about 2 inches tall, thin them to about 1 inch apart. Then, when they are about 4 inches tall, thin them again to about 3 inches apart. Gently pull out the unwanted seedlings, being careful not to disturb the roots of the remaining plants. You can eat the thinned seedlings as microgreens or add them to salads.
What are some common pests and diseases that affect carrots?
Carrot root flies are a common pest that can damage the roots of carrots. They lay their eggs near the base of the plants, and the larvae burrow into the roots, causing them to become riddled with tunnels. To prevent carrot root flies, cover your plants with a fine mesh netting or use companion planting with onions or garlic, which repel the flies. Other common pests include aphids, nematodes, and spider mites. Diseases that can affect carrots include leaf blight, powdery mildew, and root rot. To prevent diseases, ensure good air circulation, avoid overhead watering, and practice crop rotation.
How do I know when my carrots are ready to harvest?
Carrots are typically ready to harvest 60-80 days after planting, depending on the variety. The size of the carrots will vary depending on the variety, but generally, they should be at least 1/2 inch in diameter at the top. You can gently loosen the soil around the carrots and pull them out by the tops. If the soil is dry, water it well before harvesting to make it easier to pull the carrots out. Store harvested carrots in the refrigerator in a plastic bag or container for up to several weeks.
Can I grow carrots in containers?
Yes, carrots can be successfully grown in containers, as long as the containers are deep enough to accommodate the root growth. Choose a pot that is at least 12 inches deep and filled with a well-draining potting mix. Make sure the container has drainage holes to prevent waterlogging. Sow the seeds directly into the container and thin them as needed. Water regularly and fertilize with a balanced fertilizer every few weeks. Place the container in a sunny location that receives at least 6 hours of sunlight per day.
What are some good companion plants for carrots?
Companion planting can help improve the growth and health of your carrots. Some good companion plants for carrots include:
* Onions and garlic: Repel carrot root flies.
* Marigolds: Deter nematodes.
* Rosemary: Repels carrot rust fly and cabbage moths.
* Lettuce: Provides shade and helps retain moisture.
* Radishes: Loosen the soil and mark the rows.
* Beans: Fix nitrogen in the soil.
Avoid planting carrots near dill or fennel, as they can inhibit carrot growth.
How do I store my homegrown carrots?
To store your homegrown carrots for an extended period, remove the green tops, leaving about an inch of stem. Gently brush off any excess soil, but do not wash the carrots. Place the carrots in a plastic bag or container lined with a damp paper towel. Store them in the refrigerator crisper drawer. Carrots stored this way can last for several weeks or even months. You can also freeze carrots by blanching them in boiling water for a few minutes, then cooling them in ice water before freezing.
What are the benefits of eating homegrown carrots?
Homegrown carrots are packed with nutrients and offer numerous health benefits. They are an excellent source of beta-carotene, which the body converts into vitamin A. Vitamin A is essential for vision, immune function, and cell growth. Carrots are also a good source of fiber, which aids in digestion and helps regulate blood sugar levels. They contain antioxidants that protect against cell damage and may reduce the risk of chronic diseases. Plus, homegrown carrots simply taste better than store-bought carrots! They are sweeter, more flavorful, and have a satisfying crunch.

Leave a Comment