
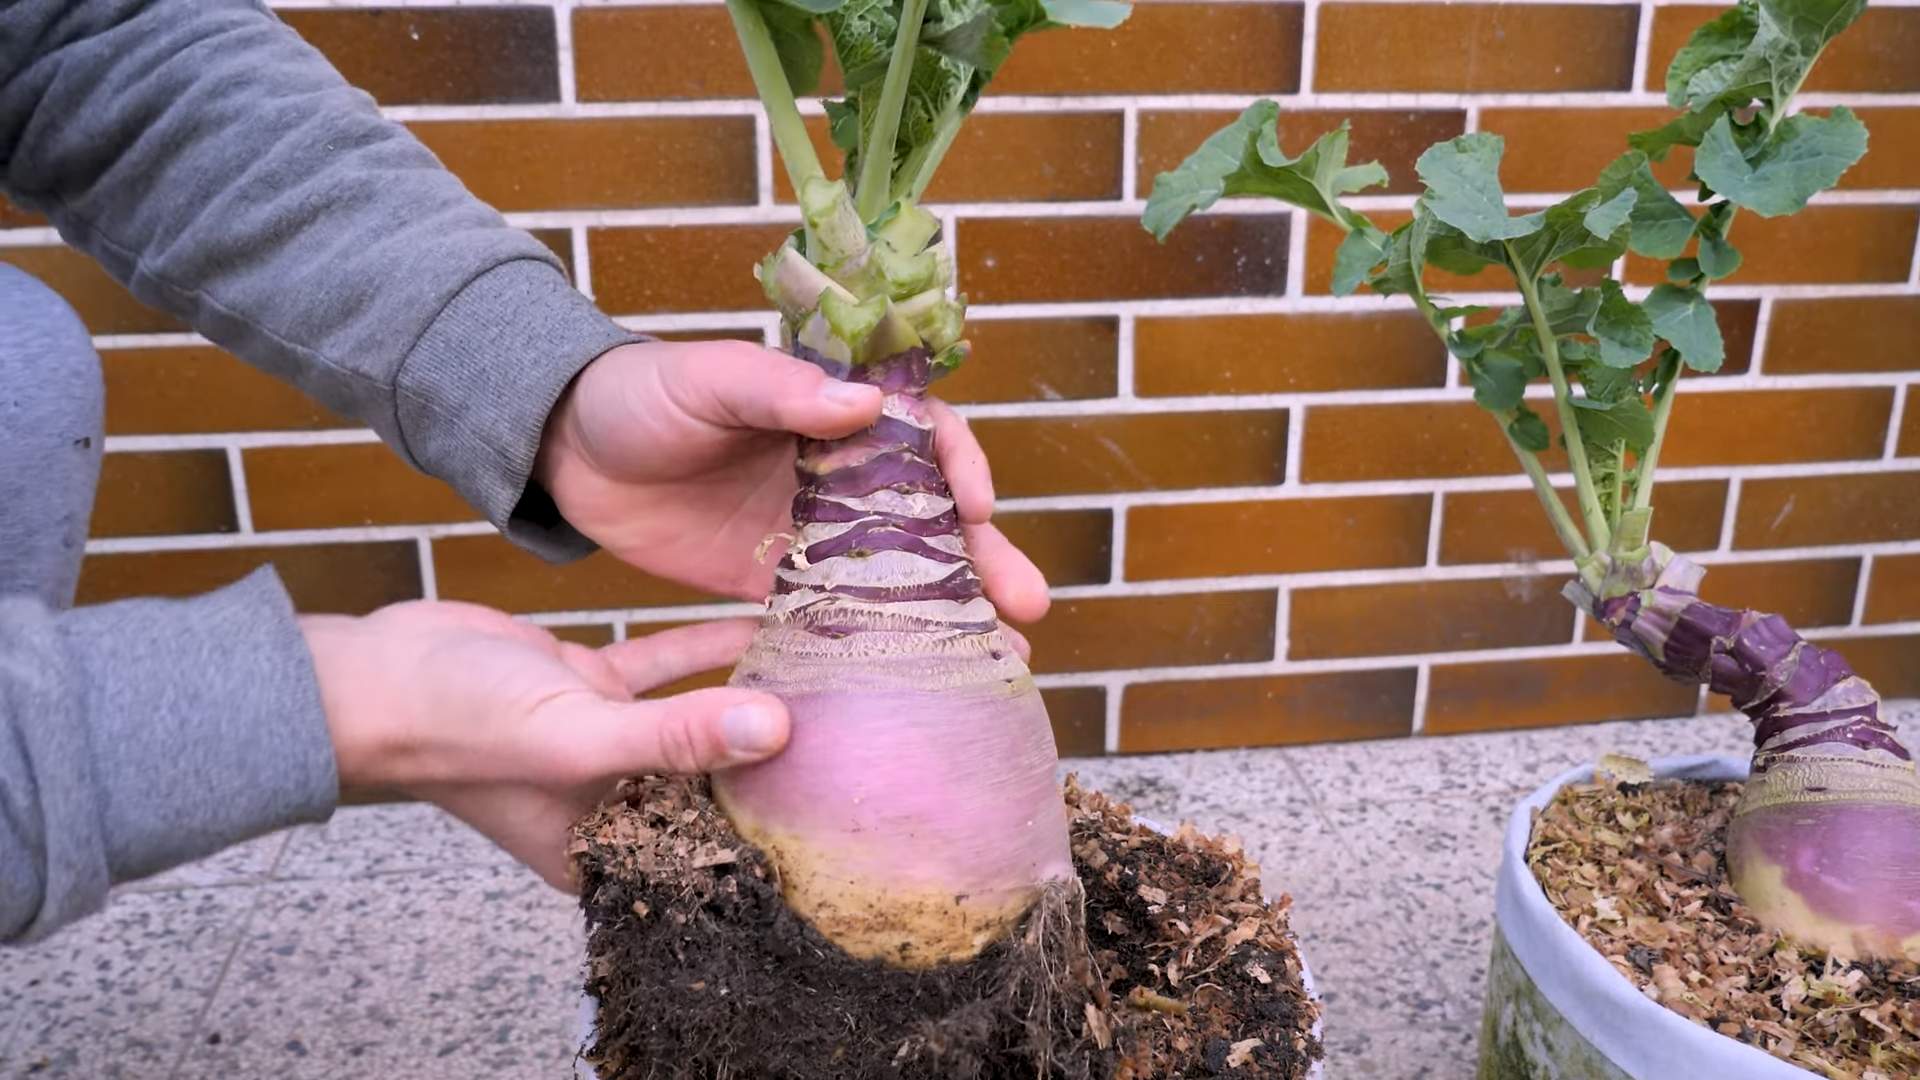
Grow Jumbo Rutabagas? Absolutely! Imagine harvesting rutabagas so large, they practically feed the whole neighborhood! Forget those small, sometimes woody rutabagas you find at the grocery store. We’re talking about garden giants, bursting with flavor and packed with nutrients.
Rutabagas, a humble root vegetable with a fascinating history, have been feeding families for centuries. Originating as a cross between a cabbage and a turnip, they’ve been a staple in colder climates, providing essential vitamins and minerals throughout the winter months. In some cultures, they’re even considered symbols of good luck and prosperity!
But let’s be honest, growing rutabagas can sometimes be a bit…underwhelming. You put in the work, and you end up with something the size of a golf ball. That’s where these DIY tricks and hacks come in! I’m going to share my secrets to help you grow jumbo rutabagas that will be the envy of every gardener on the block. We’ll cover everything from soil preparation and seed selection to watering techniques and pest control. Why settle for ordinary when you can have extraordinary? Let’s get digging and unlock the potential for truly massive rutabagas!
Growing Giant Rutabagas: My Secrets for a Bumper Crop!
Okay, so you want to grow rutabagas the size of softballs, maybe even basketballs? I’m here to tell you it’s totally possible! I’ve been experimenting with rutabagas for years, and I’ve finally cracked the code to getting those massive, delicious roots. It’s not just about luck; it’s about understanding their needs and giving them the right conditions. Let’s dive into my tried-and-true method!
Choosing the Right Variety
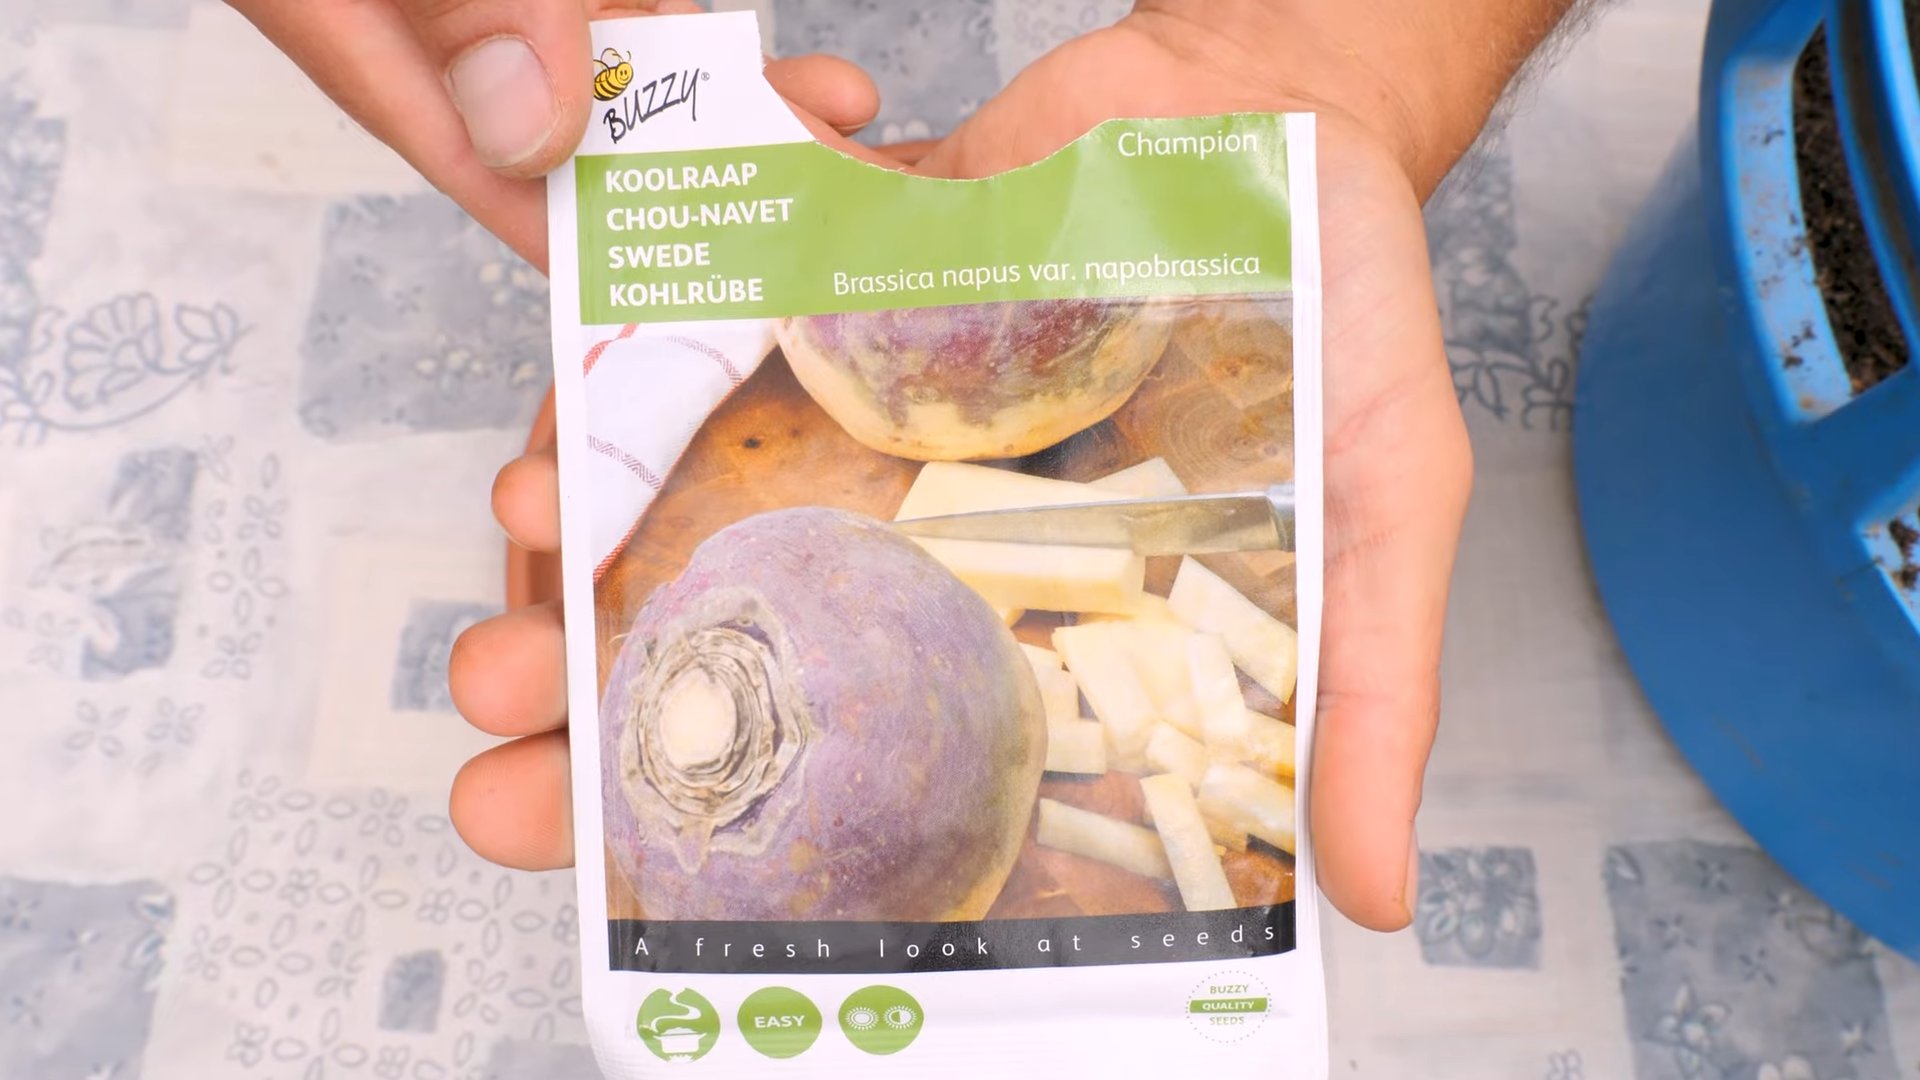
First things first, not all rutabagas are created equal. Some varieties are just naturally smaller. For giant rutabagas, you’ll want to look for specific cultivars known for their size and flavor.
* ‘American Purple Top’: This is a classic for a reason! It’s reliable, produces large roots, and has a good flavor. It’s my go-to.
* ‘Laurentian’: Another excellent choice, known for its smooth skin and sweet taste. It also stores well, which is a bonus.
* ‘Joan’: This variety is known for its disease resistance and good size.
Preparing the Soil: The Foundation for Giants
Rutabagas are heavy feeders, meaning they need a lot of nutrients to grow big. The soil preparation is absolutely crucial. I can’t stress this enough!
* Timing is Key: Start preparing your soil several weeks before you plan to sow your seeds. This gives the amendments time to break down and become available to the plants.
* Soil Testing: Ideally, get your soil tested to determine its pH and nutrient levels. Rutabagas prefer a slightly acidic to neutral pH (around 6.0 to 7.0).
* Amending the Soil: This is where the magic happens!
* Compost: Add a generous amount of well-rotted compost. I’m talking several inches! Compost improves drainage, water retention, and provides essential nutrients.
* Manure: Aged manure (cow, horse, or chicken) is another fantastic amendment. Be sure it’s well-aged to avoid burning the roots.
* Phosphorus and Potassium: Rutabagas need plenty of phosphorus and potassium for root development. Bone meal is a great source of phosphorus, and wood ash provides potassium. Be careful with wood ash, though, as it can raise the pH of your soil.
* Slow-Release Fertilizer: I also like to incorporate a slow-release fertilizer specifically formulated for root vegetables. Follow the instructions on the package.
* Deep Tilling: Rutabagas need loose soil to grow without resistance. Till the soil deeply, at least 12 inches, to create a welcoming environment for those big roots.
* Creating Raised Beds (Optional): If your soil is heavy clay or poorly drained, consider creating raised beds. This will improve drainage and warm the soil faster in the spring.
Sowing the Seeds: Timing and Spacing
Getting the timing right is important for optimal growth.
* Timing: Rutabagas are a cool-season crop, so you’ll want to sow your seeds in late spring or early summer for a fall harvest. Check your local frost dates to determine the best time to plant. I usually aim for about 90-100 days before the first expected frost.
* Direct Sowing: Rutabagas are best direct-sown into the garden. They don’t transplant well.
* Spacing: Give your rutabagas plenty of room to grow. Thin seedlings to 6-8 inches apart in rows that are 18-24 inches apart. This might seem like a lot of space, but trust me, they need it!
* Sowing Depth: Sow the seeds about 1/2 inch deep.
* Watering: Keep the soil consistently moist until the seeds germinate.
Watering and Feeding: Keeping Them Happy and Growing
Consistent watering and regular feeding are essential for growing giant rutabagas.
* Watering: Rutabagas need consistent moisture, especially during hot, dry periods. Water deeply and regularly, aiming for about 1 inch of water per week. Use a soaker hose or drip irrigation to avoid wetting the foliage, which can lead to fungal diseases.
* Fertilizing: Side-dress your rutabagas with a balanced fertilizer every 4-6 weeks. I like to use a fertilizer that’s high in phosphorus and potassium. You can also use compost tea or fish emulsion.
* Weed Control: Keep the area around your rutabagas free of weeds. Weeds compete for nutrients and water, which can stunt the growth of your plants. Mulch with straw or wood chips to suppress weeds and retain moisture.
Pest and Disease Control: Protecting Your Investment
Rutabagas are generally pretty hardy, but they can be susceptible to certain pests and diseases.
* Common Pests:
* Flea Beetles: These tiny beetles can chew small holes in the leaves. Cover your plants with row covers to prevent flea beetle damage. You can also use insecticidal soap.
* Root Maggots: These pests can damage the roots of your rutabagas. Use row covers to prevent adult flies from laying eggs near the plants. You can also use diatomaceous earth around the base of the plants.
* Aphids: These sap-sucking insects can weaken your plants. Spray them off with a strong stream of water or use insecticidal soap.
* Common Diseases:
* Clubroot: This fungal disease causes swollen, distorted roots. Prevent clubroot by practicing crop rotation and maintaining a soil pH of 7.0 or higher.
* Downy Mildew: This fungal disease causes yellow spots on the leaves. Improve air circulation and avoid overhead watering to prevent downy mildew. You can also use a fungicide.
Harvesting: The Grand Finale!
Harvest time is the most rewarding part!
* Timing: Rutabagas are typically ready to harvest in the fall, after the first frost. The frost actually sweetens the flavor of the roots.
* Size: You can harvest rutabagas at any size, but for those giant ones, wait until they’re at least 4-6 inches in diameter.
* Harvesting Method: Loosen the soil around the rutabaga with a garden fork and gently pull it out of the ground.
* Storage: Store rutabagas in a cool, dark, and humid place. You can store them in a root cellar, a refrigerator, or even in a plastic bag in the crisper drawer. They should last for several months.
Step-by-Step Instructions: From Seed to Supper
Let’s break down the whole process into easy-to-follow steps:
1. Choose Your Variety: Select a rutabaga variety known for its large size, like ‘American Purple Top’ or ‘Laurentian’.
2. Prepare the Soil (Weeks Before Planting):
* Test your soil’s pH. Aim for 6.0-7.0.
* Amend the soil with plenty of compost and aged manure.
* Incorporate bone meal and wood ash for phosphorus and potassium.
* Till the soil deeply (at least 12 inches).
3. Sow the Seeds (Late Spring/Early Summer):
* Direct sow seeds 1/2 inch deep.
* Space seeds 1-2 inches apart.
* Keep the soil consistently moist.
4. Thin Seedlings (When They Have a Few True Leaves):
* Thin seedlings to 6-8 inches apart.
5. Water Regularly:
* Water deeply and consistently, aiming for 1 inch of water per week.
6. Fertilize Every 4-6 Weeks:
* Side-dress with a balanced fertilizer high in phosphorus and potassium.
7. Control Pests and Diseases:
* Use row covers to prevent flea beetle and root maggot damage.
* Spray with insecticidal soap for aphids.
* Practice crop rotation to prevent clubroot.
8. Harvest (Fall, After the First Frost):
* Loosen the soil and gently pull the rutabagas out of the ground.
9. Store Properly:
* Store in a cool, dark, and humid place.
Troubleshooting: Common Problems and Solutions
Even with the best planning, things can sometimes go wrong. Here are a few common problems and how to fix them:
* Small Rutabagas:
* Problem: Insufficient nutrients, poor soil, or overcrowding.
* Solution: Amend the soil with more compost and fertilizer. Thin seedlings to provide adequate spacing.
* Bitter Taste:
* Problem: Lack of water or
Conclusion
So, there you have it! Growing jumbo rutabagas isn’t just a pipe dream; it’s an achievable goal with a little planning, the right techniques, and a dash of patience. We’ve walked through the key steps, from selecting the best variety and preparing your soil to nurturing your plants and protecting them from pests and diseases. But why should you invest your time and effort into cultivating these oversized root vegetables?
The answer lies in the sheer versatility and satisfaction that comes with harvesting your own bountiful crop. Imagine the hearty stews, the creamy mashes, and the roasted root vegetable medleys you can create with just one or two of these giants. Think of the bragging rights you’ll earn at the next potluck! Beyond the culinary delights, growing jumbo rutabagas offers a unique connection to the earth and a tangible reward for your gardening efforts.
This DIY trick, focusing on consistent watering, nutrient-rich soil amendments, and strategic thinning, is a game-changer. It’s not just about growing rutabagas; it’s about maximizing their potential. It’s about pushing the boundaries of what’s possible in your own backyard.
Ready to take your rutabaga game to the next level?
Don’t be afraid to experiment! Try different varieties of rutabagas to see which ones thrive best in your local climate and soil conditions. Consider companion planting with herbs like rosemary or thyme to deter pests naturally. You could even explore different methods of soil amendment, such as using compost tea or introducing beneficial microorganisms.
For a sweeter rutabaga, try leaving them in the ground a little longer after the first frost. The cold temperatures help convert starches to sugars, resulting in a more palatable flavor. If you’re short on space, consider growing rutabagas in raised beds or large containers. Just be sure to provide adequate drainage and plenty of room for the roots to develop.
The possibilities are endless! The most important thing is to get started and learn from your experiences. Embrace the challenges, celebrate the successes, and enjoy the journey of growing your own jumbo rutabagas.
We’re confident that with these tips and a little dedication, you’ll be amazed at what you can achieve. So, grab your gardening gloves, prepare your soil, and get ready to witness the magic of growing jumbo rutabagas firsthand.
Don’t forget to share your experiences with us! We’d love to hear about your successes, your challenges, and any unique techniques you discover along the way. Post pictures of your giant rutabagas on social media and tag us. Let’s create a community of rutabaga enthusiasts and inspire others to embark on this rewarding gardening adventure. Happy growing!
FAQ
What is the best time to plant rutabagas for optimal growth?
The ideal time to plant rutabagas is typically in late spring or early summer for a fall harvest. In regions with mild winters, you can also plant them in late summer for a winter harvest. The key is to ensure they have enough time to mature before the first hard frost. Check your local planting calendar for specific dates tailored to your region’s climate. Planting too early can lead to bolting (premature flowering), while planting too late may not allow them to reach their full size.
How much space do rutabagas need to grow to a jumbo size?
Rutabagas require ample space to develop into jumbo specimens. Aim for at least 6-8 inches between plants within a row and 18-24 inches between rows. This spacing allows for adequate root development and air circulation, reducing the risk of disease. If you’re growing them in raised beds or containers, ensure the container is large enough to accommodate their root system. A container that is at least 12 inches deep and 12 inches in diameter is recommended for each plant.
What type of soil is best for growing jumbo rutabagas?
Rutabagas thrive in well-drained, fertile soil that is rich in organic matter. A slightly acidic to neutral pH (6.0-7.0) is ideal. Before planting, amend your soil with compost, well-rotted manure, or other organic materials to improve drainage, fertility, and water retention. Avoid heavy clay soils, as they can restrict root growth. If your soil is compacted, consider adding sand or perlite to improve drainage.
How often should I water rutabagas to encourage jumbo growth?
Consistent watering is crucial for growing jumbo rutabagas. Aim to keep the soil consistently moist, but not waterlogged. Water deeply and regularly, especially during dry spells. A good rule of thumb is to water when the top inch of soil feels dry to the touch. Mulching around the plants can help retain moisture and suppress weeds. Avoid overhead watering, as it can increase the risk of fungal diseases. Drip irrigation or soaker hoses are excellent options for delivering water directly to the roots.
What are the most common pests and diseases that affect rutabagas, and how can I prevent them?
Common pests that affect rutabagas include aphids, flea beetles, cabbage worms, and root maggots. Diseases include clubroot, powdery mildew, and downy mildew. To prevent pest and disease problems, practice crop rotation, maintain good soil drainage, and remove any infected plants promptly. Use row covers to protect young plants from pests. Introduce beneficial insects, such as ladybugs and lacewings, to control aphids. Apply organic insecticides, such as neem oil or insecticidal soap, as needed. For clubroot, amend the soil with lime to raise the pH and consider using resistant varieties.
How do I know when my rutabagas are ready to harvest?
Rutabagas are typically ready to harvest when they reach a diameter of 4-6 inches, but for jumbo rutabagas, you’ll want to let them grow larger. The time to harvest depends on the variety and growing conditions, but generally, it takes about 90-100 days from planting. Check the seed packet for specific maturity dates. The tops of the rutabagas should be visible above the soil surface. Gently loosen the soil around the base of the plant and pull it up. If the rutabaga is difficult to pull, use a garden fork to lift it out of the ground.
Can I store rutabagas after harvesting them?
Yes, rutabagas can be stored for several months if properly handled. After harvesting, remove the tops, leaving about an inch of stem. Gently brush off any excess soil, but do not wash them. Store them in a cool, dark, and humid place, such as a root cellar or refrigerator. The ideal storage temperature is between 32-40°F (0-4°C) with high humidity. Place them in perforated plastic bags or containers to prevent them from drying out. Check them periodically and remove any that show signs of spoilage.
Are there any specific fertilizer recommendations for growing jumbo rutabagas?
Rutabagas benefit from a balanced fertilizer that is rich in phosphorus and potassium. Before planting, incorporate a slow-release fertilizer into the soil. During the growing season, side-dress the plants with a fertilizer that is high in phosphorus and potassium every 4-6 weeks. Avoid fertilizers that are too high in nitrogen, as they can promote leafy growth at the expense of root development. Compost tea is also a great way to provide nutrients to your rutabagas.
What are some creative ways to use jumbo rutabagas in cooking?
Jumbo rutabagas are incredibly versatile in the kitchen. They can be roasted, mashed, boiled, steamed, or added to soups and stews. Try roasting them with other root vegetables, such as carrots, parsnips, and potatoes. Mash them with butter, cream, and herbs for a delicious side dish. Add them to hearty stews for a boost of flavor and nutrients. You can also grate them and use them in salads or slaws. Don’t forget to try making rutabaga fries or chips! The possibilities are endless.
Can I grow rutabagas in containers?
Yes, you can grow rutabagas in containers, but you’ll need to choose a large container that is at least 12 inches deep and 12 inches in diameter. Use a well-draining potting mix that is rich in organic matter. Water regularly and fertilize every 4-6 weeks. Be sure to provide adequate sunlight. Container-grown rutabagas may not reach the same jumbo size as those grown in the ground, but you can still harvest a decent crop.

Leave a Comment