
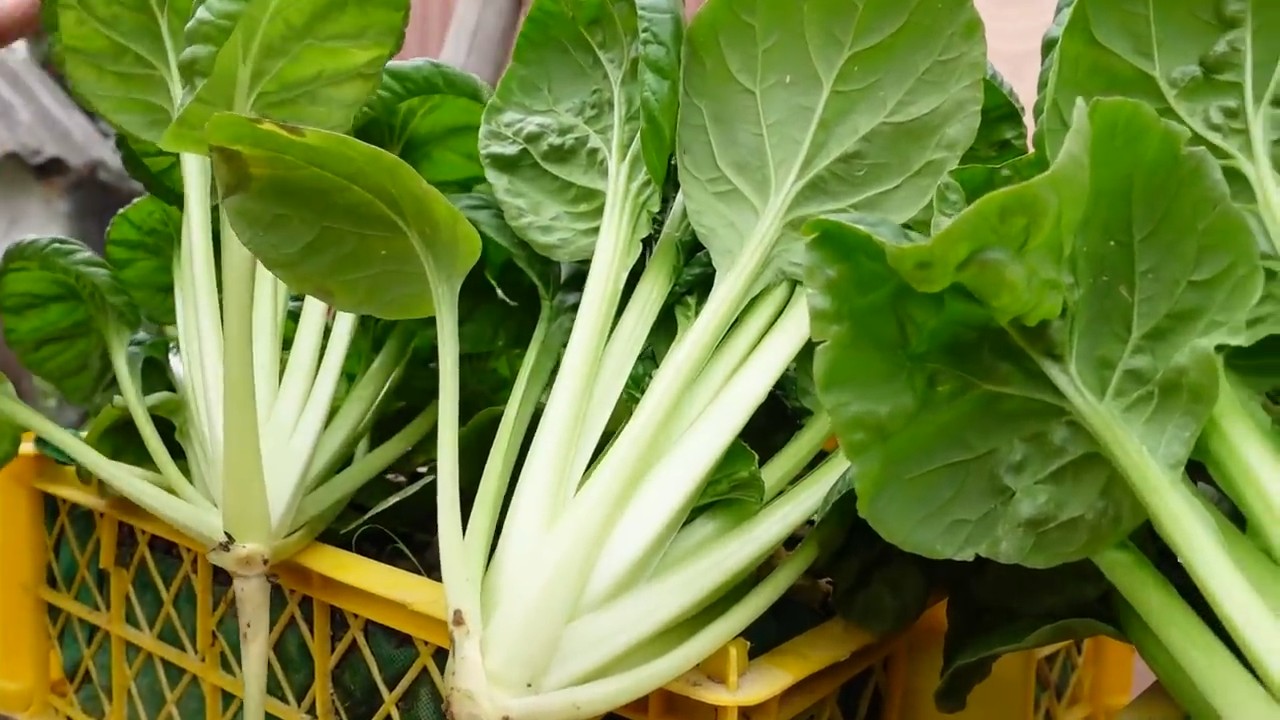
Grow Choi Sum at Home: Imagine stepping outside your back door and harvesting fresh, vibrant Choi Sum for your dinner – a delicious and nutritious addition to any meal! Forget those wilted, overpriced greens at the supermarket. This isn’t just a dream; it’s an achievable reality with a few simple home gardening tricks and a little DIY spirit.
For centuries, cultivating your own food has been a cornerstone of self-sufficiency and a connection to nature. In many Asian cultures, Choi Sum, also known as Chinese flowering cabbage, holds a special place in culinary traditions, symbolizing prosperity and good health. Now, you can bring that tradition to your own backyard, no matter how small your space may be.
Why should you learn these DIY tricks for growing Choi Sum? Well, for starters, you’ll have access to fresher, healthier produce, free from harmful pesticides. Plus, it’s incredibly rewarding to nurture a plant from seed to table. I know, I know, gardening can seem daunting, but trust me, with these easy-to-follow steps, even a complete beginner can successfully grow Choi Sum at home. We’ll cover everything from seed selection to harvesting, ensuring you have a bountiful supply of this delicious green vegetable. So, grab your gardening gloves, and let’s get started!
Choi Sum zu Hause anbauen: Dein DIY-Leitfaden für eine reiche Ernte
Hey Gärtnerfreunde! Habt ihr Lust, euer eigenes frisches, knackiges Choi Sum direkt vor eurer Haustür anzubauen? Choi Sum, auch bekannt als Chinesischer Blätterkohl, ist super einfach anzubauen und eine tolle Ergänzung für Salate, Suppen und Pfannengerichte. Ich zeige euch, wie ihr das ganz einfach selbst hinbekommt!
Was du brauchst: Deine Choi Sum-Werkzeugkiste
Bevor wir loslegen, hier eine Liste mit allem, was du für dein Choi Sum-Abenteuer benötigst:
* Choi Sum Samen: Wähle eine Sorte, die dir gefällt. Es gibt verschiedene, die sich in Größe und Wachstumszeit unterscheiden.
* Anzuchttöpfe oder Saatschalen: Für den Start der Samen.
* Anzuchterde: Eine leichte, gut durchlässige Erde ist ideal.
* Gartenerde: Für das Beet oder den Topf, in dem die Pflanzen später wachsen.
* Kompost oder organischer Dünger: Um den Boden mit Nährstoffen anzureichern.
* Gießkanne oder Sprühflasche: Für die Bewässerung.
* Gartengeräte: Spaten, Harke, Pflanzkelle.
* (Optional) Pflanzenetiketten: Um den Überblick zu behalten.
* (Optional) Schneckenschutz: Wenn du in einer Gegend mit vielen Schnecken wohnst.
Aussaat: Der Start ins Choi Sum-Glück
Choi Sum kann entweder direkt ins Beet gesät oder vorgezogen werden. Ich bevorzuge die Voranzucht, weil ich so die Kontrolle über die Bedingungen habe und die Pflanzen einen kleinen Vorsprung bekommen.
Schritt-für-Schritt-Anleitung zur Voranzucht:
1. Töpfe vorbereiten: Fülle deine Anzuchttöpfe oder Saatschalen mit Anzuchterde. Drücke die Erde leicht an.
2. Samen säen: Lege 2-3 Samen pro Topf auf die Erde. Sie sollten etwa 0,5-1 cm tief liegen.
3. Mit Erde bedecken: Bedecke die Samen mit einer dünnen Schicht Anzuchterde.
4. Bewässern: Befeuchte die Erde vorsichtig mit einer Sprühflasche oder Gießkanne. Die Erde sollte feucht, aber nicht nass sein.
5. Warm stellen: Stelle die Töpfe an einen warmen, hellen Ort. Eine Temperatur von 18-24°C ist ideal.
6. Feucht halten: Halte die Erde feucht, indem du sie regelmäßig besprühst.
7. Keimung abwarten: Die Samen keimen in der Regel innerhalb von 5-10 Tagen.
8. Vereinzeln: Sobald die Sämlinge ein paar Blätter haben, kannst du sie vereinzeln. Das bedeutet, dass du nur den stärksten Sämling pro Topf behältst und die anderen entfernst.
Umpflanzen: Ab ins Beet!
Sobald die Sämlinge kräftig genug sind (etwa 5-7 cm hoch), können sie ins Beet oder in größere Töpfe umgepflanzt werden.
Schritt-für-Schritt-Anleitung zum Umpflanzen:
1. Beet vorbereiten: Wähle einen sonnigen bis halbschattigen Standort für dein Choi Sum-Beet. Lockere die Erde auf und entferne Unkraut.
2. Boden anreichern: Mische Kompost oder organischen Dünger in die Erde, um sie mit Nährstoffen anzureichern.
3. Pflanzlöcher graben: Grabe Pflanzlöcher im Abstand von etwa 20-30 cm.
4. Sämlinge einsetzen: Nimm die Sämlinge vorsichtig aus den Anzuchttöpfen und setze sie in die Pflanzlöcher. Achte darauf, dass die Wurzeln nicht beschädigt werden.
5. Mit Erde auffüllen: Fülle die Pflanzlöcher mit Erde auf und drücke sie leicht an.
6. Bewässern: Gieße die Pflanzen gründlich an.
7. (Optional) Schneckenschutz anbringen: Wenn du in einer Gegend mit vielen Schnecken wohnst, kannst du einen Schneckenschutz um die Pflanzen anbringen.
Pflege: Damit dein Choi Sum prächtig gedeiht
Choi Sum ist relativ pflegeleicht, aber ein paar Dinge solltest du beachten, damit deine Pflanzen gesund und kräftig wachsen.
Wichtige Pflegetipps:
* Bewässerung: Choi Sum braucht regelmäßig Wasser, besonders in trockenen Perioden. Die Erde sollte immer leicht feucht sein, aber nicht nass.
* Düngung: Dünge die Pflanzen alle paar Wochen mit einem organischen Dünger oder Komposttee.
* Unkraut entfernen: Halte das Beet unkrautfrei, damit die Choi Sum-Pflanzen nicht um Nährstoffe und Wasser konkurrieren müssen.
* Schädlinge kontrollieren: Achte auf Schädlinge wie Blattläuse oder Kohlweißlinge. Bei Bedarf kannst du natürliche Schädlingsbekämpfungsmittel einsetzen.
* Blütenbildung verhindern: Choi Sum neigt dazu, schnell zu blühen, besonders bei hohen Temperaturen. Wenn die Pflanzen blühen, werden die Blätter bitter. Um die Blütenbildung zu verzögern, kannst du die Pflanzen regelmäßig ernten.
Ernte: Der Lohn deiner Mühe
Choi Sum kann etwa 4-6 Wochen nach der Aussaat geerntet werden.
So erntest du richtig:
1. Zeitpunkt: Ernte die Pflanzen, wenn sie etwa 15-20 cm hoch sind.
2. Methode: Schneide die Pflanzen knapp über dem Boden ab. Du kannst auch nur einzelne Blätter ernten, aber dann wachsen die Pflanzen nicht so schnell nach.
3. Lagerung: Choi Sum ist nicht sehr lange haltbar. Am besten verarbeitest du ihn sofort nach der Ernte. Im Kühlschrank hält er sich ein paar Tage, wenn du ihn in ein feuchtes Tuch einwickelst.
Zusätzliche Tipps für eine reiche Ernte
* Staffelweise Aussaat: Säe alle paar Wochen neue Samen aus, um eine kontinuierliche Ernte zu gewährleisten.
* Sonnenschutz: In sehr heißen Regionen kann ein Sonnenschutz während der Mittagszeit hilfreich sein, um die Pflanzen vor Verbrennungen zu schützen.
* Bodenverbesserung: Verbessere den Boden regelmäßig mit Kompost oder organischem Material, um die Nährstoffversorgung zu gewährleisten.
* Beobachtung: Beobachte deine Pflanzen regelmäßig auf Anzeichen von Krankheiten oder Schädlingen. Je früher du Probleme erkennst, desto besser kannst du sie bekämpfen.
Choi Sum im Topf anbauen: Dein Balkongarten
Kein Garten? Kein Problem! Choi Sum lässt sich auch wunderbar im Topf auf dem Balkon oder der Terrasse anbauen.
So geht’s:
1. Topf wählen: Wähle einen Topf mit einem Durchmesser von mindestens 20 cm.
2. Erde vorbereiten: Fülle den Topf mit einer Mischung aus Gartenerde und Kompost.
3. Aussaat oder Umpflanzen: Säe die Samen direkt in den Topf oder pflanze vorgezogene Sämlinge um.
4. Pflege: Achte auf regelmäßige Bewässerung und Düngung.
5. Standort: Stelle den Topf an einen sonnigen bis halbschattigen Standort.
Choi Sum in der Küche: Vielseitig und lecker
Choi Sum ist unglaublich vielseitig und kann auf viele verschiedene Arten zubereitet werden.
Einige Ideen:
* Salat: Roher Choi Sum ist knackig und leicht bitter. Er passt gut zu anderen Blattsalaten, Nüssen und einem leichten Dressing.
* Pfannengerichte: Choi Sum ist eine tolle Ergänzung für Pfannengerichte. Er wird schnell gar und behält seinen Biss.
* Suppen: Choi Sum kann in Suppen mitgekocht werden. Er verleiht der Suppe eine frische Note.
* Gedünstet: Gedünsteter Choi Sum ist eine einfache und gesunde Beilage.
* Gegrill
Conclusion
So, there you have it! Growing your own Choi Sum at home is not only achievable, but it’s also incredibly rewarding. From the vibrant green leaves gracing your garden or balcony to the fresh, crisp flavor enhancing your meals, the benefits are undeniable. This isn’t just about saving a few dollars at the grocery store; it’s about connecting with your food, understanding its journey from seed to plate, and enjoying the unparalleled taste of homegrown goodness.
Why is this DIY trick a must-try? Because it empowers you to control the quality of your food. You know exactly what goes into growing your Choi Sum – no harmful pesticides, no questionable fertilizers, just pure, natural goodness. Plus, it’s a fantastic way to reduce your carbon footprint by minimizing transportation and packaging waste. Imagine the satisfaction of serving a dish featuring Choi Sum you nurtured from a tiny seed!
But the beauty of growing your own Choi Sum lies in its adaptability. Feel free to experiment with different varieties. There are cultivars that offer varying leaf shapes, stem thicknesses, and even subtle flavor nuances. Try growing some in containers on a sunny windowsill for a continuous supply, or dedicate a small patch in your garden for a larger harvest.
Consider these variations to elevate your Choi Sum growing experience:
* Succession Planting: Sow seeds every few weeks to ensure a continuous harvest throughout the growing season. This prevents you from being overwhelmed with a massive crop all at once.
* Companion Planting: Plant your Choi Sum alongside beneficial companions like marigolds (to deter pests) or dill (to attract pollinators). This creates a healthier and more vibrant growing environment.
* Microgreens: Harvest young Choi Sum seedlings as microgreens for a concentrated burst of flavor and nutrients in salads and sandwiches.
* Fertilizer Experimentation: While organic fertilizers are generally recommended, try experimenting with different types to see what works best for your soil and growing conditions. Just be sure to monitor your plants closely for any signs of nutrient deficiencies or imbalances.
* Hydroponics: For those with limited space or a penchant for modern gardening techniques, consider growing Choi Sum hydroponically. This soilless method can yield impressive results with minimal effort.
Don’t be intimidated if you’re a beginner gardener. Growing Choi Sum is relatively straightforward, and the rewards far outweigh the effort. Start small, learn as you go, and don’t be afraid to make mistakes. Every challenge is an opportunity to learn and improve your gardening skills.
We wholeheartedly encourage you to give this DIY trick a try. Experience the joy of nurturing your own Choi Sum from seed to harvest. And most importantly, share your experiences with us! We’d love to hear about your successes, your challenges, and any unique tips or tricks you discover along the way. Post photos of your Choi Sum harvest, share your favorite recipes, and connect with fellow gardeners in the comments section below. Let’s create a community of Choi Sum enthusiasts and inspire others to embrace the joys of homegrown food. Remember, the freshest, most flavorful Choi Sum is the one you grow yourself! So, grab some seeds, get your hands dirty, and embark on this rewarding gardening adventure. Happy growing!
Frequently Asked Questions (FAQ)
What is Choi Sum and why should I grow it?
Choi Sum, also known as Choy Sum or Chinese Flowering Cabbage, is a leafy green vegetable popular in Asian cuisine. It’s prized for its tender leaves, crisp stems, and mild, slightly sweet flavor. Growing your own Choi Sum allows you to enjoy the freshest possible produce, free from pesticides and other harmful chemicals. It’s also a cost-effective and environmentally friendly way to add healthy greens to your diet. Plus, it’s a fun and rewarding gardening experience!
When is the best time to plant Choi Sum?
Choi Sum is a cool-season crop, meaning it thrives in cooler temperatures. The best time to plant it is in early spring or late summer/early fall. Avoid planting during the hottest months of summer, as high temperatures can cause the plants to bolt (go to seed prematurely), resulting in bitter-tasting leaves. Check your local climate and frost dates to determine the optimal planting time for your region.
What kind of soil does Choi Sum need?
Choi Sum prefers well-drained, fertile soil that is rich in organic matter. Amend your soil with compost or well-rotted manure before planting to improve its fertility and drainage. A soil pH of 6.0 to 7.5 is ideal. If your soil is heavy clay, consider adding sand or perlite to improve drainage.
How much sunlight does Choi Sum need?
Choi Sum needs at least 6 hours of sunlight per day to thrive. Choose a sunny location in your garden or on your balcony for planting. If you’re growing Choi Sum indoors, place it near a sunny window or use grow lights to provide adequate light.
How often should I water Choi Sum?
Choi Sum needs consistent moisture to grow well. Water regularly, especially during dry periods, to keep the soil consistently moist but not waterlogged. Check the soil moisture level regularly by sticking your finger into the soil. If the top inch of soil feels dry, it’s time to water.
What are some common pests and diseases that affect Choi Sum?
Common pests that can affect Choi Sum include aphids, cabbage worms, flea beetles, and slugs. Diseases include downy mildew and clubroot. To prevent pest and disease problems, practice good garden hygiene, such as removing weeds and debris, and rotate your crops regularly. Use organic pest control methods, such as insecticidal soap or neem oil, to control pests. Choose disease-resistant varieties of Choi Sum if possible.
How do I harvest Choi Sum?
You can harvest Choi Sum when the plants are about 6-8 inches tall. Cut the entire plant at the base, or harvest individual leaves as needed. The leaves are most tender when they are young and small. Harvest before the plants start to bolt (go to seed).
How do I store Choi Sum after harvesting?
Store Choi Sum in the refrigerator in a plastic bag or container. It will keep for several days. Wash the leaves just before using them.
Can I grow Choi Sum in containers?
Yes, Choi Sum can be grown successfully in containers. Choose a container that is at least 6-8 inches deep and wide. Use a well-draining potting mix. Place the container in a sunny location and water regularly.
What are some ways to use Choi Sum in cooking?
Choi Sum can be used in a variety of dishes. It can be stir-fried, steamed, boiled, or added to soups and stews. It pairs well with garlic, ginger, soy sauce, and other Asian flavors. It can also be used in salads or as a side dish.
Is Choi Sum nutritious?
Yes, Choi Sum is a nutritious vegetable. It is a good source of vitamins A and C, as well as calcium, iron, and fiber. It is also low in calories and fat.
Can I save seeds from my Choi Sum plants?
Yes, you can save seeds from your Choi Sum plants, but it requires allowing the plants to bolt and produce seed pods. However, be aware that Choi Sum can cross-pollinate with other members of the Brassica family, so the seeds may not produce plants that are true to type. If you want to save seeds, isolate your Choi Sum plants from other Brassicas.
What if my Choi Sum bolts (goes to seed) prematurely?
Bolting can be caused by stress, such as high temperatures or lack of water. If your Choi Sum bolts, the leaves may become bitter. You can still harvest the leaves, but they may not be as palatable. To prevent bolting, plant Choi Sum at the right time of year, provide adequate water, and protect the plants from extreme heat.
Where can I find Choi Sum seeds?
Choi Sum seeds can be found at most garden centers or online seed retailers. Look for varieties that are well-suited to your local climate.

Leave a Comment