
Rooftop Asparagus Gardening: Imagine stepping onto your rooftop, not to escape the city bustle, but to harvest fresh, vibrant asparagus spears, ready for a delicious spring meal. Sounds like a dream, right? Well, it doesn’t have to be! For centuries, urban dwellers have sought ways to connect with nature, and what better way than cultivating your own food source high above the ground?
While rooftop gardens might seem like a modern trend, the concept dates back to ancient civilizations, from the Hanging Gardens of Babylon to the resourceful communities who utilized every available space for sustenance. Today, with increasing urbanization and a growing desire for sustainable living, rooftop gardening is experiencing a major resurgence. And asparagus, with its unique flavor and nutritional benefits, is a fantastic choice for your elevated green space.
But why rooftop asparagus gardening, specifically? Well, let’s face it, traditional gardens require space, time, and often, a green thumb that many of us feel we lack. This DIY guide is designed to break down the process, making it accessible even if you’re a complete beginner. I’ll show you how to create the perfect environment for your asparagus to thrive, from choosing the right containers and soil to providing the necessary support and care. Plus, I’ll share some clever hacks to maximize your yield and protect your precious crop from pests and diseases. Get ready to transform your rooftop into a flourishing oasis and enjoy the unparalleled satisfaction of harvesting your own homegrown asparagus!
Rooftop Asparagus Gardening: A DIY Guide to Growing Your Own Spears in the Sky!
Okay, let’s be honest, the idea of growing asparagus on your roof might sound a little crazy. But trust me, it’s totally doable and incredibly rewarding! Imagine stepping out onto your rooftop garden and harvesting fresh, delicious asparagus spears – it’s a foodie’s dream come true! This guide will walk you through everything you need to know to create your own rooftop asparagus patch.
Why Asparagus on a Rooftop?
Before we dive in, you might be wondering why even bother growing asparagus on your roof. Well, here are a few compelling reasons:
* Space Saving: If you’re like me and live in a city with limited yard space, your roof can become a valuable gardening real estate.
* Sunlight: Asparagus loves sunshine, and rooftops often get plenty of it.
* Unique and Rewarding: There’s something special about growing your own food, especially when it’s something as elegant as asparagus.
* Improved Drainage: Rooftop gardens, when properly constructed, often have excellent drainage, which asparagus appreciates.
Planning Your Rooftop Asparagus Garden
Before you start hauling soil and asparagus crowns up to your roof, careful planning is essential. This is the most important part, so don’t skip it!
* Assess Your Roof’s Load-Bearing Capacity: This is non-negotiable! You need to ensure your roof can handle the weight of the soil, containers, plants, and water. Consult a structural engineer or qualified contractor if you’re unsure. Safety first!
* Choose the Right Location: Asparagus needs at least 6-8 hours of direct sunlight per day. Pick the sunniest spot on your roof.
* Consider Drainage: Proper drainage is crucial to prevent waterlogging, which can kill asparagus. Ensure your containers have drainage holes and consider using a drainage layer at the bottom.
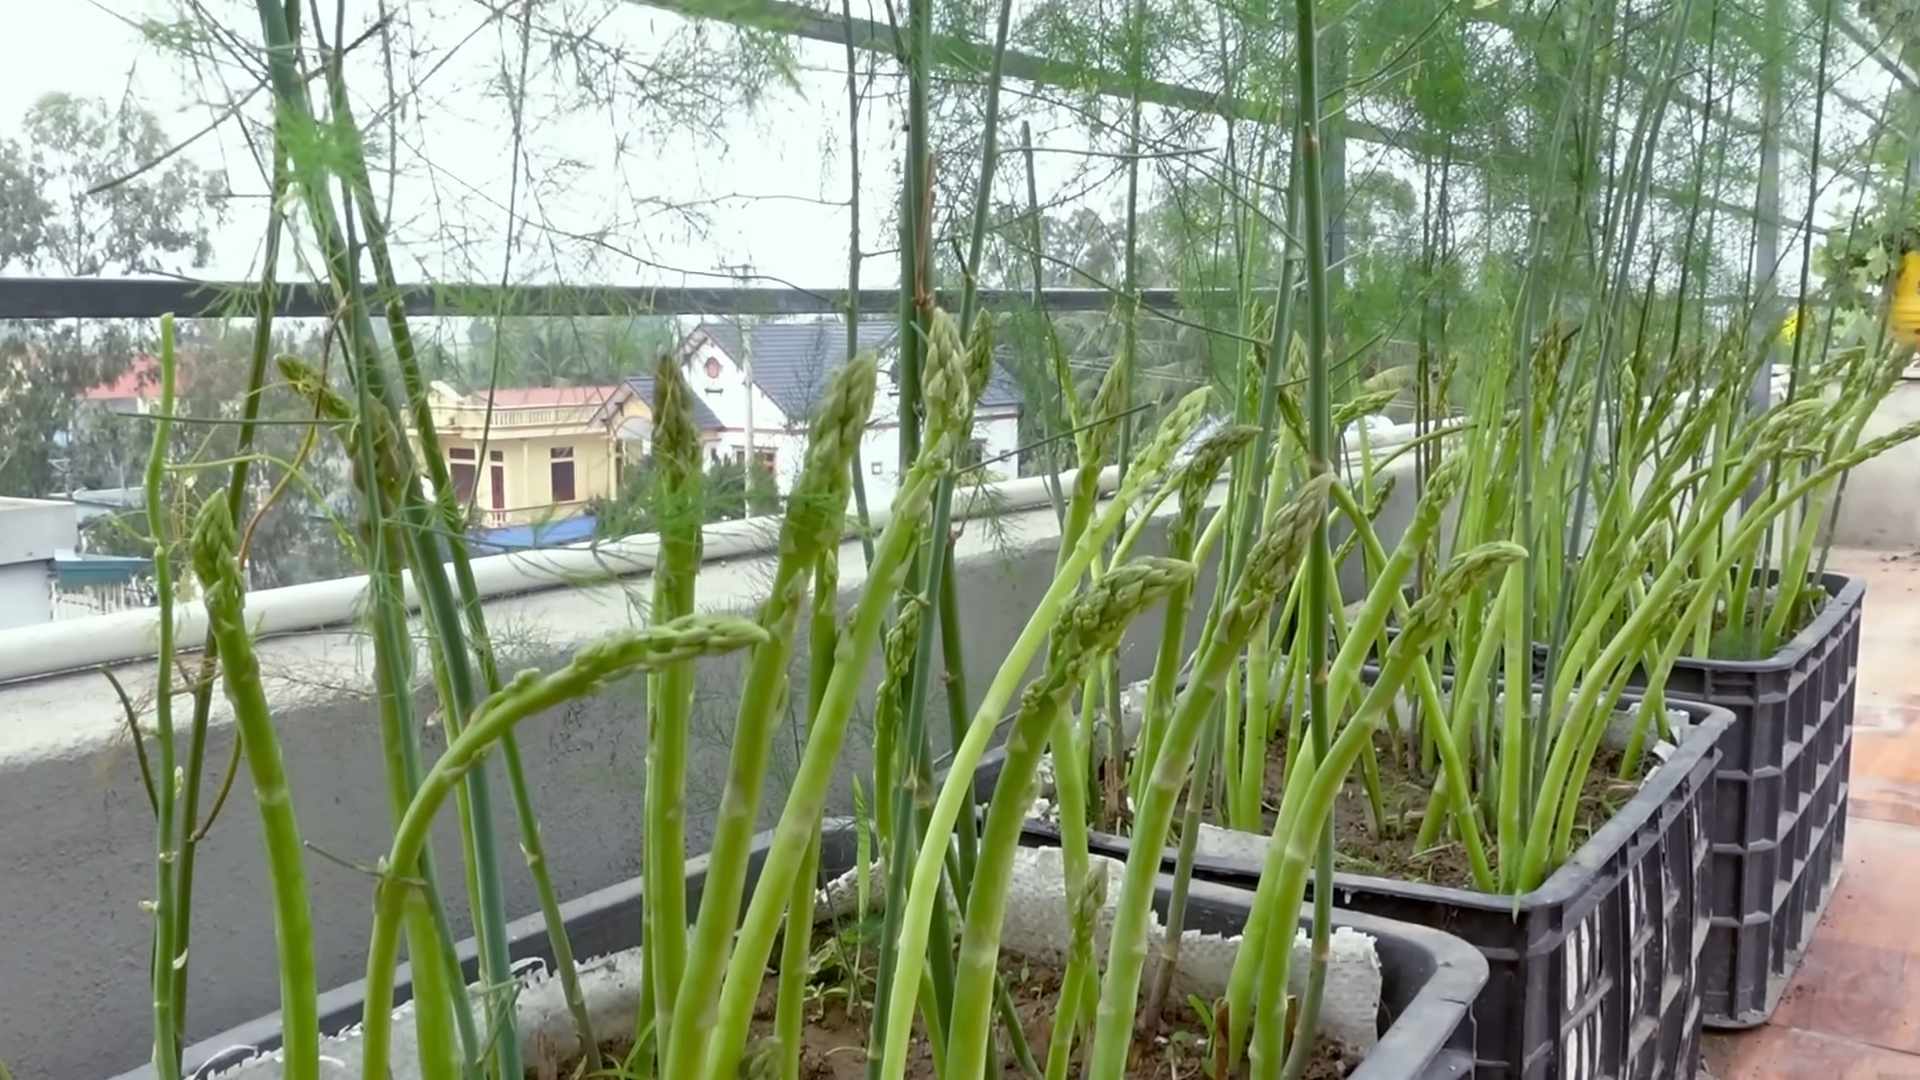
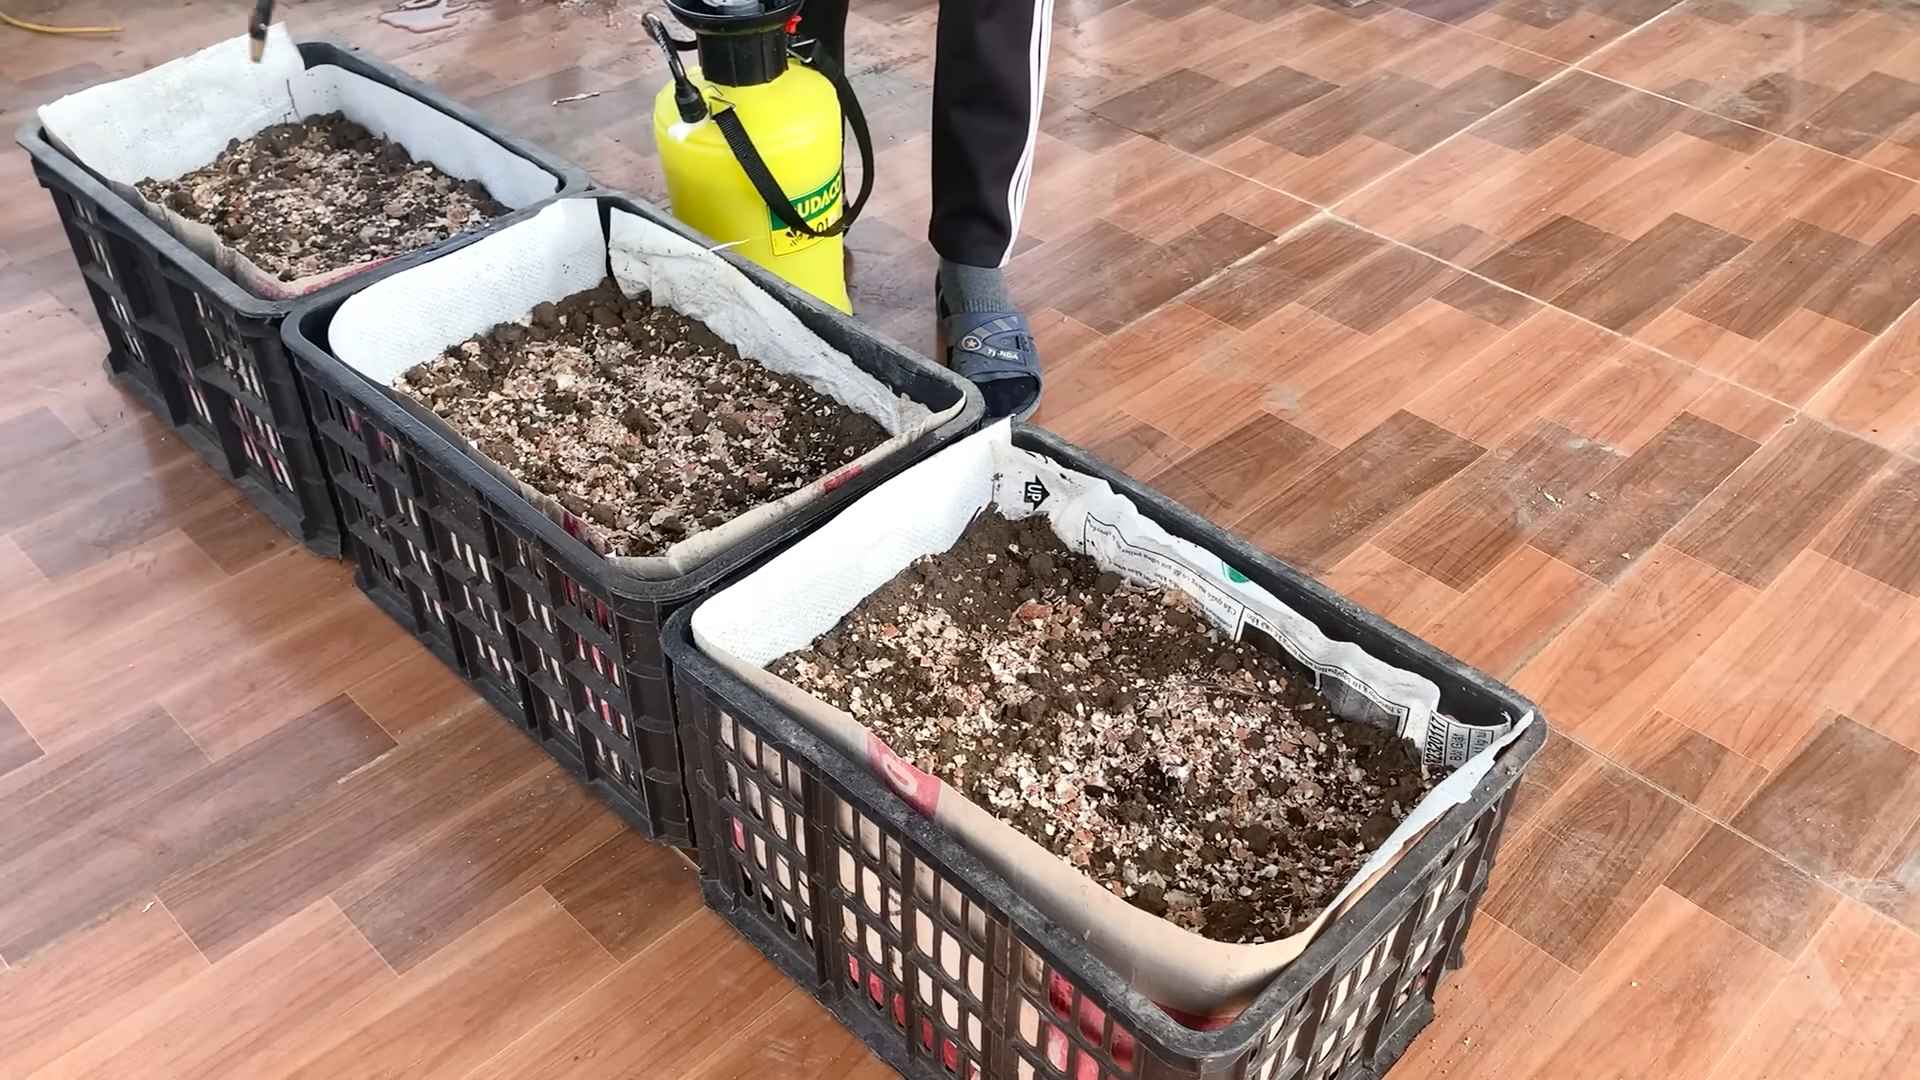
* Select the Right Containers: Asparagus needs deep containers to accommodate its extensive root system. I recommend containers that are at least 12 inches deep and wide, but bigger is always better. Think large planters, raised beds, or even repurposed containers like large plastic bins (with drainage holes, of course!).
* Choose Your Asparagus Variety: There are several asparagus varieties to choose from. ‘Jersey Knight’ and ‘Millennium’ are popular choices for their high yields and disease resistance. ‘Purple Passion’ is another option if you want something a little different.
* Gather Your Materials: You’ll need containers, high-quality potting mix (not garden soil!), asparagus crowns (one-year-old plants are best), fertilizer, mulch, and gardening tools.
Step-by-Step Instructions: Planting Your Asparagus Crowns
Now for the fun part! Let’s get those asparagus crowns in the ground (or, rather, in the containers on your roof).
1. Prepare Your Containers:
* Start by lining the bottom of your containers with a layer of landscape fabric to prevent soil from washing out through the drainage holes.
* Add a drainage layer of gravel or perlite to improve drainage. This is especially important for rooftop gardens.
* Fill the containers about halfway with your high-quality potting mix. Make sure it’s a well-draining mix, not heavy garden soil.
2. Soak the Asparagus Crowns:
* Before planting, soak the asparagus crowns in water for about an hour. This will help rehydrate them and give them a good start.
3. Create a Mound in the Container:
* In each container, create a small mound of soil in the center. This is where you’ll place the asparagus crown.
4. Position the Asparagus Crown:
* Carefully place the asparagus crown on top of the mound, spreading the roots out around it like a spider.
5. Cover the Crown with Soil:
* Gently cover the crown with about 2-3 inches of soil. Don’t bury it too deep!
6. Water Thoroughly:
* Water the newly planted asparagus crowns thoroughly until the water drains out of the bottom of the container.
7. Mulch the Surface:
* Apply a layer of mulch around the asparagus plants to help retain moisture, suppress weeds, and regulate soil temperature. Straw, wood chips, or shredded leaves work well.
8. Space Multiple Crowns:
* If you’re planting multiple asparagus crowns in the same container, space them at least 12 inches apart.
Caring for Your Rooftop Asparagus Garden
Once your asparagus is planted, it’s time to provide the care it needs to thrive.
* Watering: Asparagus needs consistent moisture, especially during the growing season. Water deeply whenever the top inch of soil feels dry. Avoid overwatering, as this can lead to root rot.
* Fertilizing: Asparagus is a heavy feeder, so regular fertilization is essential. Apply a balanced fertilizer (10-10-10) in the spring and again in mid-summer. You can also amend the soil with compost or aged manure.
* Weeding: Keep your asparagus patch free of weeds, as they can compete for nutrients and water. Hand-pull weeds carefully to avoid damaging the asparagus roots.
* Support: As the asparagus ferns grow taller, they may need support to prevent them from flopping over. You can use stakes, trellises, or cages to provide support.
* Pest and Disease Control: Asparagus is generally pest-resistant, but watch out for common pests like asparagus beetles and aphids. Treat infestations with insecticidal soap or neem oil. Prevent fungal diseases by ensuring good air circulation and avoiding overwatering.
Harvesting Your Rooftop Asparagus
Patience is key when it comes to harvesting asparagus. You shouldn’t harvest any spears during the first two years after planting. This allows the plants to establish a strong root system.
* Year 1 & 2: No Harvesting! Resist the urge to harvest any spears during the first two years. Let the ferns grow and mature to build up the plant’s energy reserves.
* Year 3: Light Harvesting. In the third year, you can begin harvesting spears for a short period (about 2-3 weeks) in the spring.
* Year 4 and Beyond: Full Harvesting. From the fourth year onward, you can harvest spears for a longer period (about 6-8 weeks) in the spring.
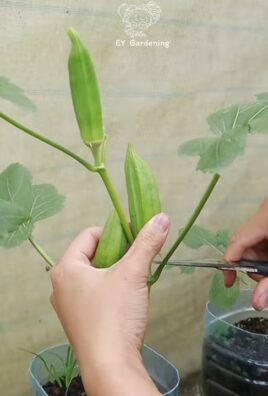
* Harvesting Technique: Harvest spears when they are about 6-8 inches tall and the tips are still tightly closed. Use a sharp knife to cut the spears at ground level.
* Stop Harvesting: Stop harvesting when the spears become thin and spindly. This indicates that the plant is starting to exhaust its energy reserves.
* Let the Ferns Grow: After harvesting, allow the ferns to grow and mature throughout the summer and fall. They will photosynthesize and store energy for the next year’s crop.
Preparing for Winter
Asparagus is a perennial plant, meaning it will come back year after year. To ensure its survival through the winter, take these steps:
* Cut Back the Ferns: In late fall or early winter, after the ferns have turned brown and died back, cut them back to ground level.
* Mulch Heavily: Apply a thick layer of mulch (straw, leaves, or compost) around the asparagus plants to protect the roots from freezing temperatures.
* Water Sparingly: Water the asparagus plants sparingly during the winter months, only when the soil is very dry.
Troubleshooting
Even with the best planning and care, you might encounter some challenges along the way. Here are a few common problems and how to address them:
* Yellowing Ferns: This could be a sign of overwatering, nutrient deficiency, or disease. Check the soil moisture, fertilize if necessary, and treat any diseases promptly.
* Thin Spears: This could be due to over-harvesting, nutrient deficiency, or lack of sunlight. Stop harvesting, fertilize, and ensure the plants are getting enough sunlight.
* Asparagus Beetles: These pests can damage the ferns and spears. Hand-pick them off the plants or treat with insecticidal soap or neem oil.
* Root Rot: This is caused by overwatering and poor drainage. Improve drainage and avoid overwatering.
Enjoying Your Rooftop Asparagus Harvest
Congratulations! You’ve successfully grown asparagus on your rooftop! Now it’s time to enjoy the fruits (or rather, spears) of your labor. Freshly harvested asparagus is incredibly delicious and versatile. You can steam it, grill it, roast it, or add it to salads, soups, and omelets.
Growing asparagus on your roof is a rewarding experience that allows you to enjoy fresh, homegrown produce in even the most urban environments. With
Conclusion
So, there you have it! Rooftop asparagus gardening, while seemingly ambitious, is entirely achievable with a little planning and dedication. We’ve walked you through the key steps, from selecting the right containers and soil to nurturing your asparagus crowns and harvesting those delicious spears. But why should you even bother with this DIY project?
The answer is simple: fresh, flavorful asparagus right at your fingertips, grown with your own two hands. Imagine stepping out onto your rooftop garden, snipping off a handful of vibrant green spears, and transforming them into a delectable side dish or a star ingredient in your favorite recipe. The taste difference between store-bought and homegrown asparagus is truly remarkable. The homegrown variety boasts a sweetness and tenderness that you just can’t find in commercially grown produce, which often travels long distances and loses its peak flavor.
Beyond the superior taste, rooftop asparagus gardening offers a unique connection to your food. You’ll witness the entire life cycle of the plant, from the emergence of the first shoots to the feathery foliage that graces your rooftop throughout the growing season. This hands-on experience is incredibly rewarding and provides a deeper appreciation for the food we consume. Plus, you’ll be contributing to a more sustainable lifestyle by reducing your reliance on commercially grown produce and minimizing your carbon footprint.
But the benefits don’t stop there. Rooftop gardens, in general, offer a myriad of environmental advantages. They help to insulate your building, reducing energy consumption for heating and cooling. They absorb rainwater, mitigating stormwater runoff and reducing the strain on municipal drainage systems. And they provide a habitat for beneficial insects and pollinators, contributing to a healthier urban ecosystem.
Now, let’s talk about variations. While we’ve focused on container gardening, you could also explore raised beds on your rooftop, provided your roof structure can support the added weight. Consider companion planting to further enhance your asparagus garden. Herbs like basil, parsley, and thyme can deter pests and attract beneficial insects. Marigolds are also excellent companions, as they repel nematodes, which can damage asparagus roots.
For those with limited rooftop space, consider growing dwarf varieties of asparagus, which are specifically bred for container gardening. These varieties tend to be more compact and require less space to thrive. You can also experiment with different soil mixes to find the perfect blend for your asparagus. Some gardeners prefer a slightly acidic soil, while others find that a neutral pH works best.
Don’t be afraid to experiment and adapt the techniques we’ve discussed to suit your specific rooftop environment and personal preferences. The key is to provide your asparagus with plenty of sunlight, well-draining soil, and consistent moisture.
So, what are you waiting for? Embrace the challenge and embark on your own rooftop asparagus gardening adventure. We’re confident that you’ll be amazed by the results. And once you’ve harvested your first crop of homegrown asparagus, be sure to share your experience with us! We’d love to hear about your successes, your challenges, and any tips or tricks you’ve discovered along the way. Share your photos and stories on social media using #RooftopAsparagus and let’s inspire others to transform their rooftops into thriving edible gardens. Happy gardening!
Frequently Asked Questions (FAQ)
What type of containers are best for rooftop asparagus gardening?
The ideal containers for rooftop asparagus gardening are large, durable, and well-draining. Asparagus roots can grow quite deep, so opt for containers that are at least 24 inches deep and 18 inches wide. This will provide ample space for the roots to spread and develop. Materials like plastic, wood, or terracotta are all suitable, but ensure that the containers are sturdy enough to withstand the weight of the soil and plants, especially when wet. Consider the overall weight when choosing your containers, as rooftop weight limits can be a concern. Dark-colored containers can absorb more heat, which can be beneficial in cooler climates, but may require more frequent watering in hotter regions. Make sure your chosen containers have adequate drainage holes to prevent waterlogging, which can lead to root rot.
How do I prepare the soil for my rooftop asparagus garden?
Asparagus thrives in well-draining, fertile soil. A good soil mix for rooftop asparagus gardening should consist of equal parts of high-quality potting soil, compost, and perlite or vermiculite. The potting soil provides a base for the plants to grow, while the compost adds essential nutrients and improves soil structure. Perlite or vermiculite enhances drainage and aeration, preventing the soil from becoming compacted. Before planting, amend the soil with a slow-release fertilizer specifically formulated for vegetables. This will provide a steady supply of nutrients to the asparagus plants throughout the growing season. Avoid using garden soil in containers, as it tends to be too heavy and doesn’t drain well. Regularly test the soil pH to ensure it’s within the optimal range of 6.5 to 7.5. If the soil is too acidic, add lime to raise the pH. If it’s too alkaline, add sulfur to lower the pH.
How much sunlight does asparagus need when grown on a rooftop?
Asparagus requires at least 6-8 hours of direct sunlight per day to thrive. When planning your rooftop asparagus garden, choose a location that receives ample sunlight throughout the day. Southern-facing rooftops are typically the sunniest, but eastern or western exposures can also work if they receive sufficient sunlight. If your rooftop is partially shaded, consider using reflective materials, such as white paint or aluminum foil, to bounce sunlight onto the asparagus plants. Monitor the plants closely and adjust their position as needed to ensure they are receiving enough sunlight. Insufficient sunlight can lead to weak growth, reduced yields, and increased susceptibility to pests and diseases.
How often should I water my rooftop asparagus plants?
Watering frequency depends on several factors, including the weather, the type of container, and the soil mix. Generally, asparagus plants need to be watered deeply whenever the top inch of soil feels dry to the touch. During hot, dry weather, you may need to water daily, while during cooler, wetter periods, you may only need to water every few days. Avoid overwatering, as this can lead to root rot. Ensure that the containers have adequate drainage holes to prevent water from accumulating at the bottom. Use a watering can or a hose with a gentle spray nozzle to avoid damaging the delicate asparagus ferns. Mulching around the base of the plants can help to retain moisture and reduce the need for frequent watering.
When can I start harvesting asparagus from my rooftop garden?
Patience is key when it comes to harvesting asparagus. It’s crucial to allow the plants to establish themselves for at least two to three years before harvesting any spears. This allows the roots to develop a strong foundation, ensuring a healthy and productive plant for years to come. In the first year, focus on providing the plants with proper care, including watering, fertilizing, and weeding. In the second year, you can harvest a few spears for a short period, typically for about two weeks. In the third year and beyond, you can harvest more extensively, for about six to eight weeks. Harvest spears when they are about 6-8 inches tall and about as thick as your finger. Cut the spears at ground level with a sharp knife.
How do I care for my asparagus plants after the harvesting season?
After the harvesting season, allow the asparagus ferns to grow and mature. These ferns are essential for replenishing the plant’s energy reserves for the following year. Continue to water and fertilize the plants throughout the summer and fall. In late fall or early winter, after the ferns have turned yellow or brown, cut them back to about 2 inches above the ground. This will help to prevent diseases and pests from overwintering in the garden. Apply a layer of compost or well-rotted manure around the base of the plants to provide additional nutrients and protect the roots from freezing temperatures. In colder climates, you may need to provide additional winter protection, such as covering the plants with a layer of straw or burlap.
What are some common pests and diseases that affect rooftop asparagus gardens, and how can I prevent them?
Asparagus beetles are a common pest that can damage asparagus ferns and spears. Handpicking the beetles and their larvae is an effective way to control small infestations. You can also use insecticidal soap or neem oil to treat larger infestations. Asparagus rust is a fungal disease that can cause orange or reddish-brown spots on the ferns. To prevent asparagus rust, ensure good air circulation around the plants and avoid overhead watering. Remove and destroy any infected ferns. Crown rot is another fungal disease that can cause the roots and crown of the asparagus plant to rot. To prevent crown rot, ensure that the soil is well-draining and avoid overwatering. Choose disease-resistant varieties of asparagus whenever possible. Regularly inspect your plants for signs of pests and diseases and take action promptly to prevent them from spreading.
Can I grow asparagus from seed on my rooftop?
While it’s possible to grow asparagus from seed, it’s a much slower process than starting with crowns. Asparagus seeds can take several weeks to germinate, and it can take up to three years for the plants to mature enough to produce spears. If you choose to grow asparagus from seed, start the seeds indoors in early spring, about 8-10 weeks before the last expected frost. Sow the seeds in individual pots filled with a well-draining potting mix. Keep the soil moist and warm, and provide plenty of light. Once the seedlings have developed several sets
Leave a Comment