
Home cleaning pro tips can feel like a closely guarded secret, passed down through generations. But guess what? I’m here to spill the beans! For centuries, keeping a tidy home has been more than just aesthetics; it’s been linked to health, well-being, and even social standing. Think about it – from ancient Roman bathhouses to meticulously kept Japanese homes, cleanliness has always been valued.
But let’s be honest, in today’s busy world, who has time to spend hours scrubbing and polishing? That’s where these DIY cleaning hacks come in. I’m going to share some of my favorite, tried-and-true methods that will save you time, money, and a whole lot of elbow grease.
Are you tired of spending your weekends battling dust bunnies and stubborn stains? Do you dream of a sparkling clean home without resorting to harsh chemicals? Then you’re in the right place! These home cleaning pro tips are designed to make your life easier and your home a haven. Get ready to transform your cleaning routine and reclaim your precious free time!
DIY Home Cleaning Hacks: Sparkling Clean on a Budget
Okay, let’s be honest, cleaning isn’t exactly anyone’s favorite pastime. But a clean home is a happy home, right? And it doesn’t have to break the bank or involve harsh chemicals. I’m going to share some of my favorite DIY cleaning hacks that will leave your place sparkling and smelling fresh, all while saving you money and being kinder to the environment.
Cleaning with Vinegar: Your All-Purpose Powerhouse
Vinegar is a cleaning superhero! It’s acidic, which makes it great for cutting through grease, dissolving mineral deposits, and killing bacteria. Plus, it’s super cheap and readily available.
Making Vinegar Cleaning Solution
* What you’ll need: White distilled vinegar, water, a spray bottle, and essential oils (optional, for scent).
* Why this works: The vinegar’s acidity breaks down grime, while the water dilutes it for safe use on most surfaces. Essential oils add a pleasant fragrance.
Step-by-step instructions:
1. Grab your spray bottle: Find an empty spray bottle. Make sure it’s clean!
2. Mix the solution: Combine equal parts white distilled vinegar and water in the spray bottle. For a stronger solution, you can use a higher concentration of vinegar, but always test it on an inconspicuous area first.
3. Add essential oils (optional): If you want to add a pleasant scent, add a few drops of your favorite essential oil. Lemon, lavender, and tea tree oil are all great choices for cleaning. I personally love lemon for its fresh, clean scent.
4. Shake it up: Give the bottle a good shake to mix everything together.
5. Label your bottle: This is important! You don’t want to accidentally mistake it for something else.
Using Vinegar to Clean Different Areas
* Kitchen: Countertops, sinks, appliances (inside and out), cutting boards.
* Bathroom: Showers, toilets, sinks, mirrors.
* Floors: Tile, linoleum, hardwood (use a diluted solution and test first).
* Windows: Streak-free shine!
Step-by-step instructions for each area:
1. Kitchen Countertops: Spray the vinegar solution onto the countertop and let it sit for a few minutes. Wipe clean with a damp cloth. For stubborn stains, let the solution sit for longer.
2. Kitchen Sinks: Spray the sink with the vinegar solution and scrub with a sponge. Rinse thoroughly with water. For extra cleaning power, sprinkle baking soda in the sink before spraying with vinegar. The fizzing action will help loosen grime.
3. Microwave: Heat a cup of vinegar and water in the microwave for a few minutes. The steam will loosen any stuck-on food. Then, simply wipe clean.
4. Cutting Boards: Sanitize your cutting boards by spraying them with vinegar and letting it sit for a few minutes. Rinse thoroughly with water.
5. Showers: Spray the shower walls and door with the vinegar solution and let it sit for a few minutes. Scrub with a sponge or brush. Rinse thoroughly with water. For tough soap scum, you may need to use a stronger solution or let it sit overnight.
6. Toilets: Pour a cup of vinegar into the toilet bowl and let it sit for at least 30 minutes, or even overnight. Scrub with a toilet brush and flush.
7. Mirrors: Spray the mirror with the vinegar solution and wipe clean with a microfiber cloth for a streak-free shine.
8. Floors: Mix a diluted vinegar solution (1/2 cup vinegar per gallon of water) and mop the floor. Be sure to test the solution on an inconspicuous area first, especially on hardwood floors.
9. Windows: Spray the windows with the vinegar solution and wipe clean with a microfiber cloth.
Baking Soda: Your Gentle Abrasive Cleaner
Baking soda is another cleaning staple. It’s a mild abrasive, which means it can gently scrub away dirt and grime without scratching surfaces. It’s also a natural deodorizer.
Making a Baking Soda Paste
* What you’ll need: Baking soda, water, a bowl, and a spoon.
* Why this works: The baking soda’s mild abrasiveness helps to scrub away dirt and grime, while the water creates a paste that’s easy to apply.
Step-by-step instructions:
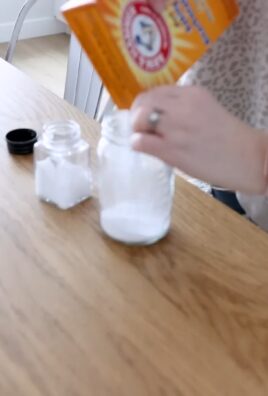
1. Combine baking soda and water: In a bowl, mix baking soda and water until you form a thick paste. The ratio is usually about 3 parts baking soda to 1 part water.
2. Adjust consistency: Add more water if the paste is too thick, or more baking soda if it’s too thin. You want it to be spreadable but not runny.
Using Baking Soda to Clean Different Areas
* Ovens: Remove baked-on grease and food.
* Sinks: Scrub away stains and deodorize.
* Bathtubs: Remove soap scum and grime.
* Stovetops: Clean burnt-on food.
Step-by-step instructions for each area:
1. Oven Cleaning: Make a baking soda paste and spread it all over the inside of your oven, avoiding the heating elements. Let it sit overnight. The next day, scrub the oven clean with a sponge and water. You may need to use a scraper for stubborn spots.
2. Sink Cleaning: Sprinkle baking soda in the sink and scrub with a sponge. Rinse thoroughly with water. For extra cleaning power, add a few drops of dish soap to the baking soda.
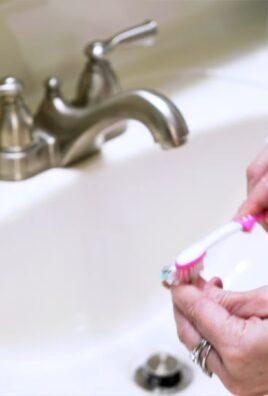
3. Bathtub Cleaning: Make a baking soda paste and spread it all over the bathtub. Let it sit for a few minutes, then scrub with a sponge. Rinse thoroughly with water.
4. Stovetop Cleaning: Sprinkle baking soda on the stovetop and add a little water to make a paste. Let it sit for a few minutes, then scrub with a sponge. Rinse thoroughly with water.
Lemon Juice: Your Natural Disinfectant and Deodorizer
Lemon juice is a natural disinfectant and deodorizer. It’s also great for removing stains and brightening surfaces.
Using Lemon Juice for Cleaning
* What you’ll need: Lemons, a knife, a cutting board, a spray bottle (optional).
* Why this works: The citric acid in lemon juice helps to kill bacteria, remove stains, and brighten surfaces.
Step-by-step instructions:
1. Cut the lemon: Cut the lemon in half.
2. Squeeze the juice: Squeeze the juice from the lemon into a bowl or directly onto the surface you want to clean.
3. Apply the juice: You can apply the juice directly to the surface or pour it into a spray bottle for easier application.
Using Lemon Juice to Clean Different Areas
* Cutting Boards: Sanitize and deodorize.
* Microwave: Remove odors and loosen food particles.
* Garbage Disposal: Freshen and clean.
* Brass and Copper: Polish and shine.
Step-by-step instructions for each area:
1. Cutting Board Cleaning: Rub a lemon half over the cutting board and let it sit for a few minutes. Rinse thoroughly with water.
2. Microwave Cleaning: Place a bowl of lemon juice and water in the microwave and heat for a few minutes. The steam will loosen any stuck-on food and the lemon juice will deodorize. Then, simply wipe clean.
3. Garbage Disposal Cleaning: Cut a lemon into wedges and drop them into the garbage disposal while running water. The lemon will help to freshen and clean the disposal.
4. Brass and Copper Polishing: Mix lemon juice with salt to make a paste. Rub the paste onto the brass or copper and let it sit for a few minutes. Rinse thoroughly with water and dry with a soft cloth.
DIY Cleaning Recipes for Specific Problems
Sometimes, you need a little extra oomph to tackle specific cleaning challenges. Here are a few of my go-to DIY cleaning recipes for those situations.
DIY Drain Cleaner
* What you’ll need: Baking soda, vinegar, hot water.
* Why this works: The baking soda and vinegar create a fizzing action that helps to break down clogs, while the hot water flushes everything away.
Step-by-step instructions:
1. Pour baking soda down the drain: Pour about 1/2 cup of baking soda down the drain.
2. Add vinegar: Follow with 1 cup of vinegar.
3. Let it fizz: Let the mixture fizz for about 30 minutes.
4. Flush with hot water: Pour a pot of boiling water down
Conclusion
So, there you have it! These home cleaning pro tips aren’t just about making your house sparkle; they’re about reclaiming your time, saving money, and creating a healthier, happier living space. We’ve covered everything from tackling stubborn stains with natural ingredients to organizing your cleaning routine for maximum efficiency.
The beauty of these DIY cleaning solutions lies in their simplicity and accessibility. You likely already have most of the ingredients you need sitting in your pantry or bathroom cabinet. Forget about shelling out big bucks for expensive, chemical-laden cleaners when you can achieve even better results with these homemade alternatives.
But the real magic happens when you start experimenting and adapting these tips to suit your specific needs and preferences. For instance, if you’re sensitive to strong smells, try using a milder essential oil like lavender or chamomile in your all-purpose cleaner. Or, if you have particularly hard water, you might need to increase the amount of vinegar you use in your cleaning solutions.
Don’t be afraid to get creative! Consider adding a few drops of tea tree oil to your bathroom cleaner for its antibacterial properties, or using lemon peels to freshen up your garbage disposal. The possibilities are endless!
Why is this a must-try? Because it empowers you to take control of your cleaning routine, reduce your exposure to harmful chemicals, and save a significant amount of money in the process. Plus, there’s a certain satisfaction that comes from knowing you’re creating a clean and healthy home using natural, sustainable ingredients.
We’ve shown you how to make your own effective cleaning solutions, but remember, consistency is key. Incorporate these home cleaning pro tips into your regular routine, and you’ll be amazed at how much easier it is to maintain a clean and organized home.
Ready to ditch the store-bought cleaners and embrace the power of DIY? We encourage you to try these tips and see the difference for yourself. Start with one or two of the solutions that resonate with you the most, and gradually incorporate more as you become more comfortable.
And most importantly, we want to hear about your experience! Share your successes, your challenges, and any variations you’ve discovered in the comments below. Let’s create a community of DIY cleaning enthusiasts who are passionate about creating healthy, happy homes. Your insights could help others discover new and effective ways to clean their homes naturally. So, go ahead, give these home cleaning pro tips a try and let us know what you think! We can’t wait to hear from you.
Frequently Asked Questions (FAQ)
Q: Are these DIY cleaning solutions as effective as store-bought cleaners?
A: In many cases, yes! Many store-bought cleaners rely on harsh chemicals that can be harmful to your health and the environment. These DIY solutions use natural ingredients like vinegar, baking soda, and lemon juice, which are surprisingly effective at cleaning, disinfecting, and deodorizing. The key is to use the right combination of ingredients for the specific cleaning task at hand. For example, vinegar is excellent for cutting through grease and grime, while baking soda is a gentle abrasive that can help remove stubborn stains. While some heavy-duty cleaning tasks might still require a commercial cleaner, these DIY options are perfect for everyday cleaning and maintenance.
Q: Are these DIY cleaning solutions safe for all surfaces?
A: While most of these DIY cleaning solutions are safe for a wide range of surfaces, it’s always a good idea to test them in an inconspicuous area first, especially on delicate or sensitive materials like marble, granite, or wood. For example, vinegar can be too acidic for some natural stone surfaces and can etch or dull the finish. Similarly, abrasive cleaners like baking soda should be used with caution on delicate surfaces to avoid scratching. Always read the label of any commercial cleaner you use and follow the manufacturer’s instructions. When in doubt, err on the side of caution and test the solution in a small, hidden area before applying it to the entire surface.
Q: How long do these DIY cleaning solutions last?
A: The shelf life of these DIY cleaning solutions depends on the ingredients used. Solutions containing water should be used within a week or two to prevent bacterial growth. Solutions made with vinegar, baking soda, or essential oils tend to last longer, typically for several months. To maximize the shelf life of your DIY cleaning solutions, store them in airtight containers in a cool, dark place. Label each container with the date it was made so you can keep track of how long it’s been stored. If you notice any changes in color, odor, or consistency, it’s best to discard the solution and make a fresh batch.
Q: Can I use essential oils in all of these DIY cleaning solutions?
A: Essential oils can be a great addition to DIY cleaning solutions, adding a pleasant scent and providing additional antibacterial or antifungal properties. However, it’s important to use essential oils safely and responsibly. Some essential oils can be irritating to the skin or respiratory system, so it’s always a good idea to dilute them properly and avoid direct contact. Also, be aware that some essential oils are not safe for use around pets or children. Do your research and choose essential oils that are appropriate for your needs and sensitivities. When in doubt, consult with a qualified aromatherapist or healthcare professional.
Q: What are some other variations I can try with these DIY cleaning solutions?
A: The possibilities are endless when it comes to customizing these DIY cleaning solutions! Here are a few ideas to get you started:
* **Citrus Infusion:** Infuse your vinegar with citrus peels (lemon, orange, grapefruit) for a more pleasant scent and added cleaning power. Simply place the peels in a jar, cover with vinegar, and let it steep for a few weeks before straining and using.
* **Herbal Power:** Add fresh or dried herbs like rosemary, thyme, or lavender to your cleaning solutions for their antibacterial and aromatic properties.
* **Castile Soap Boost:** Add a squirt of castile soap to your all-purpose cleaner for extra cleaning power and a gentle, natural scent.
* **Borax for Tough Stains:** For particularly stubborn stains, add a tablespoon of borax to your cleaning solution. Borax is a natural mineral that acts as a powerful cleaner and deodorizer.
* **Oxygen Bleach Alternative:** For whitening and stain removal, try using oxygen bleach (sodium percarbonate) instead of chlorine bleach. Oxygen bleach is a safer and more environmentally friendly alternative.
Remember to always test any new variations in an inconspicuous area before applying them to the entire surface.
Q: What if I don’t have all the ingredients listed in the recipes?
A: Don’t worry if you don’t have every single ingredient on hand. The beauty of these DIY cleaning solutions is that they are flexible and adaptable. You can often substitute ingredients or leave them out altogether without significantly affecting the effectiveness of the solution. For example, if you don’t have lemon juice, you can use vinegar instead. If you don’t have essential oils, you can simply leave them out or use a different scent. The key is to experiment and find what works best for you and your needs.
Q: How can I make my cleaning routine more sustainable?
A: There are many ways to make your cleaning routine more sustainable. Here are a few tips:
* **Use reusable cleaning cloths and sponges:** Ditch the disposable paper towels and sponges and opt for reusable alternatives made from microfiber or cotton.
* **Refill your cleaning bottles:** Instead of buying new bottles of cleaner every time you run out, refill your existing bottles with your homemade solutions.
* **Compost your food scraps:** Composting food scraps can reduce your waste and provide nutrient-rich soil for your garden.
* **Choose eco-friendly cleaning tools:** Look for cleaning tools made from sustainable materials like bamboo or recycled plastic.
* **Reduce your consumption:** The best way to reduce your environmental impact is to simply consume less. Before buying a new cleaning product, ask yourself if you really need it or if you can make a DIY alternative.
By making small changes to your cleaning routine, you can significantly reduce your environmental impact and create a healthier, more sustainable home.

Leave a Comment