
Indoor Carrot Growing: Who says you need a sprawling garden to enjoy the sweet, earthy taste of freshly harvested carrots? I’m here to tell you that bringing the joy of carrot cultivation indoors is not only possible, but surprisingly rewarding! Forget those bland, store-bought carrots – imagine plucking vibrant, homegrown beauties right from your windowsill.
For centuries, humans have cultivated carrots, tracing their origins back to wild varieties in Afghanistan. While traditionally an outdoor crop, the ingenuity of gardeners has paved the way for adapting this root vegetable to indoor environments. This DIY guide is your passport to unlocking the secrets of successful indoor carrot growing, regardless of your space or experience level.
Why should you embrace this indoor gardening adventure? Well, beyond the sheer satisfaction of nurturing your own food, indoor carrot growing offers a fantastic solution for those with limited outdoor space, challenging climates, or simply a desire to enjoy fresh produce year-round. Plus, it’s a fantastic way to introduce children to the wonders of gardening and healthy eating habits. So, let’s dive in and discover the simple yet effective tricks to master indoor carrot growing and transform your home into a miniature, edible oasis!
Growing Carrots Indoors: A Step-by-Step Guide to Fresh, Crunchy Goodness!
Okay, so you want to grow carrots indoors? Awesome! I’m here to tell you it’s totally doable, and honestly, super rewarding. Imagine having fresh, homegrown carrots right at your fingertips, no matter the weather outside. This guide will walk you through everything you need to know, from choosing the right carrots to harvesting your delicious bounty. Let’s get started!
Choosing the Right Carrot Variety
Not all carrots are created equal, especially when it comes to indoor growing. You’ll want to opt for shorter, rounder varieties that don’t require a ton of space. Think about it: long, skinny carrots need deep containers, which aren’t always practical indoors. Here are a few of my favorite varieties for indoor growing:
* ‘Thumbelina’: These are tiny, round carrots that are perfect for containers. They mature quickly and are super cute!
* ‘Paris Market’: Similar to Thumbelina, these are small and round, making them ideal for limited space.
* ‘Little Finger’: As the name suggests, these are small, finger-sized carrots that are sweet and tender.
* ‘Danvers Half Long’: While technically longer than the others, this variety is still manageable in a decent-sized container.
Gathering Your Supplies
Before we dive into the planting process, let’s make sure you have everything you need. Trust me, having all your supplies ready beforehand will make the whole experience much smoother. Here’s your checklist:
* Seeds: Choose your preferred carrot variety (from the list above, perhaps?). Make sure they are fresh for the best germination rate.
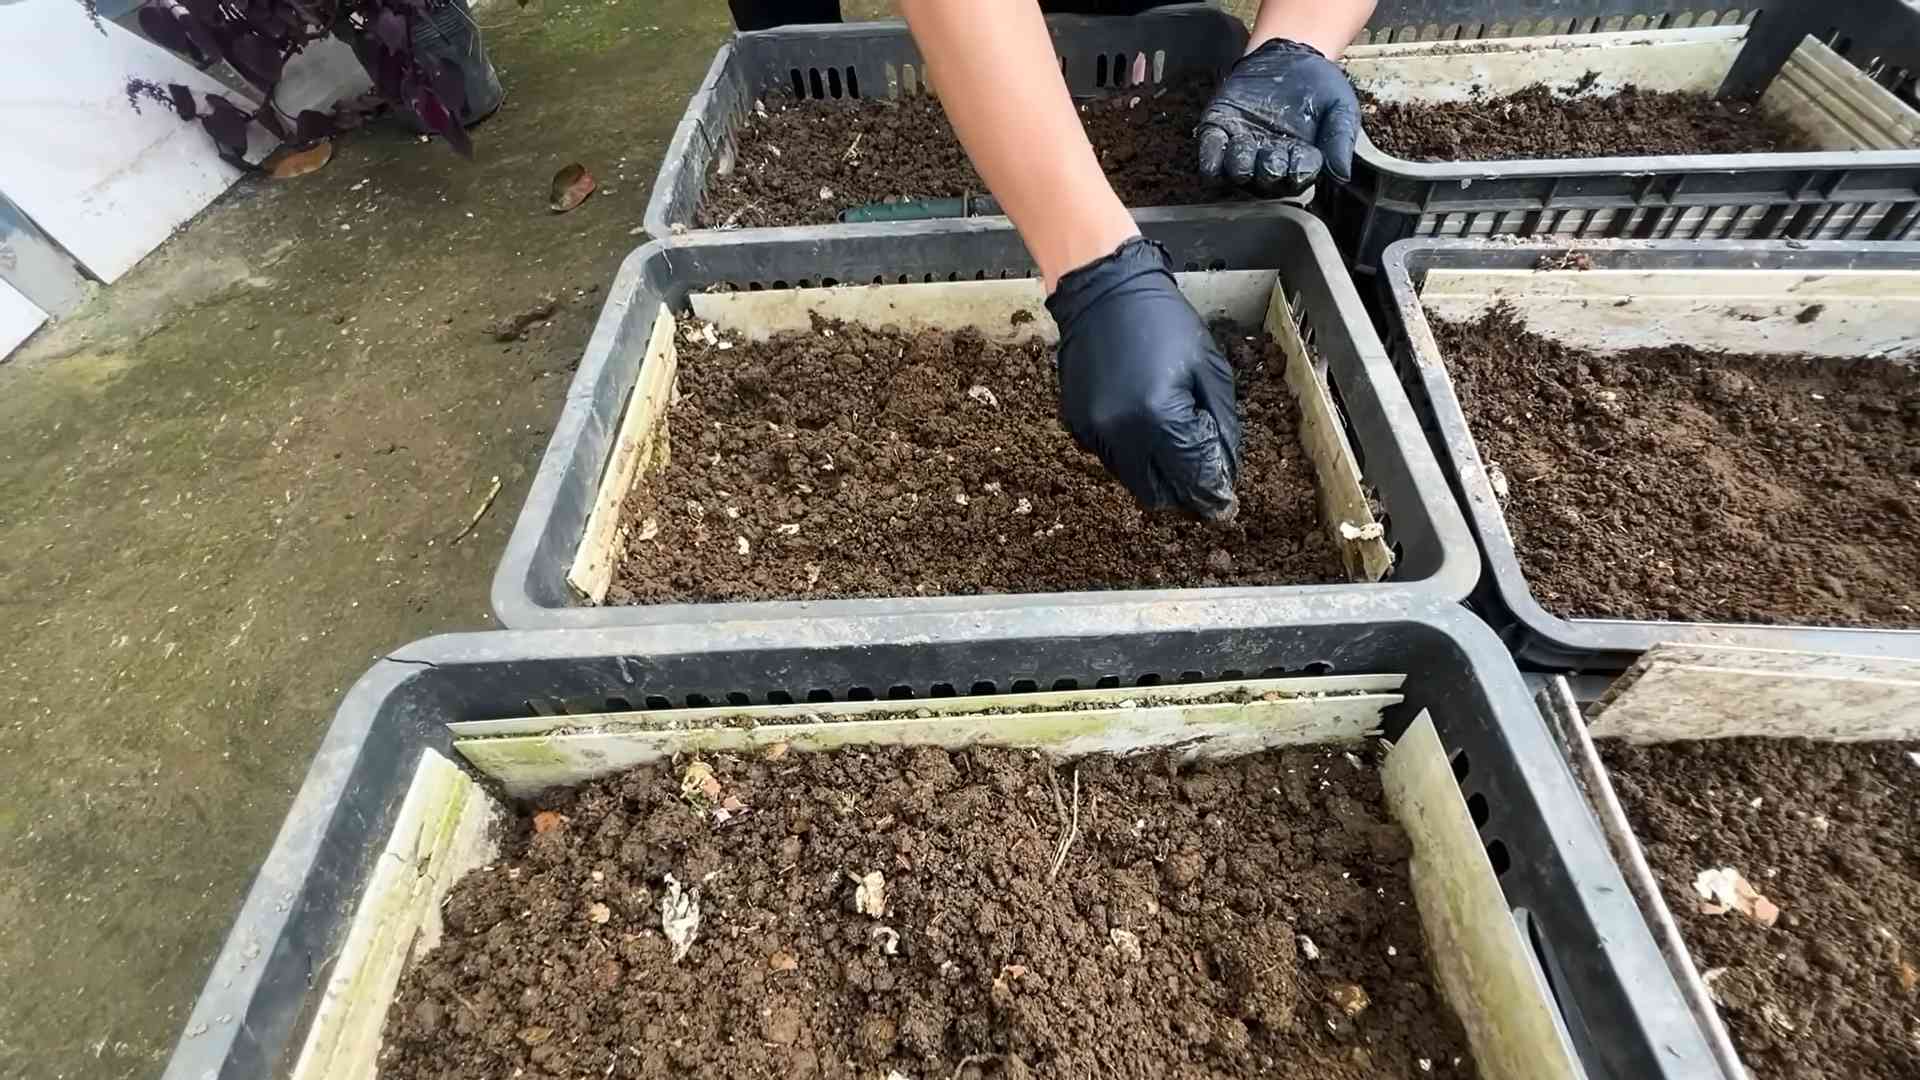
* Container: This is crucial! You’ll need a container that’s at least 12 inches deep and wide. Remember, carrots need room to grow downwards. A large pot, a raised bed kit, or even a repurposed storage bin will work. Just make sure it has drainage holes.
* Potting Mix: Don’t use garden soil! It’s too heavy and compacts easily, which isn’t ideal for carrot growth. Opt for a light, well-draining potting mix. I like to use a mix specifically formulated for vegetables.
* Watering Can or Spray Bottle: You’ll need a gentle way to water your carrots without disturbing the seeds or seedlings.
* Grow Lights (Optional but Recommended): If you don’t have a sunny spot, grow lights are essential for providing your carrots with the light they need to thrive.
* Fertilizer (Optional): A balanced, water-soluble fertilizer can help boost growth, but it’s not strictly necessary.
* Small Trowel or Spoon: For planting seeds.
* Marker and Labels: To label your carrot variety and planting date.
Planting Your Carrot Seeds
Alright, now for the fun part! Let’s get those carrot seeds in the soil.
1. Prepare Your Container: Fill your container with the potting mix, leaving about an inch of space at the top. Gently pat down the soil to create a level surface.
2. Sow the Seeds: Carrot seeds are tiny, so be careful not to plant them too close together. Sprinkle the seeds evenly over the surface of the soil. A good rule of thumb is to space them about ½ inch apart.
3. Cover the Seeds: Lightly cover the seeds with about ¼ inch of potting mix. You can use your fingers or a small trowel to do this.
4. Water Gently: Use a watering can or spray bottle to gently moisten the soil. Be careful not to wash away the seeds. The soil should be damp but not soggy.
5. Label Your Container: Use a marker and label to write the carrot variety and planting date on your container. This will help you keep track of your progress.
6. Provide Light: Place your container in a sunny spot that receives at least 6 hours of direct sunlight per day. If you don’t have enough natural light, use grow lights. Position the lights a few inches above the soil surface and keep them on for 12-16 hours per day.
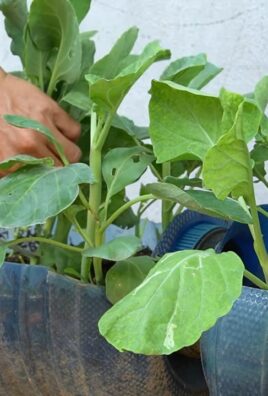
Caring for Your Indoor Carrots
Once your seeds are planted, it’s time to nurture them and watch them grow! Here’s what you need to do to keep your carrots happy and healthy:
1. Watering: Keep the soil consistently moist, but not waterlogged. Water when the top inch of soil feels dry to the touch. Avoid overwatering, as this can lead to root rot.
2. Thinning: Once your seedlings emerge (usually within 1-3 weeks), you’ll need to thin them out. This means removing some of the seedlings to give the remaining ones enough space to grow. Thin the seedlings so that they are about 1-2 inches apart. Use small scissors to snip the unwanted seedlings at the soil line. Don’t pull them out, as this can disturb the roots of the remaining seedlings.
3. Fertilizing (Optional): If you want to give your carrots a boost, you can fertilize them every 2-3 weeks with a balanced, water-soluble fertilizer. Follow the instructions on the fertilizer package.
4. Rotating: If you’re using grow lights, rotate your container regularly to ensure that all sides of the plants receive equal light. This will help prevent them from leaning towards the light source.
5. Weeding: Keep an eye out for weeds and remove them promptly. Weeds can compete with your carrots for nutrients and water.
6. Pest Control: Indoor carrots are generally less susceptible to pests than outdoor carrots, but it’s still a good idea to be vigilant. Check your plants regularly for signs of pests, such as aphids or spider mites. If you find any pests, you can try spraying them with insecticidal soap or neem oil.
Harvesting Your Carrots
Okay, so you want to grow carrots indoors? Awesome! I’m here to tell you it’s totally doable, and honestly, super rewarding. Imagine having fresh, homegrown carrots right at your fingertips, no matter the weather outside. This guide will walk you through everything you need to know, from choosing the right carrots to harvesting your delicious bounty. Let’s get started!
Choosing the Right Carrot Variety
Not all carrots are created equal, especially when it comes to indoor growing. You’ll want to opt for shorter, rounder varieties that don’t require a ton of space. Think about it: long, skinny carrots need deep containers, which aren’t always practical indoors. Here are a few of my favorite varieties for indoor growing:
* ‘Thumbelina’: These are tiny, round carrots that are perfect for containers. They mature quickly and are super cute!
* ‘Paris Market’: Similar to Thumbelina, these are small and round, making them ideal for limited space.
* ‘Little Finger’: As the name suggests, these are small, finger-sized carrots that are sweet and tender.
* ‘Danvers Half Long’: While technically longer than the others, this variety is still manageable in a decent-sized container.
Gathering Your Supplies
Before we dive into the planting process, let’s make sure you have everything you need. Trust me, having all your supplies ready beforehand will make the whole experience much smoother. Here’s your checklist:
* Seeds: Choose your preferred carrot variety (from the list above, perhaps?). Make sure they are fresh for the best germination rate.
* Container: This is crucial! You’ll need a container that’s at least 12 inches deep and wide. Remember, carrots need room to grow downwards. A large pot, a raised bed kit, or even a repurposed storage bin will work. Just make sure it has drainage holes.
* Potting Mix: Don’t use garden soil! It’s too heavy and compacts easily, which isn’t ideal for carrot growth. Opt for a light, well-draining potting mix. I like to use a mix specifically formulated for vegetables.
* Watering Can or Spray Bottle: You’ll need a gentle way to water your carrots without disturbing the seeds or seedlings.
* Grow Lights (Optional but Recommended): If you don’t have a sunny spot, grow lights are essential for providing your carrots with the light they need to thrive.
* Fertilizer (Optional): A balanced, water-soluble fertilizer can help boost growth, but it’s not strictly necessary.
* Small Trowel or Spoon: For planting seeds.
* Marker and Labels: To label your carrot variety and planting date.
Planting Your Carrot Seeds
Alright, now for the fun part! Let’s get those carrot seeds in the soil.
1. Prepare Your Container: Fill your container with the potting mix, leaving about an inch of space at the top. Gently pat down the soil to create a level surface.
2. Sow the Seeds: Carrot seeds are tiny, so be careful not to plant them too close together. Sprinkle the seeds evenly over the surface of the soil. A good rule of thumb is to space them about ½ inch apart.
3. Cover the Seeds: Lightly cover the seeds with about ¼ inch of potting mix. You can use your fingers or a small trowel to do this.
4. Water Gently: Use a watering can or spray bottle to gently moisten the soil. Be careful not to wash away the seeds. The soil should be damp but not soggy.
5. Label Your Container: Use a marker and label to write the carrot variety and planting date on your container. This will help you keep track of your progress.
6. Provide Light: Place your container in a sunny spot that receives at least 6 hours of direct sunlight per day. If you don’t have enough natural light, use grow lights. Position the lights a few inches above the soil surface and keep them on for 12-16 hours per day.
Caring for Your Indoor Carrots
Once your seeds are planted, it’s time to nurture them and watch them grow! Here’s what you need to do to keep your carrots happy and healthy:
1. Watering: Keep the soil consistently moist, but not waterlogged. Water when the top inch of soil feels dry to the touch. Avoid overwatering, as this can lead to root rot.
2. Thinning: Once your seedlings emerge (usually within 1-3 weeks), you’ll need to thin them out. This means removing some of the seedlings to give the remaining ones enough space to grow. Thin the seedlings so that they are about 1-2 inches apart. Use small scissors to snip the unwanted seedlings at the soil line. Don’t pull them out, as this can disturb the roots of the remaining seedlings.
3. Fertilizing (Optional): If you want to give your carrots a boost, you can fertilize them every 2-3 weeks with a balanced, water-soluble fertilizer. Follow the instructions on the fertilizer package.
4. Rotating: If you’re using grow lights, rotate your container regularly to ensure that all sides of the plants receive equal light. This will help prevent them from leaning towards the light source.
5. Weeding: Keep an eye out for weeds and remove them promptly. Weeds can compete with your carrots for nutrients and water.
6. Pest Control: Indoor carrots are generally less susceptible to pests than outdoor carrots, but it’s still a good idea to be vigilant. Check your plants regularly for signs of pests, such as aphids or spider mites. If you find any pests, you can try spraying them with insecticidal soap or neem oil.
Harvesting Your Carrots
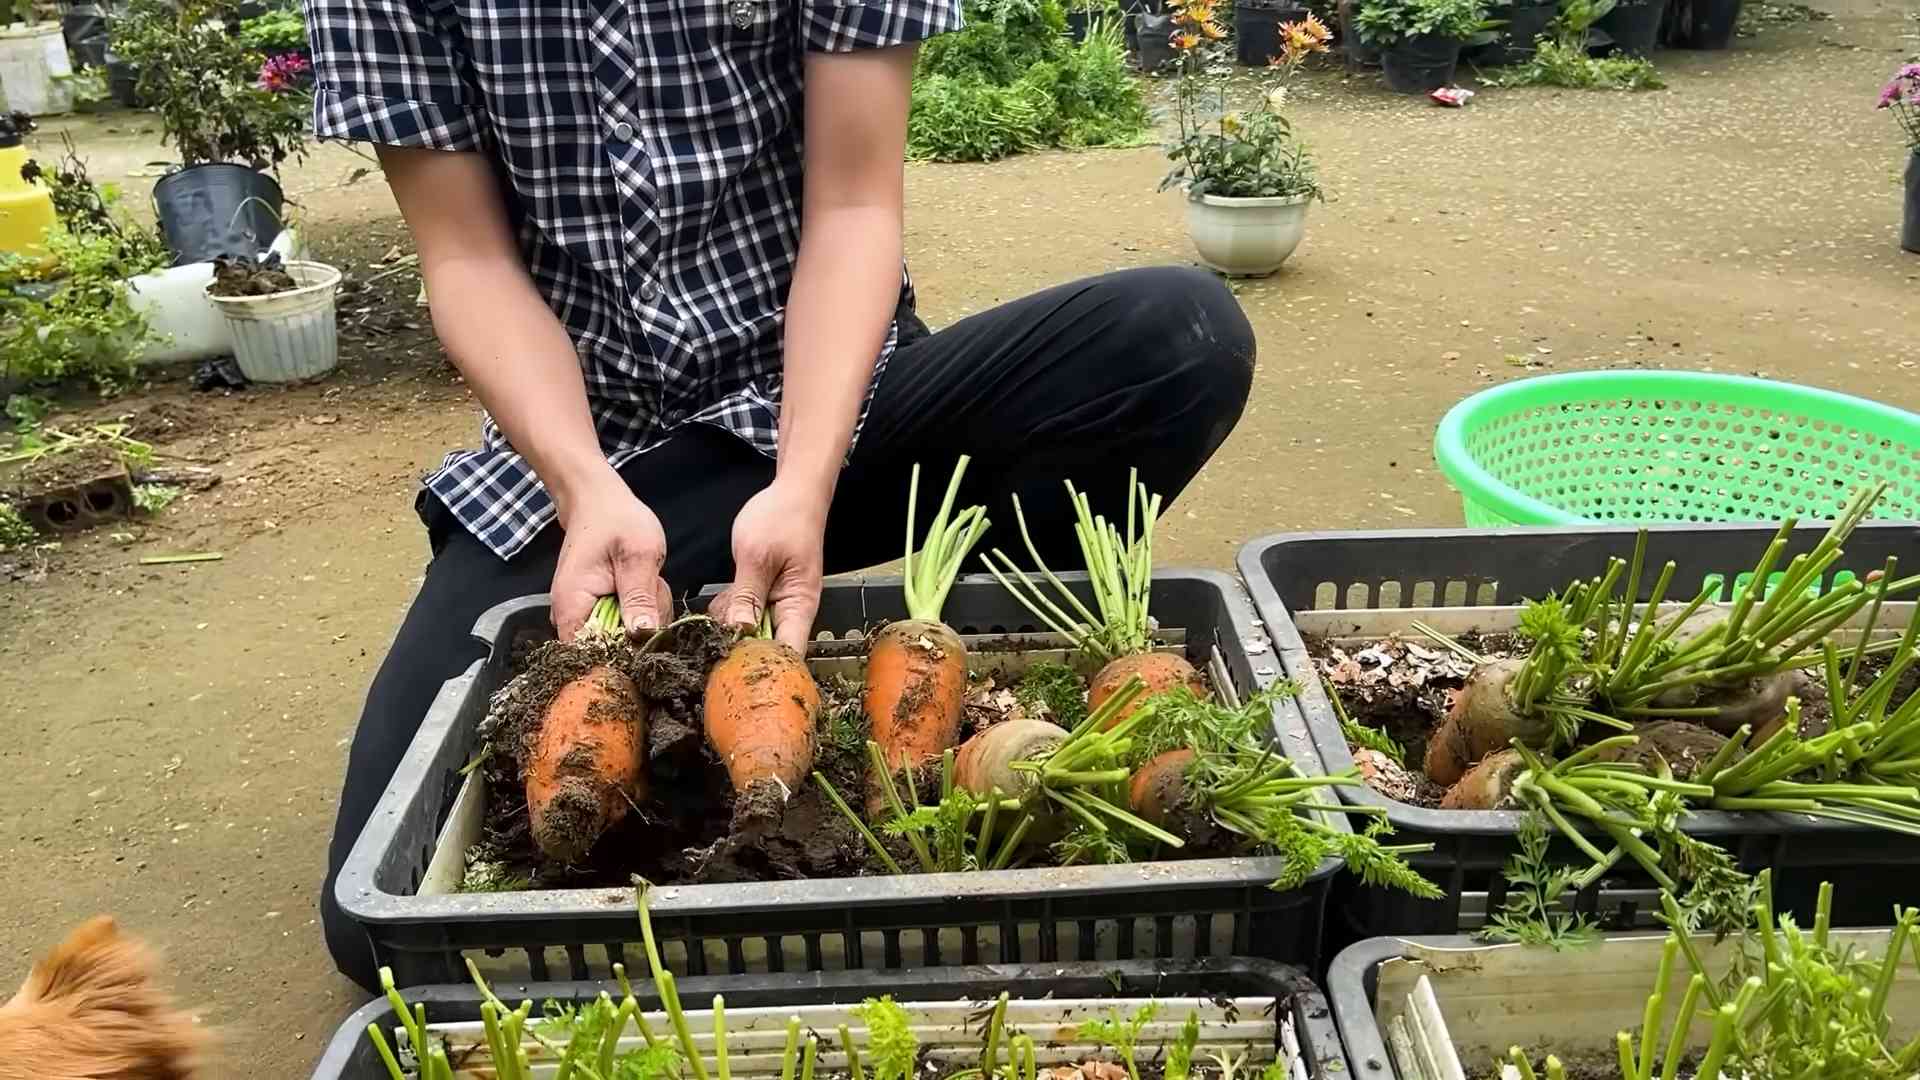
The moment you’ve been waiting for! Harvesting your homegrown carrots is incredibly satisfying.
1. Check for Maturity: Carrots are typically ready to harvest when they reach the size specified on the seed packet. However, you can also harvest them earlier if you prefer smaller, baby carrots.
2. Loosen the Soil: Before you try to pull out your carrots, loosen the soil around them with a trowel or fork. This will make it easier to remove them without breaking them.
3. Gently Pull: Grasp the carrot greens near the base and gently pull upwards. If the carrot is stuck, wiggle it back and forth until it comes loose.
4. Wash and Enjoy: Wash your freshly harvested carrots thoroughly to remove any dirt. Then, enjoy them raw, cooked, or however you like!
Troubleshooting Common Problems
Even with the best care, you might encounter a few challenges along the way. Here are some common problems and how to fix them:
* Poor Germination: If your seeds aren’t germinating, it could be due to several factors: old seeds, dry soil, or cold temperatures. Make sure your seeds are fresh, keep the soil consistently moist, and provide adequate warmth.
* Leggy Seedlings: If your seedlings are tall and spindly, they’re not getting enough light. Move them to a sunnier spot or use grow lights.
* Slow Growth: Slow growth can be caused by a lack of nutrients, poor soil, or insufficient light. Fertilize your carrots regularly, use a well-draining potting mix, and provide adequate light.
* Forked Roots: Forked roots are often caused by rocks or other obstructions in the soil. Make sure your potting mix is free of debris.
* Root Rot: Root rot is caused by overwatering. Allow the soil to dry out slightly between waterings.
Extra Tips for Success
Here are a few extra tips to help you grow the best indoor carrots possible:
* Choose the Right Container: I can’t stress this enough! The right container is essential for success. Make sure it’s deep enough and has good drainage.
* Use High-Quality Potting Mix: Don’t skimp on the potting mix. A good-quality mix will provide your carrots with the nutrients they need to thrive.
* Provide Adequate Light: Carrots need plenty of light to grow. If you don’t have a sunny spot, invest in grow lights.
* Don’t Overwater: Overwatering is a common mistake that can lead to root rot. Water only when the top inch of soil feels dry.
* Thin Your Seedlings: Thinning is crucial for giving your carrots enough space to grow.
* Be Patient: Carrots take time to mature. Don’t get discouraged if you don’t see results right away. Just keep providing them with the care they need, and you’ll be rewarded with delicious, homegrown carrots.
Growing carrots indoors is a fun and rewarding experience. With a little bit of planning and care, you can
Conclusion
So, there you have it! Growing your own carrots indoors is not only possible, but it’s also incredibly rewarding. Forget relying solely on grocery store produce, especially when you crave that fresh, earthy sweetness only a homegrown carrot can deliver. This DIY trick for indoor carrot growing offers a fantastic way to enjoy fresh vegetables year-round, regardless of your outdoor climate or available garden space.
Why is this a must-try? Because it puts you in control. You dictate the growing conditions, ensuring your carrots are free from unwanted pesticides and herbicides. Plus, there’s an undeniable satisfaction in nurturing a tiny seed into a vibrant, edible root. Imagine the pride you’ll feel serving a salad featuring carrots you grew yourself!
But the fun doesn’t stop there. Feel free to experiment with different carrot varieties. Nantes carrots, with their cylindrical shape, are particularly well-suited for container gardening. Consider trying round carrots like ‘Parisian’ for a unique twist. You can also play around with the soil mix. While the recommended blend works wonders, adding a touch of compost or worm castings can further enrich the soil and boost growth.
Another variation to consider is companion planting. While space might be limited in a container, you could try planting radishes alongside your carrots. Radishes germinate quickly and help break up the soil, making it easier for the carrots to grow. Plus, you get two crops from one container! Just be sure to harvest the radishes before they overcrowd the carrots.
Don’t be afraid to get creative with your container choices, too. While a standard pot works perfectly well, you could repurpose old buckets, storage bins, or even grow bags. Just ensure the container is deep enough to accommodate the carrot roots and has adequate drainage.
We understand that embarking on a new gardening adventure can be a little daunting, but trust us, the process is simpler than you might think. The key is to provide the right conditions: well-draining soil, consistent moisture, and plenty of sunlight (or a good grow light).
We are confident that with a little patience and care, you’ll be harvesting delicious, homegrown carrots in no time. So, grab your seeds, prepare your soil, and get ready to experience the joy of indoor carrot growing.
We’re eager to hear about your experiences! Share your tips, tricks, and photos in the comments below. Let’s build a community of indoor carrot growers and inspire others to embrace the joys of homegrown produce. What variety did you choose? What challenges did you face, and how did you overcome them? Your insights could be invaluable to fellow gardeners. Happy growing!
Frequently Asked Questions (FAQ)
What is the best carrot variety to grow indoors?
While many carrot varieties can be grown indoors, some are better suited for container gardening than others. Nantes carrots, with their shorter, cylindrical shape, are a popular choice because they don’t require as much depth as longer varieties. ‘Thumbelina’ and ‘Parisian’ are also excellent options, as they are round and compact. Consider the size of your container when selecting a variety. Avoid long, thin varieties like ‘Imperator’ unless you have a very deep container. Ultimately, the best variety depends on your personal preference and the space you have available. Experimenting with different varieties is part of the fun!
How much sunlight do indoor carrots need?
Carrots need at least 6-8 hours of direct sunlight per day to thrive. If you don’t have a sunny windowsill, you’ll need to supplement with a grow light. Place the grow light a few inches above the plants and keep it on for 12-16 hours per day. LED grow lights are energy-efficient and produce very little heat, making them a great option for indoor gardening. Insufficient light can result in leggy plants and small, underdeveloped carrots. Observe your plants closely and adjust the light accordingly. If the leaves are pale or the plants are stretching towards the light, they need more light.
What type of soil is best for growing carrots indoors?
Carrots need loose, well-draining soil to grow properly. Heavy, compacted soil can prevent the roots from developing properly, resulting in misshapen or stunted carrots. A good soil mix for indoor carrots is a combination of potting soil, sand, and compost. The potting soil provides nutrients, the sand improves drainage, and the compost adds organic matter. Avoid using garden soil, as it can be too heavy and may contain pests or diseases. You can also purchase a pre-made potting mix specifically designed for vegetables. Ensure the soil is slightly acidic, with a pH between 6.0 and 6.8.
How often should I water my indoor carrots?
Carrots need consistent moisture to grow well, but they don’t like to be waterlogged. Water your carrots when the top inch of soil feels dry to the touch. Water deeply, until the water drains out of the bottom of the container. Avoid watering the foliage, as this can promote fungal diseases. Overwatering can lead to root rot, so it’s important to ensure the soil is well-draining. Check the soil moisture regularly and adjust your watering schedule accordingly. The frequency of watering will depend on factors such as the size of the container, the type of soil, and the temperature and humidity of your home.
How long does it take for carrots to grow indoors?
The time it takes for carrots to mature indoors depends on the variety and growing conditions. Generally, it takes between 60 and 80 days from planting to harvest. Nantes carrots tend to mature faster than longer varieties. Providing optimal growing conditions, such as adequate sunlight, well-draining soil, and consistent moisture, can help speed up the process. You can start harvesting carrots when they reach the desired size. Don’t be afraid to pull up a few carrots early to check their progress.
What are some common problems when growing carrots indoors and how can I fix them?
Some common problems when growing carrots indoors include:
* **Leggy plants:** This is usually caused by insufficient light. Provide more sunlight or use a grow light.
* **Small or misshapen carrots:** This can be caused by compacted soil, overcrowding, or lack of nutrients. Use loose, well-draining soil, thin out the seedlings, and fertilize regularly.
* **Root rot:** This is caused by overwatering. Ensure the soil is well-draining and avoid overwatering.
* **Pests:** Aphids and spider mites can sometimes infest indoor carrots. Inspect your plants regularly and treat any infestations with insecticidal soap or neem oil.
Do I need to fertilize my indoor carrots?
Yes, carrots benefit from regular fertilization, especially when grown in containers. Use a balanced fertilizer with equal amounts of nitrogen, phosphorus, and potassium. You can also use a fertilizer specifically formulated for vegetables. Follow the instructions on the fertilizer package carefully. Avoid over-fertilizing, as this can lead to excessive foliage growth and small roots. A liquid fertilizer applied every few weeks is a good option for indoor carrots.
Can I grow carrots indoors year-round?
Yes, you can grow carrots indoors year-round, as long as you provide the right growing conditions. With adequate sunlight or a grow light, well-draining soil, and consistent moisture, you can enjoy fresh, homegrown carrots any time of year. Indoor carrot growing is a great way to extend the growing season and enjoy fresh vegetables even in the winter months.
How do I know when my carrots are ready to harvest?
You can harvest carrots when they reach the desired size. Gently loosen the soil around the carrot and pull it up by the greens. If the soil is dry, water it a few hours before harvesting to make it easier to pull the carrots. You can also harvest carrots gradually, as needed. Simply pull up a few carrots at a time, leaving the rest to continue growing. The size and color of the carrot tops can also be an indicator of maturity.


Leave a Comment