
Indoor Bitter Gourd Growing might sound intimidating, but trust me, it’s an incredibly rewarding experience! Imagine harvesting your own fresh, slightly bitter, yet incredibly healthy gourds right from your living room. Forget those bland, store-bought vegetables – we’re talking about vibrant, homegrown goodness!
For centuries, bitter gourd, also known as bitter melon, has been a staple in Asian cuisine and traditional medicine. From stir-fries to medicinal teas, its unique flavor and health benefits have been celebrated across cultures. But who says you need a sprawling garden to enjoy this amazing vegetable?
In today’s world, where access to fresh, organic produce can be a challenge, learning indoor bitter gourd growing techniques is more important than ever. Plus, let’s be honest, there’s something incredibly satisfying about nurturing a plant from seed to harvest. This DIY guide will walk you through every step, from choosing the right pot to dealing with common pests, ensuring you have a thriving indoor bitter gourd vine in no time. Get ready to impress your friends and family with your green thumb and enjoy the delicious rewards of your labor!
Growing Bitter Gourd Indoors: A Comprehensive DIY Guide
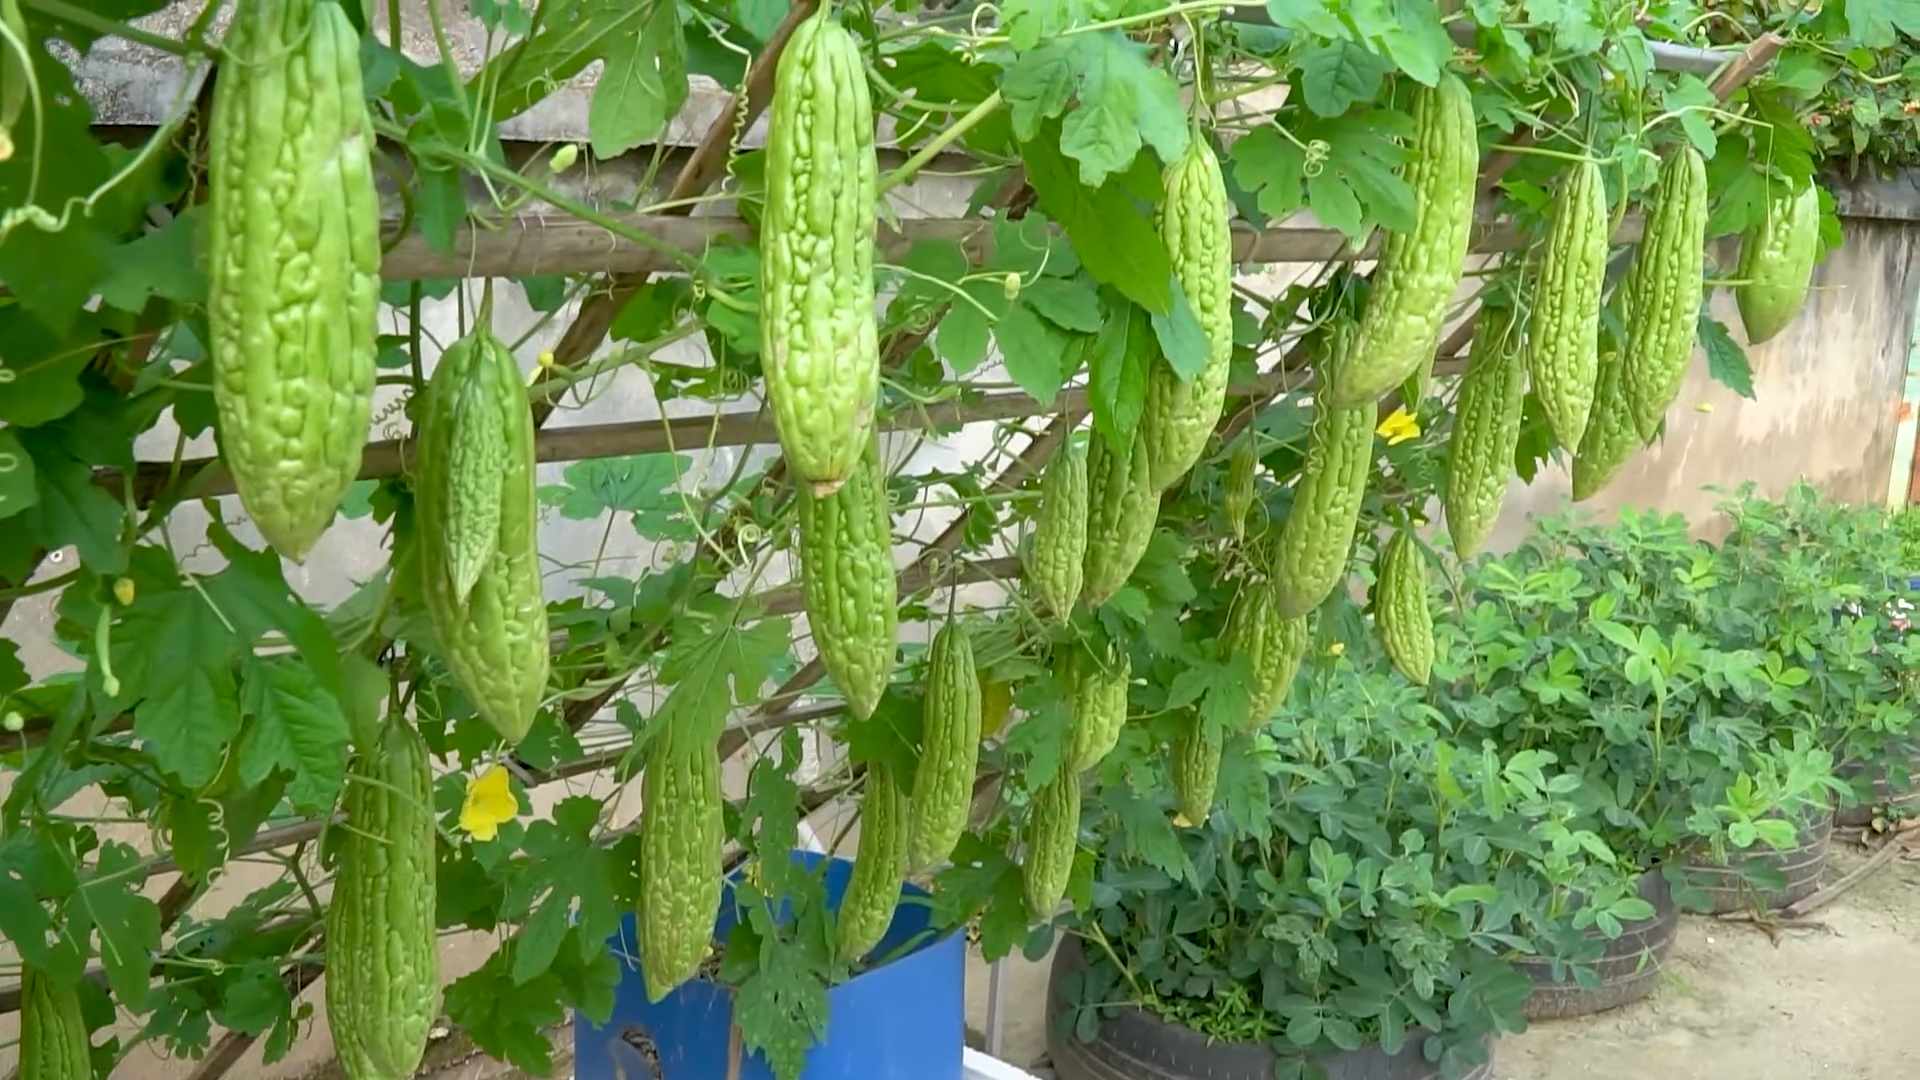
Hey there, fellow gardening enthusiasts! Ever thought about growing bitter gourd, that knobbly, uniquely flavored vegetable, right inside your home? It might sound a bit ambitious, but trust me, with a little know-how and some dedication, you can absolutely cultivate your own supply of fresh bitter gourd, even without a sprawling outdoor garden. I’m going to walk you through everything you need to know, from seed to harvest. Let’s get started!
What You’ll Need
Before we dive into the nitty-gritty, let’s gather our supplies. Having everything ready beforehand will make the whole process much smoother.
* Bitter Gourd Seeds: Choose a variety that’s well-suited for container gardening. Look for compact or bush varieties if space is a concern. You can find these online or at your local garden center.
* Large Container: Bitter gourd vines need plenty of room to grow. A container that’s at least 12-18 inches in diameter and depth is ideal. Make sure it has drainage holes!
* Well-Draining Potting Mix: Avoid using garden soil, as it can become compacted in containers. A good quality potting mix will provide the necessary nutrients and drainage.
* Trellis or Support Structure: Bitter gourd is a climbing vine, so it needs something to climb on. A trellis, bamboo stakes, or even a sturdy tomato cage will work.
* Grow Lights (Optional): If you don’t have a sunny spot, grow lights will be essential for providing the necessary light for healthy growth.
* Watering Can or Hose: For regular watering.
* Fertilizer: A balanced liquid fertilizer or slow-release fertilizer formulated for vegetables.
* Pruning Shears or Scissors: For trimming and pruning the vines.
* Spray Bottle: For misting the plants.
* Seed Starting Tray (Optional): If you prefer to start your seeds indoors before transplanting.
Phase 1: Seed Starting and Germination
Getting your seeds to sprout is the first crucial step. You can either sow the seeds directly into your container or start them in a seed starting tray for better control. I personally prefer starting them in a tray.
1. Soaking the Seeds: To improve germination rates, soak the bitter gourd seeds in warm water for 24 hours before planting. This helps soften the hard outer shell and encourages sprouting.
2. Preparing the Seed Starting Tray (Optional): Fill the seed starting tray with a seed starting mix or potting mix. Moisten the mix thoroughly.
3. Sowing the Seeds: Plant the seeds about 1/2 inch deep in the soil. If using a seed starting tray, plant one seed per cell. If direct sowing, plant 2-3 seeds per container, spacing them a few inches apart.
4. Providing Warmth and Moisture: Cover the seed starting tray with a clear plastic lid or plastic wrap to create a humid environment. Place the tray in a warm location, ideally around 75-85°F (24-29°C). Keep the soil consistently moist, but not waterlogged.
5. Waiting for Germination: Bitter gourd seeds typically germinate within 7-14 days. Once the seedlings emerge, remove the plastic cover and provide them with plenty of light.
Phase 2: Transplanting and Setting Up the Container
Once your seedlings have developed a few true leaves (the second set of leaves that appear after the initial seed leaves), it’s time to transplant them into their permanent container.
1. Preparing the Container: Fill the large container with well-draining potting mix, leaving a few inches of space at the top.
2. Creating a Planting Hole: Dig a hole in the center of the container that’s large enough to accommodate the root ball of the seedling.
3. Transplanting the Seedling: Gently remove the seedling from the seed starting tray, being careful not to damage the roots. Place the seedling in the planting hole and backfill with potting mix.
4. Watering Thoroughly: Water the transplanted seedling thoroughly to help settle the soil and encourage root growth.
5. Setting Up the Trellis: Install the trellis or support structure in the container, making sure it’s sturdy and can support the weight of the mature vine. Position it close to the seedling so it can easily start climbing.
Phase 3: Ongoing Care and Maintenance
Now that your bitter gourd plant is settled in its container, it’s time to provide the ongoing care it needs to thrive.
1. Watering: Water your bitter gourd plant regularly, especially during hot and dry weather. The soil should be consistently moist, but not waterlogged. Check the soil moisture by sticking your finger into the soil – if the top inch feels dry, it’s time to water.
2. Fertilizing: Feed your bitter gourd plant with a balanced liquid fertilizer every 2-3 weeks, or use a slow-release fertilizer according to the package instructions. This will provide the necessary nutrients for healthy growth and fruit production.
3. Providing Light: Bitter gourd needs at least 6-8 hours of sunlight per day. If you don’t have a sunny spot, use grow lights to supplement the natural light. Position the grow lights a few inches above the plant and adjust as it grows.
4. Pruning: Prune your bitter gourd vine regularly to encourage branching and fruit production. Remove any yellowing or dead leaves, and trim back any excessive growth. You can also pinch off the tips of the vines to encourage side shoots.
5. Pollination: Bitter gourd plants produce both male and female flowers. The female flowers have a small fruit behind them, while the male flowers do not. To ensure fruit production, you may need to hand-pollinate the flowers. Use a small paintbrush to transfer pollen from the male flowers to the female flowers. Do this in the morning, when the flowers are open.
6. Pest and Disease Control: Keep an eye out for common pests like aphids, spider mites, and whiteflies. You can control these pests with insecticidal soap or neem oil. Also, watch out for fungal diseases like powdery mildew. Improve air circulation and avoid overwatering to prevent these diseases. You can also use a fungicide if necessary.
7. Training the Vine: As the bitter gourd vine grows, train it to climb the trellis or support structure. Gently guide the tendrils around the trellis and tie them in place if necessary.
Phase 4: Harvesting Your Bitter Gourd
The moment you’ve been waiting for! Harvesting your own homegrown bitter gourd is incredibly rewarding.
1. Knowing When to Harvest: Bitter gourd is typically ready to harvest about 2-3 months after planting. The fruits should be firm and green, with a slightly waxy coating. The size of the fruit will vary depending on the variety.
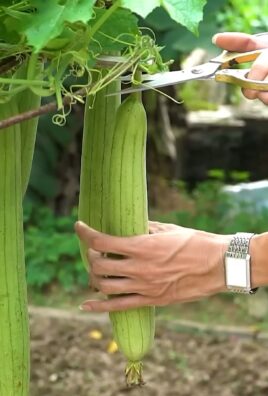
2. Harvesting the Fruits: Use pruning shears or a sharp knife to cut the bitter gourd from the vine. Leave a small stem attached to the fruit.
3. Enjoying Your Harvest: Bitter gourd can be used in a variety of dishes, from stir-fries to curries. It has a distinctively bitter flavor, which can be reduced by soaking the slices in salted water before cooking.
Troubleshooting Tips
Even with the best care, you might encounter some challenges along the way. Here are a few common problems and how to address them:
* Poor Germination: If your seeds aren’t germinating, make sure the soil is warm and moist. You can also try scarifying the seeds (gently scratching the outer shell) before soaking them.
* Yellowing Leaves: Yellowing leaves can be a sign of overwatering, underwatering, or nutrient deficiency. Adjust your watering schedule and fertilize your plant as needed.
* Lack of Fruit Production: If your plant is producing flowers but no fruit, it could be due to poor pollination. Try hand-pollinating the flowers or attracting pollinators to your garden with flowering plants.
* Pest Infestations: Regularly inspect your plant for pests and take action promptly. Insecticidal soap and neem oil are effective treatments for many common pests.
Choosing the Right Bitter Gourd Variety
Selecting the right variety is crucial for successful indoor growing. Here are a few options that tend to perform well in containers:
* Arka Harit: A high-yielding variety with dark green, medium-sized fruits.
* Priya: A compact variety that’s well-suited for small spaces.
* Green Long: A variety with long, slender fruits.
Remember to check the seed packet for specific growing instructions and maturity times.
Extra Tips for Success
* Rotate Your Crops: Avoid planting bitter gourd in the same container year after year. Rotating your crops can help prevent soilborne diseases.
* Use Companion Planting: Plant basil, marigolds, or other beneficial plants near your bitter gourd to deter pests and attract pollinators.

Conclusion
So, there you have it! Growing your own bitter gourd indoors isn’t just a quirky gardening experiment; it’s a pathway to fresh, healthy produce right at your fingertips, regardless of your climate or outdoor space limitations. We’ve walked through the essential steps, from selecting the right seeds and preparing the perfect potting mix to providing optimal light and support for those climbing vines.
Why is this DIY trick a must-try? Because it empowers you to take control of your food source, ensuring you have access to pesticide-free, incredibly fresh bitter gourd whenever you crave its unique flavor and health benefits. Imagine the satisfaction of harvesting your own bitter gourd, knowing exactly where it came from and how it was grown. Plus, it’s a fantastic conversation starter and a rewarding hobby that connects you with nature, even within the confines of your home.
But the fun doesn’t stop there! Feel free to experiment with different varieties of bitter gourd. Some are more compact and better suited for indoor growing than others. You could also try companion planting. Marigolds, for example, can help deter pests naturally. Consider adding a small fan to your growing area to improve air circulation and further prevent fungal diseases. Another variation is to experiment with different types of trellises or support systems. A simple bamboo structure can be both functional and aesthetically pleasing. You can even try hydroponic growing for a soilless approach to indoor bitter gourd cultivation.
Ultimately, the key to successful indoor bitter gourd growing lies in observation and adaptation. Pay close attention to your plants, adjust your watering and feeding schedule as needed, and don’t be afraid to tweak the environment to optimize their growth. Remember, every growing space is unique, and what works for one person might not work for another.
We wholeheartedly encourage you to give this DIY trick a try. It’s a rewarding experience that brings the joy of gardening indoors and provides you with a sustainable source of fresh, healthy bitter gourd. Don’t be intimidated by the perceived challenges; with a little patience and dedication, you’ll be harvesting your own crop in no time.
And most importantly, we want to hear about your experiences! Share your successes, your challenges, and your unique tips and tricks in the comments below. Let’s build a community of indoor bitter gourd enthusiasts and learn from each other. Your insights could be invaluable to someone just starting out on their indoor gardening journey. So, grab your seeds, prepare your potting mix, and get ready to embark on the exciting adventure of growing your own bitter gourd indoors! We can’t wait to see what you create!
Frequently Asked Questions (FAQ)
1. What is the best variety of bitter gourd to grow indoors?
While many varieties can be grown indoors, smaller, more compact cultivars tend to be more manageable. Look for varieties specifically labeled as “bush” or “dwarf,” or those known for shorter vine lengths. Some popular choices include ‘Arka Harit’ and ‘Priya’. These varieties are generally better suited to the limited space and light conditions often found indoors. Remember to check the seed packet for specific growing instructions and expected vine length.
2. How much light does indoor bitter gourd need?
Bitter gourd requires a significant amount of light to thrive. Ideally, aim for at least 6-8 hours of direct sunlight per day. If you don’t have access to sufficient natural light, supplement with grow lights. LED grow lights are a great option as they are energy-efficient and provide the full spectrum of light needed for healthy plant growth. Position the grow lights close enough to the plants (usually 6-12 inches) to provide adequate illumination, but not so close that they burn the leaves. Monitor your plants closely and adjust the light intensity and duration as needed.
3. What kind of potting mix should I use for indoor bitter gourd?
The ideal potting mix for indoor bitter gourd should be well-draining and rich in organic matter. A good mix consists of equal parts of potting soil, compost, and perlite or vermiculite. The potting soil provides a base for the plants to grow, the compost adds essential nutrients, and the perlite or vermiculite improves drainage and aeration. Avoid using garden soil, as it can be too heavy and may contain pests or diseases. You can also add a slow-release fertilizer to the potting mix to provide a steady supply of nutrients to the plants.
4. How often should I water my indoor bitter gourd plants?
Watering frequency depends on several factors, including the size of the pot, the type of potting mix, the temperature, and the humidity. Generally, you should water your bitter gourd plants when the top inch of soil feels dry to the touch. Water thoroughly until excess water drains out of the bottom of the pot. Avoid overwatering, as this can lead to root rot. During hot, dry weather, you may need to water more frequently. Conversely, during cooler, more humid weather, you may need to water less often. Monitor your plants closely and adjust your watering schedule accordingly.
5. How do I pollinate my indoor bitter gourd flowers?
Bitter gourd plants have separate male and female flowers. In an outdoor setting, pollination is typically done by insects. However, indoors, you’ll likely need to hand-pollinate the flowers. To do this, use a small paintbrush or cotton swab to collect pollen from the male flowers (which have a long, thin stem) and transfer it to the female flowers (which have a small, immature fruit behind the flower). The best time to hand-pollinate is in the morning, when the pollen is most viable. Repeat the process for several days to ensure successful pollination.
6. What are some common pests and diseases that affect indoor bitter gourd, and how can I prevent them?
Common pests that can affect indoor bitter gourd include aphids, spider mites, and whiteflies. To prevent these pests, inspect your plants regularly and remove any infested leaves or stems. You can also use insecticidal soap or neem oil to control infestations. Common diseases that can affect indoor bitter gourd include powdery mildew and fungal leaf spots. To prevent these diseases, ensure good air circulation around your plants and avoid overwatering. You can also use a fungicide to control fungal diseases.
7. How long does it take for bitter gourd to mature and be ready for harvest?
The time it takes for bitter gourd to mature and be ready for harvest depends on the variety and growing conditions. Generally, it takes about 60-90 days from planting to harvest. The fruits are typically ready to harvest when they are about two-thirds of their mature size and still green. Overripe bitter gourd will turn yellow or orange and become bitter. Harvest the fruits carefully with a sharp knife or scissors, leaving a small portion of the stem attached.
8. Can I grow bitter gourd in containers? What size container is best?
Yes, bitter gourd can be successfully grown in containers. Choose a container that is at least 12 inches in diameter and 12 inches deep to provide enough space for the roots to grow. A larger container is always better, as it will provide more room for the roots and help to retain moisture. Make sure the container has drainage holes to prevent waterlogging.
9. How do I provide support for my indoor bitter gourd vines?
Bitter gourd vines are climbers and need support to grow properly. You can use a trellis, a stake, or a string to provide support. A trellis is a good option as it provides a large surface area for the vines to climb. You can also use a stake to support the main stem of the plant. If you use a string, tie it loosely to the stem of the plant and attach it to a support structure.
10. Can I save seeds from my indoor bitter gourd harvest for future planting?
Yes, you can save seeds from your indoor bitter gourd harvest for future planting. Allow the fruits to fully mature on the vine until they turn yellow or orange. Then, harvest the fruits and remove the seeds. Wash the seeds thoroughly and dry them completely before storing them in an airtight container in a cool, dark place. Keep in mind that seeds from hybrid varieties may not produce plants that are true to type.

Leave a Comment