
Growing Water Spinach Easily is something I’ve become quite passionate about, and I’m thrilled to share my secrets with you! Have you ever dreamt of harvesting fresh, vibrant greens right from your backyard, adding a delicious and nutritious boost to your meals? Imagine the satisfaction of knowing exactly where your food comes from, free from harmful chemicals and bursting with flavor. This isn’t just a pipe dream; it’s an achievable reality with a few simple tricks.
Water spinach, also known as Ong Choy or Kang Kong, has a rich history, deeply rooted in Asian cuisine. For centuries, it’s been a staple in dishes across Southeast Asia and beyond, prized for its mild, slightly sweet flavor and impressive nutritional profile. But you don’t need to travel to Asia to enjoy this delightful vegetable.
In today’s world, where access to fresh, healthy produce can be a challenge, learning how to grow your own food is more important than ever. And that’s where these DIY tricks come in! Growing Water Spinach Easily at home not only provides you with a sustainable source of delicious greens but also offers a therapeutic and rewarding gardening experience. Plus, it’s a fantastic way to reduce your carbon footprint and connect with nature. So, let’s dive in and discover the simple steps to cultivating your own thriving water spinach patch!
Growing Water Spinach (Ong Choy) Like a Pro: A DIY Guide
Hey there, fellow gardening enthusiasts! I’m so excited to share my tried-and-true method for growing water spinach, also known as Ong Choy, right at home. This leafy green is a staple in Asian cuisine, and it’s surprisingly easy to cultivate, even if you don’t have a huge garden. I’m going to walk you through everything, from choosing the right container to harvesting your delicious, homegrown water spinach. Let’s get started!
What You’ll Need
Before we dive in, let’s gather all the necessary supplies. Trust me, having everything ready beforehand will make the whole process much smoother.
* Water Spinach Seeds or Cuttings: You can find seeds online or at your local Asian grocery store. Cuttings from mature plants also work great!
* A Large Container: I recommend a container that’s at least 12 inches deep and wide. A plastic tub, a large pot, or even a repurposed container will do the trick.
* Potting Mix: A good quality potting mix is essential for healthy growth. I prefer a mix that’s rich in organic matter.
* Water: Obviously! You’ll need plenty of water to keep your water spinach happy.
* Fertilizer (Optional): A balanced liquid fertilizer can give your plants a boost, but it’s not strictly necessary.
* Sunlight: Water spinach loves sunshine, so choose a location that gets at least 6 hours of direct sunlight per day.
* Gardening Gloves: To keep your hands clean and protected.
* Watering Can or Hose: For easy watering.
* Scissors or Pruning Shears: For harvesting.
Getting Started: Planting Your Water Spinach
Now that we have our supplies, let’s get our hands dirty! This section covers everything you need to know about planting your water spinach, whether you’re starting from seeds or cuttings.
From Seeds:
1. Soaking the Seeds: I always start by soaking the water spinach seeds in warm water for 12-24 hours. This helps to soften the seed coat and speeds up germination. You’ll notice they swell up a bit – that’s a good sign!
2. Preparing the Container: Fill your container with potting mix, leaving about an inch of space at the top. Gently pat down the soil to create a level surface.
3. Sowing the Seeds: Sprinkle the soaked seeds evenly over the surface of the soil. You can sow them quite densely, as you’ll be thinning them out later.
4. Covering the Seeds: Lightly cover the seeds with a thin layer of potting mix, about ¼ inch deep.
5. Watering: Gently water the soil until it’s thoroughly moist. Avoid overwatering, which can cause the seeds to rot.
6. Finding the Right Spot: Place the container in a warm, sunny location. Water spinach needs plenty of sunlight to thrive.
7. Germination: Keep the soil consistently moist, and you should see seedlings emerge in about 7-14 days.
8. Thinning the Seedlings: Once the seedlings are a few inches tall, thin them out to about 2-3 inches apart. This will give them enough space to grow and develop. Don’t throw away the thinned seedlings! You can transplant them to another container or even eat them.
From Cuttings:
1. Selecting Cuttings: Choose healthy, mature stems that are about 6-8 inches long. Look for stems with several nodes (the points where leaves grow).
2. Preparing the Cuttings: Remove the leaves from the bottom 2-3 inches of the stem. This will encourage root growth.
3. Rooting the Cuttings (Method 1: Water): Place the cuttings in a jar or glass of water, making sure that the bottom nodes are submerged. Change the water every 1-2 days to prevent bacteria growth. You should see roots develop in about a week or two.
4. Rooting the Cuttings (Method 2: Directly in Soil): Dip the cut end of the stem in rooting hormone (optional, but it helps). Plant the cuttings directly into the prepared potting mix, burying the bottom 2-3 inches of the stem.
5. Watering: Keep the soil consistently moist, but not waterlogged.
6. Finding the Right Spot: Place the container in a warm, sunny location.
7. Waiting for Growth: If you rooted in water, once the roots are an inch or two long, carefully transplant the cuttings into the prepared container with potting mix. If you planted directly in soil, you should see new growth in a week or two.
Caring for Your Water Spinach
Now that your water spinach is planted, it’s time to focus on providing the right care to ensure healthy growth and abundant harvests.
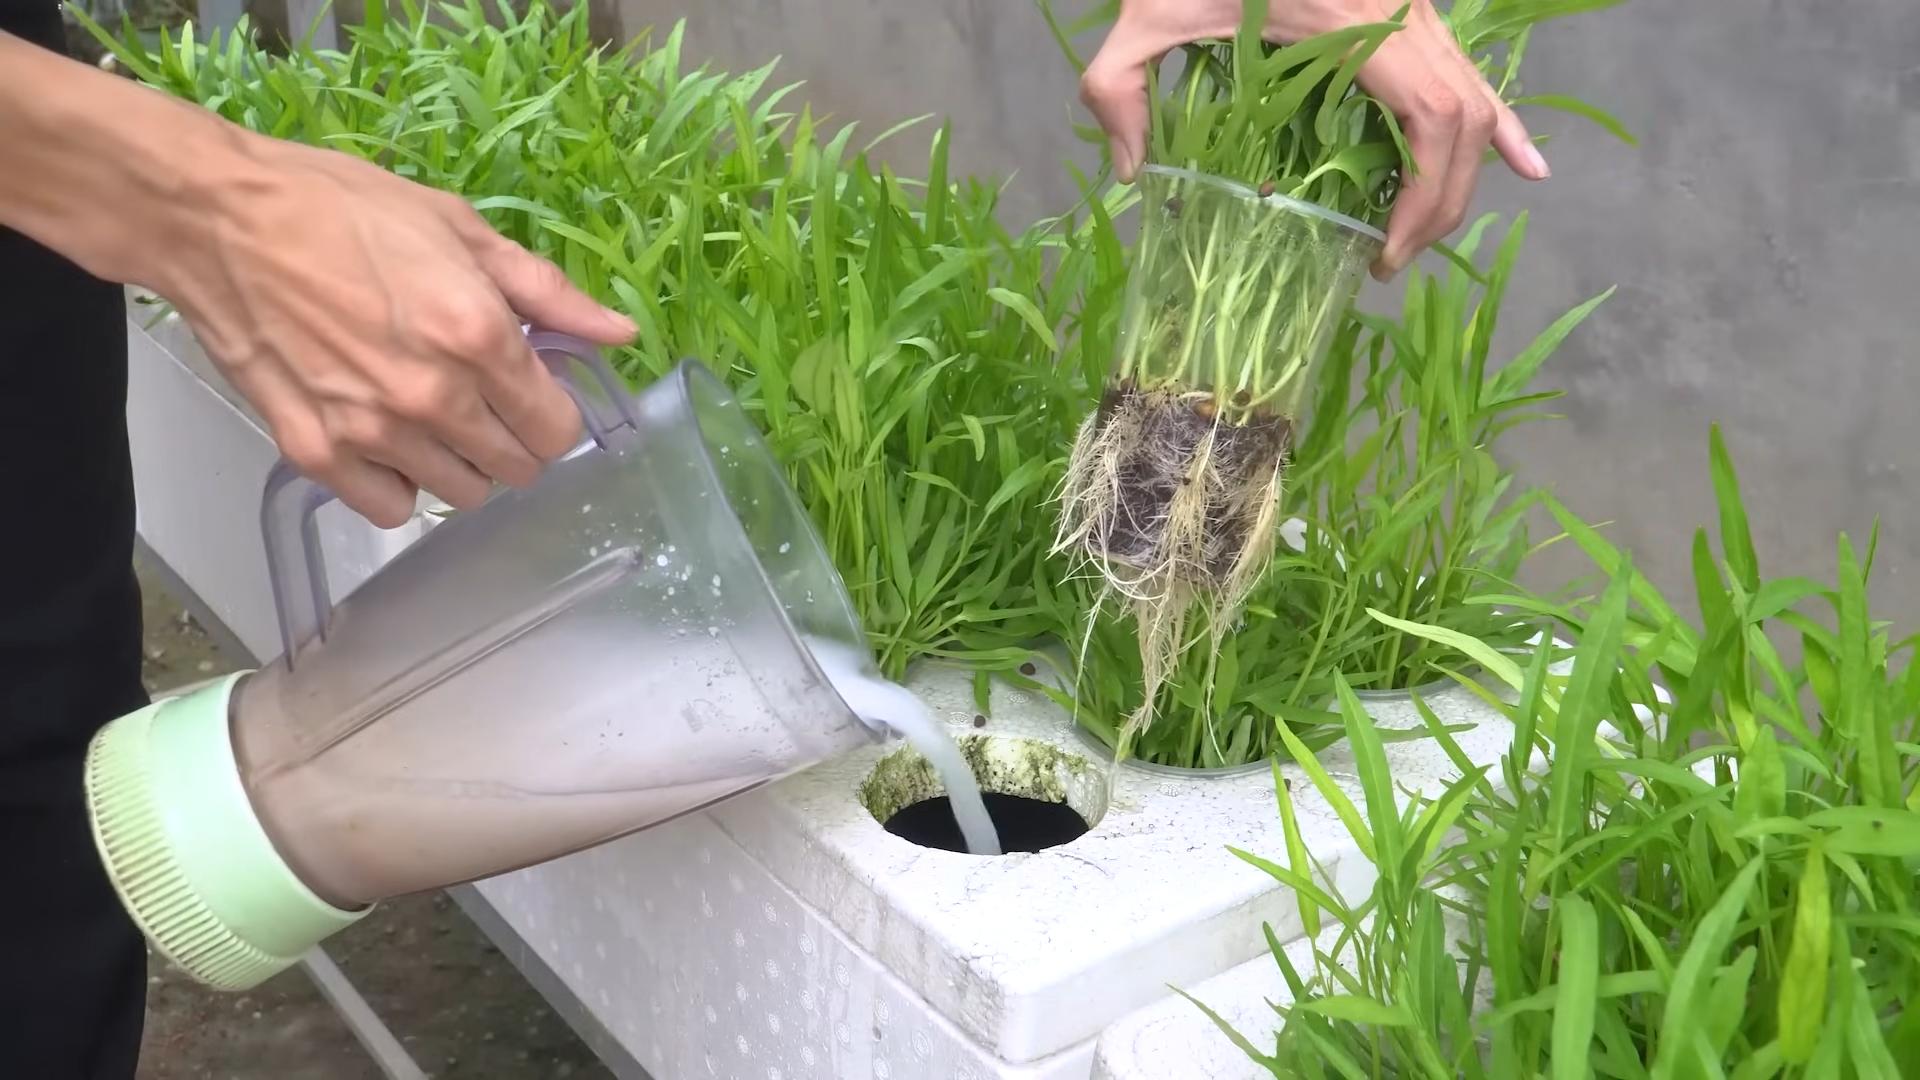
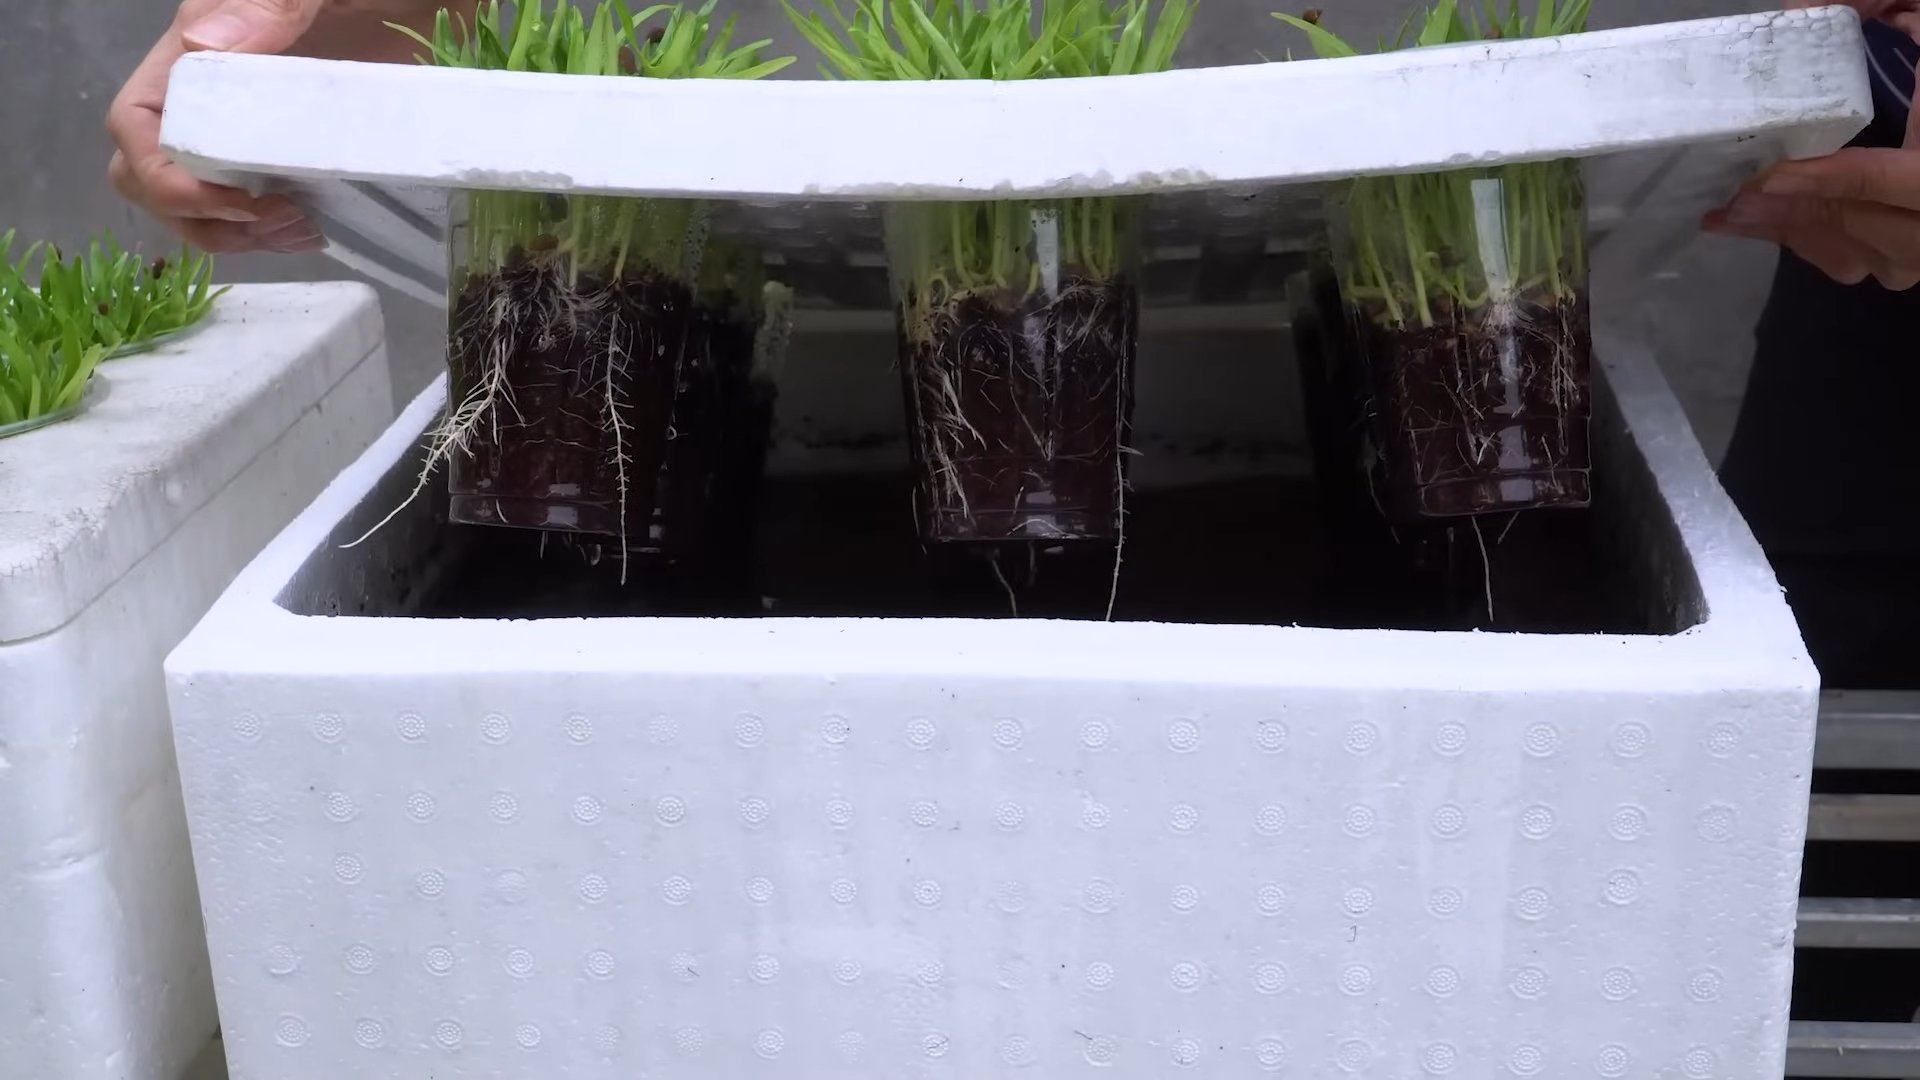
* Watering: Water spinach loves water, so keep the soil consistently moist. I usually water mine every day, especially during hot weather. You can even grow it hydroponically, with the roots submerged in water.
* Sunlight: As I mentioned earlier, water spinach needs at least 6 hours of direct sunlight per day. If you don’t have a sunny spot, you can supplement with grow lights.
* Fertilizing: If you want to give your plants a boost, you can fertilize them every 2-3 weeks with a balanced liquid fertilizer. Follow the instructions on the fertilizer label. I sometimes use compost tea as a natural fertilizer.
* Pest Control: Water spinach is generally pest-resistant, but you may occasionally encounter aphids or spider mites. You can control these pests by spraying your plants with a mixture of water and dish soap or by using insecticidal soap.
* Supporting the Growth: As your water spinach grows, it may start to trail. You can provide support by using a trellis or stakes. This will help to keep the plants upright and prevent them from sprawling.
Harvesting Your Water Spinach
The best part of growing your own water spinach is, of course, harvesting and enjoying the delicious leaves!
1. When to Harvest: You can start harvesting your water spinach about 4-6 weeks after planting. The stems should be about 12-18 inches long.
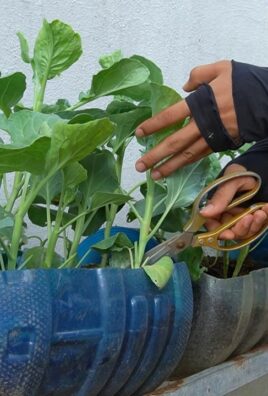
2. How to Harvest: Use scissors or pruning shears to cut the stems about 4-6 inches above the soil line. This will encourage new growth and allow you to harvest multiple times.
3. Harvesting Technique: I like to harvest the younger, more tender leaves and stems. These are the most flavorful and have the best texture.
4. Encouraging Regrowth: After harvesting, fertilize your plants to encourage new growth. Keep the soil consistently moist and provide plenty of sunlight.
5. Successive Harvests: You can harvest your water spinach every 2-3 weeks, depending on how quickly it grows. With proper care, you can enjoy a continuous supply of fresh, homegrown water spinach for several months.
Troubleshooting
Even with the best care, you may encounter some challenges when growing water spinach. Here are a few common problems and how to solve them:
* Yellowing Leaves: This can be caused by overwatering, underwatering, or nutrient deficiencies. Make sure you’re watering properly and fertilizing regularly.
* Slow Growth: This can be caused by insufficient sunlight, poor soil, or cold temperatures. Make sure your plants are getting enough sunlight and that the soil is rich in nutrients.
* Pests: As mentioned earlier, aphids and spider mites can sometimes be a problem. Control them with a mixture of water and dish soap or insecticidal soap.
* Bolting: If your water spinach starts to flower, it’s bolting. This is usually caused by hot weather or stress. To prevent bolting, keep your plants well-watered and provide some shade during the hottest part of the day.
Enjoying Your Harvest
Now that you’ve harvested your water spinach, it’s time to enjoy the fruits (or rather, leaves!) of your labor. Water spinach is incredibly versatile and can be used in a variety of dishes.
* Stir-fries: Water spinach is a classic ingredient in stir-fries. It pairs well with garlic, ginger, and soy sauce.
* Soups: Add water spinach to soups for a nutritious and flavorful boost.
* Salads: Young, tender water spinach leaves can be used in salads.
* Steaming: Steam water spinach and serve it with a dipping sauce.
* Storage: Store your harvested water spinach in the refrigerator for up to a week. Wrap it in a damp paper towel to keep it fresh.
Final Thoughts
Growing water spinach at home is a rewarding experience. It’s easy, fun, and you get to enjoy fresh,
Conclusion
So, there you have it! Growing water spinach easily at home is not only achievable but also incredibly rewarding. Forget those expensive grocery store prices and the uncertainty of freshness. With this simple DIY trick, you can have a constant supply of crisp, delicious water spinach right at your fingertips.
This method is a game-changer for anyone who loves this versatile vegetable. Imagine adding freshly harvested water spinach to your stir-fries, soups, or salads, knowing exactly where it came from and how it was grown. The taste difference is remarkable – the homegrown variety boasts a vibrant, slightly sweet flavor that store-bought options simply can’t match.
But the benefits extend beyond just taste. Growing your own water spinach is also a sustainable and eco-friendly choice. You’re reducing your carbon footprint by eliminating transportation and packaging, and you have complete control over the growing process, ensuring that no harmful pesticides or chemicals are used.
Why is this DIY trick a must-try? Because it’s cost-effective, environmentally friendly, and delivers superior flavor. It’s a simple way to elevate your cooking and connect with your food on a deeper level.
Looking for variations? Experiment with different growing mediums. While we’ve focused on a water-based system, you can also try growing water spinach in soil, ensuring it’s consistently moist. Consider adding a diluted liquid fertilizer every few weeks to boost growth, especially if you notice the leaves are pale. You can also try growing different varieties of water spinach. Some varieties have broader leaves, while others have thinner stems. Experiment to find your favorite!
Don’t be intimidated if you’ve never grown anything before. This DIY trick is incredibly beginner-friendly. The steps are straightforward, and the results are almost guaranteed. Even if you only have a small balcony or patio, you can still enjoy the satisfaction of harvesting your own water spinach.
We’re confident that once you try this method, you’ll be hooked. The joy of watching your water spinach thrive and the delicious meals you’ll create with it are well worth the effort.
So, what are you waiting for? Gather your supplies, follow the steps, and get ready to enjoy the freshest, most flavorful water spinach you’ve ever tasted.
We’d love to hear about your experience! Share your photos and stories with us in the comments below. Let us know what variations you’ve tried and any tips you’ve discovered along the way. Let’s build a community of water spinach enthusiasts and inspire others to embrace the joys of homegrown goodness. Happy growing!
Frequently Asked Questions (FAQ)
What exactly is water spinach, and what does it taste like?
Water spinach, also known as ong choy or kangkong, is a leafy green vegetable popular in Asian cuisine. It has long, hollow stems and arrow-shaped leaves. The taste is mild and slightly sweet, with a subtle earthy undertone. It’s often compared to spinach but with a more delicate flavor and a slightly crispier texture when cooked.
How long does it take to grow water spinach using this DIY method?
Generally, you can expect to harvest your first batch of water spinach within 3-4 weeks of planting the cuttings. The exact time will depend on factors like temperature, sunlight, and the variety of water spinach you’re growing. Warmer temperatures and plenty of sunlight will encourage faster growth.
What kind of container should I use for growing water spinach?
Any container that can hold water will work. A plastic tub, a large bucket, or even a repurposed storage container are all suitable options. The container should be at least 6-8 inches deep to allow for adequate root development. Make sure the container is clean before using it.
How much sunlight does water spinach need?
Water spinach thrives in full sun, meaning at least 6-8 hours of direct sunlight per day. If you don’t have a sunny spot, you can supplement with grow lights. Insufficient sunlight can result in leggy growth and smaller leaves.
How often should I change the water in the container?
It’s recommended to change the water every 2-3 days to prevent algae growth and maintain a healthy environment for the water spinach. If you notice the water becoming cloudy or developing an odor, change it more frequently.
Can I grow water spinach indoors?
Yes, you can grow water spinach indoors, but you’ll need to provide adequate lighting. A sunny windowsill might work if it receives several hours of direct sunlight, but grow lights are generally necessary for consistent growth.
What kind of fertilizer should I use for water spinach?
A diluted liquid fertilizer, such as a balanced 20-20-20 formula, is suitable for water spinach. Dilute the fertilizer to half strength and add it to the water every 2-3 weeks. Avoid over-fertilizing, as this can lead to excessive leaf growth and a less flavorful product.
How do I harvest water spinach?
You can harvest water spinach by cutting the stems about 4-6 inches above the water line. This will encourage new growth and allow you to harvest multiple times from the same plant. Harvest regularly to prevent the plants from becoming too leggy.
Are there any pests or diseases that affect water spinach?
Water spinach is generally resistant to pests and diseases, but aphids and spider mites can occasionally be a problem. If you notice any pests, you can try spraying the plants with a strong stream of water or using an insecticidal soap.
Can I eat the stems of water spinach?
Yes, the stems of water spinach are edible and delicious. They have a slightly crispier texture than the leaves and are often used in stir-fries and other dishes.
Is water spinach safe to eat?
Yes, water spinach is generally safe to eat when grown properly. However, it’s important to wash it thoroughly before consumption to remove any dirt or debris. Avoid eating water spinach that has been grown in contaminated water.
Can I grow water spinach from seeds instead of cuttings?
Yes, you can grow water spinach from seeds. Soak the seeds in water for 24 hours before planting them in a seed starting mix. Keep the soil moist and warm, and the seeds should germinate within a week. Once the seedlings are large enough, you can transplant them into your water-based system.
What are some good recipes for using homegrown water spinach?
Water spinach is incredibly versatile and can be used in a variety of dishes. Some popular recipes include stir-fried water spinach with garlic, water spinach soup, and water spinach salad. You can also add it to curries, stews, and noodle dishes.
How do I store water spinach after harvesting?
Store water spinach in the refrigerator in a plastic bag or container. It will stay fresh for several days. For longer storage, you can blanch it and freeze it.
What if my water spinach isn’t growing well?
If your water spinach isn’t growing well, consider the following factors: sunlight, water quality, and nutrient levels. Make sure it’s receiving enough sunlight, change the water regularly, and add a diluted liquid fertilizer every few weeks. Also, check for any signs of pests or diseases.


Leave a Comment