
Grow Kailan Quickly and unlock the secrets to a thriving, bountiful garden, even if you’re short on time! Have you ever dreamt of harvesting your own fresh, vibrant greens, ready to add a burst of flavor and nutrition to your meals? Imagine stepping outside your door and snipping off the perfect leaves for a stir-fry, salad, or side dish. This dream can be your reality, and it’s easier than you think!
For centuries, cultivating your own food has been a cornerstone of self-sufficiency and a connection to nature. From ancient civilizations tending their kitchen gardens to modern-day urban farmers, the desire to nurture and harvest has remained a constant. Kailan, also known as Chinese kale, is a popular choice in Asian cuisine, prized for its slightly bitter, earthy flavor and impressive nutritional profile. But let’s face it, waiting weeks for your kailan to mature can be frustrating. That’s where these DIY tricks come in!
In this article, I’m going to share my favorite tried-and-true methods to help you grow kailan quickly and efficiently. Whether you’re a seasoned gardener or just starting out, these simple hacks will empower you to accelerate growth, maximize your yield, and enjoy fresh, delicious kailan sooner than you ever thought possible. Say goodbye to long waits and hello to a garden bursting with vibrant, healthy greens!
Grow Kailan Quickly: My Foolproof DIY Guide
Hey there, fellow gardening enthusiasts! I’m so excited to share my tried-and-true method for growing kailan (also known as Chinese kale) quickly and abundantly. Kailan is a fantastic leafy green, packed with nutrients and incredibly versatile in the kitchen. Forget waiting ages for a meager harvest – with these tips, you’ll be enjoying fresh, homegrown kailan in no time!
Understanding Kailan’s Needs
Before we dive into the nitty-gritty, let’s quickly cover what kailan needs to thrive. Think of it as getting to know your new plant friend!
* Sunlight: Kailan loves sunshine! Aim for at least 6 hours of direct sunlight per day. The more sun, the better the growth.
* Soil: Well-draining soil is key. Kailan doesn’t like sitting in soggy conditions. A slightly acidic to neutral pH (around 6.0 to 7.0) is ideal.
* Water: Consistent moisture is crucial, especially during hot weather. Don’t let the soil dry out completely.
* Nutrients: Kailan is a heavy feeder, meaning it needs plenty of nutrients to grow those lush, green leaves.
* Temperature: Kailan prefers cooler temperatures, but it can tolerate some heat. The ideal temperature range is between 60°F and 70°F (15°C and 21°C).
Phase 1: Starting from Seed (My Preferred Method)
I personally prefer starting kailan from seed because it gives me more control over the entire process. Plus, it’s super rewarding to watch those tiny seeds sprout and grow into healthy plants!
1. Gather Your Supplies: You’ll need:
* Kailan seeds (choose a variety you like – there are several!)
* Seed starting trays or small pots
* Seed starting mix (this is different from regular potting soil – it’s lighter and better for germination)
* A spray bottle filled with water
* A warm, sunny location or a grow light
* A heat mat (optional, but it can speed up germination)
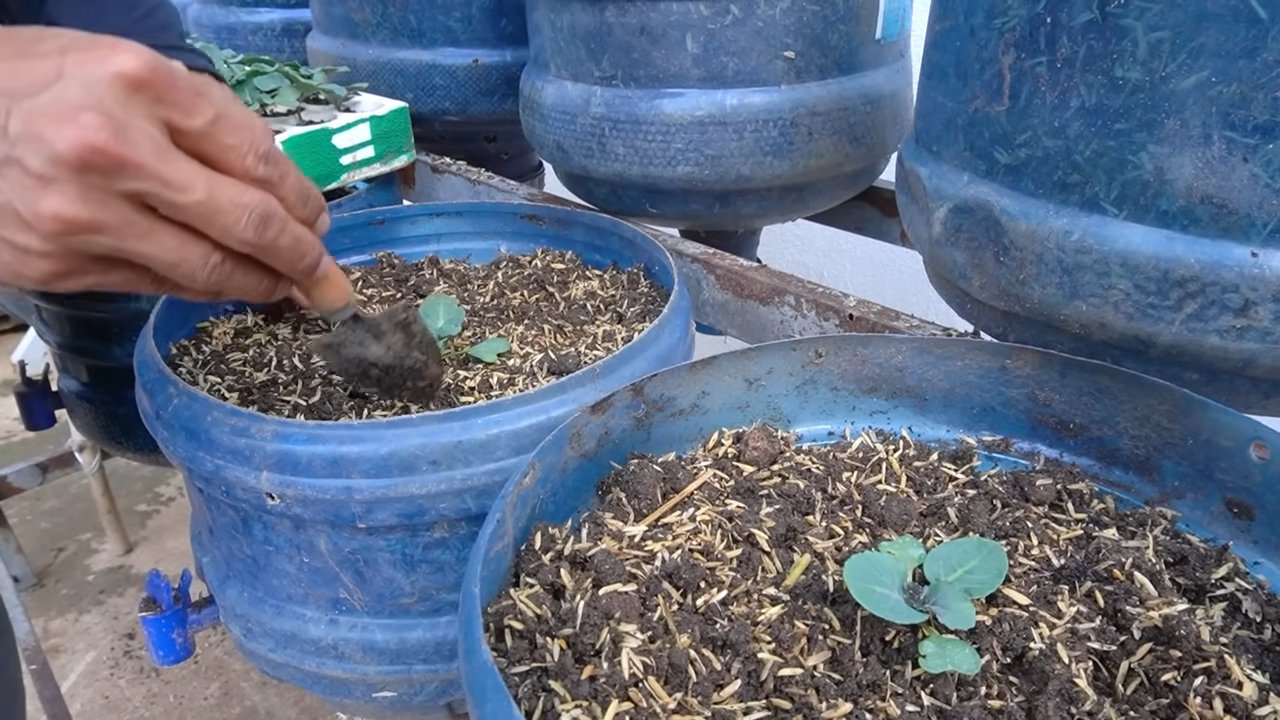
2. Sow the Seeds:
* Moisten the seed starting mix. It should be damp but not soggy.
* Fill the seed starting trays or pots with the moistened mix.
* Make a small indentation (about ¼ inch deep) in the center of each cell or pot.
* Place 2-3 kailan seeds in each indentation. This increases your chances of at least one seed germinating.
* Gently cover the seeds with more seed starting mix.
* Lightly mist the surface with water.
3. Provide the Right Conditions:
* Place the seed starting trays or pots in a warm, sunny location or under a grow light. If using a grow light, keep it a few inches above the soil surface.
* If you’re using a heat mat, place the trays or pots on top of it. This will help to maintain a consistent temperature and speed up germination.
* Keep the soil consistently moist but not waterlogged. Mist the surface with water as needed.
4. Wait for Germination:
* Kailan seeds typically germinate within 5-10 days. Be patient!
* Once the seedlings emerge, remove the heat mat (if you were using one).
* Continue to provide plenty of light and keep the soil moist.
5. Thin the Seedlings:
* Once the seedlings have developed their first true leaves (the leaves that look like miniature versions of kailan leaves), it’s time to thin them.
* Choose the strongest seedling in each cell or pot and carefully snip off the others at the soil line. This will give the remaining seedling more room to grow.
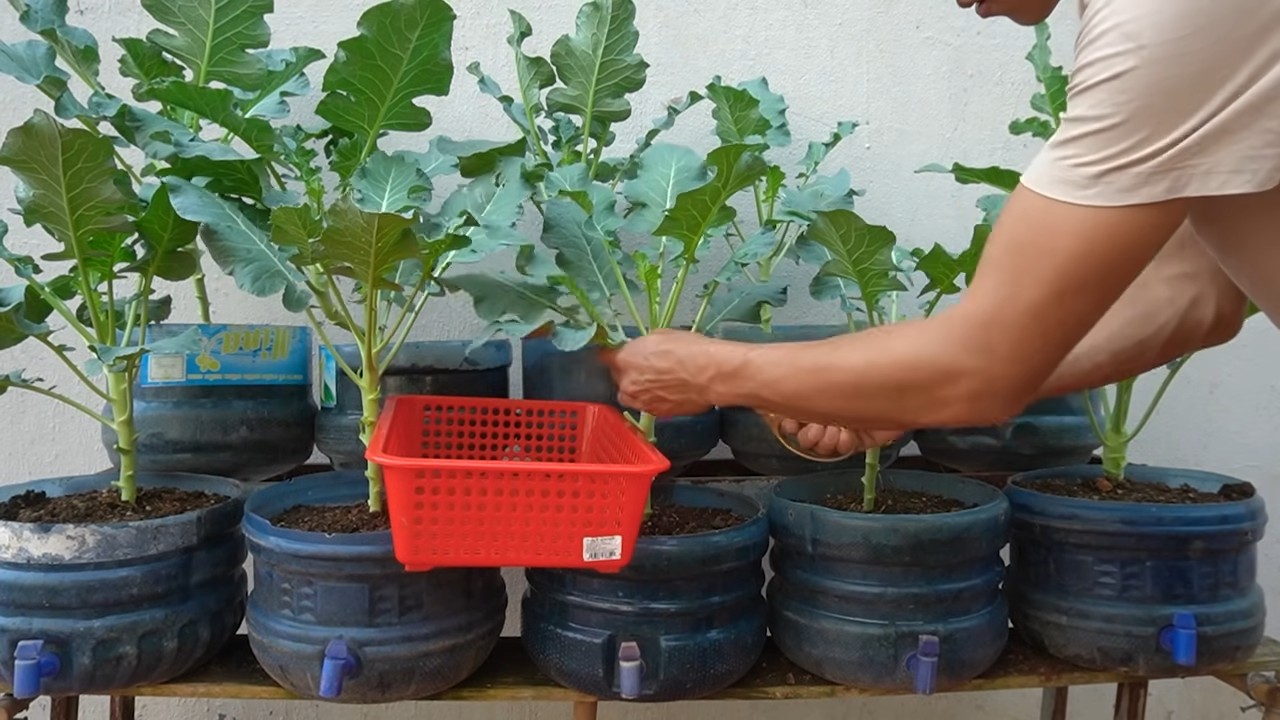
Phase 2: Transplanting Your Seedlings
Now that your seedlings are strong and healthy, it’s time to move them to their permanent home in the garden!
1. Harden Off the Seedlings: This is a crucial step to acclimate the seedlings to outdoor conditions.
* About a week before you plan to transplant, start taking the seedlings outside for a few hours each day.
* Gradually increase the amount of time they spend outdoors each day.
* Protect them from direct sunlight and strong winds during the first few days.
2. Prepare the Garden Bed:
* Choose a location that receives at least 6 hours of direct sunlight per day.
* Amend the soil with compost or other organic matter to improve drainage and fertility.
* Kailan prefers slightly acidic to neutral soil, so test the pH and adjust if necessary.
* Space the plants about 12-18 inches apart.
3. Transplant the Seedlings:
* Carefully remove the seedlings from their trays or pots.
* Dig a hole in the garden bed that is slightly larger than the root ball.
* Gently place the seedling in the hole and backfill with soil.
* Water thoroughly.
Phase 3: Ongoing Care for Rapid Growth
This is where the magic happens! Consistent care will ensure your kailan plants grow quickly and produce a bountiful harvest.
1. Watering:
* Water regularly, especially during hot weather.
* Aim to keep the soil consistently moist but not waterlogged.
* Water deeply and less frequently, rather than shallowly and more often. This encourages deep root growth.
2. Fertilizing:
* Kailan is a heavy feeder, so regular fertilization is essential.
* Apply a balanced fertilizer (e.g., 10-10-10) every 2-3 weeks.
* Alternatively, you can use organic fertilizers like compost tea or fish emulsion. I personally love using fish emulsion – it works wonders!
* Side-dress the plants with compost every few weeks to provide a slow-release source of nutrients.
3. Weeding:
* Keep the garden bed free of weeds, as they can compete with the kailan plants for nutrients and water.
* Mulch around the plants to suppress weed growth and retain moisture.
4. Pest Control:
* Kailan can be susceptible to pests like aphids, cabbage worms, and flea beetles.
* Inspect the plants regularly for signs of pests.
* Handpick any pests you find.
* Use organic pest control methods like insecticidal soap or neem oil if necessary. I’ve found that a strong blast of water from the hose can often dislodge aphids.
* Consider companion planting with herbs like rosemary or thyme, which can help to repel pests.
5. Sunlight Management:
* Ensure your kailan plants receive at least 6 hours of direct sunlight daily.
* If you live in a very hot climate, provide some afternoon shade to prevent the leaves from scorching.
Phase 4: Harvesting Your Bountiful Crop
The moment you’ve been waiting for! Harvesting kailan is easy and rewarding.
1. When to Harvest:
* You can start harvesting kailan leaves about 6-8 weeks after transplanting.
* Harvest the outer leaves first, leaving the inner leaves to continue growing.
* The leaves should be about 6-8 inches long.
2. How to Harvest:
* Use a sharp knife or scissors to cut the leaves off at the base of the plant.
* Avoid damaging the main stem.
3. Succession Planting:
* To ensure a continuous harvest, plant new kailan seeds every few weeks. This is called succession planting.
* This way, you’ll always have fresh kailan on hand!
Extra Tips for Supercharged Growth
These are my secret weapons for getting the absolute best out of my kailan plants!
* Epsom Salts: Dissolve 1 tablespoon of Epsom salts in a gallon of water and spray the plants every 2-3 weeks. Epsom salts provide magnesium, which is essential for chlorophyll production and healthy growth.
* Coffee Grounds: Sprinkle used coffee grounds around the base of the plants. Coffee grounds are a great source of nitrogen and other nutrients. Plus, they help to deter slugs and snails!
* Compost Tea: Water the plants with compost tea every few weeks. Compost tea is a liquid fertilizer that is rich in beneficial microbes and nutrients.
* Regular Pruning: Remove any yellowing or damaged leaves to encourage new growth.
* Crop Rotation: Avoid planting kailan in the same location year after year. Crop rotation helps to prevent soilborne diseases and pests.
Troubleshooting Common Problems
Conclusion
So, there you have it! Growing your own kailan quickly is not only achievable but also incredibly rewarding. We’ve walked through the steps, highlighted the key factors, and armed you with the knowledge to transform your garden into a kailan haven. But why is this DIY trick a must-try?
Firstly, consider the freshness. Store-bought kailan, even when sourced from reputable grocers, can’t compare to the vibrant, crisp flavor of freshly harvested greens. The moment you cut those leaves and bring them straight to your kitchen, you’re unlocking a level of taste and nutritional value that’s simply unmatched. You control the entire process, from seed to table, ensuring the highest quality and minimizing exposure to potentially harmful chemicals.
Secondly, think about the cost savings. While the initial investment in seeds and perhaps some basic gardening supplies might seem like a hurdle, the long-term benefits are undeniable. You’ll be harvesting kailan for weeks, even months, from a single planting, significantly reducing your grocery bill. Plus, the satisfaction of providing your family with healthy, homegrown food is priceless.
Thirdly, and perhaps most importantly, growing kailan quickly is empowering. It connects you to the natural world, fosters a sense of accomplishment, and provides a tangible way to contribute to a more sustainable lifestyle. It’s a skill that you can pass down to future generations, inspiring them to appreciate the beauty and bounty of the earth.
Now, let’s talk about variations. Feel free to experiment with different kailan varieties. Some are more heat-tolerant, while others boast unique flavor profiles. Consider companion planting to deter pests and attract beneficial insects. Marigolds, for example, are excellent at repelling nematodes, while basil can help ward off aphids. You can also adjust the fertilizer to suit your specific soil conditions. A soil test is always a good idea to determine any nutrient deficiencies.
Don’t be afraid to get creative in the kitchen, too! Kailan is incredibly versatile. Sauté it with garlic and ginger for a simple side dish, add it to stir-fries for a boost of nutrients, or blend it into smoothies for a healthy and refreshing treat. You can even use it as a substitute for spinach in your favorite recipes.
We wholeheartedly encourage you to give this DIY trick a try. It’s easier than you might think, and the rewards are well worth the effort. Remember to document your progress, take photos, and share your experiences with us. We’d love to hear about your successes, your challenges, and any tips or tricks that you discover along the way. Let’s build a community of kailan enthusiasts and inspire others to embrace the joy of homegrown food. So, grab your seeds, get your hands dirty, and prepare to enjoy the delicious and nutritious bounty of your own backyard. Happy gardening!
Frequently Asked Questions (FAQ)
What is the best time of year to plant kailan for quick growth?
The ideal time to plant kailan depends on your climate. In general, kailan thrives in cooler weather. For most regions, the best time to plant is in early spring or late summer/early fall. This allows the plants to mature before the extreme heat of summer or the freezing temperatures of winter. If you live in a warmer climate, you can plant kailan throughout the year, but be sure to provide shade during the hottest part of the day.
How much sunlight does kailan need to grow quickly?
Kailan requires at least 6 hours of direct sunlight per day to grow quickly and produce abundant leaves. If you’re growing kailan indoors, supplement with grow lights to ensure adequate light exposure. Insufficient sunlight can lead to leggy growth and reduced yields.
What type of soil is best for growing kailan quickly?
Kailan prefers well-drained, fertile soil that is rich in organic matter. The ideal soil pH is between 6.0 and 7.5. Before planting, amend your soil with compost, aged manure, or other organic materials to improve drainage, fertility, and water retention. A soil test can help you determine if your soil is lacking any essential nutrients.
How often should I water kailan to promote quick growth?
Kailan needs consistent moisture to grow quickly. Water deeply and regularly, especially during dry periods. Aim to keep the soil consistently moist but not waterlogged. Overwatering can lead to root rot, while underwatering can stunt growth. Mulching around the plants can help retain moisture and suppress weeds.
What kind of fertilizer should I use to encourage quick kailan growth?
Kailan is a heavy feeder and benefits from regular fertilization. Use a balanced fertilizer with a higher nitrogen content to promote leafy growth. You can also use organic fertilizers such as fish emulsion or compost tea. Apply fertilizer according to the package directions, and avoid over-fertilizing, which can burn the plants.
How do I protect my kailan plants from pests and diseases?
Kailan is susceptible to various pests and diseases, including aphids, cabbage worms, and downy mildew. Regularly inspect your plants for signs of infestation or disease. Use organic pest control methods such as insecticidal soap or neem oil to control pests. Ensure good air circulation to prevent fungal diseases. Crop rotation can also help reduce the risk of soilborne diseases.
How long does it take for kailan to mature and be ready for harvest?
Kailan typically matures in 50-70 days from seed, depending on the variety and growing conditions. You can start harvesting leaves as soon as they are large enough to eat, usually when they are about 6-8 inches long. Harvest the outer leaves first, allowing the inner leaves to continue growing.
Can I grow kailan in containers?
Yes, kailan can be successfully grown in containers. Choose a container that is at least 12 inches deep and wide to provide enough room for the roots to grow. Use a well-draining potting mix and fertilize regularly. Container-grown kailan may require more frequent watering than plants grown in the ground.
How do I harvest kailan leaves?
To harvest kailan leaves, simply cut them off at the base of the plant using a sharp knife or scissors. Harvest the outer leaves first, allowing the inner leaves to continue growing. Avoid harvesting more than one-third of the plant at a time to ensure continued growth.
How do I store harvested kailan leaves?
Harvested kailan leaves can be stored in the refrigerator for up to a week. Wrap the leaves in a damp paper towel and place them in a plastic bag or container. Avoid washing the leaves until you are ready to use them, as moisture can promote spoilage.
What are some creative ways to use kailan in cooking?
Kailan is a versatile vegetable that can be used in a variety of dishes. Sauté it with garlic and ginger, add it to stir-fries, blend it into smoothies, or use it as a substitute for spinach in your favorite recipes. You can also steam, boil, or grill kailan. The possibilities are endless!
Can I save seeds from my kailan plants?
Yes, you can save seeds from your kailan plants, but it’s important to note that kailan is cross-pollinated, so the seeds may not be true to type if other brassicas are growing nearby. To save seeds, allow a few plants to bolt (flower and produce seeds). Once the seed pods are dry and brown, harvest them and extract the seeds. Store the seeds in a cool, dry place.
Is growing kailan quickly organically possible?
Absolutely! By using organic fertilizers, pest control methods, and soil amendments, you can successfully grow kailan quickly and organically. Focus on building healthy soil, providing adequate sunlight and water, and preventing pests and diseases through natural means.
What if my kailan leaves are bitter?
Bitterness in kailan leaves can be caused by several factors, including heat stress, lack of water, and nutrient deficiencies. To reduce bitterness, ensure that your plants are adequately watered, fertilized, and protected from extreme heat. Harvesting leaves after a frost can also help reduce bitterness.
How can I encourage more leafy growth in my kailan plants?
To encourage more leafy growth, focus on providing adequate nitrogen, sunlight, and water. Regularly fertilize with a nitrogen-rich fertilizer, ensure that your plants receive at least 6 hours of direct sunlight per day, and water deeply and regularly. You can also pinch off the flower buds to encourage the plant to focus its energy on producing leaves.


Leave a Comment