
Wrinkle release spray DIY: Say goodbye to ironing and hello to effortlessly smooth clothes! Have you ever been in a rush, only to discover your favorite shirt is a crumpled mess? We’ve all been there! Ironing can be time-consuming and, let’s be honest, a bit of a chore. But what if I told you there’s a simple, cost-effective solution that you can whip up in minutes?
The quest for wrinkle-free fabrics isn’t new. Throughout history, people have used various methods to keep their clothes looking sharp, from pressing with heavy stones to elaborate mangle machines. While those methods worked, they were often labor-intensive. Today, we’re embracing a modern twist on an age-old problem. This wrinkle release spray DIY is your secret weapon against creases, perfect for travel, quick touch-ups, or simply avoiding the ironing board altogether.
In today’s fast-paced world, time is precious. This DIY trick not only saves you time and energy but also helps you save money by reducing your reliance on dry cleaning or expensive wrinkle-resistant fabrics. Plus, you can customize the scent to your liking! I’m excited to share this easy-to-follow guide that will transform your laundry routine and keep you looking polished, no matter how busy life gets.
DIY Wrinkle Release Spray: Say Goodbye to Ironing!
Okay, let’s be honest, ironing is nobody’s favorite chore. I personally dread it! That’s why I’m so excited to share my super easy and effective DIY wrinkle release spray recipe. This stuff is a lifesaver for those mornings when you’re running late or when you just can’t be bothered to drag out the ironing board. It’s also perfect for travel!
This recipe uses ingredients you probably already have at home, and it takes just minutes to whip up. Trust me, once you try this, you’ll wonder how you ever lived without it!
What You’ll Need: The Wrinkle-Fighting Arsenal
Before we dive in, let’s gather our supplies. This is a pretty simple recipe, so you won’t need much.
* Spray Bottle: An empty spray bottle is essential. I recommend using a clean, empty bottle that’s at least 8 ounces in size. A 16-ounce bottle is even better if you plan on using this frequently. Make sure it sprays a fine mist, not a stream.
* Distilled Water: Distilled water is best because it’s free of minerals and impurities that can leave residue on your clothes. You can find it at most grocery stores.
* White Vinegar: White vinegar is the star of the show! It’s a natural fabric softener and helps to relax the fibers in your clothes, releasing those pesky wrinkles. Don’t worry, the vinegar smell dissipates quickly!
* Liquid Fabric Softener (Optional): This is optional, but a little bit of fabric softener can add a nice scent and extra softening power. If you’re sensitive to fragrances, you can skip this.
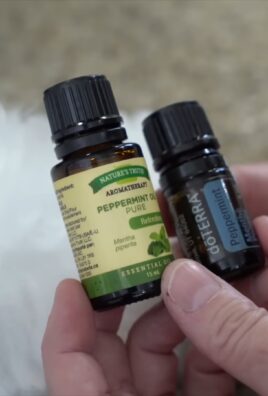
* Essential Oil (Optional): If you’re not using fabric softener, or you just want a stronger scent, a few drops of your favorite essential oil can do the trick. Lavender, lemon, or eucalyptus are great choices.
* Measuring Cup and Spoons: For accurate measurements, grab a measuring cup and some measuring spoons.
* Funnel (Optional): A funnel can make it easier to pour the ingredients into the spray bottle without making a mess.
The Magic Formula: Ratios and Measurements
Now, let’s get down to the nitty-gritty: the recipe itself! I’ve experimented with different ratios, and this is the one that works best for me. Feel free to adjust it slightly to suit your preferences.
* Distilled Water: 1 cup (8 ounces)
* White Vinegar: 1 tablespoon
* Liquid Fabric Softener (Optional): 1/2 teaspoon
* Essential Oil (Optional): 5-10 drops
Step-by-Step Instructions: Creating Your Wrinkle Release Spray
Alright, let’s get started! This is so easy, you’ll be done in no time.
1. Prepare Your Spray Bottle: Make sure your spray bottle is clean and dry. If you’ve used it for something else before, rinse it out thoroughly with soap and water.
2. Pour in the Distilled Water: Using your measuring cup, pour 1 cup (8 ounces) of distilled water into the spray bottle.
3. Add the White Vinegar: Next, measure out 1 tablespoon of white vinegar and add it to the spray bottle.
4. Add Fabric Softener (Optional): If you’re using fabric softener, measure out 1/2 teaspoon and add it to the bottle.
5. Add Essential Oil (Optional): If you’re adding essential oil, carefully add 5-10 drops to the bottle. Start with less, you can always add more if you want a stronger scent.
6. Close the Bottle and Shake Well: Secure the spray nozzle onto the bottle and shake it vigorously for about 30 seconds to ensure all the ingredients are thoroughly mixed.
7. Label Your Bottle: This is important! Label your bottle clearly with “Wrinkle Release Spray” and the date you made it. This will help you keep track of it and prevent anyone from accidentally using it for something else.
How to Use Your DIY Wrinkle Release Spray: Wrinkle-Free in Minutes!
Now that you’ve made your wrinkle release spray, let’s learn how to use it effectively.
1. Hang the Garment: Hang the wrinkled garment on a hanger. This will allow the spray to work its magic evenly.
2. Spray Lightly: Hold the spray bottle about 6-8 inches away from the garment and spray lightly, focusing on the wrinkled areas. Don’t saturate the fabric; a light mist is all you need.
3. Smooth the Fabric: After spraying, gently smooth the fabric with your hands. This will help to relax the fibers and release the wrinkles. You can also gently tug on the fabric to help stretch it out.
4. Let it Air Dry: Allow the garment to air dry completely. This usually takes about 15-30 minutes, depending on the fabric and the humidity. You can speed up the drying process by using a fan or hanging the garment in a well-ventilated area.
5. Check for Wrinkles: Once the garment is dry, check to see if the wrinkles are gone. If there are still some stubborn wrinkles, you can repeat the process.
Tips and Tricks for Best Results: Wrinkle-Fighting Pro Tips
Here are a few extra tips and tricks to help you get the best results from your DIY wrinkle release spray:
* Test on a Small Area First: Before spraying the entire garment, test the spray on a small, inconspicuous area to make sure it doesn’t stain or discolor the fabric. This is especially important for delicate fabrics.
* Use on Dry Clean Only Items with Caution: While this spray is generally safe for most fabrics, I wouldn’t recommend using it on delicate “dry clean only” items without testing it first.
* Don’t Over-Saturate: Avoid over-saturating the fabric, as this can leave water spots or make the garment feel stiff. A light mist is all you need.
* Shake Before Each Use: Always shake the bottle well before each use to ensure the ingredients are properly mixed.
* Store in a Cool, Dark Place: Store your wrinkle release spray in a cool, dark place to prolong its shelf life.
* Experiment with Scents: Feel free to experiment with different essential oils to find your favorite scent. Just make sure the essential oil is safe for use on fabrics.
* For Stubborn Wrinkles: For really stubborn wrinkles, you can try using a hair dryer on a low setting to gently heat the fabric after spraying. Be careful not to hold the hair dryer too close to the fabric, as this could damage it.
* Perfect for Travel: This spray is perfect for travel! Just pour some into a small travel-sized spray bottle and you’re good to go. It’s a lifesaver for keeping your clothes looking fresh and wrinkle-free on the road.
* Use on Curtains and Linens: This spray isn’t just for clothes! You can also use it on curtains, linens, and other fabrics around your home to freshen them up and release wrinkles.
* Vinegar Smell: Don’t worry about the vinegar smell! It dissipates quickly as the fabric dries. If you’re still concerned, you can add a few extra drops of essential oil to mask the scent.
Troubleshooting: What to Do If Things Go Wrong
Even with the best instructions, sometimes things don’t go exactly as planned. Here are a few common issues and how to fix them:
* Spray Leaves a Residue: If your spray leaves a residue on your clothes, it could be due to hard water or too much fabric softener. Try using distilled water and reducing the amount of fabric softener you use.
* Spray Doesn’t Remove Wrinkles: If your spray isn’t removing wrinkles effectively, it could be because the wrinkles are too deep or the fabric is too thick. Try repeating the process or using a hair dryer to gently heat the fabric.
* Spray Has a Strong Vinegar Smell: If your spray has a strong vinegar smell, you can add a few extra drops of essential oil to mask the scent. You can also try using a different type of vinegar, such as apple cider vinegar, which has a milder scent.
* Spray Bottle Clogs: If your spray bottle clogs, it could be due to a buildup of fabric softener or essential oil. Try cleaning the spray nozzle with warm water and a cotton swab.
Why This Works: The Science Behind the Spray
So, why does this simple spray work so well? It’s all about the science!
* Water: The water helps to hydrate the fabric fibers, making them more pliable and easier to manipulate.
* Vinegar: The vinegar acts as a natural fabric softener, relaxing the fibers and releasing wrinkles. It also helps

Conclusion
So, there you have it! Creating your own wrinkle release spray is not just a cost-effective alternative to store-bought options; it’s a game-changer for anyone who wants to maintain a crisp, polished look without the hassle of ironing. This simple DIY trick empowers you to take control of your wardrobe’s appearance, saving you time, money, and the frustration of dealing with stubborn wrinkles.
Why is this DIY wrinkle release spray a must-try? Because it’s incredibly easy to make with ingredients you likely already have in your home. It’s gentle on fabrics, unlike some harsh chemical-laden commercial sprays. And, perhaps most importantly, it works! Imagine quickly refreshing a wrinkled shirt before a last-minute meeting, or reviving a dress that’s been packed in your suitcase. This spray offers a convenient solution for those everyday wrinkle emergencies.
But the beauty of this DIY project lies in its adaptability. Feel free to experiment with different essential oils to create a scent that suits your personal preference. Lavender, lemon, or eucalyptus can add a refreshing and subtle fragrance to your clothes. For a more potent wrinkle-fighting boost, consider adding a tablespoon of white vinegar to the mix. Just be mindful of the scent, as it will dissipate quickly but might be noticeable initially. You can also adjust the ratio of water to fabric softener or hair conditioner to find the perfect balance for your specific fabrics. Delicate fabrics might benefit from a higher water ratio, while heavier fabrics might need a bit more of the wrinkle-releasing agent.
We encourage you to give this DIY wrinkle release spray a try. It’s a small investment of time that yields significant results. Once you experience the convenience and effectiveness of this homemade solution, you’ll wonder how you ever lived without it. It’s a fantastic way to reduce your reliance on ironing and keep your clothes looking their best with minimal effort.
Don’t just take our word for it! We’re eager to hear about your experiences. Share your variations, tips, and success stories in the comments below. Let us know what essential oil combinations you’ve tried, what fabrics you’ve found it works best on, and any other insights you’ve gained. Your feedback will help other readers discover the full potential of this amazing DIY wrinkle release spray. Let’s build a community of wrinkle-free enthusiasts!
Frequently Asked Questions (FAQ)
1. What exactly is wrinkle release spray and how does it work?
Wrinkle release spray is a liquid solution designed to relax fabric fibers, allowing wrinkles to smooth out without the need for ironing. The key ingredients, such as fabric softener or hair conditioner, contain surfactants that lubricate the fibers, making them more pliable. When sprayed onto wrinkled clothing and gently stretched or smoothed, the fibers relax, and the wrinkles diminish as the fabric dries. The water in the spray also plays a crucial role by helping to distribute the wrinkle-releasing agents evenly and aiding in the relaxation of the fibers.
2. Is this DIY wrinkle release spray safe for all types of fabrics?
While this DIY wrinkle release spray is generally safe for most fabrics, it’s always best to test it on an inconspicuous area first, especially with delicate materials like silk or rayon. Some fabrics may react differently to the ingredients, so a patch test will help prevent any potential damage or discoloration. Avoid using it on fabrics that are specifically labeled as “dry clean only.” For sensitive fabrics, consider diluting the spray with more water to minimize the concentration of fabric softener or hair conditioner.
3. Can I use essential oils other than lavender, lemon, or eucalyptus?
Absolutely! Feel free to experiment with different essential oils to create a scent that you enjoy. However, be mindful of the potential for staining, especially with darker-colored oils. Always dilute the essential oil properly and test it on an inconspicuous area before spraying it liberally on your clothes. Some popular alternatives include tea tree oil (which has antibacterial properties), peppermint oil (for a refreshing scent), and cedarwood oil (for a more earthy aroma).
4. How often can I use this wrinkle release spray on my clothes?
You can use this wrinkle release spray as often as needed to refresh your clothes and remove wrinkles. However, excessive use may lead to a buildup of fabric softener or hair conditioner, which can make your clothes feel stiff or attract dirt. If you notice any buildup, simply wash your clothes as usual. It’s generally recommended to use the spray sparingly and only when necessary.
5. How long does it take for the wrinkles to disappear after spraying?
The amount of time it takes for wrinkles to disappear depends on the severity of the wrinkles, the type of fabric, and the humidity level. In most cases, you should see a noticeable improvement within 15-30 minutes. For stubborn wrinkles, you may need to reapply the spray and gently stretch or smooth the fabric. Hanging the garment in a well-ventilated area can also help speed up the drying process and enhance the wrinkle-releasing effect.
6. Can I use this spray on clothes that have already been ironed?
Yes, you can use this spray on clothes that have already been ironed to help maintain their wrinkle-free appearance. It can act as a preventative measure, especially when traveling or storing clothes in a closet. Simply spray a light mist over the ironed garment and allow it to dry completely before wearing or storing it.
7. What if I don’t have fabric softener or hair conditioner? Can I use something else?
If you don’t have fabric softener or hair conditioner, you can try using a small amount of distilled white vinegar. Vinegar acts as a natural fabric softener and can help relax wrinkles. However, be mindful of the scent, as it may be noticeable initially. You can also try using a small amount of liquid starch, which will help stiffen the fabric and prevent wrinkles from forming.
8. How should I store the DIY wrinkle release spray?
Store the DIY wrinkle release spray in a cool, dark place away from direct sunlight and heat. This will help preserve the quality of the ingredients and prevent the spray from becoming cloudy or discolored. Make sure the spray bottle is tightly sealed to prevent evaporation.
9. My spray bottle is clogged. What should I do?
If your spray bottle is clogged, try rinsing the nozzle with warm water. You can also use a small pin or needle to clear any blockages. If the clog persists, try soaking the nozzle in a solution of warm water and vinegar.
10. Can I use tap water instead of distilled water?
While tap water can be used, distilled water is recommended to prevent mineral buildup in the spray bottle and on your clothes. Minerals in tap water can sometimes leave residue or stains on fabrics, especially dark-colored ones. Distilled water is pure and free of minerals, ensuring a cleaner and more effective wrinkle release spray.
Leave a Comment