
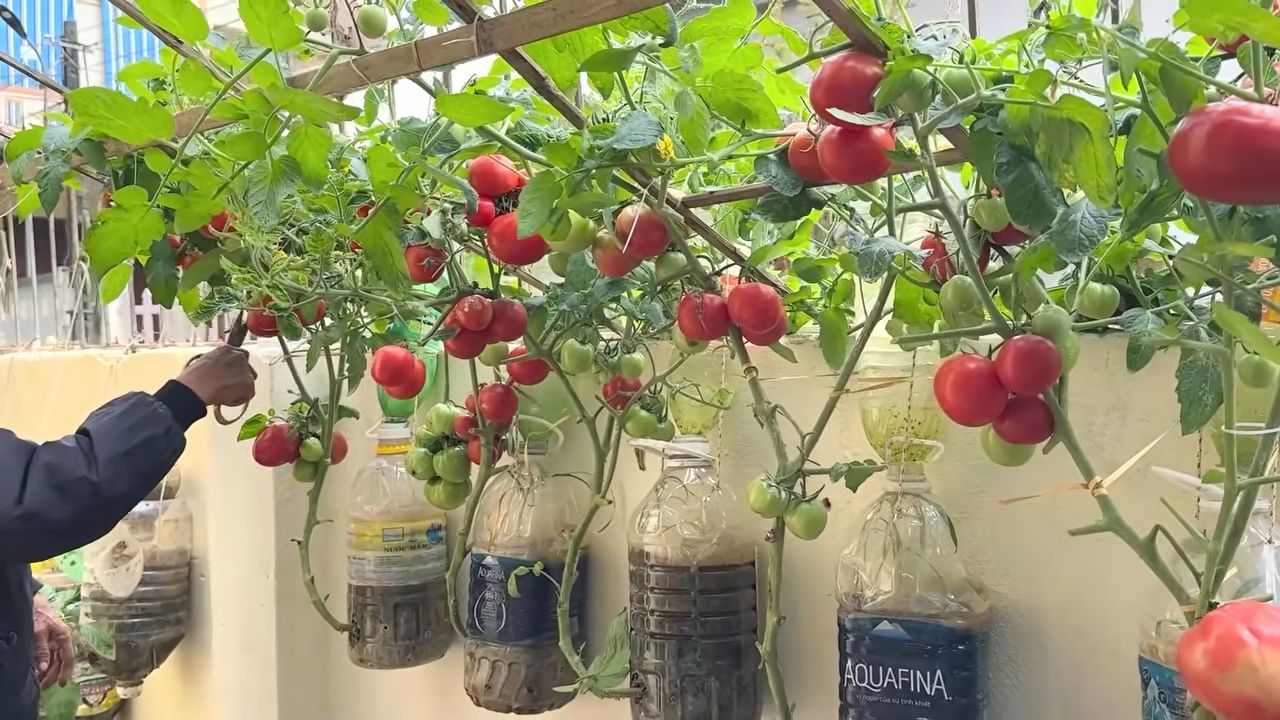
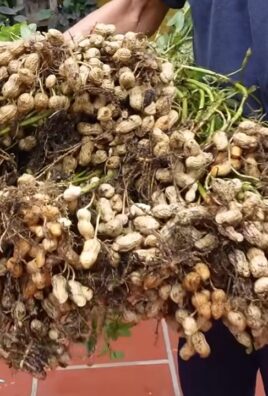
Tomato yield easy tip: Ever dream of a garden overflowing with juicy, red tomatoes, enough to make sauces, salads, and share with the neighbors? I know I have! But sometimes, despite our best efforts, those precious tomato plants just don’t seem to produce as much as we’d hoped. It’s frustrating, isn’t it?
For centuries, cultivating tomatoes has been a cherished tradition, dating back to the Aztecs and Incas who first domesticated this vibrant fruit. From sun-drenched Mediterranean fields to humble backyard plots, the tomato has become a global staple. But even with generations of knowledge, maximizing your tomato yield easy tip can still feel like a mystery.
That’s where this DIY guide comes in! We’re diving deep into simple, effective tricks and hacks that can dramatically boost your tomato harvest. Forget complicated techniques and expensive equipment. I’m going to share easy-to-implement strategies that anyone, regardless of their gardening experience, can use to get the most out of their tomato plants. Whether you’re a seasoned gardener or just starting out, these tips will help you unlock the full potential of your tomato patch and enjoy a bountiful harvest all season long. Get ready to transform your garden and enjoy the sweet taste of success!
“`html
Unlock a Bumper Crop: My Foolproof DIY Tomato Yield Booster!
Okay, tomato lovers, gather ’round! I’m about to share a secret weapon that’s transformed my tomato harvests from “meh” to “magnificent.” This isn’t some complicated, expensive gardening technique. It’s a simple, DIY trick that anyone can do, and it’s all about giving your tomato plants exactly what they need, right when they need it. Get ready for a tomato explosion!
Understanding the Tomato’s Needs: The Key to Success
Before we dive into the DIY magic, let’s quickly understand what makes tomatoes tick. They’re hungry plants, especially when they’re setting fruit. They crave:
* Calcium: Essential for preventing blossom-end rot (that nasty black spot on the bottom of your tomatoes).
* Phosphorus: Crucial for root development and flower production.
* Potassium: Vital for fruit development and overall plant health.
* Consistent Watering: Tomatoes hate being too wet or too dry.
* Sunlight: At least 6-8 hours of direct sunlight per day is non-negotiable.
This DIY booster addresses the first three points, giving your plants a readily available source of these vital nutrients.
The Secret Ingredient: Eggshells and Epsom Salts!
Yep, you read that right! The stars of our show are humble eggshells and Epsom salts.
* Eggshells: Packed with calcium carbonate, which slowly releases calcium into the soil.
* Epsom Salts: Magnesium sulfate, providing magnesium (which helps plants absorb phosphorus and potassium) and sulfur (important for chlorophyll production).
Building Your DIY Tomato Booster: Step-by-Step
Here’s how to create this amazing tomato yield booster:
1. Gather Your Supplies:
* Used eggshells (as many as you can collect!)
* Epsom salts (available at most drugstores or garden centers)
* A large pot or container for boiling
* A blender or food processor (optional, but recommended)
* A watering can or garden sprayer
* A large bucket or container for storage
2. Prepare the Eggshells:
* Rinse Thoroughly: After using eggs, rinse the shells well to remove any remaining egg white. This prevents them from smelling bad during the next step.
* Dry Completely: Spread the rinsed eggshells on a baking sheet and let them air dry completely. You can also dry them in a low oven (around 200°F or 93°C) for about 15-20 minutes. Drying them thoroughly prevents mold growth.
* Crush (Optional, but Recommended): For faster nutrient release, crush the dried eggshells into smaller pieces. You can do this by hand, or use a blender or food processor to grind them into a fine powder. Be careful not to overfill the blender, and pulse it in short bursts to avoid creating too much dust.
3. Boil the Eggshells:
* Fill the Pot: Fill your large pot with water. The amount of water doesn’t need to be precise, but make sure you have enough to completely submerge the eggshells.
* Add Eggshells: Add the dried and crushed (or uncrushed) eggshells to the pot.
* Boil for 30 Minutes: Bring the water to a boil and let it simmer for about 30 minutes. This helps to break down the eggshells and release the calcium.
* Let Cool: Turn off the heat and let the water cool completely. This can take several hours.
4. Strain the Eggshell Water:
* Strain the Mixture: Carefully strain the eggshell water through a fine-mesh sieve or cheesecloth into a clean bucket or container. Discard the eggshell solids (or add them to your compost pile!). The water you’ve strained is now calcium-rich “egg water.”
5. Prepare the Epsom Salt Solution:
* Measure Epsom Salts: Measure out 1 tablespoon of Epsom salts per gallon of water.
* Dissolve in Water: In a separate container, dissolve the Epsom salts in warm water. Make sure the salts are completely dissolved before proceeding.
6. Combine the Solutions:
* Mix Egg Water and Epsom Salt Solution: Add the Epsom salt solution to the calcium-rich egg water. Stir well to combine. This is your concentrated tomato booster!
Applying Your DIY Tomato Booster: A Feeding Schedule
Now for the fun part – feeding your tomato plants! Here’s how I apply this booster for maximum impact:
1. Dilution is Key:
* Dilute the Concentrate: Always dilute the concentrated tomato booster before applying it to your plants. I use a ratio of 1 part concentrate to 4 parts water. For example, if you have 1 cup of concentrate, mix it with 4 cups of water.
2. Application Methods: You have two main options for applying the booster:
* Soil Drench: Pour the diluted solution directly onto the soil around the base of your tomato plants. This allows the roots to absorb the nutrients directly.
* Foliar Spray: Use a garden sprayer to mist the leaves of your tomato plants with the diluted solution. This allows the plants to absorb nutrients through their leaves. I prefer a combination of both methods.
3. Feeding Schedule:
* First Application: Start feeding your tomato plants with the booster about 2-3 weeks after transplanting them into the garden.
* Regular Feeding: Continue feeding them every 2-3 weeks throughout the growing season.
* During Fruiting: Increase the frequency of feeding to every 1-2 weeks when your plants start setting fruit. This will give them the extra boost they need to produce a bumper crop.
4. Application Tips:
* Water First: Always water your tomato plants thoroughly before applying the booster. This helps the plants absorb the nutrients more effectively.
* Apply in the Morning or Evening: Avoid applying the booster during the hottest part of the day, as this can cause the leaves to burn.
* Don’t Overdo It: More isn’t always better. Stick to the recommended dilution and feeding schedule to avoid over-fertilizing your plants.
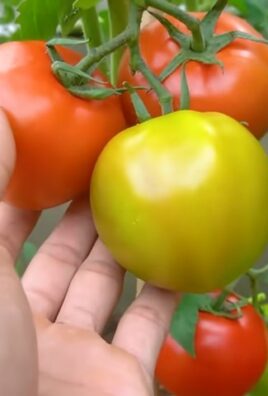
* Observe Your Plants: Pay attention to how your tomato plants respond to the booster. If you notice any signs of nutrient deficiencies (such as yellowing leaves or blossom-end rot), you may need to adjust the feeding schedule or concentration.
Troubleshooting and Tips for Success
* Blossom-End Rot: If you’re still experiencing blossom-end rot despite using the booster, make sure your plants are getting consistent watering. Fluctuations in soil moisture can prevent them from absorbing calcium properly. You can also add a calcium supplement directly to the soil.
* Yellowing Leaves: Yellowing leaves can indicate a variety of nutrient deficiencies. Make sure your plants are getting enough nitrogen, phosphorus, and potassium, in addition to calcium and magnesium. A balanced fertilizer can help address these deficiencies.
* Pest Control: While this booster focuses on nutrients, remember to protect your tomato plants from pests and diseases. Regularly inspect your plants for signs of infestation or disease, and take appropriate action to control them.
* Soil Testing: For the best results, consider getting your soil tested to determine its nutrient levels. This will help you tailor your feeding program to the specific needs of your tomato plants. Your local agricultural extension office can provide information on soil testing services.
* Composting: Add your used coffee grounds, vegetable scraps, and other organic matter to your compost pile. Compost is a great source of nutrients for your tomato plants and can help improve soil health.
* Mulching: Apply a layer of mulch around your tomato plants to help retain moisture, suppress weeds, and regulate soil temperature. Organic mulches, such as straw or wood chips, will also decompose over time and add nutrients to the soil.
Why This Works: The Science Behind the Magic
This DIY tomato booster isn’t just some old wives’ tale. It’s based on sound scientific principles.
* Calcium from Eggshells: Calcium is essential for cell wall development in plants. A calcium deficiency can lead to blossom-end rot, a common problem in tomatoes. The calcium carbonate in eggshells slowly releases calcium into the soil, providing a readily available source for your plants.
* Magnesium and Sulfur from Epsom Salts: Magnesium is a key component of chlorophyll, the pigment that allows plants to absorb sunlight for photosynthesis. Sulfur is also important for chlorophyll production and helps plants absorb other nutrients. Epsom salts provide a readily available source of magnesium and sulfur, which can improve plant growth and fruit production.
My Personal Experience: A Tomato Transformation!
I started using this DIY tomato booster a few years ago, and the results
Conclusion
So, there you have it! This simple, yet incredibly effective DIY trick for boosting your tomato yield is a game-changer for any gardener, whether you’re a seasoned pro or just starting out. We’ve walked you through the process, highlighting how easy it is to implement and the significant impact it can have on your harvest. Forget expensive fertilizers and complicated techniques; this method focuses on harnessing the natural power of your tomato plants to produce an abundance of delicious, juicy tomatoes.
Why is this a must-try? Because it’s cost-effective, environmentally friendly, and, most importantly, it works! Imagine baskets overflowing with ripe tomatoes, ready for salads, sauces, and all your favorite summer recipes. This isn’t just about growing tomatoes; it’s about maximizing your yield and enjoying the fruits (or vegetables!) of your labor.
But don’t just take our word for it. We encourage you to experiment and adapt this technique to your specific gardening conditions. For instance, if you live in a particularly hot climate, you might want to provide some afternoon shade to your tomato plants to prevent sunscald. Alternatively, if you’re growing in containers, ensure you’re using a well-draining potting mix and fertilizing regularly to supplement the nutrients in the soil.
Consider these variations to further enhance your tomato growing experience:
* Companion Planting: Plant basil, marigolds, or carrots near your tomato plants to deter pests and attract beneficial insects.
* Pruning: Regularly prune suckers (the small shoots that grow between the main stem and branches) to encourage the plant to focus its energy on fruit production.
* Watering Techniques: Water deeply and consistently, especially during dry spells. Avoid overhead watering, which can lead to fungal diseases. Soaker hoses or drip irrigation are excellent options.
* Soil Amendments: Incorporate compost or aged manure into the soil before planting to improve its fertility and drainage.
* Epsom Salt: Some gardeners swear by adding Epsom salt to the soil to provide magnesium, which can help prevent blossom-end rot.
Ultimately, the best way to discover what works best for you is to get your hands dirty and try it out! We’re confident that this DIY trick will significantly improve your tomato yield and bring you closer to the bountiful harvest you’ve always dreamed of.
Now, we want to hear from you! Try this simple technique and share your results with us. Did you notice a significant increase in your tomato production? Did you experiment with any variations? What challenges did you face, and how did you overcome them? Your experiences and insights will not only inspire other gardeners but also help us refine and improve this method for future generations of tomato lovers. Share your photos, tips, and stories in the comments section below. Let’s create a community of thriving tomato growers! This simple tip can really help with your tomato yield.
Frequently Asked Questions (FAQ)
What exactly is this DIY trick for boosting tomato yield?
This DIY trick involves a simple technique to encourage your tomato plants to develop a more extensive root system, leading to increased nutrient uptake and, ultimately, a higher yield of tomatoes. It focuses on burying a significant portion of the tomato plant’s stem when transplanting it, allowing the buried stem to sprout roots.
Why does burying the stem help increase tomato yield?
Tomato plants have the unique ability to grow roots from their stems. By burying a portion of the stem, you’re essentially creating more opportunities for the plant to develop roots. A larger root system allows the plant to absorb more water and nutrients from the soil, which are essential for healthy growth and abundant fruit production. More roots equal more food for your tomatoes!
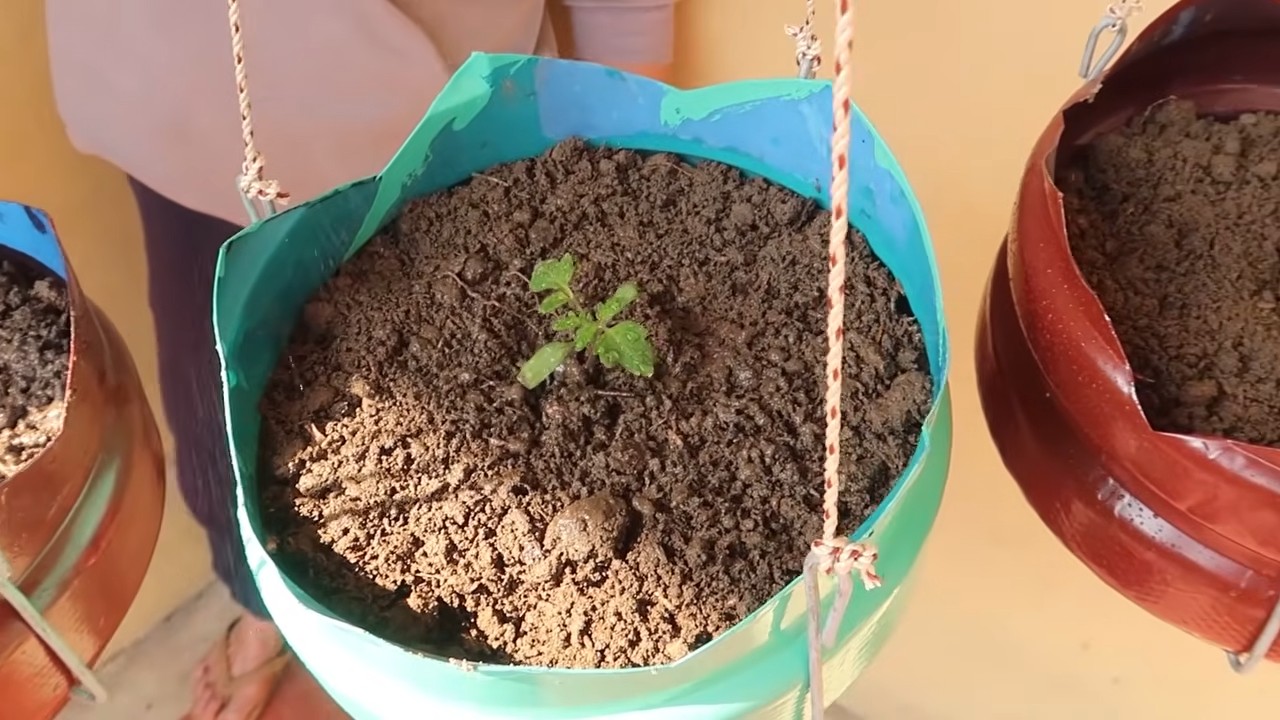
How deep should I bury the tomato plant?
You can bury up to two-thirds of the tomato plant’s stem. Gently remove the lower leaves from the stem before planting, leaving only the top few sets of leaves. Dig a hole deep enough to accommodate the root ball and the desired length of the stem. Lay the plant horizontally in the trench, gently curving the top of the plant upward. Backfill the hole with soil, covering the stem.
When is the best time to use this trick?
The best time to use this trick is when you’re transplanting your tomato seedlings into the garden or larger containers. This allows the buried stem to develop roots before the plant starts focusing on fruit production.
What type of tomato plants does this work best on?
This trick works well on most varieties of tomato plants, including determinate (bush) and indeterminate (vining) types. However, it’s particularly beneficial for indeterminate varieties, which tend to be heavier feeders and benefit from a more extensive root system.
Will this trick work in containers?
Yes, this trick can be used in containers as well. Just make sure you’re using a large enough container to accommodate the plant’s mature size and root system. Choose a container that is at least 18-24 inches in diameter and depth.
What if I already planted my tomato plants? Can I still use this trick?
While it’s best to implement this trick during transplanting, you can still try it if your plants are already in the ground. Carefully dig around the base of the plant and gently expose a portion of the stem. Lay the stem horizontally in a shallow trench and cover it with soil. Be careful not to damage the existing root system.
How long does it take to see results?
You should start to see results within a few weeks. The buried stem will begin to sprout roots, and the plant will become more vigorous and productive. Keep in mind that results may vary depending on the variety of tomato, soil conditions, and overall growing environment.
Can I use fertilizer with this trick?
Yes, you can and should use fertilizer to supplement the nutrients in the soil. Choose a fertilizer that is specifically formulated for tomatoes and follow the instructions on the label. You can also amend the soil with compost or aged manure to improve its fertility.
What are some common problems I might encounter, and how can I fix them?
* Blossom-end rot: This is caused by a calcium deficiency. Ensure your soil has adequate calcium levels and water consistently. You can also add Epsom salt to the soil.
* Sunscald: This occurs when tomatoes are exposed to too much direct sunlight. Provide some afternoon shade to protect the fruits.
* Pests and diseases: Regularly inspect your plants for pests and diseases. Use organic pest control methods and choose disease-resistant varieties.
* Poor drainage: Ensure your soil is well-draining to prevent root rot. Amend the soil with compost or perlite to improve drainage.
Is this trick safe for organic gardening?
Yes, this trick is perfectly safe for organic gardening. It doesn’t involve the use of any synthetic chemicals or fertilizers. It’s a natural and sustainable way to boost your tomato yield.
Where can I find more information about growing tomatoes?
There are many resources available online and at your local library. You can also consult with your local agricultural extension office for advice specific to your region. Don’t be afraid to experiment and learn from your own experiences. Happy gardening!
Leave a Comment